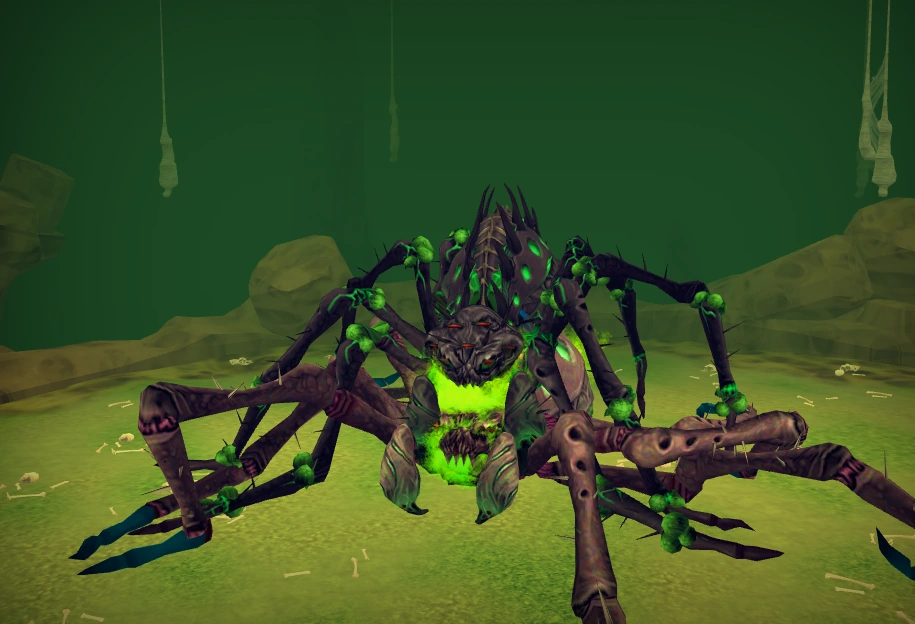
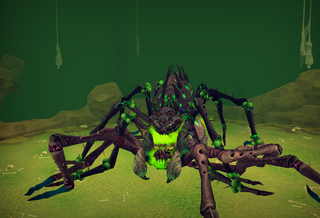
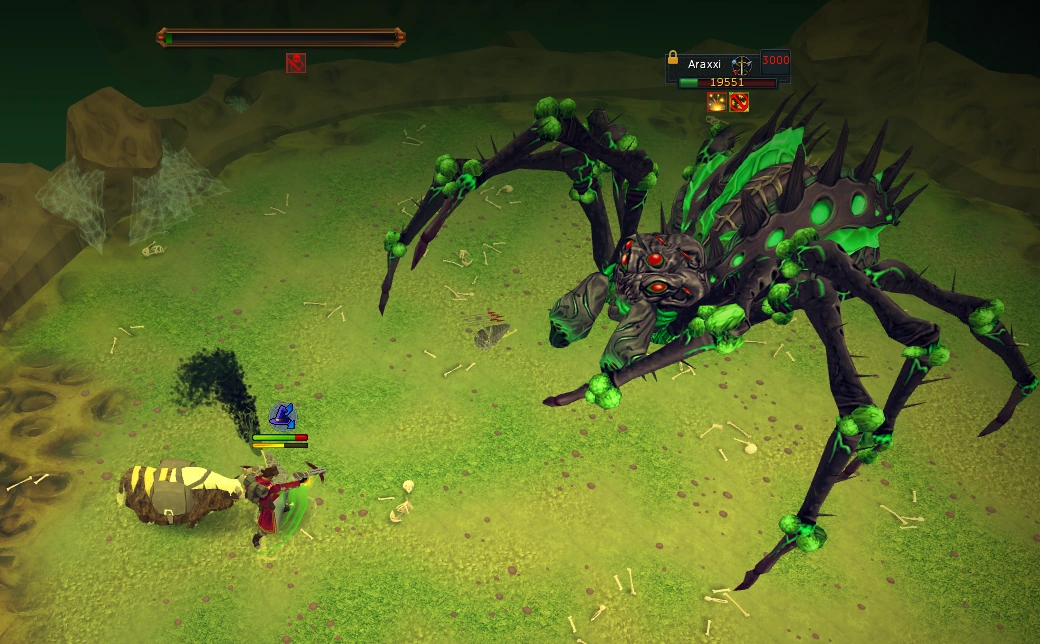
Araxxor is a large spider that can be found in the Araxyte Hive. Drops include parts of spider legs and Araxxi's eye, fang and web to create level 90 Noxious weaponry. Currently the second best 2-handed weapons outside Dungeoneering, recently surpassed by the weaponry dropped by Telos.
Players cannot teleport out of the fight; the only way to leave is by victory or death, although it is possible to leave combat and lobby from the fight. As of the update of 12 January 2015, players will be unable to log out during phase 1 of the fight; attempting to do so will result in the message "Araxxor demands your attention right now."
Therefore, it is recommended to bring an araxyte pheromone or create an instance if not carrying the pheromone, as it will cause Araxxor to spawn in the combat form he is weakest against to you based on what is on your main-hand slot.
| Path 1 (Minions) | Path 2 (Acid) | Path 3 (Darkness) |
|---|---|---|
| Open | Open | Closed |
| Days until next rotation: 1 (wrong?) | ||
| I died covered in acid and spiders. | ||
Recommended Setups
Meleeing Araxxor will presume that you are fighting the ranged version of Araxxor. Melee provides fast kills, but if a player is not using a noxious scythe or dragon rider lance, they can expect to take more damage during the first three phases of the fight as they will be attacked with both melee and ranged. If meleeing on high enrage kills bring either antipoison or an augmented armour piece with the Venomblood perk, to neutralise Araxxor and Araxxi's poison damage, as it increases based on their enrage.
A noxious scythe is highly recommended if meleeing Araxxor, as it will keep the player safe from his melee attacks for the first three phases. When used against Araxxi, it will be same as if ranging/maging her from a distance and will prevent her from randomly attacking with melee and magic.
Ranged is recommended for beginners or when dealing with high enrage at Araxxor, as his magic attacks provide the least harmful effect, stat drain, which can be easily countered with use of overloads, and his cleave special attack is more noticeable and easier to avoid.
Magic is seldom used at Araxxor, as his melee attacks can cause a small bleed which does classless damage and can stack up, especially on high enrage. Araxxi also seems to have higher resistance to magic attacks compared to ranged.
Items to avoid
- Deathtouch bracelet - While this item provides the best offensive stats in its slot (tied with the power gloves), its passive effect can cause unnecessary amounts of damage. Every attack (including typeless damage) has a chance to reflect damage back to the spiders. This includes the damage reflected off of web shields. Small mistakes can escalate quickly, as the damage reflected back by the web can be much higher than the damage dealt. Accidentally attacking during this time could snowball into large amounts of damage.
- Dark magic aura - While this aura is good for its amount of damage it can inflict over time, this effect can go off when Araxxor uses his web shield causing unnecessary damage to the player.
Inventory
- Overload flask or combination overload (highly recommended)
- Prayer renewal flask
- Antipoison++ flask
- 2 Super restore flask
- 9 Saradomin brew flasks (fill remainder with Rocktails or Rocktail soups)
- Runes for spells if maging
- A beast of burden summoned and filled with high healing food
- A Nihil familiar can be used if highly experienced
- Recommended
- Adrenaline potion
- Portent of life (or Sign of life if the player cannot make the portent)
- Elite enhanced Excalibur
- Phoenix necklace (for the last 25,000 LP of the boss on phase 4)
- A shield
- Morvran's challenge enhancer if on his slayer challenge
Attacks
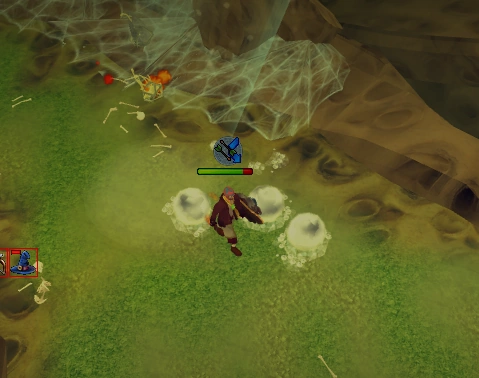
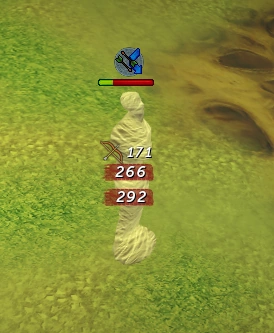
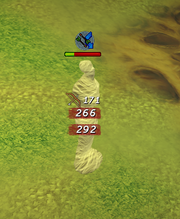
A player taking damage from Arraxor's cocoon attack
Standard attacks
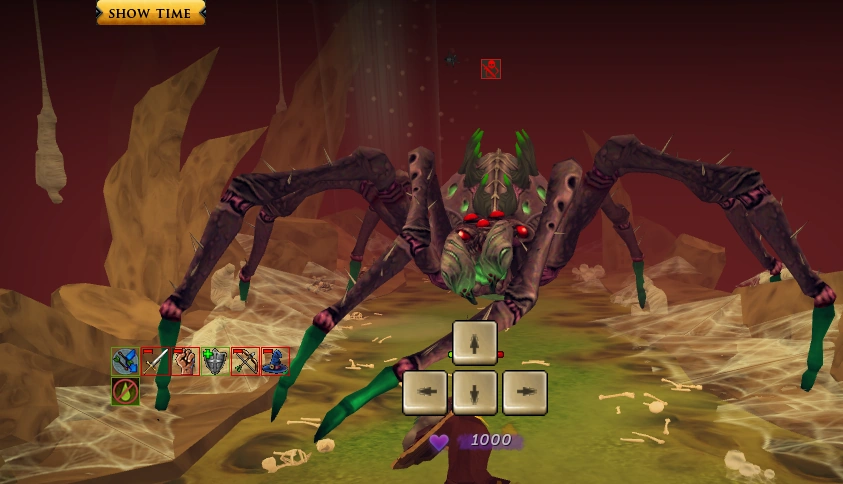
The primary combat style Araxxor uses is shown by the colour its legs are tipped in. A red tip indicates it only uses melee attacks, a green tip indicates ranged/melee attacks and a blue tip indicates magic/melee attacks. The special abilities from these standard attacks occur randomly. In a duo, ranged and magic attacks will bounce if players are close to each other. The standard attacks have a maximum hit of around 1100 if Araxxor has 0% enrage, but can deal over 3000 if his rage is higher.
If the player uses Soul Split, Araxxor will copy its effects and cause his attacks to heal slightly also.
The special effects from these attacks only occur on Araxxor's dominant combat style, and any can occur when fighting Araxxi.
- Magic: Araxxor/Araxxi spits a large ball of acid towards the player. This attack can drain overloads and then combat stats and run energy. This effect is negligible at lower enrages.
- Melee: Araxxor/Araxxi smashes its legs at the player, dealing melee damage. This attack can cause style-less extra bleed damage. Only Araxxor is able to utilise the bleed effect; Araxxi is unable to do so.
- Araxxor can use this attack no matter what his primary style is if you are within melee range.
- If fighting Araxxor in his melee form, his melee attack will have an attack range of 3–4 spaces for balancing reasons.
- Ranged: Araxxor/Araxxi launches a ball of spider silk at the player. It can cause poison anywhere from 100–2000 damage. If the Poison Purge aura is used, it will heal the damage, but will also take off 1 minute of the aura. The timers for antipoison potions are reduced.
- This does not come with the "You have been poisoned!" message.
Special attacks

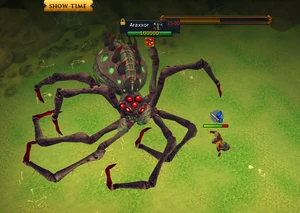
Araxxor about to use his cleave attack
These special attacks can be used on any phase. It should be noted that Araxxor will never repeat its special attacks back-to-back on the first 2 phases. If fought in a duo, all effects are doubled; this means that a cleave that would deal 4000 damage in a solo fight would deal 8000 in a duo. Araxxor/Araxxi's "rage" also affects damage from cocoon, cobweb and cleave attacks.
In a duo, Araxxor's cleave only targets the player he is attacking, while cocoons affect both players. He will rotate between players after using his cleave/cocoon attacks.
- Cocoon: Five small spiders rush at the player, trapping them in a cocoon. To struggle free, you must click rapidly. If you fail to free yourself in time, Araxxor/Araxxi will stop reinforcing the cocoon and attack normally, while the player will take massive damage from the cocoon. This attack does 200 damage per tick, and damage increases by 10 for every 5% rage gained throughout the fight. Using Freedom/Anticipate will reduce the amount of clicks needed to break free to two clicks. (four clicks for duo)
- This attack will remove the effects of Barricade, Devotion, Debilitate and Resonance, as well as resetting their cooldown.
- Cleave: Araxxor/Araxxi bends its front four legs and then swipes the area in front of him, dealing massive damage (around 4000 at 0% rage) and will deal up to 2,000 damage on familiars. If you are not within melee range, you will be dragged to the spider. If Freedom or Anticipation are active, you will not be dragged. The damage players take from a cleave only occurs within up to 2 spaces from the area the spider cleaved.
- This attack only does damage to the player within Araxxor's two spaces, but for familiars/spiders, will deal damage from a distance.
- It is recommended to hide familiar options through the game settings menu so players do not accidentally click on their familiars or pets when trying to run away from the cleave.
- Note that after a hidden update, the cleave will deal melee damage towards familiars and spiders. It will still deal classless damage against players.
- The cleave's damage against familiars is based on how far it was when they were hit by the cleave. The further they are the less damage they will take.

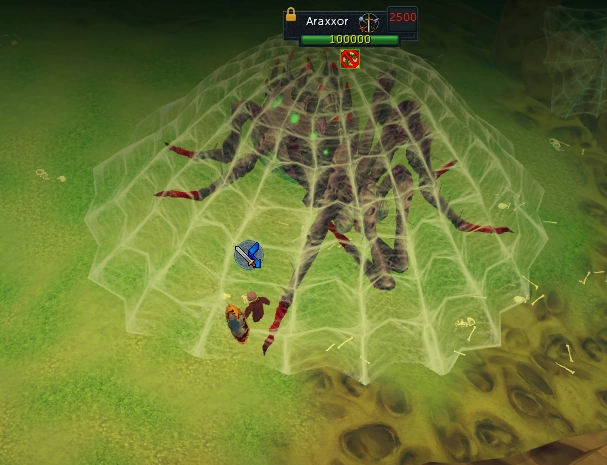
Araxxor healing
- Cobweb: A large cobweb encases Araxxor/Araxxi, healing 1% (1000) of the spider's maximum life points five times (2% (2000) if duoing). Similar to the player's Reflect ability, 50% of the damage is blocked, but the damage reflected onto the player can be higher or lower than the inflicted hit. (e.g. a 729 hit can reflect randomly based on current enrage)
- Utilising a shield, player can use Resonance followed by a single strong attack.
- A more difficult technique to use is to use an ability that has high damage then switch to a shield and activate Resonance just as your attack hits Araxxor. This is significantly harder to do with a 2-handed weapon and based on the attack speed of your weapon, as it will be significantly harder to pull this off with magic and melee attacks. Those using a one-handed weapon can equip their shield and use the ability followed by Resonance. (The difficulty of pulling this off is highly dependent on the latency of the world you play on.)
- Using a damage over time attack like Fragmentation shot will prevent the heal while minimising the damage reflected back.
- Utilising a shield, player can use Resonance followed by a single strong attack.
- Autoheal: If Araxxor's health reaches 0 during phases one and two, the spiders above will "refuse to let him die", healing him back to 5,000 life points.

- Egg drop: Araxxor's spiders drop two or three eggs onto the arena and launches an explosive attack. The explosive can hit up to five targets, but eggs will have higher priority than the spiders. The player, Araxxor and highly acidic spiders are not valid targets for damage reduction from the fireball. If there are no valid targets within range of the player, they will take 3000 damage. The damage is reduced by 900 for valid targets affected by the explosion; 2100, 1200, 300 damage for one, two and three targets respectively. If the fireball hits more than three valid targets (eggs/spiders), the player will not suffer any damage. The fireball has an 4x4 area of effect range. Leftover eggs from the explosion will either disappear or spawn combat spiders.
- This attack will remove the effects of Barricade, Devotion, Debilitate and Resonance, as well as resetting their cooldown.
- Path specific:
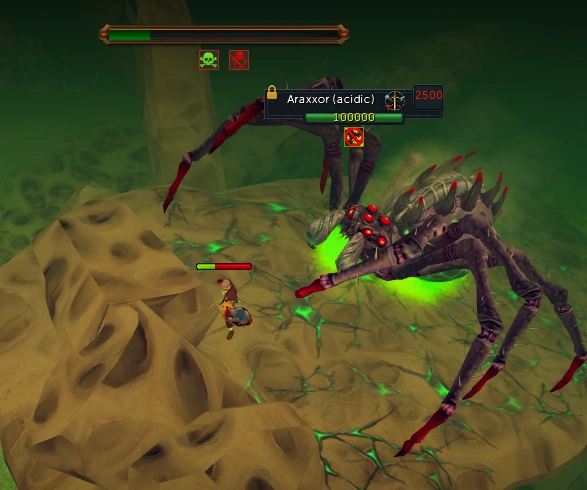
- Path 2 — Acid spider: Araxxor uses his melee attack animation and a ball of web resembling his ranged attack will fly off in a random direction, usually near the player. When it lands, that part of the ground will glow with green acid, and shortly after, an acidic spider will spawn. The spider will move towards you, and if it touches you, will explode and deal up to 32,000 damage. The movement speed of the spider is completely random; it is possible for a spider to spawn while moving one tile every 10%, or a spider that can move four tiles every 10%.
- Path 3 — Darkness: Araxxor/Araxxi will make the area dark with one spot of light open. Staying in the darkness results in rapid damage, after which they will stop at a specific cap.
- Area Attack: If Araxxor is chasing after a target but is unable to attack them due to being too far away, he will deal up to 2100 damage to the player, drain their run energy to 0% and use a cobweb to heal himself.
Araxxor and Araxxi use one of their special attacks after every 5th standard attack except for Araxxor's first special attack at the start of the fight or after Path 3, which occurs after the 1st to 5th attacks. To prevent the drag attack and to reduce the time it takes to escape the cocoon, count 4 standard attacks and then cast either Freedom or Anticipate. Rotate between the two abilities after every 4th or 5th attack to save time and supplies.
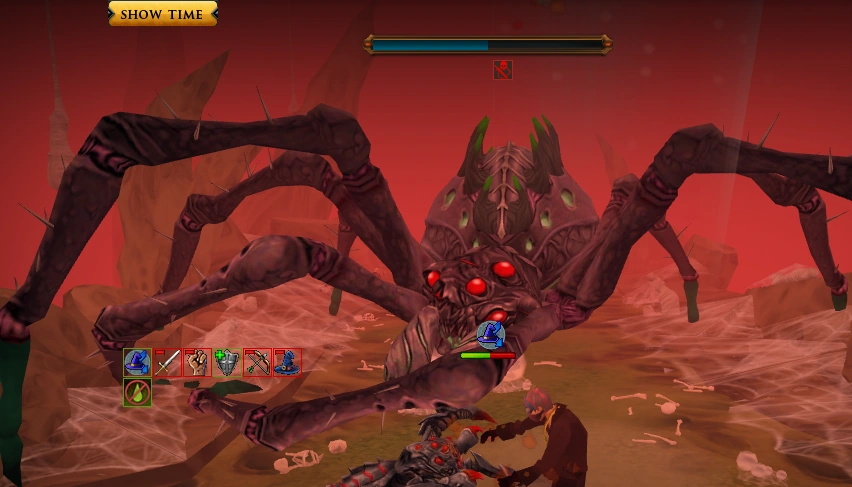
Rage meter
Throughout the fight, Araxxor and Araxxi will become more enraged at the player. The higher their rage is, all of their attacks will deal more damage and the accuracy on their standard attacks will increase dramatically. Enrage resets on reset time.
- Successfully dodging Araxxor's charge when on the bottom path.
- Killing Araxxor's hatchlings (1% rage plus 1% rage for each egg destroyed)
- Letting Araxxor cleave his minions (5% rage plus 5% rage for each minion cleaved)
- Increasing its acid level by luring Araxxor into the acid on Phase 2 (1% for every 2.5% acid absorbed; this rage is removed on phase 3)
- Increasing its acid level by luring highly acidic spiders to Araxxor. (1% for every 2.5% acid absorbed; this rage is removed on phase 4. Each spider gives adds up to 25% acidity, so 10% enrage per spider.)
- Enraging Araxxi once her health reaches 50,000 life points. (1% every 2 attacks)
- Enraging Araxxi further when her health reaches 25,000 life points. (20% rage increase)
- Araxxi absorbing leftover acid if the pool was not completely drained (1% rage for every 2.5%)
- Every time Araxxi attacks once she is below 25,000 life points , she gains 5% rage for every attack she does on the player.
- Every time Araxxi is killed, the fight will start off with an additional 20% rage. This is capped at 300%, and is reset daily. The player must log out and back in for the base enrage to reset.
For higher rage levels, the abilities Devotion and Debilitate are invaluable for reducing damage at any time during the fight.
In a duo, the rage levels are combined, regardless of who started the fight; if player A has 20% rage and starts it, while player B has 60% rage, both players will suffer damage of the combined rage of 80%.
Starting
Only one player or duo can fight the non-instanced version at a time, per world. If someone is already facing the non-instanced version, other players will not be able to enter. To get around this, players can pay 200000 coins (150000 with Instance Cost perk from Soul Reaper) for an instance which will last for one hour. After entering the arena, Araxxor will spawn and the fight truly begins.
It is worth noting that if you created an instance and die during the fight, that you can rejoin the instance that was created for no cost and attempt to kill Araxxor again if you are quick enough getting back.
Phases

A player burning the web to open the bottom path
Phase 1
Araxxor will spawn in either his melee, magic or ranged form and will stay in this form for the rest of the fight. If the player has an Araxyte pheromone in their inventory, he will spawn in the form that is weak to your combat style based on your mainhand weapon slot. The same goes with creating an instance. At higher rage levels (at least 160%+), it is advised to gain 100% adrenaline off Leeches and Viridian chinchompas outside, as depleting his health quickly is a must at these levels, as at this point, he can hit 1000+ damage through protection/deflection prayers. If you plan to gain adrenaline outside the Hive before entering with a pheromone or instance, make sure you equip your weapon as soon as you enter or you will have an encounter with Araxxor in his ranged form.
During this phase, Araxxor will only use his cleave, cobweb and cocoon special attacks. Two of the paths will be covered by webs, and the other will be blocked by rocks. Choose a path and ignite the web immediately to save time while you are depleting his health. It will take 1 minute to burn through the web. Lower Araxxor to at least 1,000 life points before proceeding.
Use Anticipation as soon as you attack Araxxor, as he may use one of his unique phase one abilities before 4-5 attacks have passed.
Note: If you are doing Araxxor near the reset time, kill as much as you can before logging. Even though the tunnels will change if the arena is entered after reset time if possible, rage does not until the player logs.
Phase 2
The way this phase plays out is dependent on the path the player(s) took. Regardless of the path chosen, Araxxor will have his egg-spawn ability available to use along with his previous special attacks. Two paths are open while the other path is closed. The available paths change every four days, with the closed off path rotation counting up and rolling over; i.e. path 1 will be closed for 4 days, then path 2 for 4 days, path 3, then path 1 again.
Top path
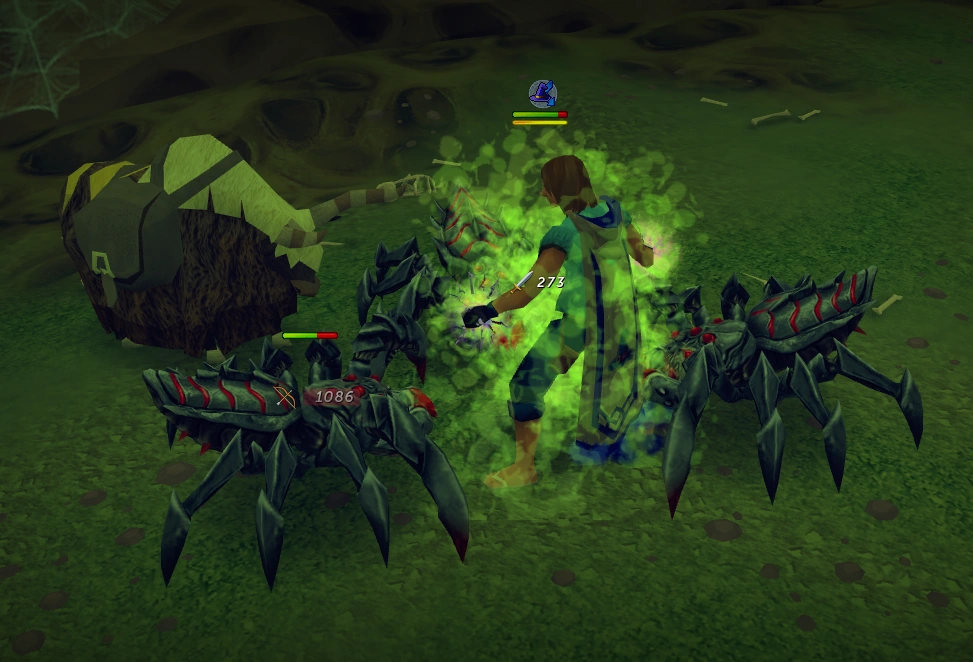
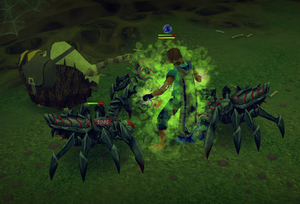
Spider minions attacking a player
If the top path (northern) is chosen, Araxxor will have 20 spiders to spawn (40 in duo), summoned in 4 waves, shown by spiders fleeing Araxxor. There are 3 combat spiders: bladed is melee; spitting is ranged; imbued is magic. There are also two support spiders: Pulsing spiders constantly heal Araxxor for 5,000 life points every 5 seconds; mirrorback spiders absorb damage taken by Araxxor and reflect it back on the player. Araxxor uses his egg drop ability much more frequently on this path compared to the other two, using it after he uses one of his other abilities (cocoon, cleave, cobweb, assistance).
The appearance of the spiders is completely random, but the order is not. For solo encounters, Araxxor will first call for two combat spiders, a support spider, and finally two more combat spiders. In the second wave, a combat spider, then a support spider, and finally three more combat spiders will appear. In the third wave, a support spider, then four combat spiders will appear. In the final wave, only combat spiders will spawn.
To keep damage low, Devotion can be used to mitigate damage from Araxxor and any spiders using the same combat style as him. If that is not available, use Debilitate or Reflect to cut Araxxor's damage by half while dealing with the minions. Kill the spiders quickly, as although they have only 3,000 life points, they are very accurate and can deal moderately heavy damage quickly, which can be fatal if Araxxor's rage levels are high enough. Melee spiders can be lured to eggs, but this is not recommended as it will cause his rage levels to increase faster. In addition, if he cleaves his spiders, it will also increase his rage. When using Devotion, prioritise any spiders that are not using the same combat style as Araxxor as they will not be affected by Devotion. Using Sacrifice.
Phase 3 can be advanced to at any time by continuing down the path; however, it is recommended to deplete the reinforcements and reduce his health to 2,000 or less.
Middle path
Araxxor leaking acid on to the bridge
In the middle path, Araxxor must be lured to the pool of acid in the centre to absorb it, then use his acid to collapse a barrier. There are 100 units of acid, or 200 in duo, and it is recommended to allow Araxxor to absorb it all before continuing. During this phase, he will not use his cocoon attack. Instead, it is replaced with the ability to spawn an acidic spider, which must be avoided until it explodes or it will deal up to 32,000 damage at the player. The spider will usually deal 32,000 damage, but occasionally it may deal anywhere from 3,000-10,000 damage, but it is still recommended to avoid them.
This path is particularly dangerous because of the acidic spiders, which may spawn around Araxxor or the player, and for a short duration, increased accuracy and damage. Surge and Escape can be helpful in avoiding spiders, although the latter should be used if there is enough space behind the player. It is advised to watch Araxxor after every 5 standard attacks; if the player does not get cleaved, or if Araxxor doesn't cobweb/egg drop, an acidic spider is on the way. Shield abilities like barricade and immortality will ensure survival from an acidic spider.
An acidic spider exploding and killing a player
When Araxxor is in the pool and on the ramp, he will get close to the player, up to two spaces from them. If he is standing in the pool, he will absorb 1 unit of acid every tick. This also increases his rage meter by 1%. Once enough acid is absorbed, run to the top of the ramp; Araxxor will soon follow. It is advised to use Surge or Escape when running to the top so acid is not lost if he uses a cobweb on the way. The acid Araxxor has on him will leak onto the platform, and once enough acid has transferred to the ramp the barrier will collapse and the player will jump down. Araxxor must be at least four spaces from the top of the ramp in order to transfer the acid; if he is too low he will leak it but it will not collapse, forcing the player to return him to the pool if too much acid was drained back into the pool. Watch the green skull from time to time when you are fighting Araxxor on the platform. If he is in the correct spot, the acid needed to drain should be still and not increasing. If the acid in the pool seems to continually rise, it means Araxxor was not lured properly and is recommended to return back to the pool if his base rage level is high enough to leave 5 acid for Araxxi. If players are concerned about cleave and/or acidic spider attacks, they should move under Araxxor to see where he moves when on the ramp; this will give ample space to avoid cleaves and good running space for either ability.
Regardless of Araxxor's position, when on the ramp he will lose one unit of acid per tick. As such, he loses 1% of his rage when he leaks acid. After 45 seconds, the ramp will collapse, and Araxxor will flee from the ramp. Any remaining acid that Araxxor had will disappear, but will not return to the pool. Go down the ramp immediately, otherwise "noxious fumes" from the pool will begin to damage the player at 250, increasing by the same amount per tick up to 2000 damage per tick, which can easily kill the player in seconds.
Araxxor should be attacked the entire time he is in the pool and on the ramp; however, it may not be particularly worth it to deplete Araxxor's health to a certain point first, due to the increased rage. If dealt with properly, Araxxor can be drained to 45,000 life points or less by the time the ramp breaks, without stalling at all to drain it further. However, it is recommended to reduce his life points to at least 20,000 before luring him to the ramp.
Bottom path

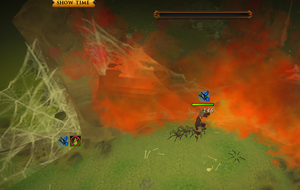
Araxxor's charge attack preparing to swipe right
In the bottom path, Araxxor flees to the ceiling, blocking out the light. The player must have Araxxor destroy the wall, which will have 100 units, or 200 when duoing.
Unlike every other part of the fight, the bottom path involves no traditional combat with Araxxor, so if your adrenaline is at 100%, it is recommended to leave combat and immediately use a defensive ability. Doing so, no adrenaline will be lost even if food is eaten or a defensive threshold (as long as the player remains in combat after initially going out of it) is used. Cycling through resonance, preparation, devotion, and reflect, a lot less damage will be taken. Also, devotion can be extended by killing minions from an egg-spawn and sacrifice can be used to heal. During this phase, the path will be engulfed in darkness with one small spot of light. Initially, damage begins at 50 and caps at 350 or 450. This initial damage increases by 10 per kill during that day when the path is taken. The mobile perk, which halves the cool down of surge, will enable the player to surge almost every spot-light. At higher rage levels, it may be worth it taking full damage from egg attacks, as the darkness attack on such rage levels can deal more damage then leaving the eggs alone. Regardless of starting base damage from rage, the maximum amount of damage done by the darkness is capped at 1000. It is hard to find the light when playing in low graphical settings. Players who do so to reduce lag should only turn lighting detail on High to make it easier to spot the light.
While in the light, players will take no damage, and the damage they took will be reset back to the lowest possible amount (so at no rage, the minimum damage is 50 and max is 450). During this phase, Araxxor alternates between his ranged and magic attacks regardless of form, but attacks with a much slower attack rate. His standard attacks and his egg drop ability are the only things players will face when taking this path.

A failed dodge of Araxxor's charge
After some time, Araxxor will come down and charge at the player. 15 seconds after the warning, the camera angle will change to close and from behind, and you will be placed at the end of the path. All incoming damage from the darkness, Araxxor's attacks and the egg bomb ability will hit the player, but will not hurt them during the cutscene. There is a quick-time event that you must react to in order to dodge the attack:
- When Araxxor swipes from the right, dodge right (right arrow key)
- When Araxxor swipes from the left, dodge left (left arrow key)
- When Araxxor's front legs are low to the ground and spread, dodge up (up arrow key)
- When Araxxor's front legs are pointing down and close to each other, dodge down (down arrow key)
If Araxxor's attack is successfully dodged, it will reduce the wall's health by 50%. If Arraxxor's attack is unsuccessfully dodged, you will be dealt with 2500 damage, and the wall will take 25% damage. Failure to move at all will deal 5000 damage, while the wall will take no damage. In a duo, if both players dodge the attack successfully, the wall will take 100% damage. If one or both unsuccessfully dodge the wall, the wall will take less damage.
Note that the eggs will hatch and if they are near the barrier, will spawn spiders that will attack the player while the cutscene plays on. Having auto-retaliate and using abilities while attacking them will dispose of them easily. Before going to the phase 3 area, find the light after Araxxor breaks the wall as players are still susceptible to darkness damage for a few seconds which could affect the kill.
After a hidden update, you will begin to take damage as soon as Araxxor lifts himself back up to the ceiling. Be prepared to run to the beam of light immediately to avoid taking high damage.
For the remaining phases, Araxxor and Araxxi have the ability to turn the area temporarily dark; they stop this after they reach a damage cap 100 lower than their maximum cap.
Phase 3
During this phase, Araxxor will copy the paths available to him. At the start of the phase, unseen spiders will watch Araxxor's health, and will heal him for an allotted amount before running out of energy. The allotted amount they can heal is 80% of the sum of the remaining life points Araxxor had for the first 2 phases. If path 3 is chosen, only the first phase health will be used. The amount of health tends to round up to the thousandth, so if his health is sufficiently depleted (less than 1000 on each phase), he will not be healed at all.
If path 1 is open then Araxxor will be able to summon spiders. Deal with them the same way as described above. If path 1 was taken, and all spiders were killed then, Araxxor will have nothing to summon. If there were still spiders that have yet to be summoned, he can summon them on this phase. He still follows the same order he would summon the spiders regardless of path (so if he had 10 spiders leftover from phase 2, he follows the support then four combat spider order immediately). They should be killed immediately as Araxxor is more likely to use his cleave ability and gain more enrage from hurting his own spiders.
When taking path 2 while path 1 is open, Araxxor can still use his egg bomb and cocoons attack. When taking path 3, he will not, which will affect the use of defensive abilities.
If path 2 is open, then any remaining acid in the pool will need to be taken care of. For every 25 units of acid (rounded up) there will be 1 highly acidic spider available for Araxxor to spawn. For example, if there were 42 units of acid, then 2 spiders will be available: one holding 25, the other holding 17. The spiders can be clicked on, and they will then follow the player. Araxxor will absorb any highly acidic spiders that are targeting you when they are under him. When Araxxor absorbs the spiders, regardless of the amount of acid they carry, he will heal 5,000 life points from each spider and gain rage appropriate to the amount of acid the spider had. If Araxxor does not absorb these spiders then they will be absorbed by Araxxi on phase 4. The best way to deal with the spiders is to lure them once Araxxor's health reaches 5000, to minimise the damage Araxxor will deal on the player. He will also spawn regular acidic spiders regardless if the path was taken or not. If path 2 was taken, he will spawn a highly acidic spider with 5 units of acid, provided that the player did not move Araxxor out of his spot when degrading the ramp.
If path 3 is open, Araxxor will have access to his darkness attack. Stay in the light spots to avoid taking damage and those spots will always spawn in the phase 3 area.
Regardless of the available paths, Araxxor's attack rate increases significantly on this phase. Once Araxxor's health is depleted to 0, the fight will advance to stage 4.
Note: If players have an obtained an Araxyte pet, the game may spawn a Mirrorback spider if the top path has been opened even if all spider reinforcements have been cleared, even if the requirements for obtaining Gavin had been achieved during the previous phase. Players should watch their damage during phase 3 if the top path is open as the spider does not give any warning when it appears and may sign/kill the player. This spider does not appear if Gavin has already been obtained.
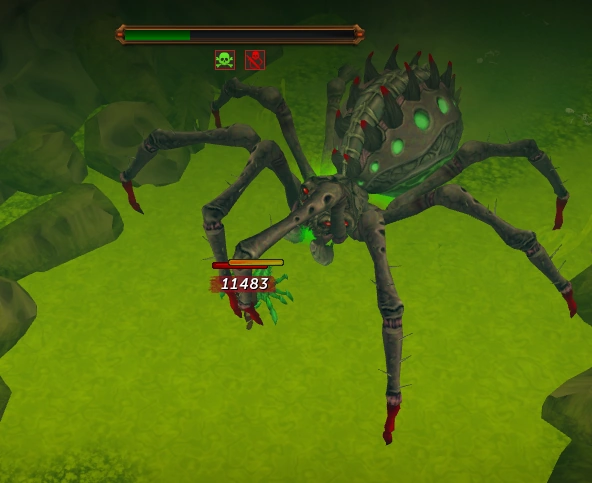
Phase 4
Araxxor is killed by its mate, Araxxi
Phase 4 begins with a cutscene of the injured Araxxor crawling to an isolated platform, only to be crushed and eaten by Araxxi. Drink an antipoison to prevent poison during the fight, as Araxxi can use all three combat styles, and like Araxxor, ranged attacks can poison and magic attacks can drain stats. The only noticeable difference is that Araxxi's melee attack does not cause the random bleed that Araxxor performs. If you are not using the Poison purge aura or Venomblood perk, drink a dose of antipoison. Ensure your health, prayer points and adrenaline is full; you can stall your adrenaline by performing shield abilities.
If the player has not killed Araxxi three times, they will be forced to an unskippable cutscene; they cannot do anything, so you will most likely lose a significant portion of your adrenaline. Once this cutscene is lifted, you can prepare up during the phase transition.
Araxxi's attacks are stronger than Araxxor's and may change style depending on your prayer. When within melee distance she will only attack with magic and melee, however if the player is not in melee distance her attacks will be magic and ranged. Araxxi takes protection prayers into account when attacking from a distance, but when attacking from melee distance, she does not take them into account.
Changing prayers is the most effective way to reduce the damage of Araxxi's attacks, especially when protection/deflection prayers are used with tier 90 armours and the Superior scrimshaw of vampyrism. Araxxi still has access to the cleave, healing web, cocoon attacks and summoning minions for the first half of her fight. She will usually use her cleave attack much more often compared to her other abilities during the first half of the fight.
When the top path is open, Araxxi will spawn the remaining spiders into the arena (this includes leftover spiders if path one was open or from egg drops) If spiders were summoned and attacked the player while the transition from phase 3 to 4 occurs, killing them before Araxxi becomes attackable will count towards the amount remaining, so they should be killed quickly if it occurs. The spiders will also spawn around the player when Araxxi calls for reinforcements; if the player was in the northern edge of the arena when she used it, they will only spawn towards the northern end of the arena. When the middle path is open, if the pool was not drained of acid completely with Araxxor, Araxxi will absorb the acid from the pool, taking in anywhere from 25 to 75 units of acid each time she siphons the pool of its acid. When the bottom path is open, she can turn the area dark for a short time. If Araxxor absorbed any acid, the rage increase from it will not apply to Araxxi. Note, however, that this may not always be reflected in the tool tip for the fight.
When paths 2 and 3 are open, if there are spiders left in the arena due to his egg drop ability, they will be called to assist Araxxi; however, this will only occur when all leftover acid from phase 3 is absorbed.
Continue counting her standard attacks and casting Freedom/Anticipation to reduce the potency of her special attacks. Due to the increased attention that is needed to be paid during this phase, it is recommended to use Revolution to automatically activate basic abilities.
At half health, Araxxi's attacks will get stronger and faster; however, she will stop using all of her special attacks, only having standard attacks available. If the player(s) are fast enough to reduce Araxxi's health to the halfway point, they can prevent her from summoning remaining spiders or absorbing leftover acid which can complicate the fight. This only applies with a large amount of spider minions yet to be called/high leftover acid.
At 25,000 life points (35,000 in duos), Araxxi will increase her rage by 20%, drain the player's adrenaline by 50% (out of 100), and release a black sludge (2 balls of sludge in duos). The sludge will bounce around the platform randomly several times before bouncing towards the player. Drink a dose of adrenaline potion at this point. When on you, it will deal rapid and powerful damage. Let the sludge hit you once and then move off of your square. If it hits you at least once, it will reset its bounce, allowing for more time before worrying about moving. The sludge can hit early, although this is because the player was on the tile the sludge was going to while bouncing around the arena. Should this happen, the sludge will reset back to the first bounce. The player should kill her as fast as possible, as her rage increases for each attack she attempts on you, resulting in the sludge dealing potentially fatal damage in tandem with her increasingly damaging attacks.
Every attack Araxxi does will increase her rage by 5%, so she must be dealt with quickly, especially on higher enrages.
Using an ultimate that increases damage (Death's Swiftness for ranged and Sunshine for magic; Berserk may be used, but is risky due to the extra 50% damage received) can either be used at the beginning of this phase or when Araxxi reaches about 40,000 health. It should be used respectively depending on the circumstances; when the acid path is open but not taken and the spiders are not lured, it is recommended to use it immediately before she can siphon all the acid. Otherwise, it should be used at 40,000 hitpoints followed with a powerful or channelled threshold so she will have taken enough damage for the player to kill her after it has ended and prevent the sludge from hitting the player. Devotion and/or Debilitate should be used before the sludge due to the 20% rage increase and the 50% adrenaline decrease once it has been released.
If players have brought along dual-wielded weapons, another viable alternative is to shield camp the remaining quarter of her health, using abilities such as Revenge and Reflect, which can help increase your damage as you get hit and decrease the amount of damage that her standard attacks do to you. This method works better when facing Araxxi with at least 200% rage, due to the her increasingly powerful attacks and the need to kill her quickly.
One item that may prove valuable during the final part of the final fight is the phoenix necklace. Phoenix necklaces can be used as a clutch means of healing back to 30% of maximum health when below 20%. Divination healing portents can also be used, provided that the player has at least 50% or more of their lifepoints still intact.
Any minion spiders still alive will remain even after Araxxi is defeated.