m (→Trivia: luck cat) Tag: apiedit |
No edit summary Tag: sourceedit |
||
| Line 7: | Line 7: | ||
{{Rots rotation}} |
{{Rots rotation}} |
||
| − | == |
+ | ==The Fight== |
| + | ===Before the Fight=== |
||
[[File:Shadow Realm portal.png|thumb|350px|The portal into the [[Shadow Realm]]]] |
[[File:Shadow Realm portal.png|thumb|350px|The portal into the [[Shadow Realm]]]] |
||
Each encounter requires an instance, requiring one [[Barrows totem]] each. Instances may be set to 1-4 players as of the [[Update:Patch_Notes_(12_December_2016)|12 December 2016]] update. Only the player making the instance needs to pay the Barrows totem. This is also true for [[Ironmen]]. Totems are obtained as a common reward from the original Barrows activity or bought from the Grand Exchange. |
Each encounter requires an instance, requiring one [[Barrows totem]] each. Instances may be set to 1-4 players as of the [[Update:Patch_Notes_(12_December_2016)|12 December 2016]] update. Only the player making the instance needs to pay the Barrows totem. This is also true for [[Ironmen]]. Totems are obtained as a common reward from the original Barrows activity or bought from the Grand Exchange. |
||
| − | Once inside, there is a randomly generated corridor containing 0-4 bridges. |
+ | Once inside, there is a randomly generated corridor containing 0-4 bridges. At the end of the tunnel there are four pressure plates for entry into the fight area. All players in the instance must stand on the pressure plates to enter the fight area. The distribution of team members on the pressure plates does not matter - 2 and 2, 3 and 1, 4 together on one side, or any combination depending on the number of players allowed by the instance. If someone lobbies after entering through the first portal, they cannot re-enter by standing on the pads alone. The team members inside the portals can either lobby and re-enter the instance or create a new instance. |
| − | When all players are inside the arena, one of them must click to disrupt the portal. A mask of Sliske will ask them if they are ready to fight (a quick-fight option is available also). Upon accepting, the 6 brothers spawn with 3 on both sides. The distribution of the brothers changes daily at 00:00 GMT. Once the fight has begun, no one can join the instance or fight area if they have died, disconnected, or did not enter the fight area after the second portal. |
+ | When all players are inside the arena, one of them must click to disrupt the portal. A mask of Sliske will ask them if they are ready to fight (a quick-fight option is available also). Upon accepting, the 6 brothers spawn with 3 on both sides. The distribution of the brothers changes daily at 00:00 GMT. Once the fight has begun, no one can join the instance or fight area if they have died, disconnected, or did not enter the fight area after the second portal. Dying in the fight will send your grave to the graveyard section of the dungeon, accessed by right-clicking the well. |
| − | ==After the fight== |
+ | ===After the fight=== |
| − | A cutscene will play once all 6 brothers are defeated, and a reward chest will appear on the west side of the arena. |
+ | A cutscene will play once all 6 brothers are defeated, and a reward chest will appear on the west side of the arena. Players on the east side must jump over the chasm where the shadow portal was. The [[Luck of the dwarves]] can affect the rewards in the chest. |
| + | Should the player's inventory be full, rewards will be dropped on the ground. If assigned as a [[Soul Reaper]] task, the kill will only count if the player dealt damage and survived the encounter. Any players who died during the encounter cannot loot the chest and the kill will not count towards their Beasts tab and Soul Reaper assignment. |
||
| ⚫ | The [[malevolent energy]] claimed from the chest is [[Malevolent energy (unstable)|unstable]] until the player is safely out of the tunnel. |
||
| + | When a player steps over the western pressure pads, the dungeon will become unstable and collapse as the shadow portal was supporting it, and players have 30 seconds to escape. The dungeon will get several changes. The small 3x2 pads begin to emit purple mist, which periodically deals damage to players near or on it. Several sections of the wall will collapse on themselves, sending out piles of rock which can damage players and act as solid obstacles. The bridges used to enter the area will also be destroyed, forcing players to use a narrow path jutting out from the chasm the bridge was on or use a vine/stepping stone to get across. As time elapses, the camera begins to tilt towards one side. If the player(s) do not get out within 30 seconds, explosions start appearing and will damage players for up to 1,500 per hit. |
||
| − | Once all players loot their items, they must run back out through the tunnel and up the rope. As soon as one person steps over the west side's entry pressure plates, a countdown of 30 seconds will start as the tunnel collapses. The camera will begin tilting back and forth, rocks will begin falling from the walls and ceilings, and purple clouds on the floor will appear. Falling rocks and the purple clouds cause damage if a player is hit. Most importantly, all bridges in the tunnels before the fight have collapsed. The gaps must be traversed by either a ledge on the side or a vine/stone pillar in the middle. Using the ledge takes longer, and only one person can pass at a time. Using the vine or stone pillar in the middle takes less time, but it can only be used by one person. Therefore usually the person farthest behind will take the middle paths to catch up. Bringing an item switch with the [[Mobile]] perk is highly recommended to get out of the tunnel faster. When the timer hits 0, the camera will tilt more and explosions will deal heavy damage until the player is safely out of the tunnel. |
||
| + | |||
| ⚫ | The [[malevolent energy]] claimed from the chest is [[Malevolent energy (unstable)|unstable]] until the player is safely out of the tunnel. Lobbying, teleporting, or leaving the tunnel in any way besides running back through it will cause the unstable energy to be destroyed. All other regular loot will be kept. |
||
==Rewards== |
==Rewards== |
||
Revision as of 03:42, 24 June 2017
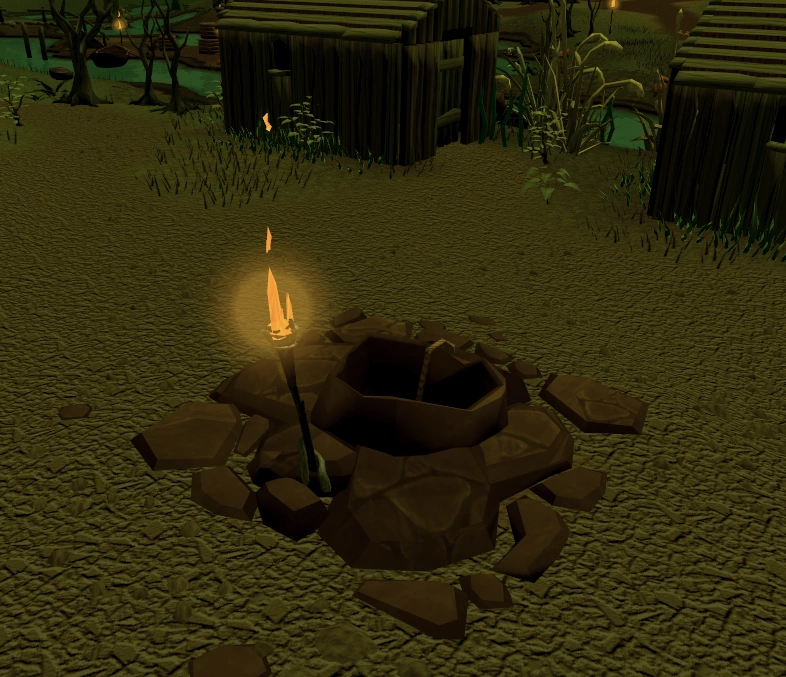
The entrance to the fight
Barrows: Rise of the Six is the sequel to the standard Barrows minigame. It was released on 13 November 2013. It features a team of one to four players fighting against all six of the Barrows Brothers: Ahrim, Dharok, Guthan, Torag, Verac, and Karil. All six brothers, however, have been greatly enhanced by Sliske's experiments in the Shadow Realm, each increasing from level 150 and 12,000 life points to level 650 and 50,000 life points. Players distribute themselves across the two sides or on one side of the arena, and defeat all 6 brothers at once in order to loot the reward chest.
The entrance to the minigame can be found west of the entrance to the Barrows within a well that is surrounded by four outbuildings (do not cross bridges). It is marked on the minimap by a well icon (blue waterdrop). The quickest way to get there is using Drakan's medallion, which is unlocked during the Branches of Darkmeyer. Teams of 4 can use the Grouping System, though one player must have a Barrows totem with them. Alternatively, players may travel through The Hollows and use the swamp boat. The table to the right shows the daily rotation of the brothers.
| West | East | |
|---|---|---|
| Karil | Guthan | |
| Ahrim | Dharok | |
| Torag | Verac | |
| (wrong?) | ||
The Fight
Before the Fight
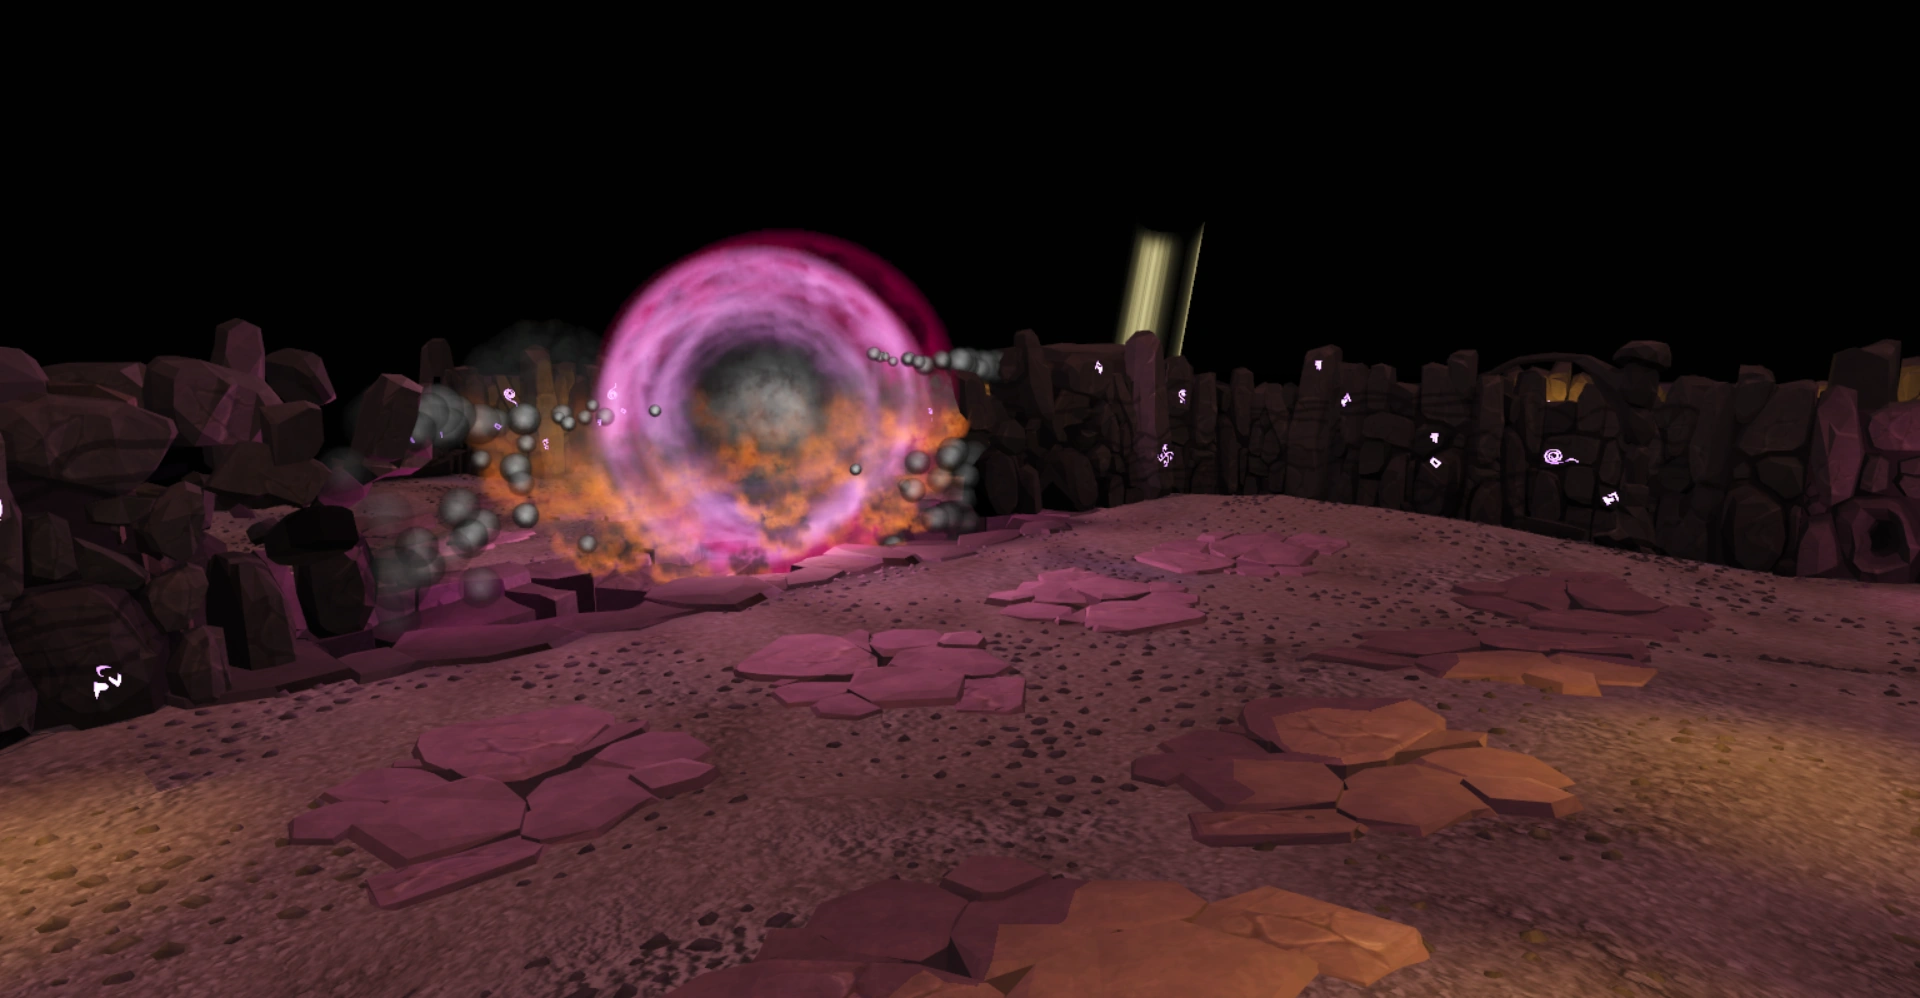
The portal into the Shadow Realm
Each encounter requires an instance, requiring one Barrows totem each. Instances may be set to 1-4 players as of the 12 December 2016 update. Only the player making the instance needs to pay the Barrows totem. This is also true for Ironmen. Totems are obtained as a common reward from the original Barrows activity or bought from the Grand Exchange.
Once inside, there is a randomly generated corridor containing 0-4 bridges. At the end of the tunnel there are four pressure plates for entry into the fight area. All players in the instance must stand on the pressure plates to enter the fight area. The distribution of team members on the pressure plates does not matter - 2 and 2, 3 and 1, 4 together on one side, or any combination depending on the number of players allowed by the instance. If someone lobbies after entering through the first portal, they cannot re-enter by standing on the pads alone. The team members inside the portals can either lobby and re-enter the instance or create a new instance.
When all players are inside the arena, one of them must click to disrupt the portal. A mask of Sliske will ask them if they are ready to fight (a quick-fight option is available also). Upon accepting, the 6 brothers spawn with 3 on both sides. The distribution of the brothers changes daily at 00:00 GMT. Once the fight has begun, no one can join the instance or fight area if they have died, disconnected, or did not enter the fight area after the second portal. Dying in the fight will send your grave to the graveyard section of the dungeon, accessed by right-clicking the well.
After the fight
A cutscene will play once all 6 brothers are defeated, and a reward chest will appear on the west side of the arena. Players on the east side must jump over the chasm where the shadow portal was. The Luck of the dwarves can affect the rewards in the chest.
Should the player's inventory be full, rewards will be dropped on the ground. If assigned as a Soul Reaper task, the kill will only count if the player dealt damage and survived the encounter. Any players who died during the encounter cannot loot the chest and the kill will not count towards their Beasts tab and Soul Reaper assignment.
When a player steps over the western pressure pads, the dungeon will become unstable and collapse as the shadow portal was supporting it, and players have 30 seconds to escape. The dungeon will get several changes. The small 3x2 pads begin to emit purple mist, which periodically deals damage to players near or on it. Several sections of the wall will collapse on themselves, sending out piles of rock which can damage players and act as solid obstacles. The bridges used to enter the area will also be destroyed, forcing players to use a narrow path jutting out from the chasm the bridge was on or use a vine/stepping stone to get across. As time elapses, the camera begins to tilt towards one side. If the player(s) do not get out within 30 seconds, explosions start appearing and will damage players for up to 1,500 per hit.
The malevolent energy claimed from the chest is unstable until the player is safely out of the tunnel. Lobbying, teleporting, or leaving the tunnel in any way besides running back through it will cause the unstable energy to be destroyed. All other regular loot will be kept.
Rewards
Rise of the Six has 5 unique rewards, including malevolent energy which can be used to smith malevolent armour and create Bobblehead pets. The tier 90 kiteshields (Merciless, Malevolent, and Vengeful) are also obtained through this boss. Barrows amulets from the reward chest can be used for the regular Barrows minigame.
100% drops
Malevolent energy is always unstable when received. The player must exit the tunnel without teleporting, lobbying, or dying in order to change it into the stable form. The value of 1 stable malevolent energy is 368,716.
| Item | Quantity | Rarity | GE price | |
|---|---|---|---|---|
| Malevolent energy (unstable) | 1–2 | Always | Not sold |
Charms
| No charm | ||||
|---|---|---|---|---|
| 29–41% | 9–17% | 11–20% | 15–25% | 13–23% |
| Represents a 90% confidence range based on a sample of 177 kills. 4 charms are dropped at a time. Add data to the log (requires JavaScript). | ||||
Armour
The kiteshields are tertiary drops.
| Item | Quantity | Rarity | GE price | |
|---|---|---|---|---|
| Malevolent kiteshield | 1 | Rare | 6,907,175 | |
| Merciless kiteshield | 1 | Rare | 6,560,569 | |
| Vengeful kiteshield | 1 | Rare | 6,753,789 |
Other
| Item | Quantity | Rarity | GE price | |
|---|---|---|---|---|
| Barrows amulet | 3–10 | Common | 9,951–33,170 | |
| Rune platebody | 6–10 (noted) | Common | 224,880–374,800 | |
| Magic logs | 190–210 (noted) | Common | 72,200–79,800 | |
| Raw rocktail | 120–150 (noted) | Common | 539,760–674,700 | |
| Black dragonhide | 60–80 (noted) | Common | 208,920–278,560 | |
| Onyx bolts (e) | 50–65 | Common | 386,150–501,995 | |
| Battlestaff | 35–45 (noted) | Common | 105,420–135,540 | |
| Runite ore | 30–34 (noted) | Common | 42,570–48,246 | |
| Magic seed | 2–4 | Common | 104,928–209,856 | |
| Dwarf weed seed | 6–10 | Common | 4,932–8,220 | |
| Lantadyme seed | 6–10 | Common | 4,356–7,260 |
Trivia
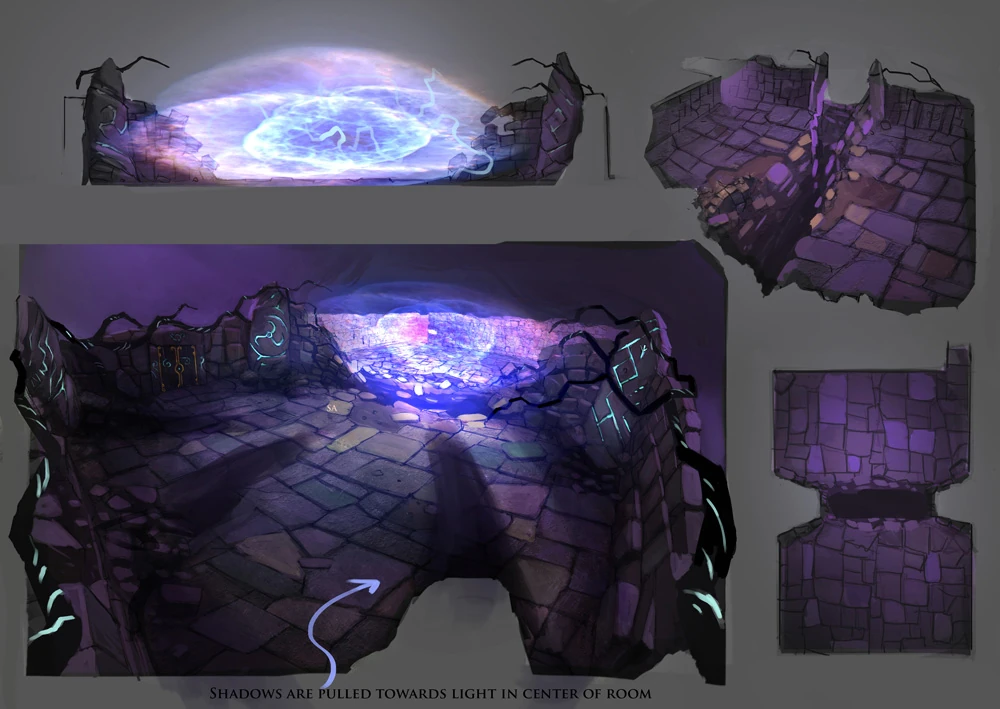

Concept art of the battle arena
- Upon release, a graveyard system was implemented, but caused disconnections to players who entered at first. Within a few minutes, a patch was implemented that put the graves right outside the original Barrows entrance. After a hidden update, the system was fixed and graves now appear inside the graveyard rather than outside.
- If a bucket is used on the entrance well, Ahrim the Blighted will appear and fill it with water. He will even have the attack option, although selecting it will do nothing.
- The fight is the third non-quest fight to make use of a cutscene after victory, the first being Bork and Vorago.
- When looting the chest for the first time, the mask of Sliske will appear and congratulate the player, telling them the rewards are theirs if they survive.
- There are several glitches that can occur during and after the fight:
- When Karil/Ahrim teleport to the middle of the field to attack players on the other side when the team is taken to the Shadow Realm, their effects may go off in the Shadow Realm but will be in the normal realm instead. A rarer glitch can happen, in which they may not transfer over to the Shadow Realm, and be stuck in the normal realm, causing the kill to be lost.
- It is possible for Dharok to be permanently killed during the fight. If this happens, the game will think that Dharok is dead. Like most NPCs, he will also drop bones, despite being a wight.
- If the player uses Surge and lands in an area where debris was just about to fall, there is a slight chance that rather than being knocked back and being dealt with damage, they will get stuck. The only way to get out of it is by lobbying or dying.
- After defeating the brothers the Adventurer's Log will say: "I defeated the wights of the Shadow Realm X time(s), sealing them back in Sliske's rift."
- Initially, the Shadow Realm ability of the brothers was completely different from the current ability. A brother would forcefully have the player possess their body in the Shadow Realm. The other brothers would follow the player in walking speed, and all five brothers had to be lured into the five gas clouds for the player to return to the normal realm. If they touched the player, they would deal some damage onto them. In the normal realm, that brother would be the "player", where they followed the movements of the player in the Shadow Realm.
- Prior to the 12 December 2016 update, Barrows: Rise of the Six required four players in order to start the fight. This was changed to allow teams to start the fight without needing four players if they were in a smaller team.
Barrows: Rise of the Six | |
|---|---|
| Brothers | |
| Malevolent armour |
|
| Shields |
|
| Bobbleheads |
|
| Resources |
|
| Music |
|