Tags: Visual edit apiedit |
(Fixing damage done) |
||
| (45 intermediate revisions by 30 users not shown) | |||
| Line 4: | Line 4: | ||
{{HasStrategy}} |
{{HasStrategy}} |
||
{{HasMMG|High level Barrows}} |
{{HasMMG|High level Barrows}} |
||
| − | {{Dangerous |
+ | {{Dangerous|minigame}} |
{{Official world|p2p=15}} |
{{Official world|p2p=15}} |
||
{{Infobox minigame |
{{Infobox minigame |
||
| Line 24: | Line 24: | ||
[[File:Barrows icon.jpg|left]] |
[[File:Barrows icon.jpg|left]] |
||
The '''Barrows''' is an area-based combat [[Minigames|minigame]]. It involves defeating the six [[Barrows brothers]], each with their own special strengths and weaknesses. A seventh, [[Akrisae the Doomed]], is unlocked after completing [[Ritual of the Mahjarrat]], and a sister, [[Linza the Disgraced]], is unlocked after completing [[Kindred Spirits]]. |
The '''Barrows''' is an area-based combat [[Minigames|minigame]]. It involves defeating the six [[Barrows brothers]], each with their own special strengths and weaknesses. A seventh, [[Akrisae the Doomed]], is unlocked after completing [[Ritual of the Mahjarrat]], and a sister, [[Linza the Disgraced]], is unlocked after completing [[Kindred Spirits]]. |
||
| + | |||
| + | Obtaining all unique drops will unlock the {{TitleAnchor|t=Graverobber|c=#595730|loc=p}} title. |
||
==Getting there== |
==Getting there== |
||
[[File:Barrows map.png|thumb|link=Map:Barrows|A map of the Barrows (click to view a larger version)]] |
[[File:Barrows map.png|thumb|link=Map:Barrows|A map of the Barrows (click to view a larger version)]] |
||
| − | * [[Drakan's medallion]] - This is the fastest means of travel to the Barrows, having a teleport directly to their graves; no charges are consumed if the medallion is used from inside Morytania, such as from Canifis lodestone. |
+ | * [[Drakan's medallion]] - This is the fastest means of travel to the Barrows, having a teleport directly to their graves; no charges are consumed if the medallion is used from inside Morytania, such as from Canifis lodestone. Alos, can be used if it has 0 charges, but it only works inside the "free-teleport" zones. |
* [[Max Guild]] PvM portal - This option is just as fast as Drakan's medallion; however, it requires level 99 in every skill. |
* [[Max Guild]] PvM portal - This option is just as fast as Drakan's medallion; however, it requires level 99 in every skill. |
||
* [[Games necklace]] - After gaining enough points from [[Temple Trekking]], a games necklace can be used to teleport directly to [[Burgh de Rott]], which is only a short walk from the Barrows. |
* [[Games necklace]] - After gaining enough points from [[Temple Trekking]], a games necklace can be used to teleport directly to [[Burgh de Rott]], which is only a short walk from the Barrows. |
||
| Line 40: | Line 42: | ||
The Barrows brothers were ancient warriors of [[Saradomin]] who established a reputation of near invincibility while fighting in the [[God Wars]]. They launched a [[Morytania Campaign|massive attack]] to liberate [[Morytania]] from the clutches of [[Lord Lowerniel Vergidiyad Drakan]] and his [[vampyre]]s, after he had established complete control over the continent as of the [[Fall of Hallowvale]]. As the brothers departed, a mysterious stranger, the [[Zaros]]ian [[Mahjarrat]] [[Sliske]], granted them superhuman power to battle Drakan's forces. It succeeded, for the brothers, who were in the front line, seemed invincible. They had not anticipated, however, that Sliske had ulterior motives for helping them. |
The Barrows brothers were ancient warriors of [[Saradomin]] who established a reputation of near invincibility while fighting in the [[God Wars]]. They launched a [[Morytania Campaign|massive attack]] to liberate [[Morytania]] from the clutches of [[Lord Lowerniel Vergidiyad Drakan]] and his [[vampyre]]s, after he had established complete control over the continent as of the [[Fall of Hallowvale]]. As the brothers departed, a mysterious stranger, the [[Zaros]]ian [[Mahjarrat]] [[Sliske]], granted them superhuman power to battle Drakan's forces. It succeeded, for the brothers, who were in the front line, seemed invincible. They had not anticipated, however, that Sliske had ulterior motives for helping them. |
||
| − | As the brothers and their accompanying army progressed further into enemy territory in [[Morytania]], Sliske followed them until the brothers became weakened. The brothers were grievously wounded in battle near the Great Vyrewall, and thus the army set up camp just west of [[Meiyerditch]]. Soon, the brothers died of their infected wounds simultaneously in the army's camp. The army spent several days and nights holding off the attacking vampyres to construct burial mounds, the Barrows, to honour the fallen brothers. The army quickly retreated from Morytania, |
+ | As the brothers and their accompanying army progressed further into enemy territory in [[Morytania]], Sliske followed them until the brothers became weakened. The brothers were grievously wounded in battle near the Great Vyrewall, and thus the army set up camp just west of [[Meiyerditch]]. Soon, the brothers died of their infected wounds simultaneously in the army's camp. The army spent several days and nights holding off the attacking vampyres to construct burial mounds, the Barrows, to honour the fallen brothers. The army quickly retreated from Morytania, realizing they could never succeed without their former leaders' prowess. |
| ⚫ | |||
| ⚫ | |||
As the army began its return, Sliske cast a magical spell on the crypts, corrupting the bodies of the brothers, turning them into his newest [[Sliske#Sliske's wights|wights]], and binding them to guard [[Barrows icon|a very powerful artefact]]. Sliske's ally [[Azzanadra]] had requested for this icon to be guarded before the latter's imprisonment in [[Jaldraocht Pyramid]], so that it could later be used to re-establish contact with the banished Zaros. Sliske, instead of directly taking the Barrows Brothers, decided it would be fun to have them almost succeed in their goal before claiming them, a typical characteristic of the Mahjarrat. |
As the army began its return, Sliske cast a magical spell on the crypts, corrupting the bodies of the brothers, turning them into his newest [[Sliske#Sliske's wights|wights]], and binding them to guard [[Barrows icon|a very powerful artefact]]. Sliske's ally [[Azzanadra]] had requested for this icon to be guarded before the latter's imprisonment in [[Jaldraocht Pyramid]], so that it could later be used to re-establish contact with the banished Zaros. Sliske, instead of directly taking the Barrows Brothers, decided it would be fun to have them almost succeed in their goal before claiming them, a typical characteristic of the Mahjarrat. |
||
| − | In [[169]] of the [[Fifth Age]], Azzanadra was released, and, with the help of an adventurer who manages to steal the Barrows Icon from the brothers, re-established communication with Zaros in time for the Mahjarrat [[Ritual of Rejuvenation]]. Shortly after said ritual, which the adventurer attends with several [[Temple Knight]] allies, Sliske attempted to claim them in a similar way. However, the [[Saradomin]]ist priest [[Akrisae Kolluym]] intercepted the spell, sacrificing himself and turning him into [[Akrisae the Doomed]] - the seventh wight. |
+ | In [[169]] of the [[Fifth Age]], Azzanadra was released, and, with the help of an adventurer who manages to steal the Barrows Icon from the brothers, re-established communication with Zaros in time for the Mahjarrat [[Ritual of Rejuvenation]]. Shortly after said ritual, which the adventurer attends with several [[Temple Knight]] allies, Sliske attempted to claim them in a similar way. However, the [[Saradomin]]ist priest [[Akrisae Kolluym]] intercepted the spell, sacrificing himself and turning him into [[Akrisae the Doomed]] - the seventh wight. Sliske was disappointed that he did not claim the player, but was content enough with a new wight. |
In approximately Year 4 of the [[Sixth Age]], Sliske lured the [[player|World Guardian]] into one of his twisted games, using [[Meg]], [[Linza]], [[Major Mary Rancour]], and [[Brother Samwell]] as bait. He instructed the World Guardian to guide the Barrows Brothers through a series of torturous tests, designed to force them to admit to and atone for various misdeeds in their lives. In a fit of temper over the World Guardian snooping around in his private journals, Sliske reveals that the whole game was a setup, and that Linza had come to him for protection from the [[Dragonkin]], from whom she'd stolen the secrets of smithing [[Orikalkum|dragon metal]], along with some dragon ore. He breaks his bargain with her, and turns her into his eighth wight, [[Linza the Disgraced]]. |
In approximately Year 4 of the [[Sixth Age]], Sliske lured the [[player|World Guardian]] into one of his twisted games, using [[Meg]], [[Linza]], [[Major Mary Rancour]], and [[Brother Samwell]] as bait. He instructed the World Guardian to guide the Barrows Brothers through a series of torturous tests, designed to force them to admit to and atone for various misdeeds in their lives. In a fit of temper over the World Guardian snooping around in his private journals, Sliske reveals that the whole game was a setup, and that Linza had come to him for protection from the [[Dragonkin]], from whom she'd stolen the secrets of smithing [[Orikalkum|dragon metal]], along with some dragon ore. He breaks his bargain with her, and turns her into his eighth wight, [[Linza the Disgraced]]. |
||
| + | |||
| + | Sliske, in his arrogance, failed to anticipate that the player's meddling greatly interrupted his control over the Barrows wights. With the exception of Akrisae, he deployed the original six to kill the player, but because of their actions, the brothers turned against Sliske. Sliske sent out [[Nomad]], [[Gregorovic]] and Linza to kill the player, but they were all defeated by the player after a long fight. When Sliske "died", the brothers (and Linza) were freed of Sliske's control. Linza informed the player that they would be waiting in the crypts, eager to battle the player again to improve their skills. |
||
A [[crumbling tome]], obtained by searching the hut near the mounds or by talking to the [[Strange Old Man]] found digging the crypts, provides a detailed account of how the brothers came to be buried. |
A [[crumbling tome]], obtained by searching the hut near the mounds or by talking to the [[Strange Old Man]] found digging the crypts, provides a detailed account of how the brothers came to be buried. |
||
===Graphical overhaul=== |
===Graphical overhaul=== |
||
| − | After the release of the new website and interfaces on [[22 November]] [[2011]], a screenshot was shown on the [[media]] page of a graphical update for the Barrows |
+ | After the release of the new website and interfaces on [[22 November]] [[2011]], a screenshot was shown on the [[media]] page of a graphical update for the Barrows mini game. The [[Update:Behind the Scenes - January (2012)|January 2012]] [[Behind the Scenes]] article confirmed that an update was coming to the minigame, which was introduced on the [[4 January]] [[Update:A Very Barrows New Year!|update]]. |
The graphical update changed the looks of the area, added mist to the crypt, changed the Barrows brothers from purple ghosts to corporeal foes, and, for a week following the release, gave a 1 in 10 chance of doubling rewards. This extra reward chance ended on [[11 January]]. |
The graphical update changed the looks of the area, added mist to the crypt, changed the Barrows brothers from purple ghosts to corporeal foes, and, for a week following the release, gave a 1 in 10 chance of doubling rewards. This extra reward chance ended on [[11 January]]. |
||
==Objective== |
==Objective== |
||
| − | The objective of the Barrows |
+ | The objective of the Barrows mini game is to defeat the eight [[Barrows brothers]]: [[Ahrim the Blighted]], [[Dharok the Wretched]], [[Guthan the Infested]], [[Karil the Tainted]], [[Torag the Corrupted]], [[Verac the Defiled]]. [[Akrisae the Doomed]] is only available after [[Ritual of the Mahjarrat]], and [[Linza the Disgraced]] is only available after [[Kindred Spirits]]. |
The Barrows brothers and sister are very strong, each with very high [[defence]]. Each brother and sister also has a different special ability, which is the same as the set effect of the corresponding armour set. Because of this, special consideration should be given to the methods with and order in which the brothers are eliminated. |
The Barrows brothers and sister are very strong, each with very high [[defence]]. Each brother and sister also has a different special ability, which is the same as the set effect of the corresponding armour set. Because of this, special consideration should be given to the methods with and order in which the brothers are eliminated. |
||
| + | |||
| + | After killing a Barrows brother, experience will not be awarded if exiting the tomb too quickly. However, the kill will count towards the "Brothers slain". |
||
| + | |||
| + | A similar effect may occur when killing a brother in the tunnels. If a player enters another room quickly after killing a brother (before receiving the exp drop), the brother may respawn in the next room. This will prevent the brother from being added to the "Brothers slain" counter and they must be killed again. |
||
===Strategy=== |
===Strategy=== |
||
| Line 69: | Line 77: | ||
If the brother whose tomb was used to enter the tunnel is not killed yet, he will appear when the chest is looted. |
If the brother whose tomb was used to enter the tunnel is not killed yet, he will appear when the chest is looted. |
||
| − | The standard monsters in the tunnels may be killed to increase the chances of receiving rare, non-Barrows items; e.g. [[dragon helm]]s. The |
+ | The standard monsters in the tunnels may be killed to increase the chances of receiving rare, non-Barrows items; e.g. [[dragon helm]]s. The total number of combat levels of the standard monsters killed affect the reward up to 1,000 combat levels.{{CiteDevBlog|author=Mod Timbo|url=http://services.runescape.com/m=forum/forums.ws?74,75,52,65949497,goto,17#160|title=Revealing Drop Rates|blogdate=27 October 2017|notes=|name=Timbo}} |
| + | Letting <math>N</math> be the number of brothers killed (excluding [[Linza the Disgraced]]), the number of reward rolls for the chest can be expressed with <math>min(N+1, 7)</math>.<ref name=Timbo /> If Barrows items are rolled successfully, they are chosen only out of the killed wights' items. It is possible to obtain multiple pieces of Barrows equipment from a single chest. |
||
| − | For every brother killed, there is a roll for the brother's item. This chance starts at 1/450 and decreases by 116 for every brother, capping at 1/44. Therefore, killing 4 brothers is required for the maximum chance per roll. Killing a brother will only add their items to the chest as a possible reward, so if a certain brother's items are undesired, he can be ignored without decreasing the chance for a desired item per roll (assuming at least 4 are killed); however, this would decrease the chance of obtaining an item overall. Killing additional brothers past 4 will not increase the odds per roll beyond 1/44; however, it will add an extra, independent roll, thus increasing the chance of obtaining ''any'' item. Each roll can produce any brother's equipment, and a brother can be rolled by multiple rolls. It is possible to obtain multiple pieces of Barrows equipment from a single chest, but it is not possible for those pieces to be the exact same item. |
||
| + | |||
| + | First, if [[Linza the Disgraced]] was killed, there is a 1 in 192 chance to obtain one of her items. If this fails due to failing the roll or not killing her, another piece of Barrows equipment is rolled with the chance <math>1/max(450-58N, 73)</math>. All of the eligible Barrows items have equal odds of being rewarded. If the Barrows equipment roll is also failed, [[Barrows totem]]s are rewarded with <math>1/(20-N)</math> chance. If this fails, the [[corruption sigil]] is rolled with <math>1/(50(7-N))</math> chance if one is eligible for one. Finally, if all of the above fails, a piece of loot from the standard reward table is rolled. In addition, wearing a [[ring of wealth]] or higher luck modification has a chance to add one extra reward to the chest.<ref name=Timbo /> |
||
Killing all six of the original brothers is required to increase the beast tab kill count and thus also required to reap a soul when on a [[Soul Reaper]] assignment. |
Killing all six of the original brothers is required to increase the beast tab kill count and thus also required to reap a soul when on a [[Soul Reaper]] assignment. |
||
| + | |||
| ⚫ | |||
| + | This loot table is rolled first if [[Linza the Disgraced]] was killed. The chance of getting a roll to Linza's unique table is 1 in 192. If the roll is successful, there is a equal chance of getting any of the item, making it 1 in 960 for a specific item, and no further rewards are awarded. |
||
| ⚫ | |||
| ⚫ | |||
| ⚫ | |||
| ⚫ | |||
| ⚫ | |||
| ⚫ | |||
| ⚫ | |||
| + | |||
| + | ===Other Barrows equipment=== |
||
| + | This table is only rolled if the above table fails due to either failing the roll or not having killed [[Linza the Disgraced]].<ref name=Timbo /> Only the items of the brothers that were killed are available to be rewarded. |
||
| + | {{DropsTableHead}} |
||
| + | {{DropsLine|Name=Ahrim's hood|Quantity=1|Rarity=Rare|Raritynotes=<ref name=Timbo /><ref name=other-Barrows>The chance to obtain any item from the table is <math>1/max(450-58N, 73)</math>, so the drop rate for this item specifically is at most 1/1,568 by only killing the respective brother.</ref>}} |
||
| ⚫ | |||
| ⚫ | |||
| ⚫ | |||
| ⚫ | |||
| ⚫ | |||
| ⚫ | |||
| ⚫ | |||
| ⚫ | |||
| ⚫ | |||
| ⚫ | |||
| ⚫ | |||
| ⚫ | |||
| ⚫ | |||
| ⚫ | |||
| ⚫ | |||
| ⚫ | |||
| ⚫ | |||
| ⚫ | |||
| ⚫ | |||
| ⚫ | |||
| ⚫ | |||
| ⚫ | |||
| ⚫ | |||
| ⚫ | |||
| ⚫ | |||
| ⚫ | |||
| ⚫ | |||
| ⚫ | |||
| ⚫ | |||
| ⚫ | |||
| + | {{DropsLine|Name=Akrisae's war mace|Quantity=1|Rarity=Rare|Raritynotes=<ref name=Timbo /><ref name=other-Barrows />}} |
||
| + | {{DropsTableBottom}} |
||
===Standard items=== |
===Standard items=== |
||
| + | This table is only rolled if the above rolls failed. If both [[Barrows totem]] and [[corruption sigil]] rolls fail, the drop is affected by the killed standard monsters in the crypt: A random number between 0 and <math>min(L, 1000)+2N</math> is rolled where <math>L</math> is the total level of monsters killed.<ref name=Timbo /> |
||
{{DropsTableHead}} |
{{DropsTableHead}} |
||
| − | {{DropsLine|Name= |
+ | {{DropsLine|Name=Coins|Quantity=1-4000|Rarity=Common|Raritynotes=<ref name=Timbo /><ref>If the random number lies between 0 and 379, inclusive.</ref>}} |
| ⚫ | |||
| ⚫ | |||
| − | {{DropsLine|Name= |
+ | {{DropsLine|Name=Loop half of a key|Quantity=1|Rarity=Rare|Raritynotes=<ref name=Timbo /><ref>If the random number lies between 1,005 and 1,010, inclusive. Either this or the tooth half is given.</ref>}} |
| + | {{DropsLine|Name=Tooth half of a key|Quantity=1|Rarity=Rare|Raritynotes=<ref name=Timbo /><ref>If the random number lies between 1,005 and 1,010, inclusive. Either this or the loop half is given.</ref>}} |
||
| − | {{DropsLine|Name=Chaos rune|Quantity=115-1890|Rarity=Common}} |
||
| − | {{DropsLine|Name= |
+ | {{DropsLine|Name=Bolt rack|Quantity=35-280|Rarity=Common|Raritynotes=<ref name=Timbo /><ref>If the random number lies between 880 and 1,004, inclusive.</ref>}} |
| − | {{DropsLine|Name= |
+ | {{DropsLine|Name=Barrows totem|Quantity=1-14|Rarity=Uncommon|Raritynotes=<ref name=Timbo /><ref>1/(20-N) drop rate.</ref>}} |
| − | {{DropsLine|Name= |
+ | {{DropsLine|Name=Dragon helm|Quantity=1|Rarity=Rare|Raritynotes=<ref name=Timbo /><ref>If the random number lies above 1,011, inclusive.</ref>}} |
| − | {{DropsLine|Name= |
+ | {{DropsLine|Name=Blood rune|Quantity=35-630|Rarity=Common|Raritynotes=<ref name=Timbo /><ref>If the random number lies between 755 and 879, inclusive.</ref>}} |
| − | {{DropsLine|Name= |
+ | {{DropsLine|Name=Chaos rune|Quantity=115-1890|Rarity=Common|Raritynotes=<ref name=Timbo /><ref>If the random number lies between 505 and 629, inclusive.</ref>}} |
| − | {{DropsLine|Name= |
+ | {{DropsLine|Name=Death rune|Quantity=70-1190|Rarity=Common|Raritynotes=<ref name=Timbo /><ref>If the random number lies between 630 and 754, inclusive.</ref>}} |
| + | {{DropsLine|Name=Mind rune|Quantity=250-4900|Rarity=Common|Raritynotes=<ref name=Timbo /><ref>If the random number lies between 380 and 504, inclusive.</ref>}} |
||
{{DropsTableBottom}} |
{{DropsTableBottom}} |
||
| − | === |
+ | ===Lucky drops=== |
| + | This drop table is accessed by having a luck modification from [[ring of wealth]] or above, and is rolled as an extra reward in respect to the above. There is a 1/10 chance to not obtain a reward even if the table is rolled.<ref name=Timbo /> |
||
{{DropsTableHead}} |
{{DropsTableHead}} |
||
| − | {{DropsLine|Name= |
+ | {{DropsLine|Name=Shark|Quantity=4|Rarity=Common|Raritynotes= (1/10)<ref name=Timbo />}} |
| + | {{DropsLine|Name=Prayer potion (2)|Quantity=1|Rarity=Common|Raritynotes= (3/10)<ref name=Timbo /><ref>1/10 chance to obtain only these, 1/10 to drop with a [[restore potion (2)]], and 1/10 to drop with [[super defence (2)]].</ref>}} |
||
| − | {{DropsLine|Name=Barrows totem|Quantity=1-13|Rarity=Uncommon}} |
||
| − | {{DropsLine|Name= |
+ | {{DropsLine|Name=Restore potion (2)|Quantity=1|Rarity=Common|Raritynotes= (3/10)<ref name=Timbo /><ref>1/10 chance to obtain only these, 1/10 to drop with a [[prayer potion (2)]], and 1/10 to drop with [[super defence (2)]].</ref>}} |
| − | {{DropsLine|Name= |
+ | {{DropsLine|Name=Super defence (2)|Quantity=1|Rarity=Common|Raritynotes= (3/10)<ref name=Timbo /><ref>1/10 chance to obtain only these, 1/10 to drop with a [[prayer potion (2)]], and 1/10 to drop with [[restore potion (2)]].</ref>}} |
| − | {{DropsLine|Name= |
+ | {{DropsLine|Name=Death rune|Quantity=15|Rarity=Common|Raritynotes= (1/10)<ref name=Timbo />}} |
| − | {{DropsLine|Name= |
+ | {{DropsLine|Name=Mind rune|Quantity=60|Rarity=Common|Raritynotes= (1/10)<ref name=Timbo />}} |
| + | {{DropsTableBottom}} |
||
| + | |||
| + | ===Other items=== |
||
| + | This drop table is seemingly not affected by the above drop tables. |
||
| + | {{DropsTableHead}} |
||
| + | {{DropsLine|Name=Barrows icon|gemw=no|Quantity=1|Rarity=Always|Raritynotes=<ref>Only during [[The Temple at Senntisten]] quest; 100% chance if 6 are killed.</ref>}} |
||
| + | {{DropsLine|Name=Sealed clue scroll (elite)|Quantity=1|Rarity=Rare|Raritynotes=<ref>1/(120 + 8*(number of brothers not killed, including Akrisae even if not unlocked)) (source [https://www.youtube.com/watch?v=EDioxmFl0F8 50:45 in this developer Q&A])</ref><ref>There is a 1% chance of this being a [[sealed clue scroll (master)]] instead</ref>}} |
||
| ⚫ | |||
{{DropsLine|Name=Crystal triskelion fragment 1|Quantity=1-2|Rarity=Very rare|gemw=no}} |
{{DropsLine|Name=Crystal triskelion fragment 1|Quantity=1-2|Rarity=Very rare|gemw=no}} |
||
{{DropsLine|Name=Crystal triskelion fragment 2|Quantity=1|Rarity=Very rare|gemw=no}} |
{{DropsLine|Name=Crystal triskelion fragment 2|Quantity=1|Rarity=Very rare|gemw=no}} |
||
| Line 102: | Line 170: | ||
{{DropsTableBottom}} |
{{DropsTableBottom}} |
||
| ⚫ | |||
| ⚫ | |||
| ⚫ | |||
| ⚫ | |||
| − | {{DropsLine|Name=Ahrim's hood|Quantity=1|Rarity=Rare}} |
||
| ⚫ | |||
| ⚫ | |||
| ⚫ | |||
| ⚫ | |||
| ⚫ | |||
| ⚫ | |||
| ⚫ | |||
| ⚫ | |||
| ⚫ | |||
| − | {{DropsLine|Name=Torag's helm|Quantity=1|Rarity=Rare}} |
||
| ⚫ | |||
| ⚫ | |||
| ⚫ | |||
| ⚫ | |||
| ⚫ | |||
| ⚫ | |||
| ⚫ | |||
| ⚫ | |||
| ⚫ | |||
| ⚫ | |||
| ⚫ | |||
| ⚫ | |||
| ⚫ | |||
| ⚫ | |||
| ⚫ | |||
| ⚫ | |||
| ⚫ | |||
| ⚫ | |||
| ⚫ | |||
| ⚫ | |||
| ⚫ | |||
| ⚫ | |||
| ⚫ | |||
| ⚫ | |||
| ⚫ | |||
| ⚫ | |||
| ⚫ | |||
| + | ==Feats== |
||
| ⚫ | |||
| + | * {{Achievement|Brothers in Arms|20|Defeat each of the Barrows Brothers, dealing the killing blow with their own weapon.}} |
||
| + | * {{Achievement|Barrowed Time|0|Obtained a collection of unique drops from the Barrows Brothers.}} |
||
| + | * {{Achievement|Something Barrowed|5|Defeat the six Barrows Brothers and loot their chest several times depending on the tier.}} |
||
==Rise of the Six== |
==Rise of the Six== |
||
| + | {{Main|Barrows: Rise of the Six}} |
||
| − | [[Barrows: Rise of the Six]] is a sequel to the Barrows minigame. Unlike in the standard minigame, you have to fight 6 greatly buffed brothers at once with three other players. Due to the increased difficulty, the rewards are much better than the standard minigame. The same update also added the Barrows totem, an item required to play Barrows - Rise of the Six, to the regular Barrows loot table, making it more popular amongst players. |
||
| + | Barrows: Rise of the Six is a hard mode variant of Barrows, with players fighting the newly empowered Barrows Brothers. In return for a harder fight (up to four players may battle them), players will find themselves greatly rewarded upon defeating them. |
||
==Music unlocked== |
==Music unlocked== |
||
| Line 156: | Line 188: | ||
==Trivia== |
==Trivia== |
||
| − | * During the graphical update in January 2012, it was possible to get a [[draconic visage]] from the barrows chest, which only lasted a week. |
+ | * During the graphical update in January [[2012]], it was possible to get a [[draconic visage]] from the barrows chest, which only lasted a week. |
* Barrows is another word for a tumulus, which is a mound of earth and stones raised over a grave, called a crypt in the minigame, or graves, which is probably where the name of the minigame comes from. Tumulus is Latin for "mound" or "small hill". |
* Barrows is another word for a tumulus, which is a mound of earth and stones raised over a grave, called a crypt in the minigame, or graves, which is probably where the name of the minigame comes from. Tumulus is Latin for "mound" or "small hill". |
||
* From 00:00 UTC [[12 November]] 2011 to 23:59 UTC [[14 November]] 2011, there was an event where players could gain double loot from several dungeons, including the Barrows minigame. This was part of Jagex's bot-busting celebration. |
* From 00:00 UTC [[12 November]] 2011 to 23:59 UTC [[14 November]] 2011, there was an event where players could gain double loot from several dungeons, including the Barrows minigame. This was part of Jagex's bot-busting celebration. |
||
| Line 162: | Line 194: | ||
* If you attempt to enter with a familiar, you will be forced out with a message saying "You cannot enter this area with a familiar. You must leave this area and dismiss your familiar if you wish to enter." |
* If you attempt to enter with a familiar, you will be forced out with a message saying "You cannot enter this area with a familiar. You must leave this area and dismiss your familiar if you wish to enter." |
||
** If you use [[Surge]] or [[Escape]] to get into the mounds with a familiar, a message will say "You cannot enter this area with a familiar. You must leave this area and dismiss your familiar if you wish to enter. Your familiar is forced to leave as it cannot remain here." The familiar will be automatically dismissed, dropping everything it is carrying. |
** If you use [[Surge]] or [[Escape]] to get into the mounds with a familiar, a message will say "You cannot enter this area with a familiar. You must leave this area and dismiss your familiar if you wish to enter. Your familiar is forced to leave as it cannot remain here." The familiar will be automatically dismissed, dropping everything it is carrying. |
||
| + | * Follower pets (e.g boss pets) cannot be summoned inside the Barrows area. However, they can be brought inside if summoned outside first. |
||
| + | * As of [[1 February]] [[2018]], the highest kill count for this boss was 12,595 kills{{CiteGeneral|url = https://www.reddit.com/r/runescape/comments/7uqej0/top_10_killers_per_boss/|title = Top 10 killers per Boss|author = Mod Shauny|date = 2 Feb 2018|accessdate = 2018-02-02|quote = Here are the top 10 kills for each Boss in RuneScape, be aware that we've not listed display names for privacy purposes however if you wish to brag about one number being yours then we won't stop you!}}. |
||
| + | ** This had not increased by [[6 May]] 2018.{{CiteGeneral|url=https://www.reddit.com/r/runescape/comments/8hj2f0/top_boss_killers_6th_may_2018/|title=Top 10 killers per Boss|author=Mod Shauny|date=6 May 2018|accessdate=2018-05-07|quote=Here are the top 10 kills for each Boss in RuneScape, be aware that we've not listed display names for privacy purposes however if you wish to brag about one number being yours then we won't stop you!}}. |
||
| + | * It is possible to receive two of the same pieces of armour from one chest. It is currently unknown if this is a glitch. |
||
| + | |||
| + | ==References== |
||
| + | {{reflist}} |
||
{{Barrows}} |
{{Barrows}} |
||
| Line 167: | Line 206: | ||
{{Soul Reaper}} |
{{Soul Reaper}} |
||
{{Tales of the God Wars}} |
{{Tales of the God Wars}} |
||
| + | {{The Fall of Six}} |
||
| + | {{Dungeons}} |
||
[[fi:Barrows (minipeli)]] |
[[fi:Barrows (minipeli)]] |
||
[[es:Barrows]] |
[[es:Barrows]] |
||
[[nl:Barrows]] |
[[nl:Barrows]] |
||
| ⚫ | |||
[[Category:Morytania]] |
[[Category:Morytania]] |
||
| − | [[Category:Locations]] |
||
[[Category:Wikia Game Guides activities]] |
[[Category:Wikia Game Guides activities]] |
||
| ⚫ | |||
Latest revision as of 10:44, 8 June 2019

| |
| Release date | 9 May 2005 (Update) |
|---|---|
| Members | Yes |
| Location | East of Burgh de Rott |
| Participants | 1 |
| Skills involved | Combat |
| Reward currency | None |
| In spotlight rotation | No |
| Hiscores | No |
| Tutorial | No |
| Custodians | Strange Old Man |
| Music unlocked | Dangerous Way |
| Developers | • Original: Graham B • Update: Tim C |
The Barrows is an area-based combat minigame. It involves defeating the six Barrows brothers, each with their own special strengths and weaknesses. A seventh, Akrisae the Doomed, is unlocked after completing Ritual of the Mahjarrat, and a sister, Linza the Disgraced, is unlocked after completing Kindred Spirits.
Obtaining all unique drops will unlock the Graverobber [Name] title.
Getting there
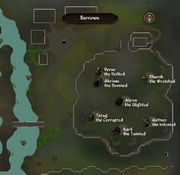
A map of the Barrows (click to view a larger version)
- Drakan's medallion - This is the fastest means of travel to the Barrows, having a teleport directly to their graves; no charges are consumed if the medallion is used from inside Morytania, such as from Canifis lodestone. Alos, can be used if it has 0 charges, but it only works inside the "free-teleport" zones.
- Max Guild PvM portal - This option is just as fast as Drakan's medallion; however, it requires level 99 in every skill.
- Games necklace - After gaining enough points from Temple Trekking, a games necklace can be used to teleport directly to Burgh de Rott, which is only a short walk from the Barrows.
- From Canifis - The slowest method is walking through the swamps from Canifis; however, there are several shortcuts for this route:
- The fairy ring in Mort Myre Swamp can be accessed by code BKR. It's only a short distance from the ring to the swamp boat.
- A Swamp Boat in the middle of the swamp can be taken for free to land on the bridge to the Barrows.
- In Search of the Myreque unlocks access to the area under the bar in Canifis, which provides a faster route to the swamp boat.
History
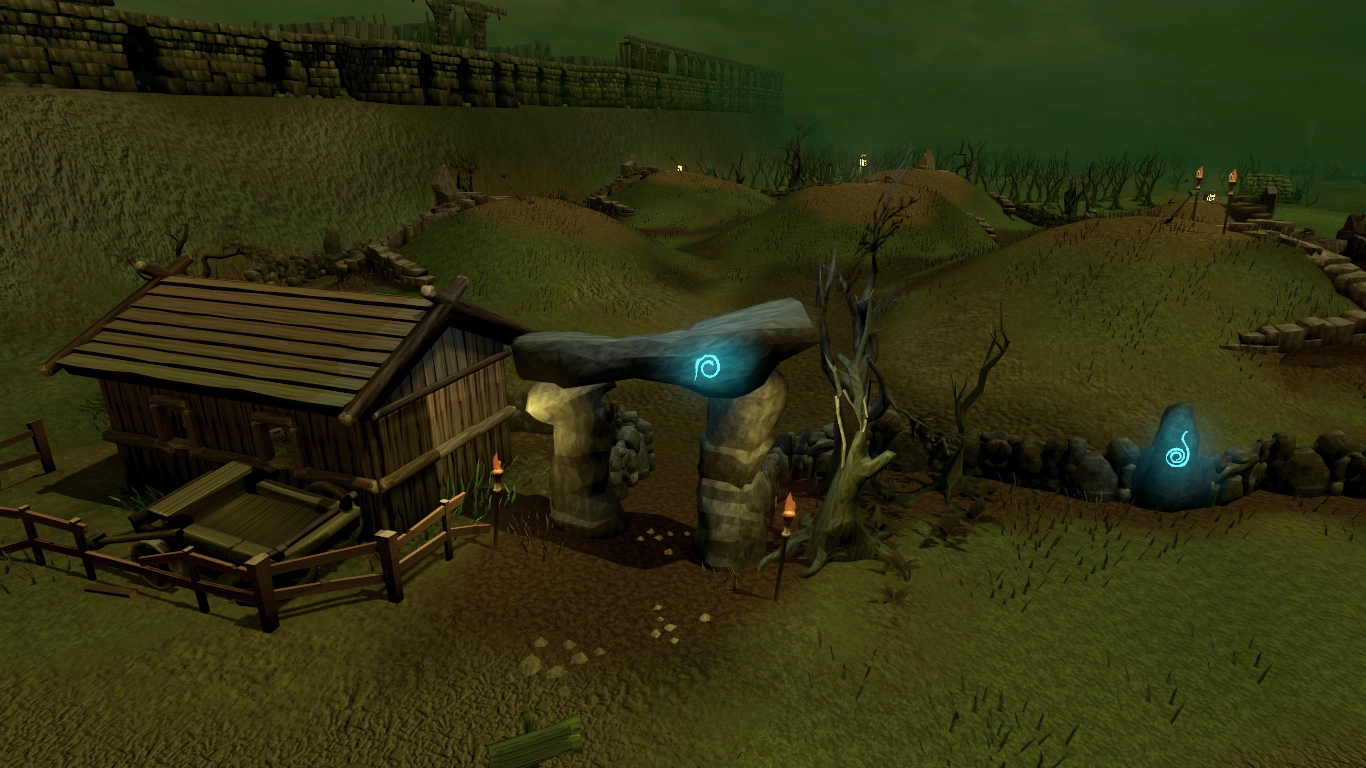

The entrance to the Barrows
The Barrows brothers were ancient warriors of Saradomin who established a reputation of near invincibility while fighting in the God Wars. They launched a massive attack to liberate Morytania from the clutches of Lord Lowerniel Vergidiyad Drakan and his vampyres, after he had established complete control over the continent as of the Fall of Hallowvale. As the brothers departed, a mysterious stranger, the Zarosian Mahjarrat Sliske, granted them superhuman power to battle Drakan's forces. It succeeded, for the brothers, who were in the front line, seemed invincible. They had not anticipated, however, that Sliske had ulterior motives for helping them.
As the brothers and their accompanying army progressed further into enemy territory in Morytania, Sliske followed them until the brothers became weakened. The brothers were grievously wounded in battle near the Great Vyrewall, and thus the army set up camp just west of Meiyerditch. Soon, the brothers died of their infected wounds simultaneously in the army's camp. The army spent several days and nights holding off the attacking vampyres to construct burial mounds, the Barrows, to honour the fallen brothers. The army quickly retreated from Morytania, realizing they could never succeed without their former leaders' prowess.
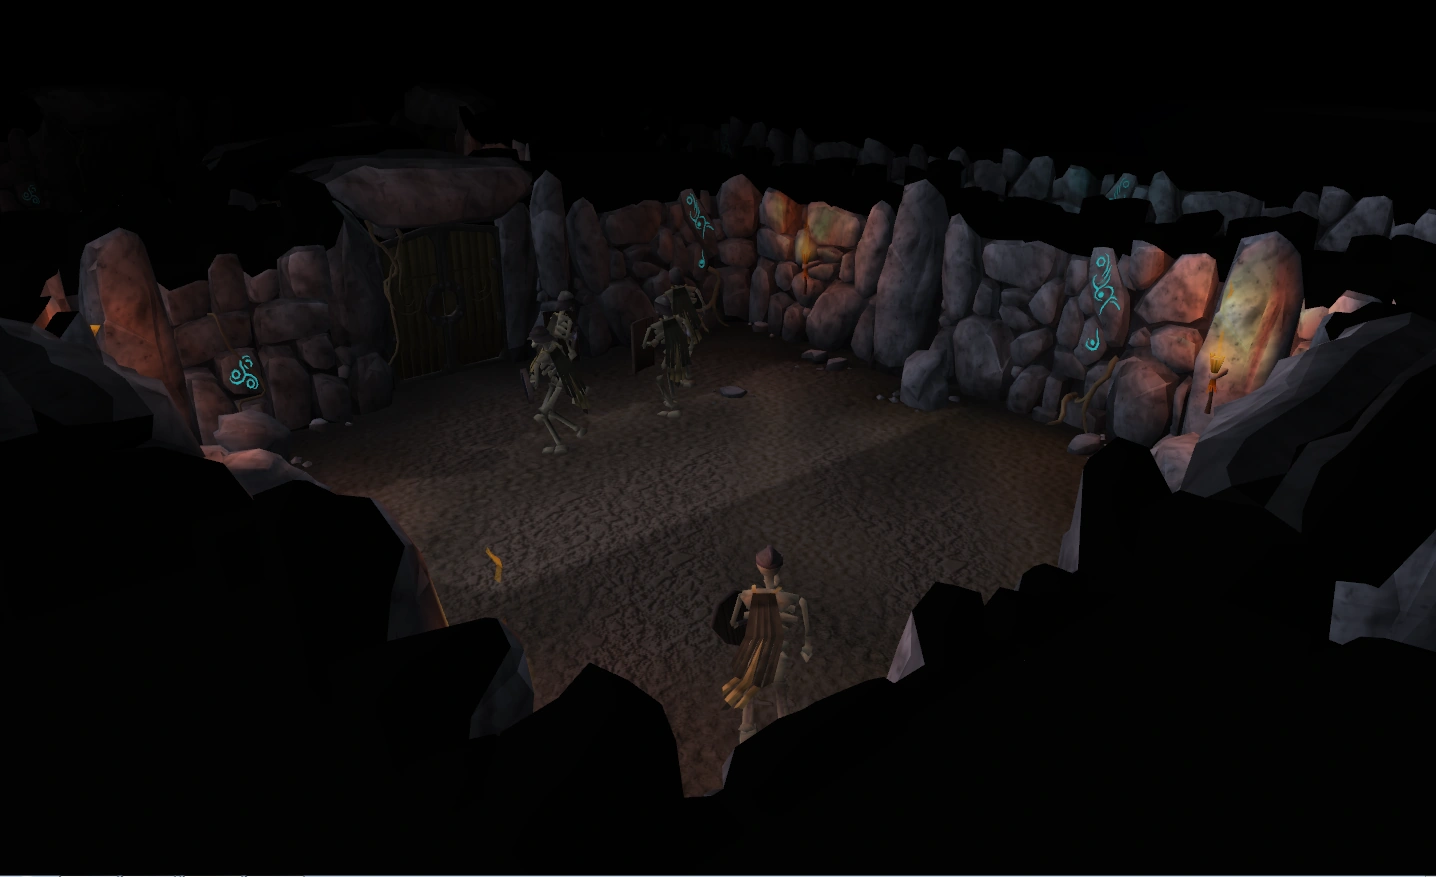
Dare you traverse the maze?
As the army began its return, Sliske cast a magical spell on the crypts, corrupting the bodies of the brothers, turning them into his newest wights, and binding them to guard a very powerful artefact. Sliske's ally Azzanadra had requested for this icon to be guarded before the latter's imprisonment in Jaldraocht Pyramid, so that it could later be used to re-establish contact with the banished Zaros. Sliske, instead of directly taking the Barrows Brothers, decided it would be fun to have them almost succeed in their goal before claiming them, a typical characteristic of the Mahjarrat.
In 169 of the Fifth Age, Azzanadra was released, and, with the help of an adventurer who manages to steal the Barrows Icon from the brothers, re-established communication with Zaros in time for the Mahjarrat Ritual of Rejuvenation. Shortly after said ritual, which the adventurer attends with several Temple Knight allies, Sliske attempted to claim them in a similar way. However, the Saradominist priest Akrisae Kolluym intercepted the spell, sacrificing himself and turning him into Akrisae the Doomed - the seventh wight. Sliske was disappointed that he did not claim the player, but was content enough with a new wight.
In approximately Year 4 of the Sixth Age, Sliske lured the World Guardian into one of his twisted games, using Meg, Linza, Major Mary Rancour, and Brother Samwell as bait. He instructed the World Guardian to guide the Barrows Brothers through a series of torturous tests, designed to force them to admit to and atone for various misdeeds in their lives. In a fit of temper over the World Guardian snooping around in his private journals, Sliske reveals that the whole game was a setup, and that Linza had come to him for protection from the Dragonkin, from whom she'd stolen the secrets of smithing dragon metal, along with some dragon ore. He breaks his bargain with her, and turns her into his eighth wight, Linza the Disgraced.
Sliske, in his arrogance, failed to anticipate that the player's meddling greatly interrupted his control over the Barrows wights. With the exception of Akrisae, he deployed the original six to kill the player, but because of their actions, the brothers turned against Sliske. Sliske sent out Nomad, Gregorovic and Linza to kill the player, but they were all defeated by the player after a long fight. When Sliske "died", the brothers (and Linza) were freed of Sliske's control. Linza informed the player that they would be waiting in the crypts, eager to battle the player again to improve their skills.
A crumbling tome, obtained by searching the hut near the mounds or by talking to the Strange Old Man found digging the crypts, provides a detailed account of how the brothers came to be buried.
Graphical overhaul
After the release of the new website and interfaces on 22 November 2011, a screenshot was shown on the media page of a graphical update for the Barrows mini game. The January 2012 Behind the Scenes article confirmed that an update was coming to the minigame, which was introduced on the 4 January update.
The graphical update changed the looks of the area, added mist to the crypt, changed the Barrows brothers from purple ghosts to corporeal foes, and, for a week following the release, gave a 1 in 10 chance of doubling rewards. This extra reward chance ended on 11 January.
Objective
The objective of the Barrows mini game is to defeat the eight Barrows brothers: Ahrim the Blighted, Dharok the Wretched, Guthan the Infested, Karil the Tainted, Torag the Corrupted, Verac the Defiled. Akrisae the Doomed is only available after Ritual of the Mahjarrat, and Linza the Disgraced is only available after Kindred Spirits.
The Barrows brothers and sister are very strong, each with very high defence. Each brother and sister also has a different special ability, which is the same as the set effect of the corresponding armour set. Because of this, special consideration should be given to the methods with and order in which the brothers are eliminated.
After killing a Barrows brother, experience will not be awarded if exiting the tomb too quickly. However, the kill will count towards the "Brothers slain".
A similar effect may occur when killing a brother in the tunnels. If a player enters another room quickly after killing a brother (before receiving the exp drop), the brother may respawn in the next room. This will prevent the brother from being added to the "Brothers slain" counter and they must be killed again.
Strategy
Rewards

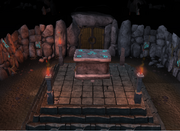
The chest that has your rewards in it
If the brother whose tomb was used to enter the tunnel is not killed yet, he will appear when the chest is looted.
The standard monsters in the tunnels may be killed to increase the chances of receiving rare, non-Barrows items; e.g. dragon helms. The total number of combat levels of the standard monsters killed affect the reward up to 1,000 combat levels.[1]
Letting be the number of brothers killed (excluding Linza the Disgraced), the number of reward rolls for the chest can be expressed with .[1] If Barrows items are rolled successfully, they are chosen only out of the killed wights' items. It is possible to obtain multiple pieces of Barrows equipment from a single chest.


First, if Linza the Disgraced was killed, there is a 1 in 192 chance to obtain one of her items. If this fails due to failing the roll or not killing her, another piece of Barrows equipment is rolled with the chance . All of the eligible Barrows items have equal odds of being rewarded. If the Barrows equipment roll is also failed, Barrows totems are rewarded with chance. If this fails, the corruption sigil is rolled with chance if one is eligible for one. Finally, if all of the above fails, a piece of loot from the standard reward table is rolled. In addition, wearing a ring of wealth or higher luck modification has a chance to add one extra reward to the chest.[1]


Killing all six of the original brothers is required to increase the beast tab kill count and thus also required to reap a soul when on a Soul Reaper assignment.
Linza the Disgraced's equipment
This loot table is rolled first if Linza the Disgraced was killed. The chance of getting a roll to Linza's unique table is 1 in 192. If the roll is successful, there is a equal chance of getting any of the item, making it 1 in 960 for a specific item, and no further rewards are awarded.
| Item | Quantity | Rarity | GE price | |
|---|---|---|---|---|
| Linza's helm | 1 | Very rare (1/960) | 2,194,829 | |
| Linza's cuirass | 1 | Very rare (1/960) | 3,636,985 | |
| Linza's greaves | 1 | Very rare (1/960) | 3,690,545 | |
| Linza's hammer | 1 | Very rare (1/960) | 4,211,278 | |
| Linza's shield | 1 | Very rare (1/960) | 2,287,962 |
Other Barrows equipment
This table is only rolled if the above table fails due to either failing the roll or not having killed Linza the Disgraced.[1] Only the items of the brothers that were killed are available to be rewarded.
Standard items
This table is only rolled if the above rolls failed. If both Barrows totem and corruption sigil rolls fail, the drop is affected by the killed standard monsters in the crypt: A random number between 0 and is rolled where is the total level of monsters killed.[1]


| Item | Quantity | Rarity | GE price | |
|---|---|---|---|---|
| Coins | 1–4,000 | Common[1][3] | 1–4,000 | |
| Corruption sigil | 1–3 | Rare[1][4][5] | Not sold | |
| Loop half of a key | 1 | Rare[1][6] | 11,053 | |
| Tooth half of a key | 1 | Rare[1][7] | 11,538 | |
| Bolt rack | 35–280 | Common[1][8] | 4,620–36,960 | |
| Barrows totem | 1–14 | Uncommon[1][9] | 1,628–22,792 | |
| Dragon helm | 1 | Rare[1][10] | 58,601 | |
| Blood rune | 35–630 | Common[1][11] | 23,730–427,140 | |
| Chaos rune | 115–1,890 | Common[1][12] | 17,480–287,280 | |
| Death rune | 70–1,190 | Common[1][13] | 16,240–276,080 | |
| Mind rune | 250–4,900 | Common[1][14] | 4,750–93,100 |
Lucky drops
This drop table is accessed by having a luck modification from ring of wealth or above, and is rolled as an extra reward in respect to the above. There is a 1/10 chance to not obtain a reward even if the table is rolled.[1]
| Item | Quantity | Rarity | GE price | |
|---|---|---|---|---|
| Shark | 4 | Common (1/10)[1] | 7,732 | |
| Prayer potion (2) | 1 | Common (3/10)[1][15] | 1,395 | |
| Restore potion (2) | 1 | Common (3/10)[1][16] | 220 | |
| Super defence (2) | 1 | Common (3/10)[1][17] | 4,780 | |
| Death rune | 15 | Common (1/10)[1] | 3,480 | |
| Mind rune | 60 | Common (1/10)[1] | 1,140 |
Other items
This drop table is seemingly not affected by the above drop tables.
| Item | Quantity | Rarity | GE price | |
|---|---|---|---|---|
| Barrows icon | 1 | Always[18] | Not sold | |
| Sealed clue scroll (elite) | 1 | Rare[19][20] | Not sold | |
| Amulet of the forsaken | 1 | Very rare | 7,526,215 | |
| Crystal triskelion fragment 1 | 1–2 | Very rare | Not sold | |
| Crystal triskelion fragment 2 | 1 | Very rare | Not sold | |
| Crystal triskelion fragment 3 | 1 | Very rare | Not sold |
- ^ a b c d e f g h i j k l m n o p q r s t u v w x y z aa ab ac ad ae af ag ah ai aj ak al am an ao ap aq ar as at au av aw ax ay az ba bb bc Mod Timbo. "Revealing Drop Rates." 27 October 2017. Developers' Blogs.
- ^ a b c d e f g h i j k l m n o p q r s t u v w x y z aa ab ac ad ae af The chance to obtain any item from the table is , so the drop rate for this item specifically is at most 1/1,568 by only killing the respective brother.
- ^ If the random number lies between 0 and 379, inclusive.
- ^ Must wield or have a Dragon defender or better in your inventory.
- ^ Only rolled if Barrows totem roll was unsuccessful. 1/(50(7-N)) drop rate.
- ^ If the random number lies between 1,005 and 1,010, inclusive. Either this or the tooth half is given.
- ^ If the random number lies between 1,005 and 1,010, inclusive. Either this or the loop half is given.
- ^ If the random number lies between 880 and 1,004, inclusive.
- ^ 1/(20-N) drop rate.
- ^ If the random number lies above 1,011, inclusive.
- ^ If the random number lies between 755 and 879, inclusive.
- ^ If the random number lies between 505 and 629, inclusive.
- ^ If the random number lies between 630 and 754, inclusive.
- ^ If the random number lies between 380 and 504, inclusive.
- ^ 1/10 chance to obtain only these, 1/10 to drop with a restore potion (2), and 1/10 to drop with super defence (2).
- ^ 1/10 chance to obtain only these, 1/10 to drop with a prayer potion (2), and 1/10 to drop with super defence (2).
- ^ 1/10 chance to obtain only these, 1/10 to drop with a prayer potion (2), and 1/10 to drop with restore potion (2).
- ^ Only during The Temple at Senntisten quest; 100% chance if 6 are killed.
- ^ 1/(120 + 8*(number of brothers not killed, including Akrisae even if not unlocked)) (source 50:45 in this developer Q&A)
- ^ There is a 1% chance of this being a sealed clue scroll (master) instead
Feats
- Brothers in Arms (
 20) - Defeat each of the Barrows Brothers, dealing the killing blow with their own weapon.
 - Barrowed Time ( 0) - Obtained a collection of unique drops from the Barrows Brothers.
- Something Barrowed ( 5) - Defeat the six Barrows Brothers and loot their chest several times depending on the tier.
Rise of the Six
Barrows: Rise of the Six is a hard mode variant of Barrows, with players fighting the newly empowered Barrows Brothers. In return for a harder fight (up to four players may battle them), players will find themselves greatly rewarded upon defeating them.
Music unlocked
The following music tracks are unlocked here:
- Dance of the Undead - In the mound area
- Dangerous Way - In the crypts and tunnels
Trivia
- During the graphical update in January 2012, it was possible to get a draconic visage from the barrows chest, which only lasted a week.
- Barrows is another word for a tumulus, which is a mound of earth and stones raised over a grave, called a crypt in the minigame, or graves, which is probably where the name of the minigame comes from. Tumulus is Latin for "mound" or "small hill".
- From 00:00 UTC 12 November 2011 to 23:59 UTC 14 November 2011, there was an event where players could gain double loot from several dungeons, including the Barrows minigame. This was part of Jagex's bot-busting celebration.
- It is possible for a brother to spawn again when you kill the first one, then rush quickly to a door nearby. Killing the brother that popped up again however, will cause it to count as a creature instead.
- If you attempt to enter with a familiar, you will be forced out with a message saying "You cannot enter this area with a familiar. You must leave this area and dismiss your familiar if you wish to enter."
- If you use Surge or Escape to get into the mounds with a familiar, a message will say "You cannot enter this area with a familiar. You must leave this area and dismiss your familiar if you wish to enter. Your familiar is forced to leave as it cannot remain here." The familiar will be automatically dismissed, dropping everything it is carrying.
- Follower pets (e.g boss pets) cannot be summoned inside the Barrows area. However, they can be brought inside if summoned outside first.
- As of 1 February 2018, the highest kill count for this boss was 12,595 kills[1].
- It is possible to receive two of the same pieces of armour from one chest. It is currently unknown if this is a glitch.
References
| Team | |
| Solo |
|
| PvP |
|
| Removed |
|
| Bosses |
| ||||||||||||||||
| Rewards |
| ||||||||||||||||
| NPCs | |||||
| Items |
| ||||
| Scenery |
| ||||
| Rewards |
| ||||
| Locations |
| ||||
| Music |
| ||||
| Miscellaneous |
| ||||
| Characters | |
| Locations |
|
| Miscellaneous |
|
| Asgarnia |
|
| Kandarin |
|
| Karamja |
|
| Kharidian Desert |
|
| Misthalin |
|
| Morytania |
|
| Fremennik Province |
|
| Feldip Hills |
|
| Wilderness |
|
| Troll Country & The North |
|
| Keldagrim |
|
| Tirannwn & Galarpos |
|
| Elite dungeons |
|
| Others |
|