(→Rewards: Charm table was missing.) |
(clarified droprate increase from non achto) |
||
| (23 intermediate revisions by 14 users not shown) | |||
| Line 25: | Line 25: | ||
|examine = '''Alive:''' At least as blind as a bat. Studies suggest more so.<br /> |
|examine = '''Alive:''' At least as blind as a bat. Studies suggest more so.<br /> |
||
'''Dead:''' Even in death he looks angry. |
'''Dead:''' Even in death he looks angry. |
||
| − | |armour = |
+ | |armour = 2765 |
| − | |defence=95 |
+ | |defence = 95 |
| − | |attack=85 |
+ | |attack = 85 |
| − | |ranged=85 |
+ | |ranged = 85 |
| − | |magic=85 |
+ | |magic = 85 |
| − | |acc_melee = |
+ | |acc_melee = 2178 |
| − | |acc_ranged = |
+ | |acc_ranged = 2178 |
| − | |acc_magic = |
+ | |acc_magic = 2178 |
|aff_weakness = 90 |
|aff_weakness = 90 |
||
|aff_melee = 55 |
|aff_melee = 55 |
||
| Line 42: | Line 42: | ||
'''Beastmaster Durzag''' is the first boss of the [[Liberation of Mazcab]] [[Raids|raid]]. He is an [[airut]] who, along with the [[Airut shaman|Shaman]], has amassed powers greater than an airut normally would, according to the [[Fifth stone fragment]]. |
'''Beastmaster Durzag''' is the first boss of the [[Liberation of Mazcab]] [[Raids|raid]]. He is an [[airut]] who, along with the [[Airut shaman|Shaman]], has amassed powers greater than an airut normally would, according to the [[Fifth stone fragment]]. |
||
| − | Beastmaster Durzag can be looted once every 2 days for rewards including the superior versions of [[Teralith equipment|Teralith]], [[Primeval equipment|Primeval]] and [[Tempest equipment]]. Starting the encounter requires challengers to form a raid group with the [[Grouping System]] to enter the instance. |
+ | Beastmaster Durzag can be looted once every 2 days for rewards including the superior versions of [[Teralith equipment|Teralith]], [[Primeval equipment|Primeval]], and [[Tempest equipment]]. Starting the encounter requires challengers to form a raid group with the [[Grouping System]] to enter the instance. |
Killing Beastmaster Durzag for the first time grants 250 [[reputation (Mazcab)|reputation]] with the goebies. |
Killing Beastmaster Durzag for the first time grants 250 [[reputation (Mazcab)|reputation]] with the goebies. |
||
| − | Obtaining all unique drops from Durzag and Yakamaru will unlock the |
+ | Obtaining all unique drops from Durzag and Yakamaru will unlock the title, {{TitleAnchor|t=the Liberator|c=#D0844A|loc=s}}. |
==The fight== |
==The fight== |
||
| Line 54: | Line 54: | ||
Krar and Tuz should be separated from Durzag, to reduce the amount of damage Durzag can deal. |
Krar and Tuz should be separated from Durzag, to reduce the amount of damage Durzag can deal. |
||
| − | Every wall also has a broken gong in it, which can be repaired; however it takes a while to construct when doing it alone. When Durzag is nearby, it can be rung one time only, decreasing his accuracy for a while and will deplete much of the player's prayer points at the same time. |
+ | Every wall also has a broken gong in it, which can be repaired; however, it takes a while to construct when doing it alone. When Durzag is nearby, it can be rung one time only, decreasing his accuracy for a while and will deplete much of the player's prayer points at the same time. |
| − | Occasionally, he throws [[Bomb (Pit of Trials)|bombs]], mobile explosives which follow a player before exploding. They deal 2,000 magic damage to nearby players upon explosion |
+ | Occasionally, he throws [[Bomb (Pit of Trials)|bombs]], mobile explosives which follow a player before exploding. They deal 2,000 magic damage to nearby players upon explosion and reset all defensive abilities. |
| − | == |
+ | ==Achievements== |
{| class="wikitable lighttable" |
{| class="wikitable lighttable" |
||
| + | ! Achievements |
||
| − | ! Feat |
||
! Details |
! Details |
||
|- |
|- |
||
| + | | [[Cormes and Goes]] |
||
| − | | One more couldn't hurt... |
||
| Defeat Durzag without killing Cormes |
| Defeat Durzag without killing Cormes |
||
|- |
|- |
||
| − | | Prison Break |
+ | | [[Prison Break]] |
| Have at least one Goebie survive the fight with Durzag |
| Have at least one Goebie survive the fight with Durzag |
||
|- |
|- |
||
| − | | Day at the Pound |
+ | | [[Day at the Pound]] |
| Defeat Durzag without opening any of the charger cages in the arena walls |
| Defeat Durzag without opening any of the charger cages in the arena walls |
||
|- |
|- |
||
| − | | Animal Cruelty |
+ | | [[Animal Cruelty]] |
| Have Durzag deal the killing blow to both Tuz and Krar |
| Have Durzag deal the killing blow to both Tuz and Krar |
||
|- |
|- |
||
| − | | Gong |
+ | | [[Gong Maintenance Expert]] |
| Defeat Durzag with all gongs repaired but unused |
| Defeat Durzag with all gongs repaired but unused |
||
| + | |- |
||
| + | | [[Master of Beatings]] |
||
| + | | Defeat Durzag up to 100 times, depending on the tier |
||
|} |
|} |
||
==Rewards== |
==Rewards== |
||
| − | When Beastmaster Durzag is killed, his corpse remains and acts as a reward coffer to collect the drops. Durzag has several drop tables that are rolled on to constitute the loot. Airut bones are always received, the consumable table is always rolled, summoning charms are commonly received, and tertiary drops may be received. If the unique drops table rolls either a [[Mazcab ability codex]] or piece of [[achto equipment]], the main drop will not be received. If the unique drops table rolls [[ |
+ | When Beastmaster Durzag is killed, his corpse remains and acts as a reward coffer to collect the drops. Durzag has several drop tables that are rolled on to constitute the loot. Airut bones are always received, the consumable table is always rolled, summoning charms are commonly received, and tertiary drops may be received. If the unique drops table rolls either a [[Mazcab ability codex]] or piece of [[achto equipment]], the main drop will not be received. If the unique drops table rolls [[teci]], the main drop table will be rolled multiple times. |
===100%=== |
===100%=== |
||
| Line 98: | Line 101: | ||
===Main drop=== |
===Main drop=== |
||
| + | This drop table is accessed only if no Achto armour or [[Mazcab ability codex]] is received.{{CiteDevBlog|author = Mod Timbo|url = http://services.runescape.com/m=forum/forums.ws?74,75,52,65949497,goto,15#147|title = Revealing Drop Rates|blogdate = 20 October 2017|notes = |name = drop-rate|group = r}} |
||
| + | |||
{{DropsTableHead}} |
{{DropsTableHead}} |
||
{{DropsLine|Name=Rune platebody|Quantity=15-46|Rarity=Common}} |
{{DropsLine|Name=Rune platebody|Quantity=15-46|Rarity=Common}} |
||
| − | {{DropsLine|Name=Rune spear|Quantity=20- |
+ | {{DropsLine|Name=Rune spear|Quantity=20-79|Rarity=Common}} |
{{DropsLine|Name=Ascendri bolts (e)|Quantity=25|Rarity=Uncommon}} |
{{DropsLine|Name=Ascendri bolts (e)|Quantity=25|Rarity=Uncommon}} |
||
{{DropsLine|Name=Battlestaff|Quantity=104-139|Rarity=Uncommon}} |
{{DropsLine|Name=Battlestaff|Quantity=104-139|Rarity=Uncommon}} |
||
| − | {{DropsLine|Name=Razorback gauntlets|Quantity=1|Rarity=Very rare|Raritynotes=<ref group="r">The drop rate for obtaining razorback gauntlets is 1 in 500.</ref>{{CiteGeneral|url=https://www.youtube.com/watch?v=Pd6zvn54_XM|postdate=21 July 2016|title=1,000 Loots From Raids - RuneScape Loot Video|group=r}}}} |
+ | {{DropsLine|Name=Razorback gauntlets|Quantity=1|Rarity=Very rare|Raritynotes=<ref group="r">The drop rate for obtaining razorback gauntlets is 1 in 500 if this drop table is accessed.</ref>{{CiteGeneral|url=https://www.youtube.com/watch?v=Pd6zvn54_XM|postdate=21 July 2016|title=1,000 Loots From Raids - RuneScape Loot Video|group=r}}}} |
{{DropsLine|Name=Yew logs|Quantity=314-869|Rarity=Common}} |
{{DropsLine|Name=Yew logs|Quantity=314-869|Rarity=Common}} |
||
{{DropsLine|Name=Magic logs|Quantity=209-245|Rarity=Common}} |
{{DropsLine|Name=Magic logs|Quantity=209-245|Rarity=Common}} |
||
| Line 112: | Line 117: | ||
{{DropsLine|Name=Raw rocktail|Quantity=103-142|Rarity=Uncommon}} |
{{DropsLine|Name=Raw rocktail|Quantity=103-142|Rarity=Uncommon}} |
||
{{DropsLine|Name=Grimy lantadyme|Quantity=44-160|Rarity=Uncommon}} |
{{DropsLine|Name=Grimy lantadyme|Quantity=44-160|Rarity=Uncommon}} |
||
| − | {{DropsLine|Name=Grimy dwarf weed|Quantity=44- |
+ | {{DropsLine|Name=Grimy dwarf weed|Quantity=44-104|Rarity=Uncommon}} |
| − | {{DropsLine|Name=Uncut dragonstone|Quantity= |
+ | {{DropsLine|Name=Uncut dragonstone|Quantity=23-73|Rarity=Uncommon}} |
{{DropsLine|Name=Hydrix bolt tips|Quantity=33|Rarity=Uncommon}} |
{{DropsLine|Name=Hydrix bolt tips|Quantity=33|Rarity=Uncommon}} |
||
{{DropsLine|Name=Runite ore|Quantity=50-98|Rarity=Uncommon}} |
{{DropsLine|Name=Runite ore|Quantity=50-98|Rarity=Uncommon}} |
||
| Line 120: | Line 125: | ||
{{DropsLine|Name=Crystal key|Quantity=13-30|Rarity=Uncommon}} |
{{DropsLine|Name=Crystal key|Quantity=13-30|Rarity=Uncommon}} |
||
{{DropsTableBottom}} |
{{DropsTableBottom}} |
||
| + | |||
<references group="r" /> |
<references group="r" /> |
||
===Tertiary drops=== |
===Tertiary drops=== |
||
Only one burial charm may drop at a time. Lil' Tuzzy cannot be received if the player has already unlocked it. The burial charm table, effigy table, and pet table are not linked - a player may receive drops from one, two, all three or neither. |
Only one burial charm may drop at a time. Lil' Tuzzy cannot be received if the player has already unlocked it. The burial charm table, effigy table, and pet table are not linked - a player may receive drops from one, two, all three or neither. |
||
| + | |||
{{DropsTableHead}} |
{{DropsTableHead}} |
||
{{DropsLine|Name=Small goebie burial charm|Quantity=1|Rarity=Common|gemw=No}} |
{{DropsLine|Name=Small goebie burial charm|Quantity=1|Rarity=Common|gemw=No}} |
||
{{DropsLine|Name=Goebie burial charm|Quantity=1|Rarity=Uncommon|gemw=no}} |
{{DropsLine|Name=Goebie burial charm|Quantity=1|Rarity=Uncommon|gemw=no}} |
||
| − | {{DropsLine|Name=Lil' Tuzzy|Quantity=1|Rarity=Very rare|gemw=No|Raritynotes=<ref group="d">The droprate for obtaining Lil' Tuzzy is 1 in 512.</ref>{{ |
+ | {{DropsLine|Name=Lil' Tuzzy|Quantity=1|Rarity=Very rare|gemw=No|Raritynotes=<ref group="d">The droprate for obtaining Lil' Tuzzy is 1 in 512, and the roll only happens if neither Achto armour or [[Mazcab ability codex]] was rolled successfully.</ref>{{CiteDevBlog|author=Mod Timbo|url=http://services.runescape.com/m=forum/forums.ws?74,75,52,65949497,goto,15#147|title=Revealing Drop Rates|blogdate=20 October 2017|notes=|name=drop-rate|group=d}}}} |
{{DropsLine|Name=Durzag's helmet|Quantity=1|Rarity=Rare|gemw=No|Raritynotes=<ref group="d">Has a base drop rate of 1/300 with a [[Boss pets#Pets unlocked by drops|threshold of 60]]. This item drops directly to the backpack if possible; the bank otherwise.</ref>{{CiteForum|author=Mod William|url=http://services.runescape.com/m=forum/forums.ws?15,16,255,65882972|title=Patch Notes - 20/02|forum=Recent Game Updates|postdate=17 February 2017|group=d}}}} |
{{DropsLine|Name=Durzag's helmet|Quantity=1|Rarity=Rare|gemw=No|Raritynotes=<ref group="d">Has a base drop rate of 1/300 with a [[Boss pets#Pets unlocked by drops|threshold of 60]]. This item drops directly to the backpack if possible; the bank otherwise.</ref>{{CiteForum|author=Mod William|url=http://services.runescape.com/m=forum/forums.ws?15,16,255,65882972|title=Patch Notes - 20/02|forum=Recent Game Updates|postdate=17 February 2017|group=d}}}} |
||
{{DropsLine|Name=Ancient effigy|Quantity=1|Rarity=Very rare|gemw=No}} |
{{DropsLine|Name=Ancient effigy|Quantity=1|Rarity=Very rare|gemw=No}} |
||
{{DropsTableBottom}} |
{{DropsTableBottom}} |
||
| + | |||
<references group="d" /> |
<references group="d" /> |
||
===Unique drops=== |
===Unique drops=== |
||
| − | Beastmaster Durzag can only drop one item from this table. If no armour piece is dropped, the player will receive teci. |
+ | Beastmaster Durzag can only drop one item from this table. If no armour piece or [[Mazcab ability codex]] is dropped, the player will receive teci. |
The drop rate of any piece of Achto [[Primeval equipment|Primeval]], [[Tempest equipment|Tempest]], or [[Teralith equipment|Teralith]] equipment is doubled if the respective non-achto equipment piece is purchased from the Goebie [[Armoursmith]]{{CiteTwitter|author = Mod Deg|url = https://twitter.com/JagexDeg/status/626668925846167552|quote = 1) Own. 2)Style only. 3) If your next drop would be X you have double chances of a drop. 4) From BM.|date = 30 July 2015}}. For example, buying the Teralith Helm will double the chance of getting the Achto Teralith Helm. |
The drop rate of any piece of Achto [[Primeval equipment|Primeval]], [[Tempest equipment|Tempest]], or [[Teralith equipment|Teralith]] equipment is doubled if the respective non-achto equipment piece is purchased from the Goebie [[Armoursmith]]{{CiteTwitter|author = Mod Deg|url = https://twitter.com/JagexDeg/status/626668925846167552|quote = 1) Own. 2)Style only. 3) If your next drop would be X you have double chances of a drop. 4) From BM.|date = 30 July 2015}}. For example, buying the Teralith Helm will double the chance of getting the Achto Teralith Helm. |
||
| Line 142: | Line 150: | ||
* The drop order is no longer enforced. For example, it is possible to receive a second Achto Teralith Helm, followed by a second Achto Teralith Platebody. |
* The drop order is no longer enforced. For example, it is possible to receive a second Achto Teralith Helm, followed by a second Achto Teralith Platebody. |
||
| − | Otherwise, armour is gained from Beastmaster Durzag in the following order: |
+ | Otherwise, armour is gained from Beastmaster Durzag in the following order: boots, gloves, helmet, legs, and body. |
| − | Progressing in the drop order requires collecting all three of the previous equipment slot's achto equipment - so in order to receive an Achto Primeval robe top, they would have to get all Achto Tempest, Primeval and Teralith boots, gloves, helm and legs. The |
+ | Progressing in the drop order requires collecting all three of the previous equipment slot's achto equipment - so in order to receive an Achto Primeval robe top, they would have to get all Achto Tempest, Primeval, and Teralith boots, gloves, helm and legs. The Achto equipment gained from each equipment slot is based on the combat style the player dealt the most damage with during the kill they obtained that armour; if the equipment piece corresponding to the used style is not owned, that is always gotten before the others, and otherwise there are equal odds of obtaining armour corresponding to one of the unused styles.{{CiteDevBlog|author = Mod Timbo|url = http://services.runescape.com/m=forum/forums.ws?74,75,52,65949497,goto,15#147|title = Revealing Drop Rates|blogdate = 20 October 2017|notes = |name = drop-rate|group = m}} |
| − | |||
| − | Durzag's boot drop chance is higher than Yakamaru's.{{CiteTwitter|author = Mod Deg|url = https://twitter.com/JagexDeg/status/650365246624899072|quote = I never ever lie. Does your little bird?|date = 3 October 2015}} |
||
{{DropsTableHead}} |
{{DropsTableHead}} |
||
| − | {{DropsLine|Name=Teci|Quantity=750-1500|Rarity=Common|gemw= |
+ | {{DropsLine|Name=Teci|Quantity=750-1500|Rarity=Common|Raritynotes=<ref group="m">Only if neither Achto armour or [[Mazcab ability codex]] rolls were successful, so at most 513/550.</ref><ref name="drop-rate" group="m"/>|gemw=No}} |
| − | {{DropsLine|Name=Achto Primeval Mask|Quantity=1|Rarity=Uncommon|gemw=No}} |
+ | {{DropsLine|Name=Achto Primeval Mask|Quantity=1|Rarity=Uncommon|Raritynotes=<ref name="other-armour" group="m">1/55 base chance if this is the next armour piece to be obtained. This chance can be improved by wearing the [[luck of the dwarves]], or owning the matching non-Achto item(doubling the chance).</ref><ref name="drop-rate" group="m"/>|gemw=No}} |
| − | {{DropsLine|Name=Achto Primeval robe top|Quantity=1|Rarity=Uncommon|gemw=No}} |
+ | {{DropsLine|Name=Achto Primeval robe top|Quantity=1|Rarity=Uncommon|Raritynotes=<ref name="other-armour" group="m" /><ref name="drop-rate" group="m"/>|gemw=No}} |
| − | {{DropsLine|Name=Achto Primeval robe legs|Quantity=1|Rarity=Uncommon|gemw=No}} |
+ | {{DropsLine|Name=Achto Primeval robe legs|Quantity=1|Rarity=Uncommon|Raritynotes=<ref name="other-armour" group="m" /><ref name="drop-rate" group="m"/>|gemw=No}} |
| − | {{DropsLine|Name=Achto Primeval Gloves|Quantity=1|Rarity=Uncommon|gemw=No}} |
+ | {{DropsLine|Name=Achto Primeval Gloves|Quantity=1|Rarity=Uncommon|Raritynotes=<ref name="other-armour" group="m" /><ref name="drop-rate" group="m"/>|gemw=No}} |
| − | {{DropsLine|Name=Achto Primeval Boots|Quantity=1|Rarity=Uncommon|gemw=No}} |
+ | {{DropsLine|Name=Achto Primeval Boots|Quantity=1|Rarity=Uncommon|Raritynotes=<ref name="boots" group="m">1/35 base chance if this is the next armour piece to be obtained. This chance can be improved by wearing the [[luck of the dwarves]], or owning the matching non-Achto item(doubling the chance).</ref><ref name="drop-rate" group="m"/>|gemw=No}} |
| − | {{DropsLine|Name=Achto Tempest Cowl|Quantity=1|Rarity=Uncommon|gemw=No}} |
+ | {{DropsLine|Name=Achto Tempest Cowl|Quantity=1|Rarity=Uncommon|Raritynotes=<ref name="other-armour" group="m" /><ref name="drop-rate" group="m"/>|gemw=No}} |
| − | {{DropsLine|Name=Achto Tempest Body|Quantity=1|Rarity=Uncommon|gemw=No}} |
+ | {{DropsLine|Name=Achto Tempest Body|Quantity=1|Rarity=Uncommon|Raritynotes=<ref name="other-armour" group="m" /><ref name="drop-rate" group="m"/>|gemw=No}} |
| − | {{DropsLine|Name=Achto Tempest Chaps|Quantity=1|Rarity=Uncommon|gemw=No}} |
+ | {{DropsLine|Name=Achto Tempest Chaps|Quantity=1|Rarity=Uncommon|Raritynotes=<ref name="other-armour" group="m" /><ref name="drop-rate" group="m"/>|gemw=No}} |
| − | {{DropsLine|Name=Achto Tempest Gloves|Quantity=1|Rarity=Uncommon|gemw=No}} |
+ | {{DropsLine|Name=Achto Tempest Gloves|Quantity=1|Rarity=Uncommon|Raritynotes=<ref name="other-armour" group="m" /><ref name="drop-rate" group="m"/>|gemw=No}} |
| − | {{DropsLine|Name=Achto Tempest Boots|Quantity=1|Rarity=Uncommon|gemw=No}} |
+ | {{DropsLine|Name=Achto Tempest Boots|Quantity=1|Rarity=Uncommon|Raritynotes=<ref name="boots" group="m" /><ref name="drop-rate" group="m"/>|gemw=No}} |
| − | {{DropsLine|Name=Achto Teralith Helmet|Quantity=1|Rarity=Uncommon|gemw=No}} |
+ | {{DropsLine|Name=Achto Teralith Helmet|Quantity=1|Rarity=Uncommon|Raritynotes=<ref name="other-armour" group="m" /><ref name="drop-rate" group="m"/>|gemw=No}} |
| − | {{DropsLine|Name=Achto Teralith Cuirass|Quantity=1|Rarity=Uncommon|gemw=No}} |
+ | {{DropsLine|Name=Achto Teralith Cuirass|Quantity=1|Rarity=Uncommon|Raritynotes=<ref name="other-armour" group="m" /><ref name="drop-rate" group="m"/>|gemw=No}} |
| − | {{DropsLine|Name=Achto Teralith Leggings|Quantity=1|Rarity=Uncommon|gemw=No}} |
+ | {{DropsLine|Name=Achto Teralith Leggings|Quantity=1|Rarity=Uncommon|Raritynotes=<ref name="other-armour" group="m" /><ref name="drop-rate" group="m"/>|gemw=No}} |
| − | {{DropsLine|Name=Achto Teralith Gauntlets|Quantity=1|Rarity=Uncommon|gemw=No}} |
+ | {{DropsLine|Name=Achto Teralith Gauntlets|Quantity=1|Rarity=Uncommon|Raritynotes=<ref name="other-armour" group="m" /><ref name="drop-rate" group="m"/>|gemw=No}} |
| − | {{DropsLine|Name=Achto Teralith Boots|Quantity=1|Rarity=Uncommon|gemw=No}} |
+ | {{DropsLine|Name=Achto Teralith Boots|Quantity=1|Rarity=Uncommon|Raritynotes=<ref name="boots" group="m" /><ref name="drop-rate" group="m"/>|gemw=No}} |
| − | {{DropsLine|Name=Mazcab ability codex|Quantity=1|Rarity=Uncommon|Raritynotes=<ref group="m"> |
+ | {{DropsLine|Name=Mazcab ability codex|Quantity=1|Rarity=Uncommon|Raritynotes=<ref group="m">1/20 if the roll for Achto armour was unsuccessful, so at most 27/550.</ref><ref name="drop-rate" group="m"/>}} |
{{DropsTableBottom}}<references group="m" /> |
{{DropsTableBottom}}<references group="m" /> |
||
| Line 176: | Line 182: | ||
* Durzag's examine references the cliche "As blind as a bat". His blindness comes into play in the fight mechanics as he loses accuracy when his pets cannot guide him towards the enemy and when the gongs impair his hearing. |
* Durzag's examine references the cliche "As blind as a bat". His blindness comes into play in the fight mechanics as he loses accuracy when his pets cannot guide him towards the enemy and when the gongs impair his hearing. |
||
* Durzag's drop table, along with Yakamaru's, was greatly increased after player complaints of the rewards being too low for having to wait 2 days to be able to loot again. |
* Durzag's drop table, along with Yakamaru's, was greatly increased after player complaints of the rewards being too low for having to wait 2 days to be able to loot again. |
||
| − | * After Beastmaster Durzag has been defeated in a Raid, the [[Pit of Trials]] may be converted into the Goebie Volleyball |
+ | * After Beastmaster Durzag has been defeated in a Raid, the [[Pit of Trials]] may be converted into the Goebie Volleyball Easter egg. This is done by repairing the gongs and striking them in a specific order. The order is North - North - South - South - West - East - West - East. This is a reference to Konami and their famous cheat code "Up Up Down Down Left Right Left Right." |
* The marker for the ball in the Goebie Volleyball game is the same marker for [[Yakamaru|Yakamaru's]] poison attack. |
* The marker for the ball in the Goebie Volleyball game is the same marker for [[Yakamaru|Yakamaru's]] poison attack. |
||
* The late Beastmaster Durzag has 1,000,000 life points. |
* The late Beastmaster Durzag has 1,000,000 life points. |
||
| − | * Prior to the patch notes of 18 July 2016, if Durzag died near the corners, it was possible for him to push the player(s) out of the Pit of Trials. |
+ | * Prior to the patch notes of [[18 July]] [[2016]], if Durzag died near the corners, it was possible for him to push the player(s) out of the Pit of Trials. |
* Durzag's AoE smash and bombs can damage and kill [[clan avatars]]. |
* Durzag's AoE smash and bombs can damage and kill [[clan avatars]]. |
||
| + | * As of [[1 February]] [[2018]], the highest kill count for this boss was 5,435 kills{{CiteGeneral|url = https://www.reddit.com/r/runescape/comments/7uqej0/top_10_killers_per_boss/|title = Top 10 killers per Boss|author = Mod Shauny|date = 2 Feb 2018|accessdate = 2018-02-02|quote = Here are the top 10 kills for each Boss in RuneScape, be aware that we've not listed display names for privacy purposes however if you wish to brag about one number being yours then we won't stop you!}}. |
||
| + | ** This had increased to 6,161 by [[6 May]] 2018.{{CiteGeneral|url = https://www.reddit.com/r/runescape/comments/8hj2f0/top_boss_killers_6th_may_2018/|title = Top 10 killers per Boss|author = Mod Shauny|date = 6 May 2018|accessdate = 2018-05-07|quote = Here are the top 10 kills for each Boss in RuneScape, be aware that we've not listed display names for privacy purposes however if you wish to brag about one number being yours then we won't stop you!}}. |
||
==References== |
==References== |
||
| + | {{reflist}} |
||
| − | {{reflist}}3.'''^''' Jagex. Mod Timbo's Forum post on drop table. http://services.runescape.com/m=forum/c=1SsfeYqht68/forums.ws?74,75,52,65949497,goto,15{{Gower Quest}} |
||
| + | |||
| + | {{Raids}} |
||
| + | {{Gower Quest}} |
||
[[pt:Guardião das Feras Durzag]] |
[[pt:Guardião das Feras Durzag]] |
||
[[Category:Bosses]] |
[[Category:Bosses]] |
||
Latest revision as of 09:16, 7 October 2018
 | ||||||||||||||||||
| Release | 13 July 2015 (Update) | |||||||||||||||||
|---|---|---|---|---|---|---|---|---|---|---|---|---|---|---|---|---|---|---|
| Members | Yes | |||||||||||||||||
| Examine | ||||||||||||||||||
| Alive: At least as blind as a bat. Studies suggest more so. Dead: Even in death he looks angry. | ||||||||||||||||||
| Combat info | ||||||||||||||||||
| Level | LP | |||||||||||||||||
| 2000 | 1,500,000 | 1,000 | 330 | |||||||||||||||
| Equipment XP (2H/MH & Armour/OH) | ||||||||||||||||||
| 60 / 40 / 20 | ||||||||||||||||||
| Aggressive | Poisonous | |||||||||||||||||
| Offensive | ||||||||||||||||||
| Max hit | ||||||||||||||||||
| 1788 | 1788 | 1788 | 5000 | |||||||||||||||
| Style | Speed | |||||||||||||||||
6 ticks (3.6s) | ||||||||||||||||||
| Combat levels | ||||||||||||||||||
| ||||||||||||||||||
| Defensive | ||||||||||||||||||
| Armour | Weakness | |||||||||||||||||
| 2765 | 95 | |||||||||||||||||
| Affinities | ||||||||||||||||||
| - | 55 | 55 | 55 | |||||||||||||||
| Immunities | ||||||||||||||||||
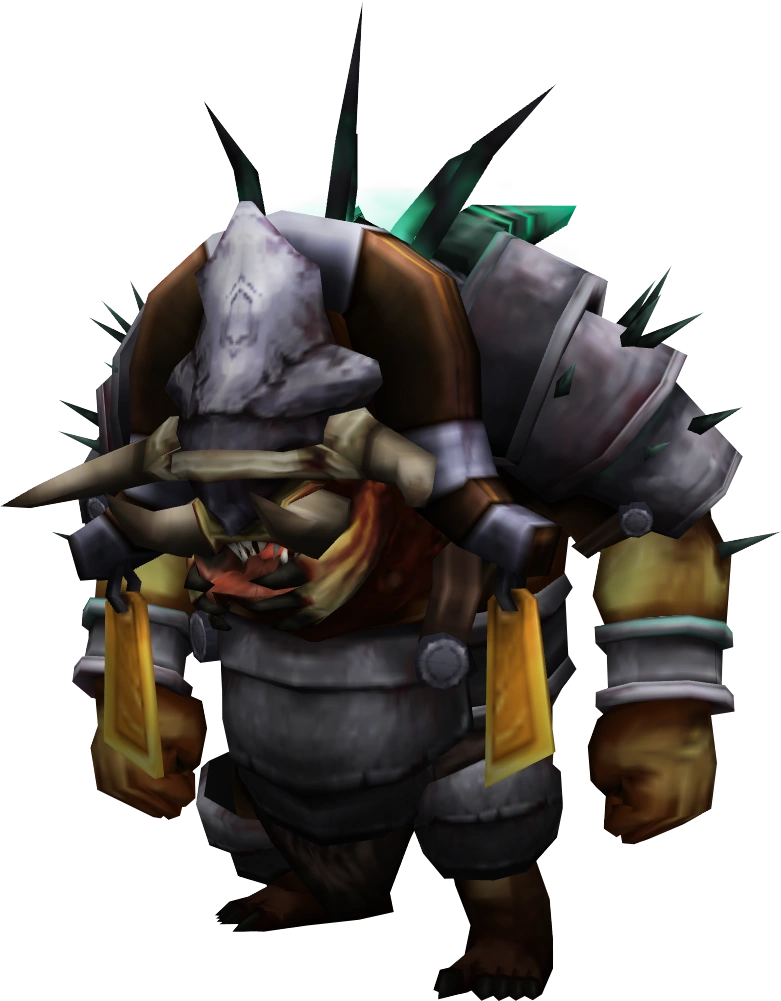
Beastmaster Durzag is the first boss of the Liberation of Mazcab raid. He is an airut who, along with the Shaman, has amassed powers greater than an airut normally would, according to the Fifth stone fragment.
Beastmaster Durzag can be looted once every 2 days for rewards including the superior versions of Teralith, Primeval, and Tempest equipment. Starting the encounter requires challengers to form a raid group with the Grouping System to enter the instance.
Killing Beastmaster Durzag for the first time grants 250 reputation with the goebies.
Obtaining all unique drops from Durzag and Yakamaru will unlock the title, [Name] the Liberator.
The fight

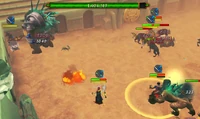
Players fighting Durzag
Beastmaster Durzag does not appear in the fight initially; players must first free the goebie in the middle of the arena to start the fight. Once freed, a wave of enemies consisting of Chargers, Airuts, along with Cormes, one of Durzag's pets, will attack the group. Once all of them are cleared, Durzag will appear with one of his pets, either Krar or Tuz, before he calls for the other one. Chargers will also appear in small pens when this happens; the pens can be opened to fight the Chargers before they swarm at nearby players when they are all released at once by Durzag.
Krar and Tuz should be separated from Durzag, to reduce the amount of damage Durzag can deal.
Every wall also has a broken gong in it, which can be repaired; however, it takes a while to construct when doing it alone. When Durzag is nearby, it can be rung one time only, decreasing his accuracy for a while and will deplete much of the player's prayer points at the same time.
Occasionally, he throws bombs, mobile explosives which follow a player before exploding. They deal 2,000 magic damage to nearby players upon explosion and reset all defensive abilities.
Achievements
| Achievements | Details |
|---|---|
| Cormes and Goes | Defeat Durzag without killing Cormes |
| Prison Break | Have at least one Goebie survive the fight with Durzag |
| Day at the Pound | Defeat Durzag without opening any of the charger cages in the arena walls |
| Animal Cruelty | Have Durzag deal the killing blow to both Tuz and Krar |
| Gong Maintenance Expert | Defeat Durzag with all gongs repaired but unused |
| Master of Beatings | Defeat Durzag up to 100 times, depending on the tier |
Rewards
When Beastmaster Durzag is killed, his corpse remains and acts as a reward coffer to collect the drops. Durzag has several drop tables that are rolled on to constitute the loot. Airut bones are always received, the consumable table is always rolled, summoning charms are commonly received, and tertiary drops may be received. If the unique drops table rolls either a Mazcab ability codex or piece of achto equipment, the main drop will not be received. If the unique drops table rolls teci, the main drop table will be rolled multiple times.
100%
| Item | Quantity | Rarity | GE price | |
|---|---|---|---|---|
| Airut bones | 8–27 | Always | 62,144–209,736 |
Summoning charms
| No charm | ||||
|---|---|---|---|---|
| 9–30% | 7–26% | 2–16% | 30–56% | 11–33% |
| Represents a 90% confidence range based on a sample of 36 kills. 20 charms are dropped at a time. Add data to the log (requires JavaScript). | ||||
Consumables
| Item | Quantity | Rarity | GE price | |
|---|---|---|---|---|
| Cooked eeligator | 5–8 | Common | 3,780–6,048 | |
| Saradomin brew (4) | 5–8 | Common | 99,400–159,040 | |
| Super restore (4) | 5–8 | Common | 13,990–22,384 |
Main drop
This drop table is accessed only if no Achto armour or Mazcab ability codex is received.[r 1]
| Item | Quantity | Rarity | GE price | |
|---|---|---|---|---|
| Rune platebody | 15–46 | Common | 562,200–1,724,080 | |
| Rune spear | 20–79 | Common | 203,700–804,615 | |
| Ascendri bolts (e) | 25 | Uncommon | 239,000 | |
| Battlestaff | 104–139 | Uncommon | 313,248–418,668 | |
| Razorback gauntlets | 1 | Very rare[r 2][r 3] | 614,984 | |
| Yew logs | 314–869 | Common | 52,438–145,123 | |
| Magic logs | 209–245 | Common | 79,420–93,100 | |
| Black dragonhide | 100–146 | Common | 348,200–508,372 | |
| Water talisman | 72–89 | Common | 182,016–224,992 | |
| Rune bar | 26–51 | Common | 77,610–152,235 | |
| Raw shark | 104–148 | Uncommon | 148,408–211,196 | |
| Raw rocktail | 103–142 | Uncommon | 463,294–638,716 | |
| Grimy lantadyme | 44–160 | Uncommon | 332,244–1,208,160 | |
| Grimy dwarf weed | 44–104 | Uncommon | 372,944–881,504 | |
| Uncut dragonstone | 23–73 | Uncommon | 277,771–881,621 | |
| Hydrix bolt tips | 33 | Uncommon | 297,462 | |
| Runite ore | 50–98 | Uncommon | 70,950–139,062 | |
| Sirenic scale | 2–4 | Uncommon | 1,397,444–2,794,888 | |
| Airut bones | 72–146 | Uncommon | 559,296–1,134,128 | |
| Crystal key | 13–30 | Uncommon | 283,543–654,330 |
- ^ Mod Timbo. "Revealing Drop Rates." 20 October 2017. Developers' Blogs.
- ^ The drop rate for obtaining razorback gauntlets is 1 in 500 if this drop table is accessed.
- ^ 1,000 Loots From Raids - RuneScape Loot Video.*
Tertiary drops
Only one burial charm may drop at a time. Lil' Tuzzy cannot be received if the player has already unlocked it. The burial charm table, effigy table, and pet table are not linked - a player may receive drops from one, two, all three or neither.
| Item | Quantity | Rarity | GE price | |
|---|---|---|---|---|
| Small goebie burial charm | 1 | Common | Not sold | |
| Goebie burial charm | 1 | Uncommon | Not sold | |
| Lil' Tuzzy | 1 | Very rare[d 1][d 2] | Not sold | |
| Durzag's helmet | 1 | Rare[d 3][d 4] | Not sold | |
| Ancient effigy | 1 | Very rare | Not sold |
- ^ The droprate for obtaining Lil' Tuzzy is 1 in 512, and the roll only happens if neither Achto armour or Mazcab ability codex was rolled successfully.
- ^ Mod Timbo. "Revealing Drop Rates." 20 October 2017. Developers' Blogs.
- ^ Has a base drop rate of 1/300 with a threshold of 60. This item drops directly to the backpack if possible; the bank otherwise.
- ^ Mod William. "Patch Notes - 20/02." 17 February 2017. Recent Game Updates Forums.
Unique drops
Beastmaster Durzag can only drop one item from this table. If no armour piece or Mazcab ability codex is dropped, the player will receive teci.
The drop rate of any piece of Achto Primeval, Tempest, or Teralith equipment is doubled if the respective non-achto equipment piece is purchased from the Goebie Armoursmith[1]. For example, buying the Teralith Helm will double the chance of getting the Achto Teralith Helm.
A player that owns all fifteen pieces of achto equipment may continue to receive achto armour as drops with the following changes to drop mechanics:
- Achto armour doubles the chance of receiving a duplicate of that item. In other words, owning the Achto Teralith Helm will double the chance of getting another Achto Teralith Helm, and owning the non-achto Teralith Helm is no longer beneficial.
- The drop order is no longer enforced. For example, it is possible to receive a second Achto Teralith Helm, followed by a second Achto Teralith Platebody.
Otherwise, armour is gained from Beastmaster Durzag in the following order: boots, gloves, helmet, legs, and body.
Progressing in the drop order requires collecting all three of the previous equipment slot's achto equipment - so in order to receive an Achto Primeval robe top, they would have to get all Achto Tempest, Primeval, and Teralith boots, gloves, helm and legs. The Achto equipment gained from each equipment slot is based on the combat style the player dealt the most damage with during the kill they obtained that armour; if the equipment piece corresponding to the used style is not owned, that is always gotten before the others, and otherwise there are equal odds of obtaining armour corresponding to one of the unused styles.[m 1]
| Item | Quantity | Rarity | GE price | |
|---|---|---|---|---|
| Teci | 750–1,500 | Common[m 2][m 1] | Not sold | |
| Achto Primeval Mask | 1 | Uncommon[m 3][m 1] | Not sold | |
| Achto Primeval robe top | 1 | Uncommon[m 3][m 1] | Not sold | |
| Achto Primeval robe legs | 1 | Uncommon[m 3][m 1] | Not sold | |
| Achto Primeval Gloves | 1 | Uncommon[m 3][m 1] | Not sold | |
| Achto Primeval Boots | 1 | Uncommon[m 4][m 1] | Not sold | |
| Achto Tempest Cowl | 1 | Uncommon[m 3][m 1] | Not sold | |
| Achto Tempest Body | 1 | Uncommon[m 3][m 1] | Not sold | |
| Achto Tempest Chaps | 1 | Uncommon[m 3][m 1] | Not sold | |
| Achto Tempest Gloves | 1 | Uncommon[m 3][m 1] | Not sold | |
| Achto Tempest Boots | 1 | Uncommon[m 4][m 1] | Not sold | |
| Achto Teralith Helmet | 1 | Uncommon[m 3][m 1] | Not sold | |
| Achto Teralith Cuirass | 1 | Uncommon[m 3][m 1] | Not sold | |
| Achto Teralith Leggings | 1 | Uncommon[m 3][m 1] | Not sold | |
| Achto Teralith Gauntlets | 1 | Uncommon[m 3][m 1] | Not sold | |
| Achto Teralith Boots | 1 | Uncommon[m 4][m 1] | Not sold | |
| Mazcab ability codex | 1 | Uncommon[m 5][m 1] | 30,300,262 |
- ^ a b c d e f g h i j k l m n o p q r Mod Timbo. "Revealing Drop Rates." 20 October 2017. Developers' Blogs.
- ^ Only if neither Achto armour or Mazcab ability codex rolls were successful, so at most 513/550.
- ^ a b c d e f g h i j k l 1/55 base chance if this is the next armour piece to be obtained. This chance can be improved by wearing the luck of the dwarves, or owning the matching non-Achto item(doubling the chance).
- ^ a b c 1/35 base chance if this is the next armour piece to be obtained. This chance can be improved by wearing the luck of the dwarves, or owning the matching non-Achto item(doubling the chance).
- ^ 1/20 if the roll for Achto armour was unsuccessful, so at most 27/550.
Gallery
")
Trivia
- Durzag's examine references the cliche "As blind as a bat". His blindness comes into play in the fight mechanics as he loses accuracy when his pets cannot guide him towards the enemy and when the gongs impair his hearing.
- Durzag's drop table, along with Yakamaru's, was greatly increased after player complaints of the rewards being too low for having to wait 2 days to be able to loot again.
- After Beastmaster Durzag has been defeated in a Raid, the Pit of Trials may be converted into the Goebie Volleyball Easter egg. This is done by repairing the gongs and striking them in a specific order. The order is North - North - South - South - West - East - West - East. This is a reference to Konami and their famous cheat code "Up Up Down Down Left Right Left Right."
- The marker for the ball in the Goebie Volleyball game is the same marker for Yakamaru's poison attack.
- The late Beastmaster Durzag has 1,000,000 life points.
- Prior to the patch notes of 18 July 2016, if Durzag died near the corners, it was possible for him to push the player(s) out of the Pit of Trials.
- Durzag's AoE smash and bombs can damage and kill clan avatars.
- As of 1 February 2018, the highest kill count for this boss was 5,435 kills[2].
References
| Bosses |
|
| Minions |
|
| Goebies |
|
| Rewards |
|
| Abilities, Spell & Codex |
|
| Teralith equipment |
|
| Tempest equipment |
|
| Primeval equipment |
|
| Locations |
|
| Music |
|
| Miscellaneous |
|