Tags: Visual edit apiedit |
m (details) Tag: sourceedit |
||
| Line 112: | Line 112: | ||
Abigail will give the player an empty [[Scabaras research]] book, and ask to collect 4 [[Scabarite notes]] and copy them into the book. These notes can be found as drops from: |
Abigail will give the player an empty [[Scabaras research]] book, and ask to collect 4 [[Scabarite notes]] and copy them into the book. These notes can be found as drops from: |
||
* [[Skeleton]]s and [[dried zombie]]s, found north of the camp. |
* [[Skeleton]]s and [[dried zombie]]s, found north of the camp. |
||
| − | * [[Scabarites]], found in the dungeon and swamp near the camp. |
+ | * [[Scabarites]], found in the dungeon and swamp near the camp. Not the ones found in the [[Sophanem]] dungeon. |
* [[Mummy|Mummies]], found to the west of the camp, near the [[Agility]] shortcut. |
* [[Mummy|Mummies]], found to the west of the camp, near the [[Agility]] shortcut. |
||
* Because the monsters that drop the Scabarite notes are undead, the [[salve amulet]] is effective here. |
* Because the monsters that drop the Scabarite notes are undead, the [[salve amulet]] is effective here. |
||
| Line 298: | Line 298: | ||
Upon entering the room, the [[High Priest of Scabaras]] will immediately talk to you, but you can safely turn off prayers, drink antipoison, etc. |
Upon entering the room, the [[High Priest of Scabaras]] will immediately talk to you, but you can safely turn off prayers, drink antipoison, etc. |
||
* First, say: "Conversion, eh?" He will say that you must either follow [[Scabaras]] or die. |
* First, say: "Conversion, eh?" He will say that you must either follow [[Scabaras]] or die. |
||
| − | * Now, you must make him angry. If you say his magic skills are bad (beetle-brained), he will attack with magic. If you say his ranged skills are bad (could not hit an ogre), he will attack with ranged. Same with melee. Pick either magic or ranged. He will start attacking you. His combat level is 92. Fight him, he is identical to his fellow scabarites in terms of combat. After you deplete his health he will immediately talk to you. |
+ | * Now, you must make him angry. If you say his magic skills are bad (beetle-brained), he will attack with magic. If you say his ranged skills are bad (could not hit an ogre), he will attack with ranged. Same with melee. Pick either magic or ranged. He will start attacking you. His combat level is 92. Fight him, he is identical to his fellow scabarites in terms of combat. After you deplete his health he will immediately talk to you. Leaving the room makes him immediately unaggressive, but also puts you back in the dangerous scabarite room. If you re-enter his room again, you must repeat "Conversion, eh?" and once again provoke him and defeat him before continuing. |
* This time, do not make him angry. Ask "By all the deities, what is going on here". Then choose "Sounds like the Devourer dragged you into heresy for her own ends." |
* This time, do not make him angry. Ask "By all the deities, what is going on here". Then choose "Sounds like the Devourer dragged you into heresy for her own ends." |
||
* He will attack you with a different attack style; pray against him and once again wait until he talks to you again. When he talks, repeat the first step ("By all the deities, what is going on here") and then say ("I sense the Devourer's hand in this."). However, this time, instead of attacking you, he will snap out of his insanity and assure you that the Scabaras will no longer do any harm. Teleport out once you are done talking with him. |
* He will attack you with a different attack style; pray against him and once again wait until he talks to you again. When he talks, repeat the first step ("By all the deities, what is going on here") and then say ("I sense the Devourer's hand in this."). However, this time, instead of attacking you, he will snap out of his insanity and assure you that the Scabaras will no longer do any harm. Teleport out once you are done talking with him. |
||
Revision as of 12:30, 19 November 2016
| |||||||||||||||||||||||||
| Also called | DwS | ||||||||||||||||||||||||
|---|---|---|---|---|---|---|---|---|---|---|---|---|---|---|---|---|---|---|---|---|---|---|---|---|---|
| Release date | 2 January 2008 (Update) | ||||||||||||||||||||||||
| Members | Yes | ||||||||||||||||||||||||
| Voice Over | No | ||||||||||||||||||||||||
| Official difficulty | Master | ||||||||||||||||||||||||
| Quest series | Desert (#5) | ||||||||||||||||||||||||
| Age | Fifth Age | ||||||||||||||||||||||||
| |||||||||||||||||||||||||
Dealing with Scabaras is a quest in the desert quest series and the direct sequel to Contact!. It continues the subplot of Scabaras and his scabarites' invasion of the tunnels beneath Sophanem.
Official description
| “ | Once more there is intrigue afoot in Sophanem and the High Priest has been seeking out his bold adventurer contacts from the past. Mysterious corpses, ancient ruins and unscrupulous treasure-hunters all await if you accept his mission. | ” |
Walkthrough
| Start point | |||
|---|---|---|---|
| Member requirement | |||
| Official difficulty | |||
| Official length | Long | ||
| Requirements | Skill requirements are not boostable unless marked with a [B] for boostable.
If you previously completed Contact! before Stolen Hearts or Diamond in the Rough were added to the game, you will need to go back and complete these required quests.
Recommended:
| ||
| Items required | Items from the tool belt are not listed unless they do not work or are not automatically added.
Recommended:
| ||
| Enemies to defeat |
|
High Priest
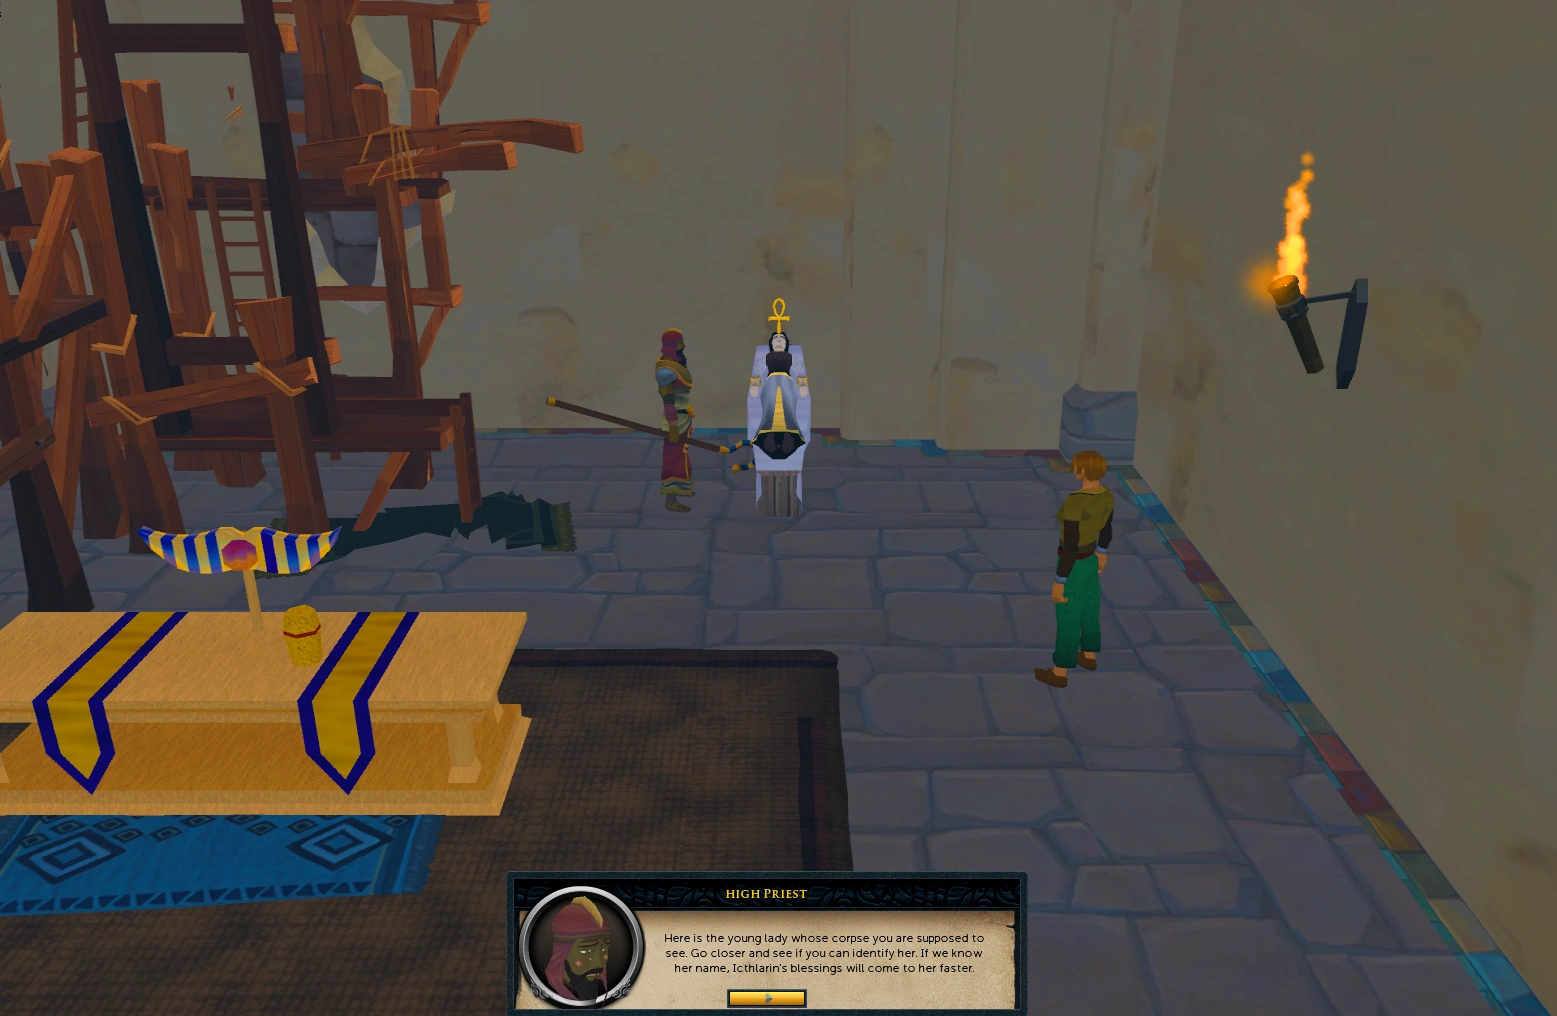

Examining the body.
Speak to the High Priest in Sophanem, located in the temple to the south-west of the Pyramid Plunder pyramid. He will request help with identifying a corpse. Climb up the ladder. Continue the conversation, and find out that the corpse is not quite dead and is, in fact, Maisa. Talk to the not-so-dead Maisa and ask her why she is there. She mentions that there are tunnels from the east coast of the desert that lead into those from Sophanem. Climb down the ladder, and talk to the High Priest to get his support for the mission to explore these tunnels.
Archaeologists
Head south-east from the main gate of Sophanem (north-east if using the eastern gate), through the lizards and vultures, and down to the swamp area. (If you had already used a rope during the Smoking Kills quest, you can proceed to Agility Pyramid and take the rope shortcut to the archaeologists. Just watch out for the level 74 mummies if you do so.)

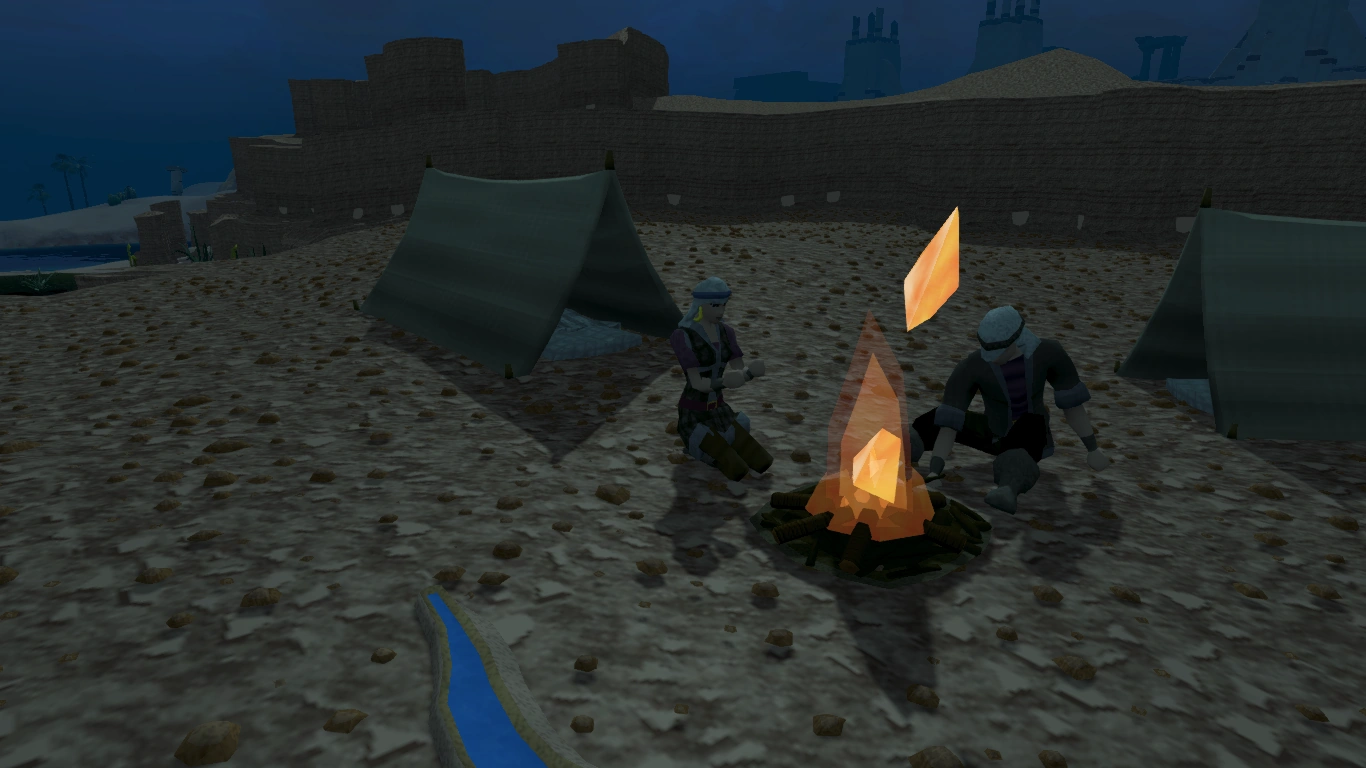
The archaeologists' camp
Make your way through to the north west corner of the swamp, using the 'Push through reeds' menu option when your path is blocked by reeds. Approach the rock stairway from the south, climb over the fallen pillar and then go up the stairs. Speak to Lead archaeologist Abigail and Assistant archaeologist Kerner at the camp. If you have done the quest Smoking Kills you may already have done this. Before the archaeologists will help you, you must prove your competence with a series of mathematical questions, then help them collect some items for Simon Templeton.
Task 1: Mathematics


The rope shortcut
The mathematical questions use 'round down division', so they are a bit different. The questions are different for each player. An example of the sums and the answers:
- Which is highest: or
- (Answer: )


Players must round down after a division or multiplication (i.e. round an answer of 33.5 to 33).
Task 2: Artefacts
The archaeologists will ask you to fulfil an order with Simon Templeton for them by collecting a pyramid top from the top of the Agility Pyramid (refer to the Agility Pyramid course guide for details), 10 gold artefacts from the Pyramid Plunder activity (gold seal, golden scarab, golden statuette; these items are tradeable), and distressed (oxidised) bronze items. The number and the type of items vary for each player, which are stated in the Quest Journal. They will provide the empty crate required for distressing.
- The possible number and type of bronze items are as follows:
| No | Bronze Items |
|---|---|
| 18 | Dagger*, Medium helm, or Sword |
| 9 | Scimitar*, Longsword, Full helm, or Square shield |
| 6 | Chainbody, Kiteshield, Platelegs,** or Plateskirt, or Two-handed sword |
- The bronze items can be smithed, or purchased from shops or other players.
- *: Bronze daggers and scimitars can be bought from from Urbi in Sophanem for 10 gp each. Bronze scimitars are also dropped by dried zombies just north of the archaeologists.
- **: Bronze platelegs can be bought from Louie Legs in Al Kharid.
- The closest anvil is in Nardah, you can walk there, use a scroll teleport or take the carpet from Sophanem to Pollnivneach and then to Nardah.
There are two ways to distress the bronze items:
- Get a bucket of Ugthanki dung. Then, use the dung on each of the bronze items, while standing under the hot desert sun. The player must be standing in the desert, or the process will not work. The items will be called "oxidised". After distressing all the items, put them in the empty crate (requires 60 Crafting, boosts work). Take the smelly crate to Simon.
- Put all the bronze items into the empty crate. Now, take the Full Crate along with a bucket of Ugthanki Dung back to Assistant Archaeologist Kerner and speak to him. He will distress the items for you over the course of exactly 3 hours. If you choose this option you cannot change your mind.
Once collected, all the items must be given to Simon Templeton, who is near the Agility pyramid. He will only take Pyramid Plunder items as unnoted items, however he will accept each of the group of items separately. Do not use the trade option. He will give you an artefact receipt. Return to the archaeologist site.
Collecting Scabarite Notes
Abigail will give the player an empty Scabaras research book, and ask to collect 4 Scabarite notes and copy them into the book. These notes can be found as drops from:
- Skeletons and dried zombies, found north of the camp.
- Scabarites, found in the dungeon and swamp near the camp. Not the ones found in the Sophanem dungeon.
- Mummies, found to the west of the camp, near the Agility shortcut.
- Because the monsters that drop the Scabarite notes are undead, the salve amulet is effective here.
- It is possible to gain all four notes from killing a single type of monster.
When at least four notes have been gathered, add them to the research book and talk to the archaeologist again. She will give you the Scabarite key that will unlock the door to the dungeon. The empty Scabaras research book does not have to be in your inventory when copying the notes in.
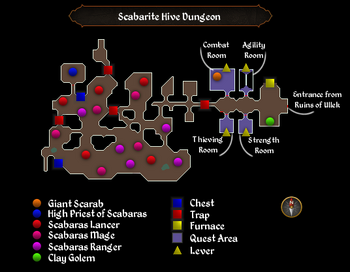
Dungeon Puzzles

Head directly north from the archaeologist's camp to enter the Scabarite Hive dungeon (the dungeon symbol furthest north) with the Scabarite key in your possession. Enter the dungeon, and talk to the clay golem to learn about the puzzle that needs to be mastered.
There are four rooms, each with a lever at the far end. Each room contains a lever that needs pulling. There is a time limit within which all levers need to be pulled or you have to start again.
The door mechanism is powered by a furnace to the north. You must first light the furnace with logs. 3 logs can be found in a storage box to the left of the furnace which may be different or above your Firemaking level. It is recommended to bring your own logs in case of failure.
Lighting the logs require a Firemaking level 20 levels higher than normal. Refer to table below for the required levels.
| Log | Firemaking level |
Required level | |
|---|---|---|---|
| Normal | 1 | 21 | |
| Achey | 1 | 21 | |
| Oak | 15 | 35 | |
| Willow | 30 | 50 | |
| Teak | 35 | 55 | |
| Arctic pine | 42 | 62 | |
| Maple | 45 | 65 | |
| Mahogany | 50 | 70 | |
| Eucalyptus | 58 | 78 | |
| Yew | 60 | 80 | |
| Magic | 75 | 95 |
Talk to the Golem to assign priority to the four rooms. Depending on your skill set, set the priority and race through the rooms. With the minimum quest requirements, the priority should be in this order: Thieving room, Agility room, Strength room, Combat room. After talking to the Golem, add another log to the fire for more time.
Room 1: Agility Room ("by the narrow walkway")
- Room 1 (North-east,narrow walkway room) requires crossing an oily pipe. Assigning more priority to this task will make the pipe less oily and therefore easier to cross.
- Agility potions or a summer pie can help with crossing the pipe.
- After successfully crossing the pipe, pull the lever.
Room 2: Strength Room: ("huge lever in the empty room")
- Room 2 (South-east, empty room) requires pulling a stuck lever. Assigning more priority to this task will lighten the lever and therefore make it easier to pull by lowering the required Strength level.
- Strength potions will help with pulling the lever.
Room 3: Combat Room ("near the giant scarab")
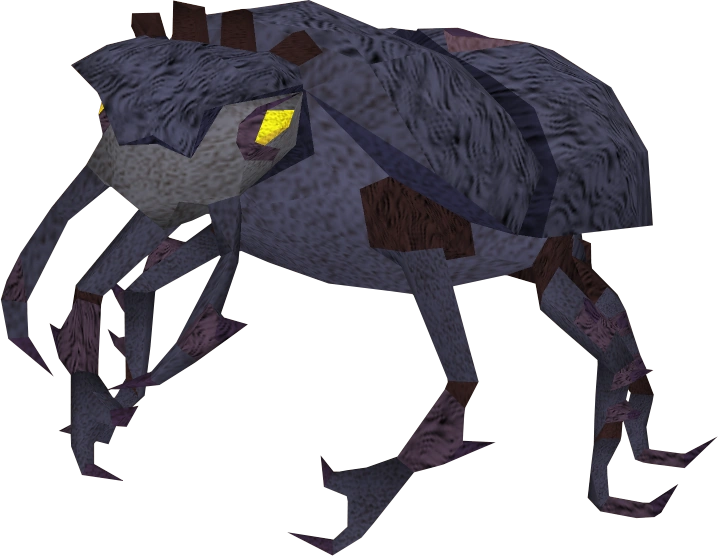

Another scarab that needs to be slain.
- Room 3 (North-west; scarab room) requires slaying a level 92 Giant scarab. Assigning more priority to this task will damage the scarab.
- Using power on the combat room can inflict: 1050 (full power), 700 (second highest), 350 (second lowest), and 10 (lowest) damage.


An easy way to protect from the scarab's melee attack, just by standing outside the narrow door.
- Equipping a Keris and using melee with a protection prayer from one of the two attacks is generally effective if the player has food. A halberd can also be used to melee the scarab from a distance in combination with Protect from Missiles so the player does not take damage.
- A powerful magic spell, such as a high level earth spell or Slayer dart, can be used effectively if a player stands outside the room and uses protect from missiles.
- Players should consider killing the giant scarab last, as a failure in any other room after the scarab has been killed may require the player to repeat the entire puzzle, depleting more life and prayer points.
- If a player dies during the fight, their gravestone will appear outside the cave entrance.
- After the scarab has been defeated, pull the lever to complete the room.
Room 4: Thieving Room - ("near the mysterious box")
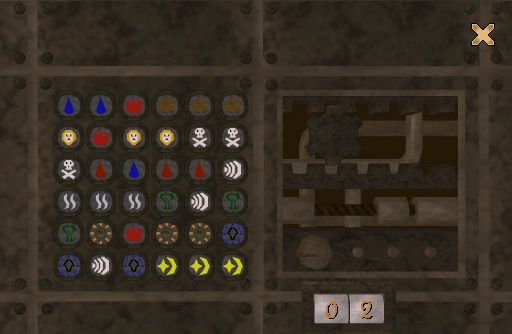

The "mysterious box" puzzle
- Room 4 (South-west; mysterious box room) requires solving a puzzle and manipulating a mechanism.
- Players need to select three of the same kind of rune on of a 6-by-6 board. Once three of the same rune have been selected together, they remain visible. The player can select and display a maximum of three runes per turn. The objective is to display all the runes on the board.
- The right hand side shows a mechanism which contains: a Cog, a Pinion, and a Switch. Clicking any of these during the puzzle will either add or remove turns to the puzzle countdown counter. Using additional power or having a higher thieving level will make this room easier to complete.
- As each puzzle assignment is random, an easy way to solve the puzzle is to prepare a paper with a 6-by-6 grid and copy the runes as you display them. You can also use the preferred way of typing them out in the chat. Use these notes to find the triples.
| Runes | |||||||
|---|---|---|---|---|---|---|---|
| Air | Mind | Water | Earth | ||||
| Fire | Body | Cosmic | Chaos | ||||
| Nature | Death | Blood | Steam | ||||
Room Success Rates
The chances of succeeding in each room based on skill level and power are tabulated below.
| Agility room | |||
|---|---|---|---|
| Power setting 3 (most Power applied) |
Level 40 Agility 0% chance of success |
Level 45 Agility 50% chance of success |
Level 50 Agility 100% chance of success |
| Power setting 2 | Level 45 Agility 0% chance of success |
Level 55 Agility 50% chance of success |
Level 65 Agility 100% chance of success |
| Power setting 1 | Level 55 Agility 0% chance of success |
Level 65 Agility 50% chance of success |
Level 75 Agility 100% chance of success |
| Power setting 0 (least Power applied) |
Level 60 Agility 0% chance of success |
Level 70 Agility 50% chance of success |
Level 80 Agility 100% chance of success |
| Strength room | |||
| Power setting 3 (most Power applied) |
Level 45 Strength 0% chance of success |
Level 60 Strength 50% chance of success |
Level 75 Strength 100% chance of success |
| Power setting 2 | Level 60 Strength 0% chance of success |
Level 75 Strength 50% chance of success |
Level 80 Strength 100% chance of success |
| Power setting 1 | Level 65 Strength 0% chance of success |
Level 75 Strength 50% chance of success |
Level 85 Strength 100% chance of success |
| Power setting 0 (least Power applied) |
Level 70 Strength 0% chance of success |
Level 80 Strength 50% chance of success |
Level 90 Strength 100% chance of success |
| Combat room | |||
| Power setting 3 (most Power applied) |
1050 life points removed from scarab | ||
| Power setting 2 | 700 life points removed from scarab | ||
| Power setting 1 | 350 life points removed from scarab | ||
| Power setting 0 (least Power applied) |
10 life points removed from scarab | ||
| Thieving Room | |||
| Power setting 3 (most Power applied) |
Level 40 Thieving 0% chance of success |
Level 50 Thieving 50% chance of success |
Level 60 Thieving 100% chance of success |
| Power setting 2 | Level 50 Thieving 0% chance of success |
Level 60 Thieving 50% chance of success |
Level 70 Thieving 100% chance of success |
| Power setting 1 | Level 65 Thieving 0% chance of success |
Level 75 Thieving 50% chance of success |
Level 85 Thieving 100% chance of success |
| Power setting 0 (least Power applied) |
Level 70 Thieving 0% chance of success |
Level 80 Thieving 50% chance of success |
Level 90 Thieving 100% chance of success |
The Antechamber: High Priest of Scabaras
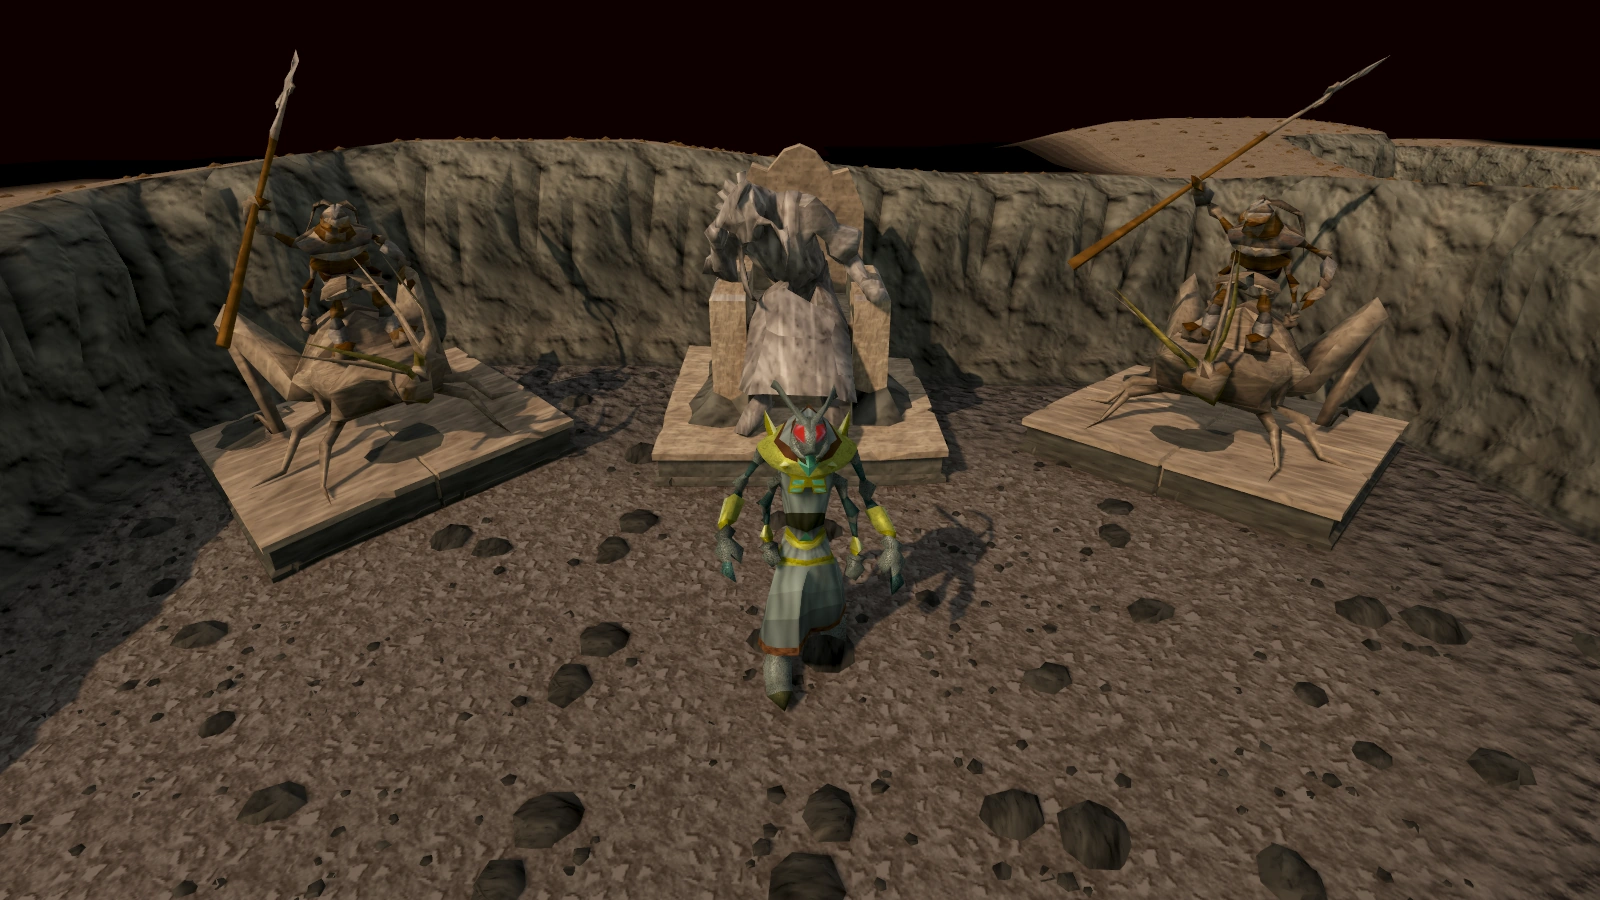

Dealing with High Priest of Scabaras
After pulling all the levers you will be allowed to enter the antechamber. Players who wish to restock supplies (food, prayer, potions) now can do so without repeating the above puzzles, as the door into the antechamber will remain open.
The monsters in the Antechamber have a high chance of poisoning players, therefore some form of anti-poison is recommended. Even when under the protection of one of these potions, the ranging monsters can still hit with one 90 poison damage. Additionally, using the Oo'glog spa facilities and disabling auto retaliate will help the player avoid taking large amounts of damage.
Enter the newly opened hallway. The first trap is two squares from the entrance door. Disable it (search and de-activate) and continue west. At some point, a yellow dot will appear on the southern point of the minimap. You've reached the area with scabarites. Turn on protect from melee or ranged and run south, then west. There will be one set of traps in a small path at some point. Either disable them or run around the trap by going to the south and then north. At some point, there will be a red line on the minimap, indicating a door. Open this door and enter the room. All attacks will now cease.
There is a fair chance of a player dying while in the Antechamber, even with 70+ combat stats and good armour. It is therefore highly recommended that a player brings high healing food (such as monkfish or sharks) and an emergency teleport (such as the ectophial) in case the player receives heavy damage.
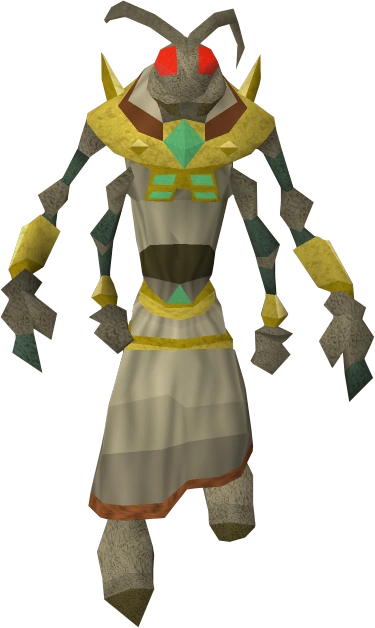
Upon entering the room, the High Priest of Scabaras will immediately talk to you, but you can safely turn off prayers, drink antipoison, etc.
- First, say: "Conversion, eh?" He will say that you must either follow Scabaras or die.
- Now, you must make him angry. If you say his magic skills are bad (beetle-brained), he will attack with magic. If you say his ranged skills are bad (could not hit an ogre), he will attack with ranged. Same with melee. Pick either magic or ranged. He will start attacking you. His combat level is 92. Fight him, he is identical to his fellow scabarites in terms of combat. After you deplete his health he will immediately talk to you. Leaving the room makes him immediately unaggressive, but also puts you back in the dangerous scabarite room. If you re-enter his room again, you must repeat "Conversion, eh?" and once again provoke him and defeat him before continuing.
- This time, do not make him angry. Ask "By all the deities, what is going on here". Then choose "Sounds like the Devourer dragged you into heresy for her own ends."
- He will attack you with a different attack style; pray against him and once again wait until he talks to you again. When he talks, repeat the first step ("By all the deities, what is going on here") and then say ("I sense the Devourer's hand in this."). However, this time, instead of attacking you, he will snap out of his insanity and assure you that the Scabaras will no longer do any harm. Teleport out once you are done talking with him.
- Scarab swarms can appear in the room with the high priest. they have low defence and are very easy to kill with keris. If you die in the room with the high priest it will be impossible to retrieve your possessions due to the fact that when you enter his room you are taken to a separate version.
Optional
During the quest you collected four (or more) Scabarite notes. For a miniquest, called Scabarites Notes, you will need to collect 19 notes and give them back to Abigail. 17 can be obtained from killing monsters as you did during the quest, the last two are found in these caves. This miniquest is a requirement for the trimmed completionist cape and the master quest cape.
- If you exit the priest's room, go along the wall going north-east. Very soon you will find a chest. Open it for a set of notes.
- South of the room there is a trap-free path leading to a small room with some lancers and rangers. Here is another chest.
Finishing up
Return to the High Priest in Sophanem, and talk to him. As Maisa has gone, he will reward you with some experience as well as teach you how to make Enchanted water tiaras.
Congratulations, quest complete!
Reward
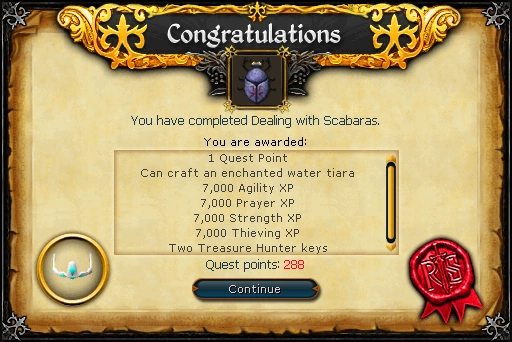
- 1 quest point
- 7,000
 experience
 - 7,000 experience
- 7,000 experience
- 7,000 experience
- The ability to craft an Enchanted water tiara - protects you from the Desert heat effect
- To craft an enchanted tiara, use water runes on a normal water tiara (they will be stored inside the tiara); every time the player takes a 'drink', the total number of water runes stored in the tiara will decrease by three.
- Destroy the enchanted tiara to get the normal water tiara and remaining water runes back—they will drop on the ground.
- You can have only one enchanted water tiara at any given time.
- 2 Treasure Hunter keys and 2 Hearts of Ice
Additional rewards
- Talk to Simon Templeton about the job he mentioned during the quest. He sends you to talk with the Pyramid Plunder mummy. After the mummy refuses, return to Simon. Simon will now accept noted pyramid treasures (from Pyramid Plunder), including golden ones, to exchange for money.
Required for completing
Completion of Dealing with Scabaras are required for the following:
- Do No Evil (You must lead Leela to Senliten's tomb)
- Desert Tasks:
- Hard: "Water on the Brain"
Scabarites Notes miniquest
Music unlocked
- Copris Lunaris - In the Scarabite Dungeon
- Scarabaeoidea - Inside the room with the Scabaras High Priest
- Tune from the Dune- South of the Agility Pyramid, in the swampland
Transcript
Trivia
- The Lead Archaeologist remarks on how she would not want to 'have a ghastly death marked on a makeshift grave', referring back to the introduction of gravestones.
- When the quest was first released, the spoiler said that: Alas, the scarabs have eaten the scroll with the rewards. You'll have to wait until tomorrow for us to find the spare.
- When the quest was first released, both the Knowledge Base article and the Quest Journal gave the wrong required Thieving Level. The actual requirement was 5 levels higher.
- Page 8 of your notes foreshadows the return of Scabaras, and also mentions the bitterness that would ensue in his loneliness.
- Before the removal of the Romeo and Juliet quest, if you were to ask Maisa how she got to Sophanem, she would explain that she used a cadavaberry potion, and you would remember using it from before if you have done the Romeo and Juliet quest. After the removal, she merely comments that "those cadavaberries aren't exactly good for my digestion".
Dealing with Scabaras | |
|---|---|
| Part 6 of the Desert quest series | |
| NPCs | |
| Enemies |
|
| Items | |
| Rewards |
|
| Locations |
|
| Music |
|
| Miscellaneous |
|
Template:Sophanem and Menaphos