No edit summary |
|||
| (12 intermediate revisions by 9 users not shown) | |||
| Line 5: | Line 5: | ||
===Starting off=== |
===Starting off=== |
||
| + | {{Needed|1 free inventory space.}} |
||
* Teleport to the empyrean citadel with an invitation box. |
* Teleport to the empyrean citadel with an invitation box. |
||
| − | * Talk to Moia. {{Chat options |
+ | * Talk to Moia. {{Chat options |
| + | |Any |
||
| + | |Accept |
||
| + | |Any}} |
||
* Talk to Sliske. {{Chat options |
* Talk to Sliske. {{Chat options |
||
|3 [Continue] |
|3 [Continue] |
||
| Line 36: | Line 40: | ||
====Hazeel/Jerrod==== |
====Hazeel/Jerrod==== |
||
| − | * Go south of Ardougne and into the sewers |
+ | * Go south of Ardougne and into the sewers. |
* Board the raft. |
* Board the raft. |
||
* Talk to Hazeel. {{Chat options |
* Talk to Hazeel. {{Chat options |
||
|3 [Continue] |
|3 [Continue] |
||
}} |
}} |
||
| − | * Go to [[Lord Handelmort]]'s mansion (west of the Ardougne market) and go down the trapdoor. |
+ | * Go to [[Lord Handelmort]]'s mansion (north-west of the Ardougne market) and go down the trapdoor. |
* Speak to Jerrod. {{Chat options |
* Speak to Jerrod. {{Chat options |
||
|2 A friend of Hazeel's. |
|2 A friend of Hazeel's. |
||
| Line 61: | Line 65: | ||
====Lord Daquarius==== |
====Lord Daquarius==== |
||
| − | * Go to the Black |
+ | * Go to the [[Black Knights' Base]] in Taverley dungeon by using a [[hoardstalker ring]] to the blue dragons, and then go south. |
| − | * Talk to [[Lord Daquarius]] in the south-west corner. {{Chat options |
+ | * Talk to [[Lord Daquarius]] in the south-west corner. {{Chat options |
| + | |1 Dishonour Among Thieves. |
||
| ⚫ | |||
| + | }} |
||
| ⚫ | |||
|1 Reason with him; firm but fair. |
|1 Reason with him; firm but fair. |
||
}} |
}} |
||
| Line 85: | Line 91: | ||
===The Plan=== |
===The Plan=== |
||
* Once you have finished recruiting, Moia will contact you to teleport to the hideout. If you do not get this message, activate the Communication device to teleport. |
* Once you have finished recruiting, Moia will contact you to teleport to the hideout. If you do not get this message, activate the Communication device to teleport. |
||
| − | * Speak to the group. {{Chat options |
+ | * Speak to the group. {{Chat options |
| + | |Any |
||
| ⚫ | |||
| + | }} |
||
| ⚫ | |||
| + | |1 |
||
| + | }} |
||
* Go south of the Barrows Brother's mounds (outside the stone wall). |
* Go south of the Barrows Brother's mounds (outside the stone wall). |
||
* Loot the chest at the cave entrance and retrieve a set of 3 rubies, 5,000 coins and 250 Dungeoneering tokens. |
* Loot the chest at the cave entrance and retrieve a set of 3 rubies, 5,000 coins and 250 Dungeoneering tokens. |
||
| Line 100: | Line 110: | ||
*# Complete face (On the floor). |
*# Complete face (On the floor). |
||
*# Grey (may also appear as a white colour; leftmost door at the north-eastern corner). |
*# Grey (may also appear as a white colour; leftmost door at the north-eastern corner). |
||
| − | * Watch a cutscene. {{Chat options |
+ | * Watch a cutscene. {{Chat options |
| + | |1 Yeah, let's get him! |
||
| + | }} |
||
===Stealth=== |
===Stealth=== |
||
| Line 109: | Line 121: | ||
|Wait for the masks to scan 3 times. |
|Wait for the masks to scan 3 times. |
||
|- |
|- |
||
| − | | |
+ | |Move quickly to the middle of the room and pull the lever. |
|- |
|- |
||
|Get caught, walk west to room 2 (pull the lever). |
|Get caught, walk west to room 2 (pull the lever). |
||
| Line 129: | Line 141: | ||
;Room 3 |
;Room 3 |
||
{| class="wikitable lighttable" |
{| class="wikitable lighttable" |
||
| − | |Forward dive past the guard to the east and assassinate him, travel through the pathway in the middle of the two masks and assassinate the Wight to the west, then pull the lever to the south |
+ | |Forward dive past the guard to the east and assassinate him, travel through the pathway in the middle of the two masks and assassinate the Wight to the west, then pull the lever to the south-east. |
|- |
|- |
||
|Continue to the north and dispatch the next guard, stand in the doorway and wait for the guard in the hallway to come to you and dispatch him (watch out for the shadow on the floor). |
|Continue to the north and dispatch the next guard, stand in the doorway and wait for the guard in the hallway to come to you and dispatch him (watch out for the shadow on the floor). |
||
| Line 154: | Line 166: | ||
|3 Follow tracks. |
|3 Follow tracks. |
||
}} |
}} |
||
| − | * Talk to Moia. {{Chat options |
+ | * Talk to Moia. {{Chat options |
| + | |1 Yes. |
||
| + | }} |
||
* Hover over different areas of the interface until the cursor is blinking fast. |
* Hover over different areas of the interface until the cursor is blinking fast. |
||
* Place a probe. |
* Place a probe. |
||
| Line 168: | Line 182: | ||
** Speak to Zemouregal immediately after he changes portals to direct him for the next wave. |
** Speak to Zemouregal immediately after he changes portals to direct him for the next wave. |
||
* After all 5 memories are retrieved, open the large vault door. |
* After all 5 memories are retrieved, open the large vault door. |
||
| − | * Watch the cutscene. {{Chat options |
+ | * Watch the cutscene. {{Chat options |
| + | |Any |
||
| + | |Any |
||
| + | }} |
||
===Your apparition=== |
===Your apparition=== |
||
| Line 181: | Line 198: | ||
===Apparitions=== |
===Apparitions=== |
||
| − | * Touch the Stone of Jas. {{Chat options |
+ | * Touch the Stone of Jas. {{Chat options |
| + | |1 Yes. |
||
| + | }} |
||
* Kill everyone's apparition. |
* Kill everyone's apparition. |
||
* All damage is increased to 10,000 and above, capping at 25,000. |
* All damage is increased to 10,000 and above, capping at 25,000. |
||
Latest revision as of 22:27, 16 September 2018
Walkthrough
| Start point | |||
|---|---|---|---|
| Member requirement | |||
| Official difficulty | |||
| Official length | Long | ||
| Requirements | Skill requirements are not boostable unless marked with a [B] for boostable.
| ||
| Items required | Items from the tool belt are not listed unless they do not work or are not automatically added. | ||
| Recommended |
| ||
| Enemies to defeat |
|
Starting off
Items needed: 1 free inventory space.
- Teleport to the empyrean citadel with an invitation box.
- Talk to Moia. (
 ••)
••) - Talk to Sliske. ( •)
- Activate the communication device in your inventory. ( )
- Continue dialogue with Zamorak. ( ••)
Recruiting
Enakhra/Zemouregal
- Talk to Moia. ( •••)
- Kill the armoured zombies.
- Go upstairs and talk to Zemouregal or Enakhra. ( •)
- Open and search the chest for 5,000 coins, 3 emeralds and 250 Dungeoneering tokens.
Hazeel/Jerrod
- Go south of Ardougne and into the sewers.
- Board the raft.
- Talk to Hazeel. ( )
- Go to Lord Handelmort's mansion (north-west of the Ardougne market) and go down the trapdoor.
- Speak to Jerrod. ( •)
- Search the butler for a key.
- Unlock the cell door.
- Open and search the chest for 5,000 coins, 3 sapphires and 250 Dungeoneering tokens.
Khazard
- Go to the Ruins of Uzer (fairy ring dlq, then north-east).
- Enter and talk to General Khazard. ( •)
- In the shadow realm, search Palkeera's corpse.
- Speak to Khazard.
- Loot the chest to retrieve 5,000 coins, 3 sapphires and 250 Dungeoneering tokens.
Lord Daquarius
- Go to the Black Knights' Base in Taverley dungeon by using a hoardstalker ring to the blue dragons, and then go south.
- Talk to Lord Daquarius in the south-west corner. ( )
- Talk to the Preaching Black Knight in the middle. ( )
- Speak to the group of black knights in the north-east corner. ( )
- Get the poison from the chest in the north-west corner.
- Talk to Lord Daquarius.
- Loot the chest to retrieve 5,000 coins, 3 emeralds and 250 Dungeoneering tokens.
Nomad
The Plan
- Once you have finished recruiting, Moia will contact you to teleport to the hideout. If you do not get this message, activate the Communication device to teleport.
- Speak to the group. ( )
- Teleport to the Barrows or Burgh de Rott. If using Drakan's medallion. ( 1)
- Go south of the Barrows Brother's mounds (outside the stone wall).
- Loot the chest at the cave entrance and retrieve a set of 3 rubies, 5,000 coins and 250 Dungeoneering tokens.
- Enter Sliske's lair (you cannot enter with a familiar summoned).
Sliske's maze
- From the first room, enter the doors as follows:
- Blue (blue paint above the door).
- 5 (V) (on the floor) - players that use "low detail" may have some trouble seeing the V-shape. You can examine the slabs to be told which number is engraved on it, if it is unclear.
- A sinister green face (northern most door).
- Triangle (north-eastern most door).
- Red (red paint above the door).
- Complete face (On the floor).
- Grey (may also appear as a white colour; leftmost door at the north-eastern corner).
- Watch a cutscene. ( )
Stealth
- Room 1
| Wait for the guard to face away from you and forward dive past him to assassinate him. |
| Wait for the masks to scan 3 times. |
| Move quickly to the middle of the room and pull the lever. |
| Get caught, walk west to room 2 (pull the lever). |
- Room 2
| Stand on the right side of the hallway with the shadow and forward dive to the doorway on the east, avoiding the shadow along the way (use the crevices on the sides of the hallway to hide). |
| Assassinate the guard and pull the lever. |
| Go through the passageway now open at the beginning of the room, forward dive past the guard, and assassinate him. |
| Proceed up the hallway and dive past the last two masks to the lever. |
| Enter room 3. |
- Room 3
| Forward dive past the guard to the east and assassinate him, travel through the pathway in the middle of the two masks and assassinate the Wight to the west, then pull the lever to the south-east. |
| Continue to the north and dispatch the next guard, stand in the doorway and wait for the guard in the hallway to come to you and dispatch him (watch out for the shadow on the floor). |
| Continue across the hallway and dispatch the guard walking around the pillar. |
| Go north to the lever, pull it, then assassinate the guard, and pull the other lever. |
| Make your way to the east side by getting caught or crossing the hallway. |
| The next lever is in the north-east corner. Quickly dodge past the shadow into the doorway and assassinate the guard in the north-east room. |
| Stand in the doorway again, go behind the shadow and pull the lever. |
| Wait for Jerrod to kill the next guard then pull the lever next to the door. |
| Once inside, finish the dialogue. ( |
Memories
- Talk to Jerrod to control him. ( ••)
- Talk to Moia. ( )
- Hover over different areas of the interface until the cursor is blinking fast.
- Place a probe.
- This is done 5 times.
- After the first time, Moia will discover a balancing mechanic with the door.
- Do not let either meter on the door get filled entirely with white or black.
- Nomad increases the meter, Enakhra drains it.
- Switch them to maintain a balance.
- After the second time, wights will begin jumping from 2 of the 4 paths. Check your compass to ensure you are facing the correct direction.
- Zemouregal's portals automatically stop them the first time.
- Subsequent times, you will need to direct him on where to place portals.
- Look for glowing eyes in the pathways to see where wights will come from next.
- Speak to Zemouregal immediately after he changes portals to direct him for the next wave.
- After all 5 memories are retrieved, open the large vault door.
- Watch the cutscene. ( •)
Your apparition
- Fight and kill your shadow apparition.
- Run off of the platform when teleported to the centre and move out of the path of the smoke.
- Click rapidly to escape cocoons.
- Stand near the boss when he summons darkness.
Wights
- Kill 30 wights around the room.
- Use Nomad's special attacks to kill multiple wights with a single hit.
Apparitions
- Touch the Stone of Jas. ( )
- Kill everyone's apparition.
- All damage is increased to 10,000 and above, capping at 25,000.
- As such, bleed attacks are helpful here as well as EoC.
Finishing up
- Stop Nomad. ( •)
- You must choose to stop him, otherwise he becomes powerful in future quests.
- Watch the final cutscene. ( •••)
- Quest complete!
Rewards
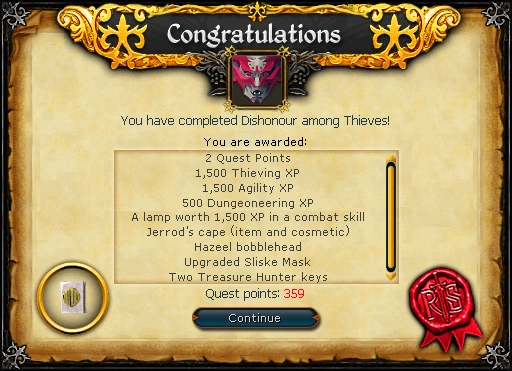
- 2 quest points
- 1,500 experience
- 1,500 experience
- 500 experience
- Combat XP lamp rewarding 1,500 experience in a choice of either Attack, Strength, Defence, Magic, Ranged or Constitution
- Jerrod's cape (and override)
- Tiny Hazeel
- An upgraded Mask of Sliske - when worn in the head slot or carried in the pocket slot during combat, it will occasionally spawn an undead archer, who'll deal damage to your current target before dissipating.
- Access to the Stalker dungeon
- 2 Treasure Hunter keys and 2 Hearts of Ice
- Additional rewards/activities
There are four chests within Zamorak's hideout, three of which contain an experience lamp which can be used on any skill. To go to the hideout use the communication device. The chests do not require elite skills (e.g. Invention) to open.
- The first chest contains an XP lamp (tier 1) with 7,000 experience, and requires level 50 in all skills to obtain (south side, along the east wall right before the wall slants diagonally).
- The second chest contains an experience XP lamp (tier 2) with 50,000 experience, and requires level 70 in all skills to obtain (east side, in front of the northern lava pit).
- The third chest contains an XP lamp (tier 3) with 96,000 experience, and requires level 90 in all skills to obtain (behind Zamorak's throne).
The fourth chest in Zamorak's hideout and five other chests contain 5,000 coins, 250 Dungeoneering tokens, and 3 noted cut gems (either sapphires, emeralds or rubies):
- West end of Zamorak's hideout (sapphires)
- Behind the Handelmort Mansion in the cellar where Jerrod was kept (sapphires - inaccessible after the quest)
- Inside the Ruins of Uzer, near General Khazard (sapphires)
- Black Knights' Base, near Lord Daquarius (emeralds)
- Zemouregal's fort, on the east side of the ground floor, accessible from Trollweiss Mountain (emeralds)
- South of Barrows, near the entrance to Sliske's lair (rubies)
Looting all these chests, excluding the Jerrod chest, is a requirement for the master quest cape.
- Music unlocked
- Breaking and Entering
- The Heist (Unless unlocked during The Curse of Arrav)
- The Heist II
- Zamorak Zoo (If not already unlocked)