
| File:Do no evil quest.jpg | |||||||||||||||||||||||||
| Release date | 1 December 2010 (Update) | ||||||||||||||||||||||||
|---|---|---|---|---|---|---|---|---|---|---|---|---|---|---|---|---|---|---|---|---|---|---|---|---|---|
| Members | Yes | ||||||||||||||||||||||||
| Voice Over | Unknown edit | ||||||||||||||||||||||||
| Official difficulty | Master | ||||||||||||||||||||||||
| Quest series | Desert series | ||||||||||||||||||||||||
| Age | Fifth Age | ||||||||||||||||||||||||
| |||||||||||||||||||||||||
Official description
| “ | Having awoken from her sleep, Senliten, the Pharaoh Queen, can sense that something is missing from the desert. That 'something' isn't water, vegetation or a sense of right and wrong: it's monkeys! Generations ago, when Apmeken, the monkey god, roamed the desert, monkeys were as common as a blackjack mugging in the desert; but when she left the desert, the monkeys left too. Can you convince Awowogei to send a colony of simians to the desert? And how will they fare in a climate where even the hardiest of adventurers have perished? | ” |
Walkthrough
| Start point | |||
|---|---|---|---|
| Member requirement | |||
| Official difficulty | |||
| Official length | Long | ||
| Requirements | Skill requirements are not boostable unless marked with a [B] for boostable.
| ||
| Items required | Items from the tool belt are not listed unless they do not work or are not automatically added.
Toolbelt:
Recommended:
| ||
| Enemies to defeat |
|
Monkeys in the desert
Before starting the quest, travel to Draynor Village and speak to Leela who is East of the bank. The two of you will travel to Uzer Mastaba. Talk to Senliten and Leela. Ask the queen if there is anything you can do. After a small rendition of her life story, she directs players to Jex and the Sphinx, both in Sophanem, to learn more about Apmeken.
Accumulating information
Items required: A cat or kitten. Suggested: Coins for magic carpet rides, ring of Charos (a) and access to the Fairy Ring network for quick transportation to Nardah and the Uzer Mastaba (code: DLQ).
Head back to the Shantay Pass, take a carpet to Pollnivneach, then finally take a carpet to Sophanem. Once there, talk to Jex at the wrecked temple in the north-east part of the city. Ask him about minor gods, then ask him all the questions about Apmeken. Next, go to the Sphinx with your cat, ask about minor gods, then about Apmeken. (Note: It is permissible to talk to Sphinx first and Jex second).
Go back to the Pharaoh Queen. She asks players to return all the desert monkeys to their rightful place.
The Three Wise Monkeys
Items required: Any monkey greegree and a monkeyspeak amulet. Suggested: Runes and bananas for teleporting to Ape Atoll OR having the Ape Atoll Agility Course Fairy Ring shortcut unlocked (Code: CLR) after A Fairy Tale Part III - Battle at Orks Rift, 10 Coins for buying a monkeyspeak amulet mould if you don't already have one (you'll only need it later, but it's convenient to buy it during this part of the quest) and lots of empty inventory space for holding many green bananas; 20 - 25 spaces should be sufficient, though quick and skillful players can do it with fewer inventory spaces.
With the required items, head to Ape Atoll and speak to any of the three wise monkeys in The Temple of Marimbo. After some conversation with the monkeys, admit to them that you are really human. They will ask for proof, meaning that you will have to lead the monkey guard away from the three monkeys in order to safely show them your true form.
16 banana method.
10 banana method.
Take some green bananas from the crate to the east of the monkeys and lay a trail from the monkey to the crate by dropping bananas on the ground at regular intervals, starting from the northwest to the southwest, southeast, then northeast in the room. There should not be more than 2 spots between bananas, counting a diagonal move as one. For example, if one banana is 3 steps northeast of another, there are only two squares directly between them, so the guard will follow the trail from one to the next. It is recommended to have 10 (or 16 for the less-efficient method) bananas in your inventory when laying the bananas. If the trail ends at any time before the guard is within sight of the crate, he will return to his original position by the monkeys. As such, it is recommended to gain a head start on the trail as depicted in the pictures to the right.
Pay close attention to the location of other monkey guards which may eat bananas that are placed near them. The banana trail must be placed quickly, as the bananas become mouldy and disappear after a short time. In order to gain a head start, lay up to the green circles as shown in the images to the right before placing the banana that will trigger the monkey guard to start following the trail. While the guard is following the beginning of the trail, the remaining bananas must be quickly placed, leading to the crate. Pre-laying the green section of the trail makes it much easier as the bananas do not have to be placed as quickly. However, it is not possible to pre-lay the whole trail before luring the monkey guard as the bananas will start going bad before the trail is complete.
Quick players can opt to lure the monkey guard to the crate without pre-laying parts of the trail, eliminating concerns of the bananas getting mouldy over time because the guard will always be close behind. If the bananas are dropped in sequence quickly enough, the guard will not catch up to the player, though this may be challenging to pull off.
When laying the trail, keep in mind that the guard cannot see around the corners of the fire pits, and that the guard will not pick up bananas that rest on the trap door of the temple.
After successfully luring the guard to the crate, talk to the three wise monkeys again. After you remove your greegree to show them that you really are human, they urge you to quickly put it back on before you are discovered. They will then test your knowledge of Apmeken by asking you a couple of questions about her.
Oddly, if you reveal your human form before first talking, saying that the guard has gone, they will respond with shock but the questline will not proceed.
Respond that Apmeken has a baboon head when she is in a comical mood. Next, tell them that the only place the squirrel could sit that the monkey couldn't was "on the monkey's shoulders".
After you have gotten the three wise monkeys to trust you, talk to King Awowogei, who is in a building south of the temple. Convince him to start a colony. Make sure that you do not mention Apmeken to him or you will be imprisoned. He will immediately take up the idea, but insist on building one in Karamja. Persuade him that the desert would be a wiser option by telling him of the deliciousness and popularity of choc-ices. (There is no penalty for choosing the other options, and you'll just be booted back to the previous list of options after a short dialogue.) The king will get excited and commission choc-ices in the shape of a monkey (chimp ices).
Note: Before leaving Ape Atoll, it is recommend that you buy a m'amulet mould for 10 coins from Hamab's crafting stall directly west of the temple as it is needed to make the chimp ice. It won't be consumed, so feel free to use one in your bank if you have it.
Chimp ice deliveries
Items required: M'amulet mould, AT LEAST 1000 Coins for buying a chimp ice, more may be needed if you don't succeed the first time, as well as having the Ancient Magicks spellbook active in order to cast ice spells to periodically refreeze your chimp ice. Suggested: Coins for magic carpet rides, Ring of Charos (a) and access to the Fairy Ring network for quick transport to Nardah. (Code: DLQ)
Make your way to Nardah and talk with Rokuh, the owner of the Rok's Chocs Box. Talk to him about making a "special choc-ice" in the shape of a monkey, and he'll tell you that he needs a mould to make one. Allow him to borrow the m'amulet mould, and he'll agree to make you one for 1,000 coins. You can buy more later from him for the same price. He'll eagerly hand over a chimp ice, but he'll warn you that because of its irregular shape, the magic used to keep the treat frozen is seeping out. To keep the chimp ice from melting, you'll have to periodically cast one of the Ancient Magicks ice spells on it. However, Ice Rush has no effect on the chimp ice, so higher level ice spells will be required. In order to freeze the treat, left-click on the chimp ice to place it on the ground, then select an ice spell and cast it on the treat. After using one of the ice spells on the chimp ice, it will be returned to your inventory automatically.
The higher level the ice spell, the longer it will stay frozen. Ice Barrage, the most powerful ice spell, will keep the chimp ice from melting for approximately 1 minute. Ice Blitz will keep it frozen for about 45 seconds, and Ice Burst will keep it frozen for about 35 seconds.
You will be warned with a red message in your chatbox (similar to the messages warning you about dragonfire protection) of the status of your chimp ice.
- 20 seconds before melting, you will receive the message, "Your chimp ice is beginning to melt."
- 10 seconds before melting, you will receive the message, "Your chimp ice has nearly melted."
- When your chimp ice melts, you will receive the message, "Your chimp ice has melted."
It is useful to note that the timer on your chimp ice will not advance when using a bank, the world map, transportation such as carpets and eagles, and when talking to NPCs.
Chimp ice transportation methods
Items required: Any Monkey Greegree, Monkeyspeak amulet, a means of transportation other than teleportation, fairy rings, commercial gnome gliders, spirit trees, or grand tree pods (details below), runes for casting ice spells other than Ice Rush. Depending on the magic level of the spell as well as your chosen method of transportation, you may need greater or fewer runes, but bring enough for at least 25 casts. As many casts as possible is recommended in order to avoid running out. Suggested: Access to Oo'glog for the salt-water spring, having unlocked the hot air balloon route to the Tree Gnome Stronghold (Requires one magic log and Enlightened Journey), some form of antipoison in case you get poisoned on Ape Atoll, weight-reducing equipment and energy potions and food.
Due to the volatile nature of the magic holding the chimp ice together, you are limited in your methods of transport. In order to get to Ape Atoll, you will have to speak with Daero, Waydar, and Lumdo (three gnomes from the Monkey Madness quest). Daero can be found in the south-east corner on the first floor of the Grand Tree.
Before you take the ice or before you go to the island, at least make sure you have anti-poison, good armour, energy potions, and food. Also, players should turn off auto-retaliate so that they will not automatically fight back against attacking creatures as this makes it harder to re-freeze the chimp ice.
Note: If you run out of run energy and forgot potions, you can rest and pull up the world map at the same time, replenishing your energy without the ice melting.
Spellbook and tablet teleports are prohibited as well as fairy ring, commercial glider, spirit tree, grand tree pod, and jewellery teleports. Getting teleported by a random event will also melt the chimp ice! Below is a list of possible methods of getting to the Tree Gnome Stronghold:
- If you've done the Enlightened Journey quest and have unlocked the route to the Stronghold, a very fast method is to use the Shantay Pass to Port Sarim Jail "teleport". Talk to Shantay. Ask him: "What is this place?" Tell him: "I am definitely an outlaw, prepare to die!" Say: "Deport me to Port Sarim!" He will throw you in the Port Sarim Jail, from which you can easily escape by picking the lock. Once out, run to the balloon just north of the Crafting Guild and fly using the balloon transport system to the Gnome Stronghold. Note that doing so requires one magic log. (Remember you must keep your weight under 40kg in order to use the balloon network, so if you intend to use this method make sure that you don't weigh more than this amount before you set off.)
- Another method is to use the eagle transport system to get to Eagle's Peak and then run to the Gnome Stronghold. From Nardah, run almost due North to the desert eagle lair located to the north of Uzer Hunter area and use a rope (one spawns inside the lair) on an eagle to be transported. From there, you only need to run a short ways along the south fence of the stronghold to get to the Grand Tree.
- Another good method is to utilise the carpet rides from Nardah to Shantay Pass. Then run straight north to the Varrock balloon located near the lumberyard and the earth altar (some players use the canoe system up River Lum to Varrock). Fly using the balloon transport system to the Gnome Stronghold. As aforementioned, doing so requires one magic log.
- Using charter ships, you can travel from Port Sarim to Catherby for 250 coins with Ring of Charos (a) equipped, then run to Grand Tree, resting at the musician at the Fishing Guild on the way.
After reaching the Gnome Stronghold, speak to Daero (near Blurberry's Bar), then Waydar, then Lumdo in order to reach Ape Atoll. There is a 'chocpoint' here, so if your chimp ice melts, you may start again from Lumdo by speaking to him. (If you use the chocpoint, note that you don't have to pay another 1,000 Coins.)
Chimp Ice on Ape Atoll
Note on dying on Ape Atoll: You may be carrying significant amounts of runes and good armour, plus your Greegree, and if you die you will want to get back to your tombstone before it vanishes. You will almost certainly need a second Greegree to reach the tombstone without trouble. The volcanic ash stopping the gliders amazingly clears once you have reached the chocpoint, so you can take the glider in Al Kharid to start your journey back. You will be able to use the fairy rings as long as the Greegree in the tombstone is not your only Ninja monkey greegree. If you lose your Amulet of Monkeyspeak, you will have to remake it before you continue the quest (when you go to Zooknock, do not forget to replace your missing Greegree at the same time).
Run to the beginning of the canyon before the gates and wield a Greegree (any type except Zombie monkey greegree - you cannot run with this ). Note that you cannot try to wield a Greegree while in combat so kill anything attacking you or escape from combat while simultaneously keeping the chimp ice frozen. Try not to go far enough north to be attacked by archers and captured as a human. It is harder, albeit a little faster, to escape from the prison while keeping the chimp ice frozen (the NPCs helpfully tell you you should not have got captured). Once you drop the Chimp Ice, or let it melt, you can escape and return to Lumdo and try again.
Make sure that you have just recently re-frozen the chimp ice before entering the city so that you have enough time to go past the guards and out of their view in order to avoid being thrown into jail. An easy way to reach the king without being detected by the monkey archers is to run along the north coastline of the island, refreezing the chimp ice as necessary. Just northwest of the temple, refreeze and run south to the grassy place just westwards of Awowogei (where you hid during Monkey Madness). You can also hide upstairs in one of the houses. Make sure you have enough time before the chimp ice melts to reach the king before turning back into a monkey and talking to the guards. He will eat the treat and will immediately be convinced. He loves the chimp ice so much that he gives you a barrel of monkeys and grants you permission to set up the desert colony at last.
Founding the Colony
Items required: Monkeyspeak amulet, Ava's accumulator, Ring of Charos(a), Barrel of monkeys . Suggested: A Broomstick with teleport capabilities for quick access to the Shantay Pass and transportation to Draynor Manor.
The location for the new monkey colony.
Now that you have the king's permission to start a new colony, go to the wise monkeys and talk to them. When you ask where they want to go, they tell you to take them "between the camels humps". Add them to the barrel you were given and head out.
Head to the Kharidian Desert and release the monkeys at the camel hump-like mountain south-west of the Desert Mining Camp as shown on the map to the right (Using the Bandit Camp home teleport through the Lodestone Network is the fastest and most convenient way to get there, or alternatively, you can take a magic carpet to the Bedabin camp and run directly southeast). The monkeys will now demand that they be given a carpet route to and from their colony, and they advise you to speak to Ali Morrisane. Make sure you bring your ring of charos and head north to Al Kharid.
When you talk to Ali Morrisane about a new carpet route, he will refuse, saying that he has tried to start a route that way in the past, but lost all his supplies in a tragic storm. With a bit of persuasion, you'll urge him to tell you more. He will eventually tell you that he lost five metal crates in the desert and was planning on talking to Ava to see if there was some means of recovering them. Ask him for a model of the crate, and he'll give you one. However, if you offer to be hired for the task of recovering the crates, he'll refuse on the grounds that you might steal the carpets from him.
Head to Draynor Manor with the metal crate, a spade (can be obtained at the manor, toolbelt doesn't work like when digging during Treasure Trails) and Ava's accumulator; you can use a glory amulet, the explorer's ring, the Draynor Village home teleport or talk to Shantay to get to the area quickly. Make sure your accumulator is in your inventory, then speak to Ava, and she'll alter your accumulator and upgrade it to Ava's alerter. If she doesn't then try to use the metal crate on Ava to get an upgrade. In addition to an upgraded range bonus and all the perks it gave before, the alerter will warn you when you're near one of the metal crates. Ava hides the metal crate you gave her around the manor and asks you to find it to test the alerter. If you didn't bring one, grab a spade from the south-eastern room of the house and head near the fountain in the south-west corner of the lot. Make sure you are not wearing metallic armour, or the alerter will not work. The crate should be around the trees outside of the manor and a little north-east of the fountain, you will know the right spot when your alerter says "Bwuk!" four times in a row. Dig up the crate and return to Ava to tell her of the good news.
Head back to the desert and search for the crates. They can be found in the area between Bedabin Camp and the Desert Mining Camp, north of the monkey camp. The approximate location of each of the crates is shown to the right, the exact location varies for each player. A level 41 scarab may appear when you try to dig up the metal crates. You will have to defeat it before trying to dig up the crate again.
Crate locations
The crates will contain one of the following:
- Nothing.
- An uncut sapphire and an uncut emerald. (*)
- An unnoted waterskin (4) and 5 noted waterskins (4).
- An uncut ruby and an uncut diamond. (*)
- Bundle of carpets.
It is recommended that you DO NOT cut any gems you receive. They can be used in the next part and will save you some money because uncut gems are much more expensive on the G.E. than the other items you'll be required to bring.
Bring the carpets back to the three wise monkeys and talk to them. They will then set up carpet routes with the Shantay Pass and southern Pollnivneach. (Note: Routes related to the monkey colony are completely free, unlike Morrisane's other carpet routes.) Also, Iwazaru will hand you a book, Economy building for dummies, detailing what items you'll need to build the colony. Return to a bank, gather the supplies, and proceed with the next section. The most convenient bank is probably the chest at the Shantay Pass which can be easily reached through the new carpet route.
Note: If the carpets are lost, talk to Ali Morrisane with a ring of charos (a) on to get another bundle.
Building the Colony
Note: The Economy Building for dummies book must've been read in order to be able to start this section.
Required:
- May be carried in toolbelt
- Must be unnoted
- 6 teak planks
- 10 bolts of cloth
- 1 rope
- Suggested to note
- 10 bananas (can be stored in two baskets, until 8 additional inventory spaces are available)
- 3 knives
- 3 waterskins (4)
- May be put in gem bag
- May be worn
- 1 pair of desert boots
- 1 desert robe
- 1 desert shirt
- 1 monkeyspeak amulet
Suggested:
- Use a beast of burden to carry more items.
- Use a gem bag to carry the four gems in only one inventory space.
- Note the bananas, knives, and waterskins.
- Carry tools in your toolbelt to save space.
- Wear the desert clothing while carrying it so it doesn't take inventory space.
The most time and cost-efficient way to return to the colony is by using the Bandit Camp home teleport, then going north and around the mountain camel's "head."
To start building, remove the rubble from the four building spots with a spade.
- Build the stalls in the stall plots and build the tent in the tent plot. For this you will need a hammer, a saw (a crystal saw will not work), a knife and:
- 6 teak planks and 6 bolts of cloth for the stalls (2 planks and 2 cloth for each stall).
- 4 bolts of cloth and a rope for the tent.
When the stalls are built, they must be stocked with goods (if you don't have a knife on your toolbelt, consider building the tent BEFORE stocking the general stall in order to avoid losing the last knife, where one is needed to build the tent).
- Use the uncut gems found earlier to make a gem stall.
- Use 10 bananas to make a banana stall.
- Lastly, use 3 knives, 3 waterskins (4), a pair of desert boots, a desert robe, and a desert shirt to make a general store.
Arming the Colony
Items required: Monkeyspeak amulet and Gorilla greegree (MUST be a gorilla-type greegree, others won't work). Suggested: Food for healing damage from failed pickpocketing attempts and runes and bananas for Ape Atoll teleport OR having the Ape Atoll Agility Course Fairy Ring shortcut unlocked (Code: CLR).
After building the colony, the wise monkeys will complain that they aren't adequately protected and send you to steal 6 monkey knives from the king's guards. The wise monkeys tell you that you will need great strength to knock them out and pickpocket them, so you will need a gorilla greegree. Head back to Ape Atoll and find the building with the monkey knife fighters; it is located just east of the building with the Monkey Child. Receiving a monkey knife is fairly common, but it is recommended that you bring some food because the knife fighters hit somewhat hard when stunning you due to a failed pickpocketing attempt. It is helpful to note that you can pickpocket the fighters twice per knockout. If you try to pickpocket the fighters before knocking them out, you might be thrown in jail if you fail. Additionally, failing to knock out the monkeys three times in a row will also result in you being thrown in jail.
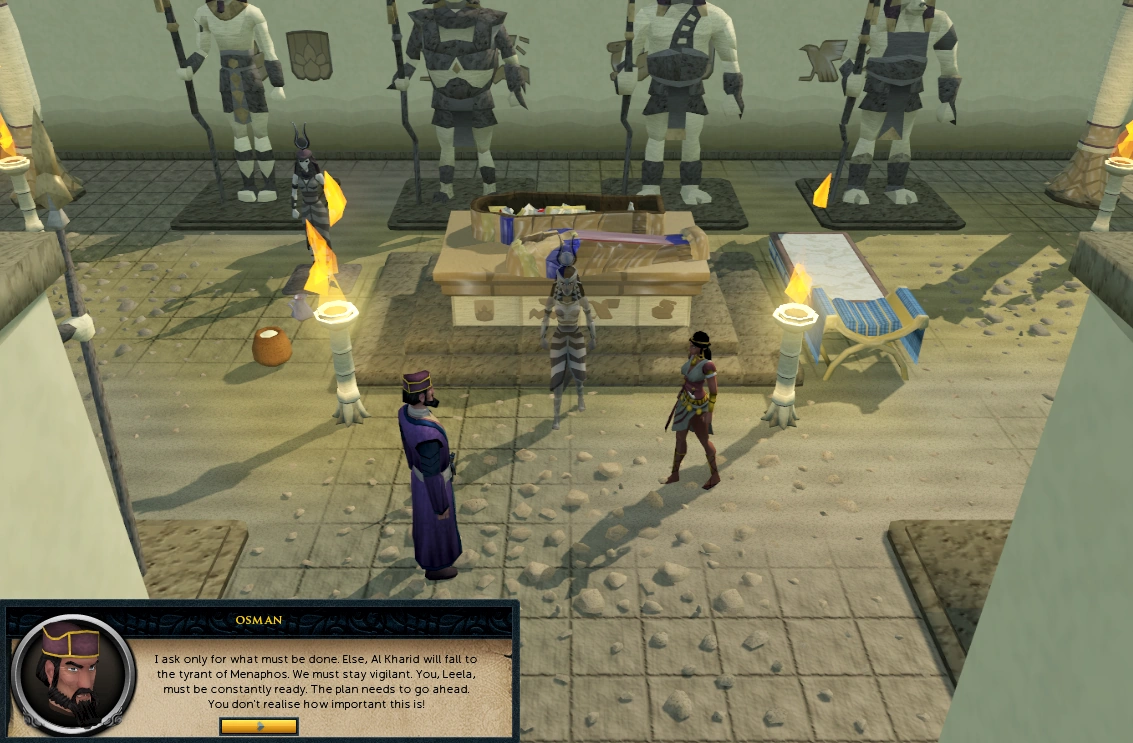

Osman confronts Leela.
After collecting all 6 knives, return to the three wise monkeys and hand the knives over. After handing the knives over, talk to the three wise monkeys again to find out they are finally done with your help.
Not Over Yet...
Items required: Monkeyspeak amulet and a ghostspeak amulet. Suggested: Coins for magic carpet rides, Ring of Charos (a) and access to the Fairy Ring network for quick transport to the Uzer Mastaba. (Code: DLQ)
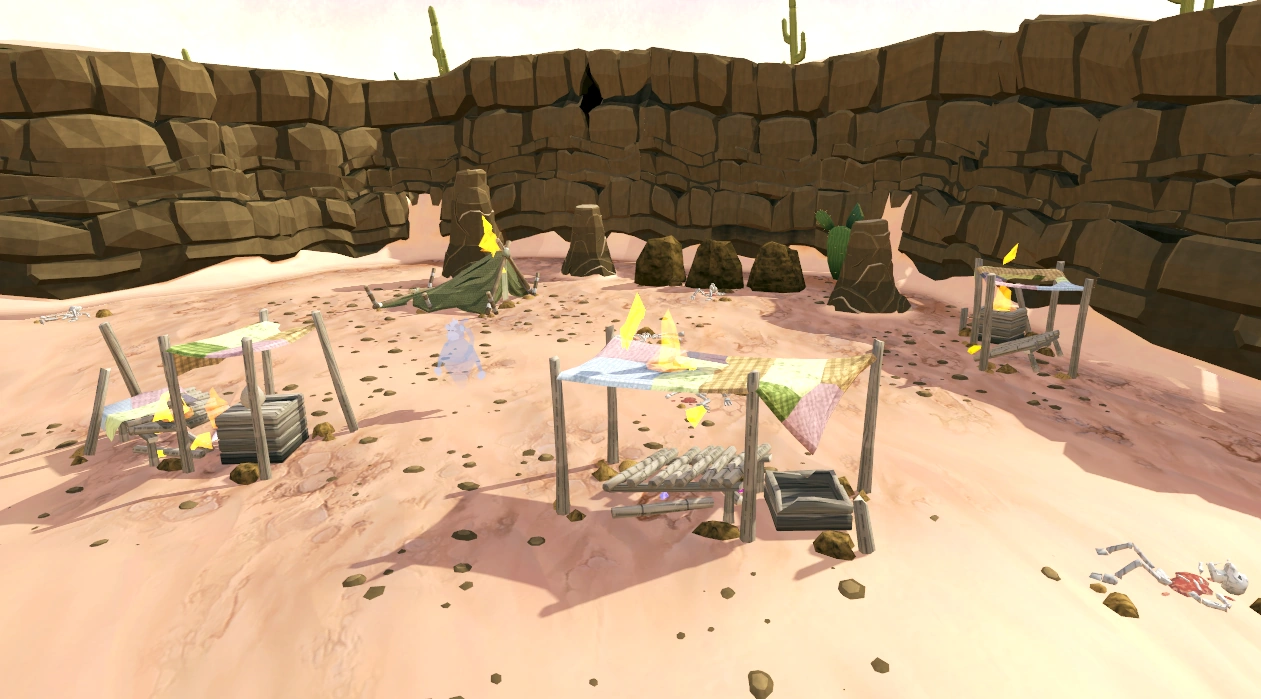
The ruins of the colony.
After handing over the knives to the three wise monkeys, return to Senliten. After congratulating you on what a great job you've done, she pauses and notes that something is wrong. When you return to the colony, it will be in ruins (you will not be able to use the monkey colony magic carpet routes to return right now). Investigate a corpse to make a ghost monkey appear. You won't be able to understand it unless you somehow figure out how to get the effects of both the monkeyspeak amulet and the ghostspeak amulet. Use one of the amulets on the other to combine them to make a cramulet, and then try to talk to the ghost monkey again. (You can additionally combine a camulet and a catspeak amulet with the cramulet. Note however that if you use an enchanted catspeak amulet that it will lose its enchantment.) With your newly combined amulet, the ghost monkey will tell you that three "butchers" kidnapped the three wise monkeys and massacred everyone else in the colony, although he will claim that he somehow managed to stay alive. The ghost monkey will tell you that he knows where they are keeping Iwazaru and will direct you to the Pollnivneach Slayer Dungeon.
Note: The three bosses' magic attacks are a combination of magic and ranged. Therefore, only part of the attack can be negated by using prayers. It is recommended to wear armour that will provide a high defence against one attack style and to pray against the other.
Note: A Dwarf Multi-cannon cannot be used against any of these bosses.
Leeuni


Leeuni, the embodiment of Apmeken's stolen voice.
Leeuni's location.
Leeuni is the first boss monster encountered, a creation of Amascut. She is located in the Pollnivneach Slayer Dungeon where the Banshee Mistress was located during Smoking Kills. However, killing a mighty banshee to pass the barrier is not required this time.
Leeuni uses standard melee attacks and a more dangerous projectile attack that deals both Ranged and Magic damage simultaneously. The Magic portion of the projectile attack is much more powerful. Thus, using either Protect from Magic or Deflect Magic is highly advised as only one style of the projectile attack can be prayed against. If the attack is not prayed against, Leeuni will be able to hit close to or over 500 damage (in two separate hits of 250+). Note that it is highly recommended to stay within melee range of Leeuni if you choose to use Magic or Ranged, as she will be able to deal constant hits over 250 with Ranged if you protect against Magic. Her Melee attacks are significantly less accurate than her Ranged ones, but can still hit up to 272 if she gets lucky.
During the fight, Leeuni can force the player's helmet off (she says "Let me see those beautiful lips!" or something similar when she does this), which can cause the player to take 100 damage from the smoke and lower their player's stats if they don't re-equip it fast enough. One way that players can avoid this is to keep their inventory full at all times, but if she cannot remove the player's helmet because of this, she will instantly deal 300 damage instead (this is unavoidable, and she says "Stop hiding those lips from me!" or something similar when it occurs). The second and highly recommended way is to keep 1 item slot free and watch your inventory, so that you may quickly re-equip your helmet before the smoke can damage you and reduce your stats.
Leeuni occasionally teleports around the room, but using Ranged seems to lower its occurrence. She appears to be weak to melee (stab and slash) and ranged attacks, with melee being the more effective and recommended option.
As Leeuni is capable of hitting high damage fairly frequently and quickly, high healing foods such as rocktails or Saradomin brews are recommended. If players wish to prevent her from removing their helmet however, then saradomin brews have the advantage, as they leave an empty vial when used, but as stated before this is strongly discouraged as Leeuni will deal 300 points of unavoidable damage whenever she attempts to remove the player's helmet and fails due to the player having a full inventory (and she's likely to use the helmet-removing move a lot throughout the fight). If using the Saradomin brew method, remember to bring approximately one super restore potion for every three Saradomin brews in their inventory. Summoning familiars such as beasts of burden, high-level healing familiars such as titans or unicorns, or combat familiars such as spirit kyatts and iron or steel titans may prove to be helpful during the fight.
If you should die, your grave appears outside of the well. This can easily be reached using a chipped house teleport tablet or a slayer ring.
After defeating Leeuni, talk to Iwazaru, then return to the colony. (Since he doesn't really speak, you aren't actually required to have the cramulet in order to bring him back to the colony. You still need it for the ghost monkey though.) Speak to the ghost monkey again and he says that he's managed to locate Mizaru. Mizaru is being held hostage in the Kalphite Hive in a room adjacent to that of the Kalphite Queen.
Ayuni

Ayuni, the embodiment of Apmeken's stolen sight.
Ayuni's location.
Note: You will need a cramulet for after the battles with Ayuni and Eruni. If you do not bring one, you will have to get one after the fight and return to rescue the monkeys. (the demons will have been defeated)
Ayuni is the second boss monster encountered and can be accessed through a tunnel in the north wall of the Kalphite Queen's lair. As it is very likely that you will be attacked by the Kalphite Queen or one of the guardians, it is useful to bring an anti-poison for the trip, though note that there is a glitch that can cause the unicorn stallion's healing ability to not cure your poison. It's also necessary to bring two ropes to get down the tunnel entrance if you have never visited the Kalphite Queen. You might want to turn your protect/deflect magic prayer on when near the Kalphite Queen in case she locks on to you. The cramulet will also be necessary as Mizaru will explain what is going on after you save him. You may want to get to Ayuni first and quickly exit her lair through a secret entrance; this will unlock a shortcut near the Colony for quick future access to Ayuni or, after the quest is completed, a room full of kalphites and one click away from the Queen.
Ayuni's most common method of attack is melee, which hits up to 253 life points. This attack is very accurate and deals a lot of damage, so beware. When she is not within melee range of her opponent she will resort to projectile attacks, which, like Leeuni's projectile attacks, deal both ranged and magic damage simultaneously, and hence cannot be completely blocked by prayer. Ayuni's weakness is her speed. She can only move at about half the speed of a walk. Therefore, it is advisable to use a hit-and-run technique to defeat her.
Note: For this battle, it is extremely useful to take a dip in the salt water spring in Oo'glog as you will be doing a lot of running. Alternatively, you can use a spirit terrorbird as it can double as both a beast of burden and a replenisher for your run energy using its tireless run scrolls. The explorer's ring has also proven useful with run-replenish.
When fighting Ayuni, avoid letting her attack you with melee as her melee attacks are extremely accurate and drain prayer (up to 250 points per hit). The best tactic is to use Protection from Magic (or Deflect Magic) and range her from afar, this method requires the least amount of food. Also note that like her sister, she is able to teleport around the room which could put her within melee range, so strong food like Rocktails or Tuna potatoes are recommended. Saradomin brews are not recommended, but if you decide to go that route, remember to take one super restore per three Saradomin brews. If you're too far from Ayuni she will still hit you while you're frozen.
Players may also use Ice Barrage to momentarily freeze Ayuni. However, the spell will not freeze her for as long as it would another player. Once again, a beast of burden, high healing familiar, or combat familiar is recommended for this fight. Safespotting Ayuni no longer works because you will be unable to hit Ayuni if she cannot reach you.
If you die, your gravestone appears outside the Kalphite Hive in the desert. If you respawn in Lumbridge, you can run back to your grave in under 2 minutes.
After the battle, talk to Mizaru, and he will tell you what is going on. After a short history of his life, return to the colony with him. Speak again with the ghost monkey, and he will tell you that he has found the location of the last monkey, somewhere in the ruins of Uzer. Prepare for the final fight and head over to Uzer to rescue the last monkey.
Note: It is recommended to leave the room from the hole to the east to unlock the 'backdoor' entrance so the room can be more easily accessed in the future.
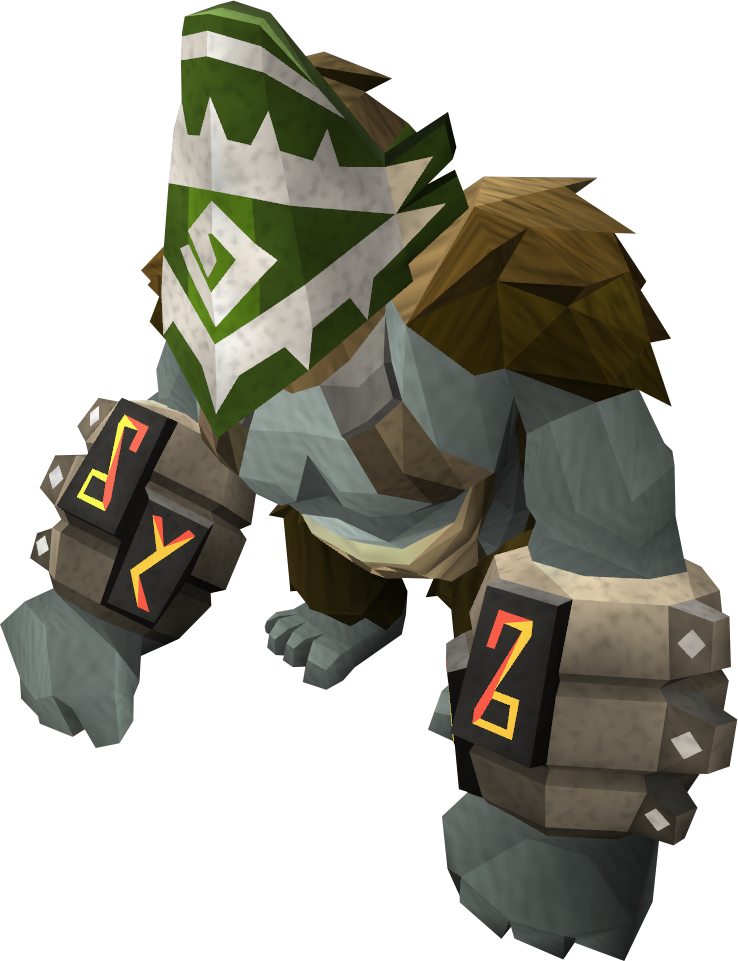
Eruni
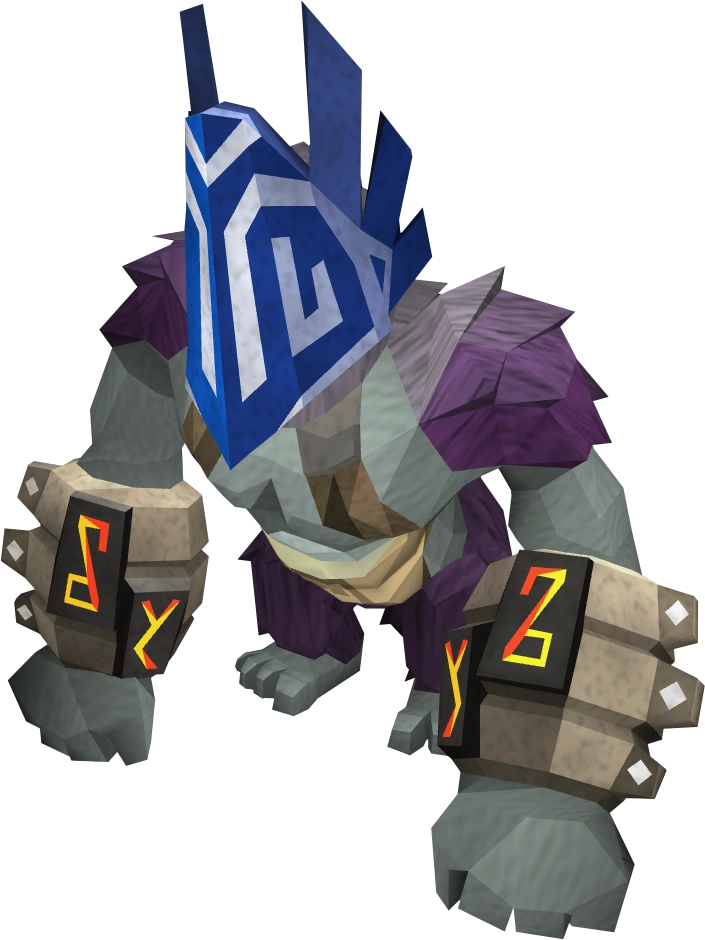

Eruni, the embodiment of Apmeken's stolen hearing.
Eruni's location.
Eruni is the final boss of the quest. She is located through the portal to the demonic realm where Agrith-Naar was defeated in the Shadow of the Storm quest. Unlike her sisters, Eruni will remain stationary in the centre of the room for the entire fight. Also unlike her sisters, she has no melee attack and only uses the projectile attack that deals simultaneous ranged and magic damage and hence can only be partially blocked.
She spawns 1 Lesser Demon at the beginning of the fight, 2 when she is at 75% health, 3 at 50% health, and finally 4 demons at 25% health. When the demons are spawned, she becomes invulnerable, and the demons must be slain for her to become vulnerable again. Once Eruni reaches one of the health levels where she spawns demons, her health will not go back up as long as the player stays in the room, so such things as an Enhanced Excalibur, resting or the Lunar spell Dream are viable means of healing, especially when used with a regen bracelet. Players can easily heal and kill the demons behind the horned pillars around the room, Eruni will not attack you while you are there.
The magic portion of Eruni's projectile attack is extremely powerful and deadly (capable of hitting well over 250), so Protect from Magic or Deflect Magic should be used, though her ranged attacks will still cause significant damage (usually in the low 200s). Because of this, a couple of Prayer potions are a good idea for players with less than approximately 70 Prayer. High level melee armour keeps the ranged attacks from hitting as often, but healing is still required. Also, the pillars around the room can be used for cover while healing and while killing the demons Eruni spawns. Guthan's armour, in conjunction with hiding behind the various pillars in the room, can help restore hitpoints by siphoning health from the spawned demons. While killing the lesser demons, players with 92 Prayer can use Soul Split to heal if they are using ancient curses.
With a strong weapon, a magic-blocking prayer, strong melee gear, and using the pillars for cover, this fight should be easier than the other two bosses and need much less food. A single inventory of food may be sufficient, but a full beast of burden is good insurance. Alternatively, a spirit kyatt with ambush scrolls could be used. The Abyssal vine whip's special attack seems to be unusually effective against Eruni.
After defeating Eruni, speak to Kikazaru who will return you to the monkey colony.
Finishing up
Items required: Cramulet. Suggested: Coins for magic carpet rides and access to the Fairy Ring network for quick transport to the Uzer Mastaba. (Code: DLQ)
Once back at the colony, speak to the three wise monkeys, and Apmeken will appear and speak to you. As the three wise monkeys cannot see her, they will think that you have gone insane. After a short chat with Apmeken, the camp will be rebuilt and you can return to Senliten to finally complete the quest. If you click elsewhere during the conversation, it will reset. Senliten will thank you for all that you have done, and reward you for your efforts. Quest complete!
Rewards
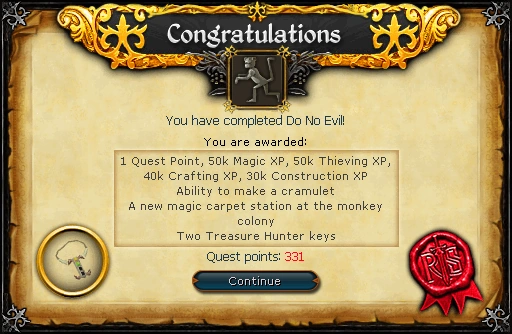
- 1 Quest Point
- 50,000
 Magic experience
 - 50,000 Thieving experience
- 40,000 Crafting experience
- 30,000 Construction experience
- New magic carpet destinations.
- Cramulet and the ability to add other speaking amulets to it (camulet and catspeak amulet).
- The ability to upgrade Ava's accumulator to Ava's alerter.
- Ability to run chimp ice for further rewards.
- Ability to pickpocket monkey knife fighters.
- Access to a passageway from the desert (rockslide south of the Kalphite Hive entrance) to a new area with Kalphites. This is unlocked if you left the room from the hole while you were in it.
- Access to the Monkey colony.
- Find one "free" Clue scroll (elite) with Ava's Alerter. This Clue scroll can be found in either Meiyerditch, on the Iceberg, in Isafdar or on Lunar Isle.
- 2 extra spins on the Squeal of Fortune.
Music unlocked
Development team
- Developer: Seb D
- Graphics: Alex R, James W
- Quality Assurance: Thomas H, Hakan S, Adam D
- QuestHelp: David O
- Audio: Ian T, Adam B
Trivia
- The quest title likely refers to a Chinese saying of "See no evil, Hear no evil, Speak no evil, Act no evil" from the Chinese scholar Confucius. It may just as well be a reference to the Three Wise Monkeys of Japanese proverb, embodying this quote as one covers his eyes (see no evil), yet another who covers his ears (hear no evil),and a final who covers his mouth (speak no evil). They relate almost perfectly with the apes featured in the quest itself.
- There are also supposed to be Four Wise Monkeys instead of Three.The last is Shizaru (do no evil) hence the quest name.
- On the first day of release in the knowledge base, the reward spoiler was: "Iwazaru tried to mime the rewards, Kikazaru thought we were asking about 'cheeseboards', and Mizaru mistook the reward for a choc ice. Come back tomorrow when we can piece together the truth".
- After the quest the Adventurer's Log reads: 'After much monkey business, colony building and general chimpish shenanigans, I returned the monkeys to the desert, uncovered an ancient feud and restored Apmeken.'
- The names of the three bosses hint at their origins: "Lee" for lips, "Ay" for eyes, and "Er" for ear.
- Ayuni translates into "My eyes" in Arabic.
- It can be seen on the bosses masks the sense in which they possess. Leeuni has a caricature of a pair of lips on her mask, Eruni a pair of ears and Ayuni an eye.
- Whenever a level requirement is reached, a message notifying the player of Do No Evil is not given. This has not yet been fixed.