Tag: sourceedit |
(cleanup) |
||
| (41 intermediate revisions by 32 users not shown) | |||
| Line 1: | Line 1: | ||
{{Otheruses|def=no|other uses|Dominion}} |
{{Otheruses|def=no|other uses|Dominion}} |
||
| − | {{Safe |
+ | {{Safe|minigame}} |
{{HasStrategy}} |
{{HasStrategy}} |
||
{{Infobox minigame |
{{Infobox minigame |
||
| Line 19: | Line 19: | ||
}} |
}} |
||
[[File:Dominion Tower icon.jpg|left]] |
[[File:Dominion Tower icon.jpg|left]] |
||
| − | The '''Dominion Tower''' is the tallest building in [[Gielinor]], located in the [[Kharidian Desert]], on the eastern bank of the [[River Elid]]. Constructed by an individual known as [[The Founder]], it houses a [[minigame]] which gives players the opportunity to re-fight various [[ |
+ | The '''Dominion Tower''' is the tallest building in [[Gielinor]], located in the [[Kharidian Desert]], on the eastern bank of the [[River Elid]]. Constructed by an individual known as [[The Founder]], it houses a [[minigame]] which gives players the opportunity to re-fight various [[quest bosses]]. The rewards include combat [[experience]], new consumable items, and [[Dominion gloves|dominion glove]] sets. The history of the Tower is revealed in the [[Dominion journal]], which is acquired as one beats bosses. A [[Strange face|stone face]] manages the Tower, which is said to come from ancient times. |
| − | + | During a match, you cannot exit the arena gates or teleport out of the arena. Therefore, it is recommended you do not bring teleport items, unless they have another use that will help you in the matches. Players can win some items like [[runes]], [[arrows]], and [[bolts]] that can be sold, but these only appear in small quantity, and are highly unlikely to cover the costs of consumables used during matches. The rewards, however, will often include food or potions specifically for use within the tower, so it is possible to minimise the amount of money spent on supplies by using these instead. In general, players use the tower for prestige or to gain its non-tradeable rewards rather than to make money. |
|
{{ToC|left}} |
{{ToC|left}} |
||
| − | {{Relative location |
||
| − | |location = Dominion Tower |
||
| − | |north = [[Desert eagle]] lair |
||
| − | |south = [[Uzer Hunter area]] |
||
| − | |east = [[Ruins of Uzer]] |
||
| − | |west = [[Shantay Pass]] |
||
| − | }} |
||
{{Clear}} |
{{Clear}} |
||
| Line 41: | Line 34: | ||
==Getting there== |
==Getting there== |
||
| + | * Use a [[Dominion medallion]] or [[Super dominion medallion]] to teleport there (requires a minimum of being able to compete in the Dominion Tower (110 quest points and 20 of the 38 quests completed); if able to compete in the Dominion Tower, one can obtain the medallion on a previous trip to the tower). Both versions of the medallion allows a maximum of three teleports per day to the tower. |
||
| − | [[File:Groundfloor of dom tower.png|right|thumb|A map of the ground floor]] |
||
| + | * If the player's player-owned house is located in the Menaphos Port district or if by using a Menaphos tablet (requires the Love Story quest), players can teleport to Port district's dock, use right-click "Travel" option on [[Portmaster Kags]] and choose Dominion Tower, this is one of the quickest ways to get to Dominion Tower. Using the teleport option on a [[Slayer codex]] with at least 50 souls added also gets you within a few steps of the Portmaster. |
||
| − | * Use a [[Dominion medallion]] or [[Super dominion medallion]] to teleport there (requires obtaining the medallion on a previous trip to the tower). Both versions of the medallion allows a maximum of three teleports per day to the tower. |
||
* Go through the [[Shantay Pass]], run East-South-East to the River Elid, cross the bridge and go slightly North to reach the tower. The quickest transport to the Pass is by using a [[broomstick]], or a charged [[Amulet of glory]]. |
* Go through the [[Shantay Pass]], run East-South-East to the River Elid, cross the bridge and go slightly North to reach the tower. The quickest transport to the Pass is by using a [[broomstick]], or a charged [[Amulet of glory]]. |
||
* Use the [[Eagle transport system]] to travel to the [[Uzer Hunter area]] and run south-west (requires completing the [[Eagles' Peak]] quest). |
* Use the [[Eagle transport system]] to travel to the [[Uzer Hunter area]] and run south-west (requires completing the [[Eagles' Peak]] quest). |
||
| Line 54: | Line 47: | ||
:''Note:'' Spectating has no requirements. |
:''Note:'' Spectating has no requirements. |
||
| − | * A [[combat level|combat]] level of 110 is required. |
||
* Completion of at least 20 of the following [[quests]] are required to start the [[minigame]]. Only bosses of quests the player has completed will be available to fight in the tower, so the more quests the player has completed, the more bosses are available: |
* Completion of at least 20 of the following [[quests]] are required to start the [[minigame]]. Only bosses of quests the player has completed will be available to fight in the tower, so the more quests the player has completed, the more bosses are available: |
||
[[File:Dawn (monster).png|right|200px|Dawn, from The Death of Chivalry, is one of the many available bosses to fight.]] |
[[File:Dawn (monster).png|right|200px|Dawn, from The Death of Chivalry, is one of the many available bosses to fight.]] |
||
{{list|c=2| |
{{list|c=2| |
||
* [[The Chosen Commander]] ([[Sigmund]]) |
* [[The Chosen Commander]] ([[Sigmund]]) |
||
| − | * [[A Void Dance]] ([[Black Knight |
+ | * [[A Void Dance]] ([[Black Knight guardian]]) |
* [[Between a Rock...]] ([[Arzinian Being of Bordanzan]]) |
* [[Between a Rock...]] ([[Arzinian Being of Bordanzan]]) |
||
* [[Birthright of the Dwarves]] ([[Chaos Grimsson]] and [[Chaos Hreidmar]]) |
* [[Birthright of the Dwarves]] ([[Chaos Grimsson]] and [[Chaos Hreidmar]]) |
||
| − | * [[Blood Runs Deep]] ([[Dagannoth |
+ | * [[Blood Runs Deep]] ([[Dagannoth sentinel]]s, [[Dagannoth Mother (Blood Runs Deep)|Dagannoth Mother]]) |
* [[The Branches of Darkmeyer]] ([[Vanstrom Klause]]) |
* [[The Branches of Darkmeyer]] ([[Vanstrom Klause]]) |
||
* [[Contact!]] ([[Giant scarab]]) |
* [[Contact!]] ([[Giant scarab]]) |
||
* [[The Curse of Arrav]] ([[Arrav]]) |
* [[The Curse of Arrav]] ([[Arrav]]) |
||
| − | * [[Diamond |
+ | * [[Diamond in the Rough]] ([[Apep]] and [[Heru]]) |
* [[The Death of Chivalry]] ([[Dawn]]) |
* [[The Death of Chivalry]] ([[Dawn]]) |
||
* [[Demon Slayer]] ([[Delrith]]) |
* [[Demon Slayer]] ([[Delrith]]) |
||
| Line 72: | Line 64: | ||
* [[Desert Treasure]] ([[Dessous]], [[Fareed]], [[Damis]], and [[Kamil]]) |
* [[Desert Treasure]] ([[Dessous]], [[Fareed]], [[Damis]], and [[Kamil]]) |
||
* [[Dragon Slayer]] ([[Elvarg]]) |
* [[Dragon Slayer]] ([[Elvarg]]) |
||
| − | * [[Dream Mentor]] ([[The Inadequacy]]; [[The Everlasting]] and [[The Illusive]]; |
+ | * [[Dream Mentor]] ([[The Inadequacy]]; [[The Everlasting]] and [[The Illusive]]; [[The Untouchable]]) |
* [[Family Crest]] ([[Chronozon]]) |
* [[Family Crest]] ([[Chronozon]]) |
||
* [[The Firemaker's Curse]] ([[Char]]) |
* [[The Firemaker's Curse]] ([[Char]]) |
||
| Line 82: | Line 74: | ||
* [[Horror from the Deep]] ([[Dagannoth Mother (Horror From The Deep)|Dagannoth Mother]]) |
* [[Horror from the Deep]] ([[Dagannoth Mother (Horror From The Deep)|Dagannoth Mother]]) |
||
* [[Legends' Quest]] ([[Nezikchened]]) |
* [[Legends' Quest]] ([[Nezikchened]]) |
||
| − | * [[Lost City]] ([[Dramen |
+ | * [[Lost City]] ([[Dramen tree spirit]]) |
* [[Love Story]] ([[Zenevivia]]) |
* [[Love Story]] ([[Zenevivia]]) |
||
* [[The Mighty Fall]] ([[Yelps]]; [[Lol]]) |
* [[The Mighty Fall]] ([[Yelps]]; [[Lol]]) |
||
| Line 94: | Line 86: | ||
* [[Ritual of the Mahjarrat]] ([[General Khazard]] and [[Lucien]]) |
* [[Ritual of the Mahjarrat]] ([[General Khazard]] and [[Lucien]]) |
||
* [[Shadow of the Storm]] ([[Agrith Naar]]) |
* [[Shadow of the Storm]] ([[Agrith Naar]]) |
||
| − | * [[Spirits of the Elid]] ([[Grey |
+ | * [[Spirits of the Elid]] ([[Grey golem]], [[Black golem]], and [[White golem]]) |
* [[The Great Brain Robbery]] ([[Barrelchest]]) |
* [[The Great Brain Robbery]] ([[Barrelchest]]) |
||
* [[The Temple at Senntisten]] ([[Ice demon]]) |
* [[The Temple at Senntisten]] ([[Ice demon]]) |
||
* [[The Void Stares Back]] ([[Pest Queen]]) |
* [[The Void Stares Back]] ([[Pest Queen]]) |
||
| − | * [[TokTz-Ket-Dill]] ([[TokTz-Ket-Dill]]) |
+ | * [[TokTz-Ket-Dill]] ([[TokTz-Ket-Dill (monster)|TokTz-Ket-Dill]]) |
* [[Troll Romance]] ([[Arrg]]) |
* [[Troll Romance]] ([[Arrg]]) |
||
* [[Troll Stronghold]] ([[Dad]]) |
* [[Troll Stronghold]] ([[Dad]]) |
||
| Line 109: | Line 101: | ||
==Modes== |
==Modes== |
||
[[File:Domarena.png|thumb|The arena in which one fights]] |
[[File:Domarena.png|thumb|The arena in which one fights]] |
||
| + | * '''Climber''' allows the player to ascend through the levels of the tower, facing a randomly chosen boss scenario on each floor. The maximum number of rounds in this mode is 249. After each victory, an effect will be applied and will persist through all subsequent fights in that attempt. While a few of these will be beneficial, most of them will be handicaps. Players will be able to replenish food and change equipment between fights. |
||
| − | [[File:Dom tower ground floor.jpg|right|thumb|The arena floor]] |
||
| − | * '''Climber''' allows the player to ascend through the levels of the tower, facing a randomly chosen boss scenario on each floor. The maximum number of rounds in this mode is 249. After each victory, an effect will be applied and will persist through all subsequent fights in that attempt. While a few of these will be beneficial, most of them will be handicaps. Players will be able to replenish food and change equipment between fights. |
||
* '''Endurance''' requires the player to fight as many bosses as they can on a single inventory of food/equipment, so whatever they take in needs to last. Access to the bank chest is not allowed. |
* '''Endurance''' requires the player to fight as many bosses as they can on a single inventory of food/equipment, so whatever they take in needs to last. Access to the bank chest is not allowed. |
||
| − | * '''Special''' presents a range of challenging, treacherous and |
+ | * '''Special''' presents a range of challenging, treacherous, and often strange encounters to test the player's skill and ingenuity. |
* '''Rumble''' lets players team up with up to four other adventurers to battle multiple bosses together on the roof of the tower. This mode does not increase general kill count, but has a separate one. It also presumably does not award journal pages. |
* '''Rumble''' lets players team up with up to four other adventurers to battle multiple bosses together on the roof of the tower. This mode does not increase general kill count, but has a separate one. It also presumably does not award journal pages. |
||
| − | * '''Freestyle''' lets players fight on their own terms. There are no rewards (no dominion factor or boss kill counts) for using this mode, but it’s a way to practice against monsters before fighting them under handicap conditions, have the experience of fighting a boss again, or just to show off fighting a boss under the player's own crazily difficult rules. |
+ | * '''Freestyle''' lets players fight on their own terms. There are no rewards (no dominion factor or boss kill counts) for using this mode, but it’s a way to practice against monsters before fighting them under handicap conditions, have the experience of fighting a boss again, or just to show off fighting a boss under the player's own crazily difficult rules. Though there is no dominion factor to be gained, players '''can''' still gain experience in this mode. |
* '''Spectator''' allows players to view the fights of another player who has the spectators option enabled. One can tag friends with their dominion medallion to directly watch them. |
* '''Spectator''' allows players to view the fights of another player who has the spectators option enabled. One can tag friends with their dominion medallion to directly watch them. |
||
| Line 127: | Line 118: | ||
====Handicaps==== |
====Handicaps==== |
||
| − | [[File:Dominion Tower handicaps interface.png|thumb|left| |
+ | [[File:Dominion Tower handicaps interface.png|thumb|left|The handicap roulette.]] |
When entering doors to begin a fight on a floor, the player receives one new handicap. Many handicaps hinder the player, although some handicap the monsters instead. There are 22 handicaps in total, and every handicap is active on every floor once it is received. A player must suffer each and every one of them at least once to unlock the [[Dominion sword]]. |
When entering doors to begin a fight on a floor, the player receives one new handicap. Many handicaps hinder the player, although some handicap the monsters instead. There are 22 handicaps in total, and every handicap is active on every floor once it is received. A player must suffer each and every one of them at least once to unlock the [[Dominion sword]]. |
||
| Line 144: | Line 135: | ||
| '''Reduced Adrenaline''' |
| '''Reduced Adrenaline''' |
||
| 70 |
| 70 |
||
| − | | You gain |
+ | | You gain 20% less adrenaline from your attacks. This does not affect other sources of adrenaline gain, such as [[adrenaline potion]]s |
|- |
|- |
||
|[[File:Reduced Magic Attack.png|center]] |
|[[File:Reduced Magic Attack.png|center]] |
||
| Line 161: | Line 152: | ||
| '''No Prayer''' |
| '''No Prayer''' |
||
| 130 |
| 130 |
||
| − | | You cannot use any prayers in battle, including [[Ancient Curses]]. You will also be blocked from using them before battle, meaning you cannot deliberately drain your own prayer to stop the [[Black Knight |
+ | | You cannot use any prayers in battle, including [[Ancient Curses]]. You will also be blocked from using them before battle, meaning you cannot deliberately drain your own prayer to stop the [[Black Knight guardian]] from healing. This handicap will also prevent the use of the [[Prayer book]] from [[The Great Brain Robbery]] to cure yourself of poison. |
|- |
|- |
||
|[[File:Monster Stun.png|center]] |
|[[File:Monster Stun.png|center]] |
||
| Line 220: | Line 211: | ||
Once during each match, you are healed to full health if you reach low health. All stats, prayer points and summoning points are restored to full. '''WARNING: Your adrenaline will also be drained to zero in doing so.''' |
Once during each match, you are healed to full health if you reach low health. All stats, prayer points and summoning points are restored to full. '''WARNING: Your adrenaline will also be drained to zero in doing so.''' |
||
| − | Note: This will '''not''' heal you if you are killed by poison or Char's fire wall. |
+ | Note: This will '''not''' heal you if you are killed by poison or certain types of typeless damage, such as Char's fire wall. |
|- |
|- |
||
|[[File:No Potions.png|center]] |
|[[File:No Potions.png|center]] |
||
| '''No Potions''' |
| '''No Potions''' |
||
| 50 |
| 50 |
||
| − | | You cannot drink potions during any match. This includes dominion potions and [[Saradomin brew|Saradomin brews]]. |
+ | | You cannot drink potions during any match. This includes dominion potions and [[Saradomin brew|Saradomin brews]]. This handicap also blocks the active ability of the [[Tireless blood essence]]. |
|- |
|- |
||
|[[File:No Power-ups.png|center]] |
|[[File:No Power-ups.png|center]] |
||
| Line 240: | Line 231: | ||
| '''[[Poison]] ''' |
| '''[[Poison]] ''' |
||
| -60 |
| -60 |
||
| − | | You are poisoned at the start of each match. The damage starts at 98 life points. You '''can''' cure yourself. If using the [[Poison purge]] [[Aura]], the poison can be an advantage, as the aura converts poison damage into life points. If wielding an [[Anti- |
+ | | You are poisoned at the start of each match. The damage starts at 98 life points. You '''can''' cure yourself. If using the [[Poison purge]] [[Aura]], the poison can be an advantage, as the aura converts poison damage into life points. If wielding an [[Anti-poison totem]] at the beginning of the match, you will not be poisoned at all. Also after you completed [[The Great Brain Robbery]] you can use the [[Prayer book]] (you must wear a [[Holy symbol]] ) to cure yourself from poison, though this method does not work if you have the "No Prayers" handicap active. |
|- |
|- |
||
|[[File:Random Daze.png|center]] |
|[[File:Random Daze.png|center]] |
||
| Line 268: | Line 259: | ||
This mode does not increase general kill count, but has a separate one. It also presumably does not award journal pages. |
This mode does not increase general kill count, but has a separate one. It also presumably does not award journal pages. |
||
| − | There are different rules for bosses that are specific to rumble mode: if a boss requires a certain method to be killed (such as [[Count Draynor]]), normal combat will suffice; if a boss spawns as a team (such as the |
+ | There are different rules for bosses that are specific to rumble mode: if a boss requires a certain method to be killed (such as [[Count Draynor]]), normal combat will suffice; if a boss spawns as a team (such as the golems), they will spawn individually; bosses who spawn other monsters (such as the [[Giant scarab]]) will not do so; and bosses with moves that are hard to dodge will not use them. If there is only 1 player, there will be 4 bosses; for 2 players, there will be 7; for 3 players, there will be 9; and if there are any more players, there will be 10 bosses. If a player in rumble mode dies, the number of bosses does not change. |
| − | Additionally, there are certain random events that can happen while in this mode. Occasionally, tornadoes will appear and deal [[ranged]] and [[magic]] damage to players. Wizards appear and attempt to create a portal that explodes and deals damage if they are not killed quickly enough. [[Sunfreet]] may come and engulf the arena with fire. |
+ | Additionally, there are certain random events that can happen while in this mode. Occasionally, tornadoes will appear and deal [[ranged]] and [[magic]] damage to players. Wizards appear and attempt to create a portal that explodes and deals damage if they are not killed quickly enough. [[Sunfreet]] may come and engulf the arena with fire. [[Char]]'s walls of fire may be spawned and if they are not dodged correctly, deal damage to players. [[Evil Chicken]]s may also spawn and attack players, although they are easy to kill as they are relatively weak. |
| − | Power-ups also appear randomly in this mode on the floor which can be picked up to use. The [[Vigorous orb]] gives the player who activated it 100% [[adrenaline]] for 30 seconds, instantly replenishing any adrenaline used during this time. The [[volatile orb]] produces a random handicap from the [[ |
+ | Power-ups also appear randomly in this mode on the floor which can be picked up to use. The [[Vigorous orb]] gives the player who activated it 100% [[adrenaline]] for 30 seconds, instantly replenishing any adrenaline used during this time. The [[volatile orb]] produces a random handicap from the [[#Handicaps|Climber mode]]. The [[booster orb]] doubles any dominion factor that the respective player gains for 30 seconds. The [[healing orb]] restores life points and prayer points to all players by 50% of their total. |
===Endurance mode=== |
===Endurance mode=== |
||
| Line 284: | Line 275: | ||
===Special mode=== |
===Special mode=== |
||
In special mode, you select to undertake any of ten different matches. Each match has a specific set of opponents and handicaps. A match's handicaps are incurred only for that match (they do not carry over to other matches). You can only choose a special mode match if you have already fought the match's boss in climber mode (you don't have to win the climber mode match). |
In special mode, you select to undertake any of ten different matches. Each match has a specific set of opponents and handicaps. A match's handicaps are incurred only for that match (they do not carry over to other matches). You can only choose a special mode match if you have already fought the match's boss in climber mode (you don't have to win the climber mode match). |
||
| − | |||
| − | It should be noted that a special fight only counts as 1 boss killed. |
||
Special mode matches are: |
Special mode matches are: |
||
| − | *'''Revenge of the Evil Chickens''' - The player must fight 15 [[Evil Chicken (Recipe for Disaster)|Evil chickens]] without any prayer. The chickens use magic and are aggressive. ''Hint:'' Align the chickens, so there is only one attacking you at a time. Use red chinchompas or Barrage spells to inflict extra damage to more than one chicken. |
+ | *'''Revenge of the Evil Chickens''' - The player must fight 15 [[Evil Chicken (Recipe for Disaster)|Evil chickens]] without any prayer. The chickens use magic and are aggressive. ''Hint:'' Align the chickens, so there is only one attacking you at a time. Use red chinchompas or Barrage spells to inflict extra damage to more than one chicken. Counts for two kills. |
| − | *'''Finish Him!''' - The player must fight [[Arrav]], [[Koschei the deathless]], [[General Khazard (monster)|General Khazard]], the [[Black Knight |
+ | *'''Finish Him!''' - The player must fight [[Arrav]], [[Koschei the deathless]], [[General Khazard (monster)|General Khazard]], the [[Black Knight guardian]], [[The Kendal]], the [[Black golem]], the [[White golem]] and the [[Grey golem]] simultaneously. Each boss only has 20% health. The player will have these handicaps: no prayer, reduced stats, poison, random daze, no ultimate abilities and no power-ups. ''Hint:'' All the bosses only use melee, so try to line them up so that only one attacks at a time. Counts for two kills. |
| − | *'''Just Die Already''' - The player must fight six [[Dagannoth sentinel]]s. Using the [[Balmung]] in tandem with two-handed abilities such as [[Hurricane]] and [[Quake]] should make them fall quickly. Another strategy is to use a barrage spell and line them up. Barraging them hits both of them at once so they will have minimal chances to heal, but if the difference in health between a pair reaches a certain point, they '''will''' heal. |
+ | *'''Just Die Already''' - The player must fight six [[Dagannoth sentinel]]s. Using the [[Balmung]] in tandem with two-handed abilities such as [[Hurricane]] and [[Quake]] should make them fall quickly. Another strategy is to use a barrage spell and line them up. Barraging them hits both of them at once so they will have minimal chances to heal, but if the difference in health between a pair reaches a certain point, they '''will''' heal. Counts for three kills. |
| − | *'''No More Nomad...No More!''' - The player must fight [[Nomad (monster)|Nomad]] twice without using a bank or taking a breather. |
+ | *'''No More Nomad...No More!''' - The player must fight [[Nomad (monster)|Nomad]] twice without using a bank or taking a breather. Counts for five kills. |
| − | *'''I Eat Dagannoths for Breakfast''' - The player must fight the original [[Dagannoth mother]], [[Dagannoth Mother|the second Dagannoth mother]], and two Dagannoth sentinels at once. The [[Balmung]], which is supplied in the arena '''must''' be used to harm the second Dagannoth mother. ''Hint'': Using all three styles of combat is a benefit. Kill the strongest Dagannoth Mother first, then stand under the |
+ | *'''I Eat Dagannoths for Breakfast''' - The player must fight the original [[Dagannoth mother]], [[Dagannoth Mother|the second Dagannoth mother]], and two Dagannoth sentinels at once. The [[Balmung]], which is supplied in the arena '''must''' be used to harm the second Dagannoth mother. ''Hint'': Using all three styles of combat is a benefit. Kill the strongest Dagannoth Mother first, then stand under the sentinels and slay them with the Balmung, then finish off the weakest Dagannoth Mother. Use thrown weapons ([[Death lotus dart]]s work best) for ranged and a slash weapon (the provided Balmung can be used) for melee. Counts for three kills. |
| − | *'''Indigestion''' - The player must fight all of the bosses from [[Recipe for Disaster]] at once: [[Agrith-Na-Na]], [[Flambeed]], [[Karamel]], [[Dessourt]], [[Gelatinnoth Mother]], and the [[Culinaromancer]]. The player will have reduced defences, no shield, no body armour, no familiar, no powerups, and no ultimate abilities. |
+ | *'''Indigestion''' - The player must fight all of the bosses from [[Recipe for Disaster]] at once: [[Agrith-Na-Na]], [[Flambeed]], [[Karamel]], [[Dessourt]], [[Gelatinnoth Mother]], and the [[Culinaromancer]]. The player will have reduced defences, no shield, no body armour, no familiar, no powerups, and no ultimate abilities. Counts for three kills. |
| − | *'''You'll Never Defeat Me''' - The player must survive for five minutes with |
+ | *'''You'll Never Defeat Me''' - The player must survive for five minutes with [[The Inadequacy]], [[The Everlasting]], [[The Illusive]], and [[The Untouchable]]. The player will have reduced attack and defence, no shield or body armour, no potions, random daze, halved life points, no prayers, no food and no familiar. However, random food will spawn in the arena. ''Hint'': Trap The Everlasting and The Untouchable behind the Inadequacy, which easily done from the starting position. The doubts will need to be killed as they spawn. The Inadequacy is immobile and doesn't use its ranged attack during this fight, so won't hit you if you stand a few spaces away. Alternatively, killing everything also counts as a victory and doesn't require waiting for five minutes. Counts for three kills. |
| − | *'''Hey! Eat Power-up''' - The player must defeat many low-level boss monsters with only bomb power-ups. The bosses are [[Solus Dellagar]], [[Delrith]], [[Count Draynor]], [[Melzar the Mad]], [[Sigmund (monster)|Sigmund]], [[Tarn|Tarn Razorlor]], [[The Draugen]], [[The Kendal]], [[Tumeken's shadow]], [[Culinaromancer]], [[Elvarg]], and [[Treus Dayth]]. The player will not be able to use armour or weapons. ''Hint'': [[Elvarg]] is the biggest threat with her deadly fire breath. Using a [[super antifire]] potion is the best solution if the player has access to it. She can torch a player without dragon fire protection in a second, and will use dragonfire all the time if she's not in melee range. Familiars like the [[Spirit Kyatt]], the [[Iron Titan]] and the [[Steel Titan]] are each capable of killing her fast. [[Protect from Melee]] is a very useful prayer, since most of the bosses fight in close combat. TIP: Run as close to the edge of the arena as you can behind the massive bomb to the left of the entrance gate, wait for Elvarg to get within melee range, and then pick up the bomb. The other bosses will trap her and you will take no damage from any of the other bosses except the Culinaromancer, who can be taken out fairly easily with a combat familiar. Once the Culinaromancer is gone all you have to do is collect and use the massive bomb spawn under you. The bomb power-ups respawn quickly; if you find a spot between colossal and massive bomb spawns, for example, you could in fact stay there and keep reusing the same, powerful bombs until the end of the match. TIP: In the beginning of the match you can pick up the ancient mace, it's very useful to use when waiting for bombs to respawn. |
+ | *'''Hey! Eat Power-up''' - The player must defeat many low-level boss monsters with only bomb power-ups. The bosses are [[Solus Dellagar]], [[Delrith]], [[Count Draynor]], [[Melzar the Mad]], [[Sigmund (monster)|Sigmund]], [[Tarn|Tarn Razorlor]], [[The Draugen]], [[The Kendal]], [[Tumeken's shadow]], [[Culinaromancer]], [[Elvarg]], and [[Treus Dayth]]. The player will not be able to use armour or weapons. ''Hint'': [[Elvarg]] is the biggest threat with her deadly fire breath. Using a [[super antifire]] potion is the best solution if the player has access to it. She can torch a player without dragon fire protection in a second, and will use dragonfire all the time if she's not in melee range. Familiars like the [[Spirit Kyatt]], the [[Iron Titan]] and the [[Steel Titan]] are each capable of killing her fast. [[Protect from Melee]] is a very useful prayer, since most of the bosses fight in close combat. TIP: Run as close to the edge of the arena as you can behind the massive bomb to the left of the entrance gate, wait for Elvarg to get within melee range, and then pick up the bomb. The other bosses will trap her and you will take no damage from any of the other bosses except the Culinaromancer, who can be taken out fairly easily with a combat familiar. Once the Culinaromancer is gone all you have to do is collect and use the massive bomb spawn under you. The bomb power-ups respawn quickly; if you find a spot between colossal and massive bomb spawns, for example, you could in fact stay there and keep reusing the same, powerful bombs until the end of the match. TIP: In the beginning of the match you can pick up the ancient mace, it's very useful to use when waiting for bombs to respawn. Counts for two kills. |
| − | *'''The Fire! It Burns!''' - The player must fight a level 112 [[Sunfreet]]. Players cannot use power-ups, prayer, ultimate abilities, or familiars. |
+ | *'''The Fire! It Burns!''' - The player must fight a level 112 [[Sunfreet]]. Players cannot use power-ups, prayer, ultimate abilities, or familiars. Counts for one kill. |
| − | *'''The Fire! It Burns! (easy version)''' - The player must fight a level 49 [[Sunfreet]] |
+ | *'''The Fire! It Burns! (easy version)''' - The player must fight a level 49 [[Sunfreet]]. Players cannot use power-ups, prayer, ultimate abilities or familiars. ''Note'': No rewards are gained if you do not fulfil the regular requirements. Counts for one kill. |
===Freestyle mode=== |
===Freestyle mode=== |
||
| Line 332: | Line 321: | ||
:''See [[Dominion Tower/Strategies]] for a guide on fighting these bosses.'' |
:''See [[Dominion Tower/Strategies]] for a guide on fighting these bosses.'' |
||
| − | === |
+ | ===Class A: Floor 6+=== |
| − | {| class="wikitable" style="text-align: center;" |
+ | {| class="wikitable lighttable" style="text-align: center;" |
| + | | width="200px" | [[Nomad (Dominion Tower)|Nomad]]<br />[[File:Nomad icon.png]]<br />[[Nomad's Requiem]] |
||
| − | | width="200px" | |
||
| − | [[ |
+ | | width="200px" | [[Pest Queen]] and [[Pest drone|drones]]<br />[[File:Pest Queen icon.png]]<br />[[The Void Stares Back]] |
| + | | width="200px" | [[Decaying avatar]]<br />[[File:Decaying avatar icon.png]]<br />[[Nomad's Requiem]] |
||
| − | |||
| − | |||
| − | [[Nomad's Requiem]] |
||
| − | | width="200px" | |
||
| − | [[Pest Queen]] and [[Pest drone|drones]]<br />[[File:Pest Queen icon.png]] |
||
| − | |||
| − | |||
| − | [[The Void Stares Back]] |
||
| − | | width="200px" | |
||
| − | [[Decaying avatar]]<br />[[File:Decaying avatar icon.png]] |
||
| − | |||
| − | |||
| − | [[Nomad's Requiem]] |
||
|- |
|- |
||
| + | | [[Eruni, Ayuni and Leeuni]]<br />[[File:Eruni, Ayuni & Leeuni icon.png]]<br />[[Do No Evil]] |
||
| − | | |
||
| − | [[ |
+ | | [[Dagannoth Mother (Blood Runs Deep)|Dagannoth Mother]] (II)<br />[[File:Dagannoth Mother 2 icon.png]]<br />[[Blood Runs Deep]] |
| + | | [[Zenevivia]]<br />[[File:Zenevivia icon.png]]<br />[[Love Story]] |
||
| − | |||
| − | |||
| − | [[Do No Evil]] |
||
| − | | |
||
| − | [[Dagannoth Mother]] (II)<br />[[File:Dagannoth Mother 2 icon.png]] |
||
| − | |||
| − | |||
| − | [[Blood Runs Deep]] |
||
| − | | |
||
| − | [[Zenevivia]]<br />[[File:Zenevivia icon.png]] |
||
| − | |||
| − | |||
| − | [[Love Story]] |
||
|} |
|} |
||
===Class B: Floor 1+=== |
===Class B: Floor 1+=== |
||
| − | {| class="wikitable" style="text-align: center;" |
+ | {| class="wikitable lighttable" style="text-align: center;" |
| + | | width="200px" | [[The Untouchable]]<br />[[File:The Untouchable icon.png]]<br />[[Dream Mentor]] |
||
| − | | width="200px" | |
||
| − | [[ |
+ | | width="200px" | [[Damis, Fareed, Kamil and Dessous]]<br />[[File:Damis, Fareed, Kamil & Dessous icon.png]]<br />[[Desert Treasure]] |
| + | | width="200px" | [[The Everlasting and The Illusive]]<br />[[File:The Everlasting & The Illusive icon.png]]<br />[[Dream Mentor]] |
||
| − | |||
| − | |||
| − | [[Dream Mentor]] |
||
| − | | width="200px" | |
||
| − | [[Damis, Fareed, Kamil and Dessous]]<br />[[File:Damis, Fareed, Kamil & Dessous icon.png]] |
||
| − | |||
| − | |||
| − | [[Desert Treasure]] |
||
| − | | width="200px" | |
||
| − | [[The Everlasting and The Illusive]]<br />[[File:The Everlasting & The Illusive icon.png]] |
||
| − | |||
| − | |||
| − | [[Dream Mentor]] |
||
|- |
|- |
||
| + | | [[Dagannoth sentinel]]s<br />[[File:Dagannoth sentinel icon.png]]<br />[[Blood Runs Deep]] |
||
| − | | |
||
| − | [[ |
+ | | [[Karamel and Gelatinnoth Mother]]<br />[[File:Karamel & Gelatinnoth Mother icon.png]]<br />[[Recipe for Disaster]] |
| + | | [[Nezikchened]]<br />[[File:Nezikchened icon.png]]<br />[[Legends' Quest]] |
||
| − | |||
| − | |||
| − | [[Blood Runs Deep]] |
||
| − | | |
||
| − | [[Karamel and Gelatinnoth Mother]]<br />[[File:Karamel & Gelatinnoth Mother icon.png]] |
||
| − | |||
| − | |||
| − | [[Recipe for Disaster]] |
||
| − | | |
||
| − | [[Nezikchened]]<br />[[File:Nezikchened icon.png]] |
||
| − | |||
| − | |||
| − | [[Legends' Quest]] |
||
|} |
|} |
||
===Class C: Floor 1+=== |
===Class C: Floor 1+=== |
||
| − | {| class="wikitable" style="text-align: center;" |
+ | {| class="wikitable lighttable" style="text-align: center;" |
| + | | width="200px" | [[Balance Elemental]]<br />[[File:Balance Elemental icon.png]]<br />[[While Guthix Sleeps]] |
||
| − | | width="200px" | |
||
| + | | width="200px" | [[Jungle demon]]<br />[[File:Jungle demon icon.png]]<br />[[Monkey Madness]] |
||
| − | [[Balance Elemental]] |
||
| + | | width="200px" | [[Arrav (Dominion Tower)|Arrav]]<br />[[File:Arrav icon.png]]<br />[[The Curse of Arrav]] |
||
| − | |||
| − | |||
| − | [[File:Balance Elemental icon.png]] |
||
| − | |||
| − | |||
| − | |||
| − | [[While Guthix Sleeps]] |
||
| − | | width="200px" | |
||
| − | [[Jungle demon]] |
||
| − | |||
| − | |||
| − | [[File:Jungle demon icon.png]] |
||
| − | |||
| − | |||
| − | |||
| − | [[Monkey Madness]] |
||
| − | | width="200px" | |
||
| − | [[Arrav (Dominion Tower)|Arrav]] |
||
| − | |||
| − | |||
| − | [[File:Arrav icon.png]] |
||
| − | |||
| − | |||
| − | |||
| − | [[The Curse of Arrav]] |
||
|- |
|- |
||
| + | | [[Ice demon]]<br />[[File:Ice demon icon.png]]<br />[[The Temple at Senntisten]] |
||
| − | | |
||
| + | | [[The Inadequacy and Doubts]]<br />[[File:The Inadequacy & A Doubt icon.png]]<br />[[Dream Mentor]] |
||
| − | [[Ice demon]] |
||
| + | | [[Giant Roc]]<br />[[File:Giant Roc icon.png]]<br />[[My Arm's Big Adventure]] |
||
| − | |||
| − | |||
| − | [[File:Ice demon icon.png]] |
||
| − | |||
| − | |||
| − | |||
| − | [[The Temple at Senntisten]] |
||
| − | | |
||
| − | [[The Inadequacy and Doubts]] |
||
| − | |||
| − | |||
| − | [[File:The Inadequacy & A Doubt icon.png]] |
||
| − | |||
| − | |||
| − | |||
| − | [[Dream Mentor]] |
||
| − | | |
||
| − | [[Giant Roc]] |
||
| − | |||
| − | |||
| − | [[File:Giant Roc icon.png]] |
||
| − | |||
| − | |||
| − | |||
| − | [[My Arm's Big Adventure]] |
||
|} |
|} |
||
===Class D: Floor 1+=== |
===Class D: Floor 1+=== |
||
| − | {| class="wikitable" style="text-align: center;" |
+ | {| class="wikitable lighttable" style="text-align: center;" |
| − | | width="200px" | |
+ | | width="200px" | [[Arrg]]<br />[[File:Arrg icon.png]]<br />[[Troll Romance]] |
| + | | width="200px" | [[Barrelchest]]<br />[[File:Barrelchest icon.png]]<br />[[The Great Brain Robbery]] |
||
| − | [[Arrg]] |
||
| + | | width="200px" | [[Chronozon]]<br />[[File:Chronozon icon.png]]<br />[[Family Crest]] |
||
| − | |||
| − | |||
| − | [[File:Arrg icon.png]] |
||
| − | |||
| − | |||
| − | |||
| − | [[Troll Romance]] |
||
| − | | width="200px" | |
||
| − | [[Barrelchest]] |
||
| − | |||
| − | |||
| − | [[File:Barrelchest icon.png]] |
||
| − | |||
| − | |||
| − | |||
| − | [[The Great Brain Robbery]] |
||
| − | | width="200px" | |
||
| − | [[Chronozon]] |
||
| − | |||
| − | |||
| − | [[File:Chronozon icon.png]] |
||
| − | |||
| − | |||
| − | |||
| − | [[Family Crest]] |
||
|- |
|- |
||
| + | | [[Evil Chicken (Recipe for Disaster)|Evil Chicken]]<br />[[File:Evil Chicken icon.png]]<br />[[Recipe for Disaster]] |
||
| − | | |
||
| + | | [[Flambeed, Agrith-Na-Na and Dessourt]]<br />[[File:Flambeed, Agrith-Na-Na & Dessourt icon.png]]<br />[[Recipe for Disaster]] |
||
| − | [[Evil Chicken (Recipe for Disaster)|Evil Chicken]] |
||
| + | | [[Giant scarab]]<br />[[File:Giant scarab (Contact!) icon.png]]<br />[[Contact!]] |
||
| − | |||
| − | |||
| − | [[File:Evil Chicken icon.png]] |
||
| − | |||
| − | |||
| − | |||
| − | [[Recipe for Disaster]] |
||
| − | | |
||
| − | [[Flambeed, Agrith-Na-Na and Dessourt]] |
||
| − | |||
| − | |||
| − | [[File:Flambeed, Agrith-Na-Na & Dessourt icon.png]] |
||
| − | |||
| − | |||
| − | |||
| − | [[Recipe for Disaster]] |
||
| − | | |
||
| − | [[Giant scarab]] |
||
| − | |||
| − | |||
| − | [[File:Giant scarab (Contact!) icon.png]] |
||
| − | |||
| − | |||
| − | |||
| − | [[Contact!]] |
||
|} |
|} |
||
===Class E: Floor 1+=== |
===Class E: Floor 1+=== |
||
| − | {| class="wikitable" style="text-align: center;" |
+ | {| class="wikitable lighttable" style="text-align: center;" |
| − | | width="200px" | |
+ | | width="200px" | [[Bouncer]]<br />[[File:Bouncer icon.png]]<br />[[Fight Arena]] |
| + | | width="200px" | [[Koschei the deathless]]<br />[[File:Koschei the Deathless icon.png]]<br />[[The Fremennik Trials]] |
||
| − | [[Bouncer]] |
||
| + | | width="200px" | [[Arzinian Avatar]]<br />[[File:Arzinian Avatar icon.png]]<br />[[Between a Rock...]] |
||
| − | |||
| − | |||
| − | [[File:Bouncer icon.png]] |
||
| − | |||
| − | |||
| − | |||
| − | [[Fight Arena]] |
||
| − | | width="200px" | |
||
| − | [[Koschei the deathless]] |
||
| − | |||
| − | |||
| − | [[File:Koschei the Deathless icon.png]] |
||
| − | |||
| − | |||
| − | |||
| − | [[The Fremennik Trials]] |
||
| − | | width="200px" | |
||
| − | [[Arzinian Avatar]] |
||
| − | |||
| − | |||
| − | [[File:Arzinian Avatar icon.png]] |
||
| − | |||
| − | |||
| − | |||
| − | [[Between a Rock...]] |
||
|- |
|- |
||
| + | | [[Black Knight Titan]]<br />[[File:Black Knight Titan icon.png]]<br />[[Holy Grail]] |
||
| − | | |
||
| + | | [[General Khazard]]<br />[[File:General Khazard icon.png]]<br />[[Fight Arena]] |
||
| − | [[Black Knight Titan]] |
||
| + | | [[Black Knight guardian]]<br />[[File:Black Knight guardian icon.png]]<br />[[A Void Dance]] |
||
| − | |||
| − | |||
| − | [[File:Black Knight Titan icon.png]] |
||
| − | |||
| − | |||
| − | |||
| − | [[Holy Grail]] |
||
| − | | |
||
| − | [[General Khazard]] |
||
| − | |||
| − | |||
| − | [[File:General Khazard icon.png]] |
||
| − | |||
| − | |||
| − | |||
| − | [[Fight Arena]] |
||
| − | | |
||
| − | [[Black Knight guardian]] |
||
| − | |||
| − | |||
| − | [[File:Black Knight guardian icon.png]] |
||
| − | |||
| − | |||
| − | |||
| − | [[A Void Dance]] |
||
|} |
|} |
||
===Class F: Floor 1+=== |
===Class F: Floor 1+=== |
||
| − | {| class="wikitable" style="text-align: center;" |
+ | {| class="wikitable lighttable" style="text-align: center;" |
| − | | width="200px" | |
+ | | width="200px" | [[Dad]]<br />[[File:Dad icon.png]]<br />[[Troll Stronghold]] |
| + | | width="200px" | [[Dramen tree spirit]]<br />[[File:Dramen Tree Spirit icon.png]]<br />[[Lost City]] |
||
| − | [[Dad]] |
||
| + | | width="200px" | [[Agrith Naar]]<br />[[File:Agrith Naar icon.png]]<br />[[Shadow of the Storm]] |
||
| − | |||
| − | |||
| − | [[File:Dad icon.png]] |
||
| − | |||
| − | |||
| − | |||
| − | [[Troll Stronghold]] |
||
| − | | width="200px" | |
||
| − | [[Dramen Tree Spirit]] |
||
| − | |||
| − | |||
| − | [[File:Dramen Tree Spirit icon.png]] |
||
| − | |||
| − | |||
| − | |||
| − | [[Lost City]] |
||
| − | | width="200px" | |
||
| − | [[Agrith Naar]] |
||
| − | |||
| − | |||
| − | [[File:Agrith Naar icon.png]] |
||
| − | |||
| − | |||
| − | |||
| − | [[Shadow of the Storm]] |
||
|- |
|- |
||
| + | | [[Dagannoth mother (Horror from the Deep)|Dagannoth mother]] (I)<br />[[File:Dagannoth Mother icon.png]]<br />[[Horror from the Deep]] |
||
| − | | |
||
| + | | [[TokTz-Ket-Dill (monster)|TokTz-Ket-Dill]]<br />[[File:TokTz-Ket-Dill DT icon.png]]<br />[[TokTz-Ket-Dill]] |
||
| − | [[Dagannoth mother]] (I) |
||
| + | | [[Black golem, Grey golem, White golem]]<br />[[File:Black golem, Grey golem & White golem icon.png]]<br />[[Spirits of the Elid]] |
||
| − | |||
| − | |||
| − | [[File:Dagannoth Mother icon.png]] |
||
| − | |||
| − | |||
| − | |||
| − | [[Horror from the Deep]] |
||
| − | | |
||
| − | [[TokTz-Ket-Dill (monster)|TokTz-Ket-Dill]] |
||
| − | |||
| − | |||
| − | [[File:TokTz-Ket-Dill DT icon.png]] |
||
| − | |||
| − | |||
| − | |||
| − | [[TokTz-Ket-Dill]] |
||
| − | | |
||
| − | [[Black golem, Grey golem, White golem]] |
||
| − | |||
| − | |||
| − | [[File:Black golem, Grey golem & White golem icon.png]] |
||
| − | |||
| − | |||
| − | |||
| − | [[Spirits of the Elid]] |
||
|} |
|} |
||
===Class G: Floor 1+=== |
===Class G: Floor 1+=== |
||
| − | {| class="wikitable" style="text-align: center;" |
+ | {| class="wikitable lighttable" style="text-align: center;" |
| + | | width="200px" | [[Treus Dayth]]<br />[[File:Treus Dayth icon.png]]<br />[[Haunted Mine]] |
||
| − | | width="200px" | |
||
| + | | width="200px" | [[Elvarg]]<br />[[File:Elvarg icon.png]]<br />[[Dragon Slayer]] |
||
| − | [[Treus Dayth]] |
||
| + | | width="200px" | [[Culinaromancer]]<br />[[File:Culinaromancer icon.png]]<br />[[Recipe for Disaster]] |
||
| − | |||
| − | |||
| − | [[File:Treus Dayth icon.png]] |
||
| − | |||
| − | |||
| − | |||
| − | [[Haunted Mine]] |
||
| − | | width="200px" | |
||
| − | [[Elvarg]] |
||
| − | |||
| − | |||
| − | [[File:Elvarg icon.png]] |
||
| − | |||
| − | |||
| − | |||
| − | [[Dragon Slayer]] |
||
| − | | width="200px" | |
||
| − | [[Culinaromancer]] |
||
| − | |||
| − | |||
| − | [[File:Culinaromancer icon.png]] |
||
| − | |||
| − | |||
| − | |||
| − | [[Recipe for Disaster]] |
||
|- |
|- |
||
| + | | [[Tumeken's shadow]]<br />[[File:Tumeken's shadow icon.png]]<br />[[Missing My Mummy]] |
||
| − | | |
||
| + | | [[The Kendal]]<br />[[File:The Kendal icon.png]]<br />[[Mountain Daughter]] |
||
| − | [[Tumeken's shadow]] |
||
| + | | [[The Draugen]]<br />[[File:The Draugen icon.png]]<br />[[The Fremennik Trials]] |
||
| − | |||
| − | |||
| − | [[File:Tumeken's shadow icon.png]] |
||
| − | |||
| − | |||
| − | |||
| − | [[Missing My Mummy]] |
||
| − | | |
||
| − | [[The Kendal]] |
||
| − | |||
| − | |||
| − | [[File:The Kendal icon.png]] |
||
| − | |||
| − | |||
| − | |||
| − | [[Mountain Daughter]] |
||
| − | | |
||
| − | [[The Draugen]] |
||
| − | |||
| − | |||
| − | [[File:The Draugen icon.png]] |
||
| − | |||
| − | |||
| − | |||
| − | [[The Fremennik Trials]] |
||
|} |
|} |
||
===Class H: Floor 1+=== |
===Class H: Floor 1+=== |
||
| − | {| class="wikitable" style="text-align: center;" |
+ | {| class="wikitable lighttable" style="text-align: center;" |
| + | | width="200px" | [[Tarn Razorlor]] and [[terror dog]]s<br />[[File:Tarn Razorlor icon.png]]<br />[[The Lair of Tarn Razorlor]] |
||
| − | | width="200px" | |
||
| + | | width="200px" | [[Sigmund]]<br />[[File:Sigmund icon.png]]<br />[[The Chosen Commander]] |
||
| − | [[Tarn Razorlor]] and [[terror dog]]s |
||
| + | | width="200px" | [[Melzar the Mad]]<br />[[File:Melzar the Mad icon.png]]<br />[[Dragon Slayer]] |
||
| − | |||
| − | |||
| − | [[File:Tarn Razorlor icon.png]] |
||
| − | |||
| − | |||
| − | |||
| − | [[The Lair of Tarn Razorlor]] |
||
| − | | width="200px" | |
||
| − | [[Sigmund]] |
||
| − | |||
| − | |||
| − | [[File:Sigmund icon.png]] |
||
| − | |||
| − | |||
| − | |||
| − | [[The Chosen Commander]] |
||
| − | | width="200px" | |
||
| − | [[Melzar the Mad]] |
||
| − | |||
| − | |||
| − | [[File:Melzar the Mad icon.png]] |
||
| − | |||
| − | |||
| − | |||
| − | [[Dragon Slayer]] |
||
|- |
|- |
||
| + | | [[Count Draynor]]<br />[[File:Count Draynor icon.png]]<br />[[Vampyre Slayer]] |
||
| − | | |
||
| + | | [[Delrith]]<br />[[File:Delrith icon.png]]<br />[[Demon Slayer]] |
||
| − | [[Count Draynor]] |
||
| + | | [[Solus Dellagar]]<br />[[File:Solus Dellagar icon.png]]<br />[[Wanted!]] |
||
| − | |||
| − | |||
| − | [[File:Count Draynor icon.png]] |
||
| − | |||
| − | |||
| − | |||
| − | [[Vampyre Slayer]] |
||
| − | | |
||
| − | [[Delrith]] |
||
| − | |||
| − | |||
| − | [[File:Delrith icon.png]] |
||
| − | |||
| − | |||
| − | |||
| − | [[Demon Slayer]] |
||
| − | | |
||
| − | [[Solus Dellagar]] |
||
| − | |||
| − | |||
| − | [[File:Solus Dellagar icon.png]] |
||
| − | |||
| − | |||
| − | |||
| − | [[Wanted!]] |
||
|} |
|} |
||
| − | === |
+ | ===Class X1: Floor 1+=== |
| − | {| class="wikitable" style="text-align: center;" |
+ | {| class="wikitable lighttable" style="text-align: center;" |
| + | | width="200px" | [[Vanstrom Klause]]<br />[[File:Vanstrom Klause icon.png]]<br />[[Branches of Darkmeyer]] |
||
| − | | width="200px" | |
||
| + | | width="200px" | [[Char]]<br />[[File:Char icon.png]]<br />[[The Firemakers' Curse]] |
||
| − | [[Vanstrom Klause]] |
||
| + | | width="200px" | [[Apep and Heru]]<br />[[File:Apep and Heru icon.png]]<br />[[Diamond in the Rough]] |
||
| − | |||
| − | [[File:Vanstrom Klause icon.png]] |
||
| − | |||
| − | [[Branches of Darkmeyer]] |
||
| − | | width="200px" | |
||
| − | [[Char]] |
||
| − | |||
| − | [[File:Char icon.png]] |
||
| − | |||
| − | [[The Firemakers' Curse]] |
||
| − | | width="200px" | |
||
| − | [[Apep and Heru]] |
||
| − | |||
| − | [[File:Apep and Heru icon.png]] |
||
| − | |||
| − | [[Diamond in the Rough]] |
||
|- |
|- |
||
| + | | [[Khazard]] and [[Lucien]]<br />[[File:Khazard and Lucien icon.png]]<br />[[Ritual of the Mahjarrat]] |
||
| − | | |
||
| + | | [[Dawn]]<br />[[File:Dawn DT icon.png]]<br />[[The Death of Chivalry]] |
||
| − | [[Khazard]] and [[Lucien]] |
||
| + | | [[Zemouregal]] and [[Enakhra]]<br />[[File:Zemouregal and Enakhra icon.png]]<br />[[The World Wakes]] |
||
| − | |||
| − | [[File:Khazard and Lucien icon.png]] |
||
| − | |||
| − | [[Ritual of the Mahjarrat]] |
||
| − | | |
||
| − | [[Dawn]] |
||
| − | |||
| − | [[File:Dawn DT icon.png]] |
||
| − | |||
| − | [[The Death of Chivalry]] |
||
| − | | |
||
| − | [[Zemouregal]] and [[Enakhra]] |
||
| − | |||
| − | [[File:Zemouregal and Enakhra icon.png]] |
||
| − | |||
| − | [[The World Wakes]] |
||
|} |
|} |
||
| − | === |
+ | ===Class X2: Floor 1+=== |
| − | {| class="wikitable" style="text-align: center;" |
+ | {| class="wikitable lighttable" style="text-align: center;" |
| − | | width="200px" | |
+ | | width="200px" | [[Yelps]]<br />[[File:Yelps icon.png]]<br />[[The Mighty Fall]] |
| + | | width="200px" | Dragon Hunters<br />[[File:Dragon Hunters icon.png]]<br />[[One of a Kind]] |
||
| − | [[Yelps]] |
||
| + | | width="200px" | [[Echo of Jas]]<br />[[File:Echo of Jas icon.png]]<br />[[One of a Kind]] |
||
| − | |||
| − | [[File:Yelps icon.png]] |
||
| − | |||
| − | [[The Mighty Fall]] |
||
| − | | width="200px" | |
||
| − | Dragon Hunters |
||
| − | |||
| − | [[File:Dragon Hunters icon.png]] |
||
| − | |||
| − | [[One of a Kind]] |
||
| − | | width="200px" | |
||
| − | [[Echo of Jas]] |
||
| − | |||
| − | [[File:Echo of Jas icon.png]] |
||
| − | |||
| − | [[One of a Kind]] |
||
|- |
|- |
||
| + | | [[Chaos Grimsson]] and [[Hreidmar]]<br />[[File:Chaos Grimsson and Hreidmar icon.png]]<br />[[Birthright of the Dwarves]] |
||
| − | | |
||
| + | | [[Lol]]<br />[[File:Lol icon.png]]<br />[[The Mighty Fall]] |
||
| − | [[Chaos Grimsson]] and [[Hreidmar]] |
||
| + | | [[Nial Swiftfling]]<br />[[File:Nial Swiftfling icon.png]]<br />[[Glorious Memories]] |
||
| − | |||
| − | [[File:Chaos Grimsson and Hreidmar icon.png]] |
||
| − | |||
| − | [[Birthright of the Dwarves]] |
||
| − | | |
||
| − | [[Lol]] |
||
| − | |||
| − | [[File:Lol icon.png]] |
||
| − | |||
| − | [[The Mighty Fall]] |
||
| − | | |
||
| − | [[Nial Swiftfling]] |
||
| − | |||
| − | [[File:Nial Swiftfling icon.png]] |
||
| − | |||
| − | [[Glorious Memories]] |
||
|} |
|} |
||
===Non-quest monsters (special mode only)=== |
===Non-quest monsters (special mode only)=== |
||
| − | {| class="wikitable" style="text-align: center;" |
+ | {| class="wikitable lighttable" style="text-align: center;" |
|- |
|- |
||
| + | | width="200px" | [[Sunfreet]]<br />[[File:Sunfreet.png|150px]]<br />Level 49 and Level 112 |
||
| − | | width="200px" | |
||
| − | [[Sunfreet]] |
||
| − | |||
| − | |||
| − | |||
| − | [[File:Sunfreet.png|150px]] |
||
| − | |||
| − | |||
| − | |||
| − | Level 49 and Level 112 |
||
|} |
|} |
||
==Tricks== |
==Tricks== |
||
[[File:Dominion menu.png|thumb|The screen before a fight displaying the next opponent]] |
[[File:Dominion menu.png|thumb|The screen before a fight displaying the next opponent]] |
||
| − | *Having a full inventory with the "Slippery Fingers" handicap will prevent your weapon from being unequipped. This can be taken advantage of by bringing in consumable items such as [[pies]] or [[stews]] to eat that leave an item in the inventory. Another strategy is to bring a [[coal bag]] or a [[gem bag]] to fill up your inventory if you do not have pies, stews or Saradomin brews. A somewhat easier item to use is the statue collection bag, as it is much easier to empty than a coal bag/gem bag, however this requires a large quantity (at most 27) to have been collected prior to entering the tower. |
+ | * Having a full inventory with the "Slippery Fingers" handicap will prevent your weapon from being unequipped. This can be taken advantage of by bringing in consumable items such as [[pies]] or [[stews]] to eat that leave an item in the inventory. Another strategy is to bring a [[coal bag]] or a [[gem bag]] to fill up your inventory if you do not have pies, stews or Saradomin brews. A somewhat easier item to use is the statue collection bag, as it is much easier to empty than a coal bag/gem bag, however this requires a large quantity (at most 27) to have been collected prior to entering the tower. |
| − | *Even though the opponent screen will tell the player that the [[jungle demon]] will change its attack according to your protection prayer. If they aren't within melee range, it will only use magic. |
+ | * Even though the opponent screen will tell the player that the [[jungle demon]] will change its attack according to your protection prayer. If they aren't within melee range, it will only use magic. |
| − | *During the battle intro cutscene the player can click to activate your [[ |
+ | * During the battle intro cutscene the player can click to activate your [[Quick Prayers]]/[[curses]] or a single prayer/curse without draining your prayer. Whatever prayer or curse they activate during the cutscene will turn on at the beginning of the battle. |
| − | *When facing Arrav in the tower, during the fight the player will also talk with Arrav, which can interrupt combat. |
+ | * When facing Arrav in the tower, during the fight the player will also talk with Arrav, which can interrupt combat. |
| − | *If a player faces the [[Pest Queen]], they must use the [[Korasi's |
+ | * If a player faces the [[Pest Queen]], they must use the [[Korasi's sword]] (either their own or the one provided) with Stun Abilities. |
| − | *If using [[Saradomin brews]] or other items/effects that lower your combat stats, the player can repeatedly remove and re-equip the [[Dominion medallion]] for free stat restoration (the regular medallion boosts by 4, the upgraded [[Super dominion medallion|super medallion]] boosts by 8). |
+ | * If using [[Saradomin brews]] or other items/effects that lower your combat stats, the player can repeatedly remove and re-equip the [[Dominion medallion]] for free stat restoration (the regular medallion boosts by 4, the upgraded [[Super dominion medallion|super medallion]] boosts by 8). |
| − | *If using the Dominion medallion, it will negate the effects of reduced combat stats, as the medallion re-boosts stats periodically. However, Elvarg will still drain all of your combat stats down to 1 very quickly if the player is not using an anti-dragon shield. |
+ | * If using the Dominion medallion, it will negate the effects of reduced combat stats, as the medallion re-boosts stats periodically. However, Elvarg will still drain all of your combat stats down to 1 very quickly if the player is not using an anti-dragon shield. |
| − | *Dominion Factor for the hiscores cannot go down, so dying won't reduce the amount one gets. Players get |
+ | * Dominion Factor for the hiscores cannot go down, so dying won't reduce the amount one gets. Players get fewer rewards from the chest and xp book for less dominion factor. |
==Rewards== |
==Rewards== |
||
| Line 883: | Line 467: | ||
===Exchanging rewards for Xp books=== |
===Exchanging rewards for Xp books=== |
||
The following rewards can be exchanged for Xp books: |
The following rewards can be exchanged for Xp books: |
||
| − | *[[Dominion sword]]s |
+ | * [[Dominion sword]]s |
| − | *[[Dominion staff|Dominion staves]] |
+ | * [[Dominion staff|Dominion staves]] |
| − | *[[Dominion crossbow]]s |
+ | * [[Dominion crossbow]]s |
| − | *[[Dominion potion]]s |
+ | * [[Dominion potion]]s |
| − | *[[Diminutive bomb]]s |
+ | * [[Diminutive bomb]]s |
| − | *[[Massive bomb]]s |
+ | * [[Massive bomb]]s |
| − | *[[Colossal bomb]]s |
+ | * [[Colossal bomb]]s |
| − | *[[Scorpion meat]] |
+ | * [[Scorpion meat]] |
| − | *[[Help horn]]s |
+ | * [[Help horn]]s |
To exchange rewards for books, fill your inventory with the rewards you want to exchange, right-click a rewards chest, and choose the 'Exchange' option. All reward items in inventory will be exchanged for a single Xp book. |
To exchange rewards for books, fill your inventory with the rewards you want to exchange, right-click a rewards chest, and choose the 'Exchange' option. All reward items in inventory will be exchanged for a single Xp book. |
||
| − | You can also convert items to books when claiming rewards from the rewards box by clicking the 'Convert all items' button. Doing this will convert all convertible |
+ | You can also convert items to books when claiming rewards from the rewards box by clicking the 'Convert all items' button. Doing this will convert all convertible items in the box (not in your inventory) to a book. Make sure you remove any convertible items you want to keep before clicking the button. |
The amount of experience gained from the book depends upon the number and type of rewards exchanged. For example, exchanging 28 pieces of scorpion meat gets a book that can provide one of the following: |
The amount of experience gained from the book depends upon the number and type of rewards exchanged. For example, exchanging 28 pieces of scorpion meat gets a book that can provide one of the following: |
||
| − | *1,410 experience in any one of Attack, Strength, Defence, or Constitution |
+ | * 1,410 experience in any one of Attack, Strength, Defence, or Constitution |
| − | *1,287 experience in Magic |
+ | * 1,287 experience in Magic |
| − | *1,207 experience in Ranged |
+ | * 1,207 experience in Ranged |
| − | *677 experience in Prayer |
+ | * 677 experience in Prayer |
| + | |||
This figure may not be accurate for everyone, because the amount of experience awarded varies according to the level of the skill. (ex. A player with level 85 constitution and 80 defence would receive more experience if they spent the points on constitution) Note: Xp books can only be used on skills that are 75 or higher. |
This figure may not be accurate for everyone, because the amount of experience awarded varies according to the level of the skill. (ex. A player with level 85 constitution and 80 defence would receive more experience if they spent the points on constitution) Note: Xp books can only be used on skills that are 75 or higher. |
||
| Line 931: | Line 516: | ||
|The [[Dominion sword]] power-up <ref name="power-up" /> |
|The [[Dominion sword]] power-up <ref name="power-up" /> |
||
|- |
|- |
||
| + | |Use the Help horn and all 3 types of bomb power-ups in the arena (special match bombs do not count) |
||
| − | |Find half (10) of the [[A journal page|Journal pages]] |
||
| + | |The [[Dominion staff]] power-up <ref name="power-up" /> |
||
| + | |- |
||
| + | |Find half (10) of the [[A journal page|Journal pages]]<ref name="pages">Journal pages should be added.</ref> |
||
|The [[Diminutive bomb]] power-up <ref name="power-up" /> |
|The [[Diminutive bomb]] power-up <ref name="power-up" /> |
||
|- |
|- |
||
| − | |Find all (20) of the [[A journal page|Journal pages]] |
+ | |Find all (20) of the [[A journal page|Journal pages]]<ref name="pages" /> |
|The [[Massive bomb]] power-up <ref name="power-up" /> |
|The [[Massive bomb]] power-up <ref name="power-up" /> |
||
|- |
|- |
||
| − | |Dominion Factor of 10,000 and all [[A journal page|Journal pages]] |
+ | |Dominion Factor of 10,000 and all [[A journal page|Journal pages]]<ref name="pages" /> |
|The [[Colossal bomb]] power-up <ref name="power-up" /> |
|The [[Colossal bomb]] power-up <ref name="power-up" /> |
||
| − | |- |
||
| − | |Use the Help horn and all 3 types of bomb power-ups in the arena (special match bombs do not count) |
||
| − | |The [[Dominion staff]] power-up <ref name="power-up" /> |
||
|- |
|- |
||
|Kill 100 bosses |
|Kill 100 bosses |
||
| Line 961: | Line 546: | ||
|[[Ascendency mine|Ascendancy mines]] |
|[[Ascendency mine|Ascendancy mines]] |
||
|- |
|- |
||
| − | |Kill all bosses in ''set 1'' <ref>Set 1 consists of: [[Nomad (monster)|Nomad]]; [[Eruni]], [[Leeuni]] and [[Ayuni]]; [[The Untouchable]]; [[Dagannoth sentinel]]s; [[Balance Elemental]]; [[Ice demon]]. It can be particularly useful to kill Nomad in Special mode, since he otherwise only occurs in Endurance mode, although players need to kill two of him in Special mode.</ref> and 500 bosses<ref name="set" /> |
+ | |Kill all bosses in ''set 1'' <ref>Set 1 consists of: [[Nomad (monster)|Nomad]]; [[Eruni]], [[Leeuni]] and [[Ayuni]]; [[The Untouchable]]; [[Dagannoth sentinel]]s; [[Balance Elemental]]; [[Ice demon]]. It can be particularly useful to kill Nomad in Special mode, since he otherwise only occurs in Endurance or Climber mode, although players need to kill two of him in Special mode.</ref> and 500 bosses<ref name="set" /> |
|[[Goliath gloves]] |
|[[Goliath gloves]] |
||
|- |
|- |
||
| Line 977: | Line 562: | ||
|- |
|- |
||
|Kill 1600 bosses in Rumble Mode<ref name=":0">Does not appear to be classed as a necessary achievement for stage 4 Dominion Marker or visiting the top of the tower.</ref> |
|Kill 1600 bosses in Rumble Mode<ref name=":0">Does not appear to be classed as a necessary achievement for stage 4 Dominion Marker or visiting the top of the tower.</ref> |
||
| − | |Enhancement of the [[ |
+ | |Enhancement of the [[Dominion medallion]] into the [[Extreme dominion medallion]]. |
|- |
|- |
||
|Survive for 45 minutes in a 4+ man Rumble Mode<ref name=":0" /> |
|Survive for 45 minutes in a 4+ man Rumble Mode<ref name=":0" /> |
||
| Line 987: | Line 572: | ||
===The top of the Dominion Tower=== |
===The top of the Dominion Tower=== |
||
Upon completing all Achievements, you are granted access to the top of the Dominion Tower. The top of the tower consists of an arena with various monsters. You get no XP for fighting the monsters, and your combat stats (excluding summoning and prayer) are boosted significantly. It is notable that it does not count as part of the tower, thus powerups like [[Dreadnips]] can be used, and [[Scorpion Meat]] does not function. The top of the tower is not instanced, so it is possible to bring your friends up there to fight with you. |
Upon completing all Achievements, you are granted access to the top of the Dominion Tower. The top of the tower consists of an arena with various monsters. You get no XP for fighting the monsters, and your combat stats (excluding summoning and prayer) are boosted significantly. It is notable that it does not count as part of the tower, thus powerups like [[Dreadnips]] can be used, and [[Scorpion Meat]] does not function. The top of the tower is not instanced, so it is possible to bring your friends up there to fight with you. |
||
| + | |||
====Monsters==== |
====Monsters==== |
||
| − | *[[The Inadequacy]] (only |
+ | * [[The Inadequacy]] (only melees) |
[[File:Dominiont Tower scoreboard.png|thumb|80px|The scoreboard.]] |
[[File:Dominiont Tower scoreboard.png|thumb|80px|The scoreboard.]] |
||
| − | *[[Evil Chicken]] |
+ | * [[Evil Chicken]] |
| − | *[[Koschei the Deathless]] (final form) |
+ | * [[Koschei the Deathless]] (final form) |
| − | *[[Barrelchest]] |
+ | * [[Barrelchest]] |
| − | *[[Elvarg]] |
+ | * [[Elvarg]] |
| − | *[[Draugen]] |
+ | * [[Draugen]] |
| − | *[[Jungle Demon]] (unupdated) |
+ | * [[Jungle Demon]] (unupdated) |
| − | *[[The Kendal]] |
+ | * [[The Kendal]] |
| − | *[[Karamel]] (doesn't use magic, just fires an invisible crossbow |
+ | * [[Karamel]] (doesn't use magic, just fires an invisible crossbow) |
| − | *[[Bouncer]] |
+ | * [[Bouncer]] |
| − | *[[The Untouchable]] |
+ | * [[The Untouchable]] |
===Scoreboard=== |
===Scoreboard=== |
||
| Line 1,005: | Line 591: | ||
For the very best of combatants in the Dominion Tower there is the possibility to get listed on the Scoreboard in the lobby of the Dominion Tower on the east side of the Strange Face. |
For the very best of combatants in the Dominion Tower there is the possibility to get listed on the Scoreboard in the lobby of the Dominion Tower on the east side of the Strange Face. |
||
| − | This scoreboard will list the best 10 players in each world based on what dominion factor they have gained in one trip in any of Climber, Endurance or Rumble mode |
+ | This scoreboard will list the best 10 players in each world based on what dominion factor they have gained in one trip in any of Climber, Endurance or Rumble mode. |
| + | |||
| + | ==Achievements== |
||
| + | * {{Achievement|Disowned|40|Defeat Vanstrom Klause in the Dominion Tower whilst wielding a reforged Sunspear and full set of House Drakan robes.}} |
||
| + | * {{Achievement|Do a Minion, Take Notes|25|Complete the Dominion journal.}} |
||
==Pre-release== |
==Pre-release== |
||
| Line 1,030: | Line 620: | ||
On behalf of RuneScape Content |
On behalf of RuneScape Content |
||
}} |
}} |
||
| + | |||
==Music== |
==Music== |
||
| − | *[[Dominion Lobby I]] |
+ | * [[Dominion Lobby I]] |
| − | *[[Dominion Lobby II]] |
+ | * [[Dominion Lobby II]] |
| − | *[[Dominion Lobby III]] |
+ | * [[Dominion Lobby III]] |
| − | *[[Dominion Tower I]] |
+ | * [[Dominion Tower I]] |
| − | *[[Dominion Tower II]] |
+ | * [[Dominion Tower II]] |
| − | *[[Dominion Tower III]] |
+ | * [[Dominion Tower III]] |
| − | *[[Dominion Tower IV]] |
+ | * [[Dominion Tower IV]] |
| − | *[[Dominion Tower V]] |
+ | * [[Dominion Tower V]] |
==Trivia== |
==Trivia== |
||
| − | *On the day of release the Knowledge |
+ | * On the day of release the [[Knowledge Base]] read, ''"The rewards were stored somewhere in the tower and the face can't find them. Come back tomorrow when he's managed to have a look around."'' |
| − | *The Founder who created the Dominion is likely a reference to Star Trek Deep Space Nine, which also features a Dominion created by god-like Founders. |
+ | * The Founder who created the Dominion is likely a reference to Star Trek Deep Space Nine, which also features a Dominion created by god-like Founders. |
| − | *If you perform the [[dance]] emote while in a fight it says, "Someone likes to party!" and the [[Strange face]] comes in on the left side of the screen. Similar messages appear, if you use the [[think]] or [[blow kiss]] emotes, wear a [[Runefest hood]] or wield a [[fun weapon]] in a battle. Think gives the message "Now's not the time to think!", and blow kiss gives the message "Flattery ain't gonna help you here!". |
+ | * If you perform the [[dance]] emote while in a fight it says, "Someone likes to party!" and the [[Strange face]] comes in on the left side of the screen. Similar messages appear, if you use the [[think]] or [[blow kiss]] emotes, wear a [[Runefest hood]] or wield a [[fun weapon]] in a battle. Think gives the message "Now's not the time to think!", and blow kiss gives the message "Flattery ain't gonna help you here!". |
| − | *An update on [[3 November]] [[2014]] changed the number of boss kills required for one pair of dominion gloves or a set of dreadnips was increased from 5 to 25. Dreadnips now come in batches of 500 as opposed to the previous 100. |
+ | * An update on [[3 November]] [[2014]] changed the number of boss kills required for one pair of dominion gloves or a set of dreadnips was increased from 5 to 25. Dreadnips now come in batches of 500 as opposed to the previous 100. |
| + | * Many of the previously unvoiced monsters received [[Voice Over]] for their lines, but only for their appearances inside the Dominion Tower. Some also received damage, attack and death sound updates (the golems, for example). |
||
==Gallery== |
==Gallery== |
||
<gallery captionalign="center" perrow="4" widths="210"> |
<gallery captionalign="center" perrow="4" widths="210"> |
||
| − | Dom face.jpg|Pre-release |
+ | Dom face.jpg|Pre-release concept art from the October Behind the Scenes (the [[Strange face]]). |
Unknown creature concept art.png|The final boss designed at RuneFest, the [[Sunfreet]]. |
Unknown creature concept art.png|The final boss designed at RuneFest, the [[Sunfreet]]. |
||
Dominion Tower top arena.png|A player fighting at the very top of the Dominion Tower. |
Dominion Tower top arena.png|A player fighting at the very top of the Dominion Tower. |
||
Latest revision as of 15:15, 3 March 2019
| |
| Release date | 1 November 2011 (Update) |
|---|---|
| Members | Yes |
| Location | North-west of Uzer |
| Participants | 1-5 |
| Skills involved | Combat |
| Reward currency | Dominion Factor |
| In spotlight rotation | No |
| Hiscores | |
| Tutorial | No |
| Custodians | Strange face |
| Music unlocked | Dominion Lobby I, Dominion Lobby II, Dominion Lobby III, Dominion Tower I, Dominion Tower II, Dominion Tower III, Dominion Tower IV, Dominion Tower V |
| Developers | • Original: Tim C • Update: Anthony W |
The Dominion Tower is the tallest building in Gielinor, located in the Kharidian Desert, on the eastern bank of the River Elid. Constructed by an individual known as The Founder, it houses a minigame which gives players the opportunity to re-fight various quest bosses. The rewards include combat experience, new consumable items, and dominion glove sets. The history of the Tower is revealed in the Dominion journal, which is acquired as one beats bosses. A stone face manages the Tower, which is said to come from ancient times.
During a match, you cannot exit the arena gates or teleport out of the arena. Therefore, it is recommended you do not bring teleport items, unless they have another use that will help you in the matches. Players can win some items like runes, arrows, and bolts that can be sold, but these only appear in small quantity, and are highly unlikely to cover the costs of consumables used during matches. The rewards, however, will often include food or potions specifically for use within the tower, so it is possible to minimise the amount of money spent on supplies by using these instead. In general, players use the tower for prestige or to gain its non-tradeable rewards rather than to make money.
History
The tower was constructed by an individual who henceforth became known as The Founder, at the location of his birth. As a child he was sickly, and did not have the physique for combat. His family however, were renowned fighters, who dedicated their lives to vanquishing fearsome beasts. The Founder was keen to learn from his family's combat techniques and disciplines, and as he was growing up, he felt the necessity to prove himself through knowledge instead of having the ability for combat. Because his family were such prestigious fighters, he himself, being unable to fight, wanted to leave a mark on the world. He decided to build a massive tower, and travelled great distances to obtain the knowledge and assistance to construct it. The Founder took thirty years to construct the tower, and his brother, who was on the verge of death, accepted to be bound to the tower by their mother, a powerful sorceress.
The tower is magical, and has the ability to extract memories of severe combat from people and project them in the arena, creating very real and dangerous boss monsters that have already been defeated once by participants of the minigame in their adventures. In addition, the tower is able to create monsters from people's fears, which resulted in the creation of Sunfreet.
Getting there
- Use a Dominion medallion or Super dominion medallion to teleport there (requires a minimum of being able to compete in the Dominion Tower (110 quest points and 20 of the 38 quests completed); if able to compete in the Dominion Tower, one can obtain the medallion on a previous trip to the tower). Both versions of the medallion allows a maximum of three teleports per day to the tower.
- If the player's player-owned house is located in the Menaphos Port district or if by using a Menaphos tablet (requires the Love Story quest), players can teleport to Port district's dock, use right-click "Travel" option on Portmaster Kags and choose Dominion Tower, this is one of the quickest ways to get to Dominion Tower. Using the teleport option on a Slayer codex with at least 50 souls added also gets you within a few steps of the Portmaster.
- Go through the Shantay Pass, run East-South-East to the River Elid, cross the bridge and go slightly North to reach the tower. The quickest transport to the Pass is by using a broomstick, or a charged Amulet of glory.
- Use the Eagle transport system to travel to the Uzer Hunter area and run south-west (requires completing the Eagles' Peak quest).
- Use a Pollnivneach tablet to get to the house portal and run north to the bridge (requires completing the Love Story quest).
- Use a ring of slaying to teleport to Pollnivneach, then run north along the River Elid until the bridge, cross that bridge and go north (requires the ability to purchase or make the ring).
- Use Fairy ring DLQ to get to the Uzer Hunter area, then run north (requires partial completion of the Fairy Tale II - Cure a Queen quest).
- Use a Pollnivneach teleport scroll to get to Pollnivneach, then run north along the River Elid until the bridge, cross that bridge and continue north.
- Use a Desert amulet 2, 3 or 4's Nardah teleport ability, then run north along the Elid.
Requirements
- Note: Spectating has no requirements.
- Completion of at least 20 of the following quests are required to start the minigame. Only bosses of quests the player has completed will be available to fight in the tower, so the more quests the player has completed, the more bosses are available:
- The Chosen Commander (Sigmund)
- A Void Dance (Black Knight guardian)
- Between a Rock... (Arzinian Being of Bordanzan)
- Birthright of the Dwarves (Chaos Grimsson and Chaos Hreidmar)
- Blood Runs Deep (Dagannoth sentinels, Dagannoth Mother)
- The Branches of Darkmeyer (Vanstrom Klause)
- Contact! (Giant scarab)
- The Curse of Arrav (Arrav)
- Diamond in the Rough (Apep and Heru)
- The Death of Chivalry (Dawn)
- Demon Slayer (Delrith)
- Do No Evil (Leeuni, Ayuni, and Eruni)
- Desert Treasure (Dessous, Fareed, Damis, and Kamil)
- Dragon Slayer (Elvarg)
- Dream Mentor (The Inadequacy; The Everlasting and The Illusive; The Untouchable)
- Family Crest (Chronozon)
- The Firemaker's Curse (Char)
- Fight Arena (Bouncer; General Khazard)
- The Fremennik Trials (Koschei the Deathless)
- Glorious Memories (Nial Swifling)
- Haunted Mine (Treus Dayth; Tarn Razorlor)
- Holy Grail (Black Knight Titan)
- Horror from the Deep (Dagannoth Mother)
- Legends' Quest (Nezikchened)
- Lost City (Dramen tree spirit)
- Love Story (Zenevivia)
- The Mighty Fall (Yelps; Lol)
- Missing My Mummy (Tumeken's shadow)
- Monkey Madness (Jungle demon)
- Mountain Daughter (The Kendal)
- My Arm's Big Adventure (Giant roc)
- Nomad's Requiem (Decaying avatar; Nomad)
- One of a Kind (Dragon-hunter archer, Dragon-hunter mage, and Dragon-hunter warrior; Echo of Jas)
- Recipe For Disaster (Agrith Na-Na, Flambeed and Dessous; Karamel and the Gelatinnoth mother; Culinaromancer)
- Ritual of the Mahjarrat (General Khazard and Lucien)
- Shadow of the Storm (Agrith Naar)
- Spirits of the Elid (Grey golem, Black golem, and White golem)
- The Great Brain Robbery (Barrelchest)
- The Temple at Senntisten (Ice demon)
- The Void Stares Back (Pest Queen)
- TokTz-Ket-Dill (TokTz-Ket-Dill)
- Troll Romance (Arrg)
- Troll Stronghold (Dad)
- Vampyre Slayer (Count Draynor)
- Wanted! (Solus Dellagar)
- While Guthix Sleeps (Balance Elemental)
- The World Wakes (Zemouregal and Enakhra)
Modes


The arena in which one fights
- Climber allows the player to ascend through the levels of the tower, facing a randomly chosen boss scenario on each floor. The maximum number of rounds in this mode is 249. After each victory, an effect will be applied and will persist through all subsequent fights in that attempt. While a few of these will be beneficial, most of them will be handicaps. Players will be able to replenish food and change equipment between fights.
- Endurance requires the player to fight as many bosses as they can on a single inventory of food/equipment, so whatever they take in needs to last. Access to the bank chest is not allowed.
- Special presents a range of challenging, treacherous, and often strange encounters to test the player's skill and ingenuity.
- Rumble lets players team up with up to four other adventurers to battle multiple bosses together on the roof of the tower. This mode does not increase general kill count, but has a separate one. It also presumably does not award journal pages.
- Freestyle lets players fight on their own terms. There are no rewards (no dominion factor or boss kill counts) for using this mode, but it’s a way to practice against monsters before fighting them under handicap conditions, have the experience of fighting a boss again, or just to show off fighting a boss under the player's own crazily difficult rules. Though there is no dominion factor to be gained, players can still gain experience in this mode.
- Spectator allows players to view the fights of another player who has the spectators option enabled. One can tag friends with their dominion medallion to directly watch them.
Climber mode
In climber mode, the player fights randomly-chosen bosses and can use a bank to restock and change equipment before each round. The player receives one additional new handicap each round, and that handicap plus all previously-received handicaps are active in the round.
The player ascends a floor with each round the player wins, and reaching certain floors unlocks abilities or items for the player. The player accumulates dominion factor for winning, which can be used at a rewards chest to claim rewards. Losing a fight reduces the player's dominion factor. For fights the player believes will very likely be lost, a player seeking the rewards is recommended to cash in the factor and restart climber mode.

If the player loses a fight, climber mode ends and the player is returned to the lobby on the ground floor. The player can voluntarily end climber mode by cashing in the accumulated dominion factor at any rewards chest.
Once climber mode is started, the player cannot play another Dominion Tower mode until climber mode is ended.
Handicaps
The handicap roulette.
When entering doors to begin a fight on a floor, the player receives one new handicap. Many handicaps hinder the player, although some handicap the monsters instead. There are 22 handicaps in total, and every handicap is active on every floor once it is received. A player must suffer each and every one of them at least once to unlock the Dominion sword.
When receiving a handicap on a floor, a handicap the player does not already have is randomly-chosen at first. The player then often has a chance to respin for a different handicap or to nudge the handicap spinner up to three places to get another one. It is recommended that the player avoid the worse handicaps for as long as possible. For example, a player who plans to use prayer frequently should avoid the 'no prayer' handicap.
Hint: You can also use the following list to see the effects of nudging. The list is organised, from bottom to top, in the order that nudges occur. (Example: If you get Reduced Magic Attack and nudge one position, you get Reduced Adrenaline.) Nudging off the top of the list goes to the bottom, so that nudging once from Reduced Adrenaline goes to No Ultimate Abilities.
| Icon | Handicap | Dominion factor per round |
Effects of handicap once incurred |
|---|---|---|---|
 |
Reduced Adrenaline | 70 | You gain 20% less adrenaline from your attacks. This does not affect other sources of adrenaline gain, such as adrenaline potions |
 |
Reduced Magic Attack | 70 | Your magic attack bonus is reduced in every match. |
 |
Slippery Fingers | 90 | Occasionally during every match your weapon becomes unequipped and goes to inventory. If your inventory is full, this handicap does nothing. 3 sacks of potatoes or 1 coal or gem bag are enough to keep your inventory full during combat.
Warning: When fully consumed, a dominion potion does not leave a vial behind and thus will open a slot in inventory, allowing your weapon to become unequipped. |
 |
No Prayer | 130 | You cannot use any prayers in battle, including Ancient Curses. You will also be blocked from using them before battle, meaning you cannot deliberately drain your own prayer to stop the Black Knight guardian from healing. This handicap will also prevent the use of the Prayer book from The Great Brain Robbery to cure yourself of poison. |
 |
Monster Stun | -190 | All foes at the beginning of the battle are stunned for a few seconds (about ten) and cannot attack or move. Note: The Illusive is effectively immune to this handicap, as it still burrows away during the stun period and thereafter isn't stunned. Eruni will also be able to move, but not attack. This can be useful for luring her behind a pillar. |
 |
No Familiar | -60 | You cannot summon a familiar during the matches. If you already have one summoned, it will be hidden and unusable during the matches. |
 |
Reduced Range Attack | 70 | Your ranged attack bonus is reduced in every match. |
 |
No Body Armour | 50 | When this is incurred, any item worn in the body armour slot is removed and sent to your bank. During matches, you cannot equip anything to the body armour slot. |
 |
Halved Life Points | -10 | Your starting health is reduced by half at the start of each match. You can thereafter heal back up to full life points, provided you have the means to do so. |
 |
Random Freeze | -40 | Occasionally you will become frozen and unable to move during every match. Since this does not count as a stun, anticipation will not stop it. However, this also means you can still attack while frozen, or use Freedom to release yourself. |
 |
Reduced Melee Defence | 50 | Your melee defence bonus is reduced in every match. |
 |
No Food | 120 | You cannot eat any type of food during any match, including Scorpion meat. However, other means of life point recovery can be used.
(Attuned) Portents of restoration, the Vampyrism aura, the Vampyrism scrimshaw, and the Regenerate and Sacrifice abilities are usable regardless of handicaps. Saradomin brews and Soul Split can also be used if their respective handicaps are not active. If the "No Ultimate Abilities" handicap is not active, the Guthix's Blessing, Transfigure, and Rejuvenate abilities can also be used. |
 |
No Shield | -20 | You cannot equip shields, defenders, or shieldbows, and any that you currently have equipped will be sent to the bank. However, you can use off-hand weapons and two-handed weapons. This does not include the Ward of Subjugation. |
 |
Reduced Melee Attack | 70 | Your melee attack bonus is reduced in every match. |
 |
Life Saver | -200 |
Once during each match, you are healed to full health if you reach low health. All stats, prayer points and summoning points are restored to full. WARNING: Your adrenaline will also be drained to zero in doing so. Note: This will not heal you if you are killed by poison or certain types of typeless damage, such as Char's fire wall. |
 |
No Potions | 50 | You cannot drink potions during any match. This includes dominion potions and Saradomin brews. This handicap also blocks the active ability of the Tireless blood essence. |
 |
No Power-ups | -80 | You cannot use any dominion power-ups during any match. This includes dominion weapons and the help horn, but excludes the dominion medallion, dominion potions, and scorpion meat. |
 |
Reduced Ranged Defence | 10 | Your ranged defence bonus is reduced in every match. |
 |
Poison | -60 | You are poisoned at the start of each match. The damage starts at 98 life points. You can cure yourself. If using the Poison purge Aura, the poison can be an advantage, as the aura converts poison damage into life points. If wielding an Anti-poison totem at the beginning of the match, you will not be poisoned at all. Also after you completed The Great Brain Robbery you can use the Prayer book (you must wear a Holy symbol ) to cure yourself from poison, though this method does not work if you have the "No Prayers" handicap active. |
 |
Random Daze | 110 | Occasionally during every match you become dazed, have auto-retaliate turned off, and have your combat interrupted. Simply re-attacking a foe will resume combat. |
 |
Reduced Magic Defence | 10 | Your magic defence bonus is reduced in every match. |
 |
No Ultimate Abilities | -100 | You are not allowed to use Ultimate Abilities, even if your Adrenaline bar is full. This handicap prevents the use of special attacks, but does not prevent the use of basic or threshold abilities. |


Inside the Dominion Tower.
Notes:
- Dominion factor per round is calculated by taking the difference between the estimated factor for a round and the actual dominion factor earned at the end of the round.
- If your equipment is disabled, your equipment will be placed in your bank.
Rumble mode
In rumble mode, players can team up with up to four other adventurers to battle multiple bosses together on the roof of the tower. When the mode is chosen, players will be able to either create their own instance (setting the maximum number of people allowed, the minimum combat level to join, and also an entry key) or join an existing instance.
This mode does not increase general kill count, but has a separate one. It also presumably does not award journal pages.
There are different rules for bosses that are specific to rumble mode: if a boss requires a certain method to be killed (such as Count Draynor), normal combat will suffice; if a boss spawns as a team (such as the golems), they will spawn individually; bosses who spawn other monsters (such as the Giant scarab) will not do so; and bosses with moves that are hard to dodge will not use them. If there is only 1 player, there will be 4 bosses; for 2 players, there will be 7; for 3 players, there will be 9; and if there are any more players, there will be 10 bosses. If a player in rumble mode dies, the number of bosses does not change.
Additionally, there are certain random events that can happen while in this mode. Occasionally, tornadoes will appear and deal ranged and magic damage to players. Wizards appear and attempt to create a portal that explodes and deals damage if they are not killed quickly enough. Sunfreet may come and engulf the arena with fire. Char's walls of fire may be spawned and if they are not dodged correctly, deal damage to players. Evil Chickens may also spawn and attack players, although they are easy to kill as they are relatively weak.
Power-ups also appear randomly in this mode on the floor which can be picked up to use. The Vigorous orb gives the player who activated it 100% adrenaline for 30 seconds, instantly replenishing any adrenaline used during this time. The volatile orb produces a random handicap from the Climber mode. The booster orb doubles any dominion factor that the respective player gains for 30 seconds. The healing orb restores life points and prayer points to all players by 50% of their total.
Endurance mode
In endurance mode, players must battle successive bosses, as in climber mode but without incurring any handicaps. Instead, players are not allowed to access the bank throughout the entirety of their run. Players must play this mode in order to unlock the Dominion crossbow and Super dominion medallion. The maximum number of rounds in this mode is 250. After reaching floor 250, you will receive a message saying that "The tower is incredibly impressed with your skills. You have climbed as high as he is willing to allow.", and will be unable to proceed further. You will also have the message "Ascended as high as floor 250 in endurance mode and beyond!" added to your dominion marker.
A marker that has reached floor 250
In endurance mode, the bosses players face are generally easier than those in climber mode. However, all bosses still have a chance of appearing.
This mode earns much less dominion factor per fight, and after reaching floor 30 in endurance mode, players will earn dominion factor at a further reduced rate.
Special mode
In special mode, you select to undertake any of ten different matches. Each match has a specific set of opponents and handicaps. A match's handicaps are incurred only for that match (they do not carry over to other matches). You can only choose a special mode match if you have already fought the match's boss in climber mode (you don't have to win the climber mode match).
Special mode matches are:
- Revenge of the Evil Chickens - The player must fight 15 Evil chickens without any prayer. The chickens use magic and are aggressive. Hint: Align the chickens, so there is only one attacking you at a time. Use red chinchompas or Barrage spells to inflict extra damage to more than one chicken. Counts for two kills.
- Finish Him! - The player must fight Arrav, Koschei the deathless, General Khazard, the Black Knight guardian, The Kendal, the Black golem, the White golem and the Grey golem simultaneously. Each boss only has 20% health. The player will have these handicaps: no prayer, reduced stats, poison, random daze, no ultimate abilities and no power-ups. Hint: All the bosses only use melee, so try to line them up so that only one attacks at a time. Counts for two kills.
- Just Die Already - The player must fight six Dagannoth sentinels. Using the Balmung in tandem with two-handed abilities such as Hurricane and Quake should make them fall quickly. Another strategy is to use a barrage spell and line them up. Barraging them hits both of them at once so they will have minimal chances to heal, but if the difference in health between a pair reaches a certain point, they will heal. Counts for three kills.
- No More Nomad...No More! - The player must fight Nomad twice without using a bank or taking a breather. Counts for five kills.
- I Eat Dagannoths for Breakfast - The player must fight the original Dagannoth mother, the second Dagannoth mother, and two Dagannoth sentinels at once. The Balmung, which is supplied in the arena must be used to harm the second Dagannoth mother. Hint: Using all three styles of combat is a benefit. Kill the strongest Dagannoth Mother first, then stand under the sentinels and slay them with the Balmung, then finish off the weakest Dagannoth Mother. Use thrown weapons (Death lotus darts work best) for ranged and a slash weapon (the provided Balmung can be used) for melee. Counts for three kills.
- Indigestion - The player must fight all of the bosses from Recipe for Disaster at once: Agrith-Na-Na, Flambeed, Karamel, Dessourt, Gelatinnoth Mother, and the Culinaromancer. The player will have reduced defences, no shield, no body armour, no familiar, no powerups, and no ultimate abilities. Counts for three kills.
- You'll Never Defeat Me - The player must survive for five minutes with The Inadequacy, The Everlasting, The Illusive, and The Untouchable. The player will have reduced attack and defence, no shield or body armour, no potions, random daze, halved life points, no prayers, no food and no familiar. However, random food will spawn in the arena. Hint: Trap The Everlasting and The Untouchable behind the Inadequacy, which easily done from the starting position. The doubts will need to be killed as they spawn. The Inadequacy is immobile and doesn't use its ranged attack during this fight, so won't hit you if you stand a few spaces away. Alternatively, killing everything also counts as a victory and doesn't require waiting for five minutes. Counts for three kills.
- Hey! Eat Power-up - The player must defeat many low-level boss monsters with only bomb power-ups. The bosses are Solus Dellagar, Delrith, Count Draynor, Melzar the Mad, Sigmund, Tarn Razorlor, The Draugen, The Kendal, Tumeken's shadow, Culinaromancer, Elvarg, and Treus Dayth. The player will not be able to use armour or weapons. Hint: Elvarg is the biggest threat with her deadly fire breath. Using a super antifire potion is the best solution if the player has access to it. She can torch a player without dragon fire protection in a second, and will use dragonfire all the time if she's not in melee range. Familiars like the Spirit Kyatt, the Iron Titan and the Steel Titan are each capable of killing her fast. Protect from Melee is a very useful prayer, since most of the bosses fight in close combat. TIP: Run as close to the edge of the arena as you can behind the massive bomb to the left of the entrance gate, wait for Elvarg to get within melee range, and then pick up the bomb. The other bosses will trap her and you will take no damage from any of the other bosses except the Culinaromancer, who can be taken out fairly easily with a combat familiar. Once the Culinaromancer is gone all you have to do is collect and use the massive bomb spawn under you. The bomb power-ups respawn quickly; if you find a spot between colossal and massive bomb spawns, for example, you could in fact stay there and keep reusing the same, powerful bombs until the end of the match. TIP: In the beginning of the match you can pick up the ancient mace, it's very useful to use when waiting for bombs to respawn. Counts for two kills.
- The Fire! It Burns! - The player must fight a level 112 Sunfreet. Players cannot use power-ups, prayer, ultimate abilities, or familiars. Counts for one kill.
- The Fire! It Burns! (easy version) - The player must fight a level 49 Sunfreet. Players cannot use power-ups, prayer, ultimate abilities or familiars. Note: No rewards are gained if you do not fulfil the regular requirements. Counts for one kill.
Freestyle mode
Players can choose their opponents and what handicaps, if any, will be used in the match. You must have defeated (not just faced) a boss in climber, endurance or special mode before you can choose that boss in freestyle.
There are no rewards (no dominion factor or boss kill counts) for freestyle mode, but it’s a way to practice against monsters or just to show off fighting a boss under the player's own crazily difficult rules. Players can gain experience in this mode.
Spectator mode
Spectator mode allows players to view the matches of other players. These players can choose to allow or disallow spectators when preparing for a match, although they cannot block individual spectators if they allow spectators at all.
A player with a dominion medallion can use the medallion to tag a friend in tower to directly watch them.
A spectator stands on the outside area of the arena, on one of the engraved eyes. The view ("camera") by default tracks the combatants in the arena, but the player can choose to control the camera to see the action from a variety of angles.
Spectating a match is a requirement for earning one of the Dominion Tower achievements.
Taunts and skipping cutscenes
Matches normally start with you and the boss exchanging challenge taunts in a cutscene. They end with the victor performing a victory taunt in a cutscene.
On the initial match information screen, you can press a taunt button to choose which challenge taunt you will use for matches. You can also use this button to turn the challenge and victory cutscenes on or off entirely.
Some challenge taunts start locked and unusable. You can unlock them by accomplishing certain Dominion Tower Achievements.
Monsters
- See Dominion Tower/Strategies for a guide on fighting these bosses.
Class A: Floor 6+
| Nomad Nomad's Requiem |
Pest Queen and drones The Void Stares Back |
Decaying avatar Nomad's Requiem |
| Eruni, Ayuni and Leeuni Do No Evil |
Dagannoth Mother (II) Blood Runs Deep |
Zenevivia Love Story |
Class B: Floor 1+
Class C: Floor 1+
| Balance Elemental While Guthix Sleeps |
Jungle demon Monkey Madness |
Arrav The Curse of Arrav |
| Ice demon The Temple at Senntisten |
The Inadequacy and Doubts Dream Mentor |
Giant Roc My Arm's Big Adventure |
Class D: Floor 1+
| Arrg Troll Romance |
Barrelchest The Great Brain Robbery |
Chronozon Family Crest |
| Evil Chicken Recipe for Disaster |
Flambeed, Agrith-Na-Na and Dessourt Recipe for Disaster |
Giant scarab Contact! |
Class E: Floor 1+
| Bouncer Fight Arena |
Koschei the deathless The Fremennik Trials |
Arzinian Avatar Between a Rock... |
| Black Knight Titan Holy Grail |
General Khazard Fight Arena |
Black Knight guardian A Void Dance |
Class F: Floor 1+
Class G: Floor 1+
| Treus Dayth Haunted Mine |
Elvarg Dragon Slayer |
Culinaromancer Recipe for Disaster |
| Tumeken's shadow Missing My Mummy |
The Kendal Mountain Daughter |
The Draugen The Fremennik Trials |
Class H: Floor 1+
| Tarn Razorlor and terror dogs The Lair of Tarn Razorlor |
Sigmund The Chosen Commander |
Melzar the Mad Dragon Slayer |
| Count Draynor Vampyre Slayer |
Delrith Demon Slayer |
Solus Dellagar Wanted! |
Class X1: Floor 1+
Class X2: Floor 1+
| Yelps The Mighty Fall |
Dragon Hunters One of a Kind |
Echo of Jas One of a Kind |
| Chaos Grimsson and Hreidmar Birthright of the Dwarves |
Lol The Mighty Fall |
Nial Swiftfling Glorious Memories |
Non-quest monsters (special mode only)
Sunfreet Level 49 and Level 112 |
Tricks
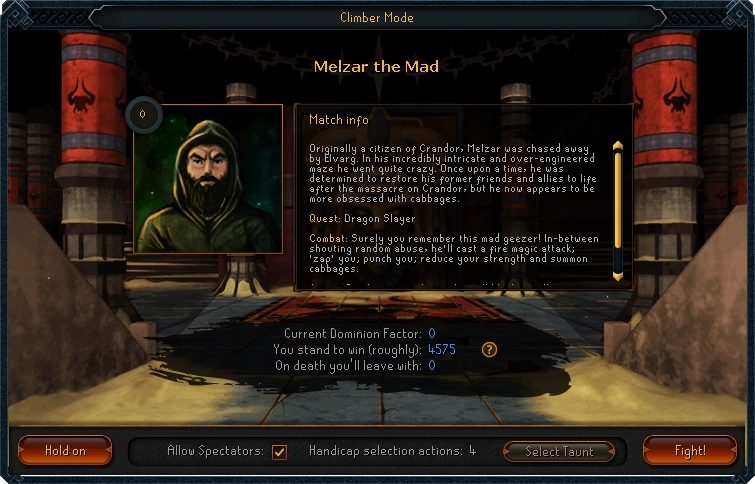
The screen before a fight displaying the next opponent
- Having a full inventory with the "Slippery Fingers" handicap will prevent your weapon from being unequipped. This can be taken advantage of by bringing in consumable items such as pies or stews to eat that leave an item in the inventory. Another strategy is to bring a coal bag or a gem bag to fill up your inventory if you do not have pies, stews or Saradomin brews. A somewhat easier item to use is the statue collection bag, as it is much easier to empty than a coal bag/gem bag, however this requires a large quantity (at most 27) to have been collected prior to entering the tower.
- Even though the opponent screen will tell the player that the jungle demon will change its attack according to your protection prayer. If they aren't within melee range, it will only use magic.
- During the battle intro cutscene the player can click to activate your Quick Prayers/curses or a single prayer/curse without draining your prayer. Whatever prayer or curse they activate during the cutscene will turn on at the beginning of the battle.
- When facing Arrav in the tower, during the fight the player will also talk with Arrav, which can interrupt combat.
- If a player faces the Pest Queen, they must use the Korasi's sword (either their own or the one provided) with Stun Abilities.
- If using Saradomin brews or other items/effects that lower your combat stats, the player can repeatedly remove and re-equip the Dominion medallion for free stat restoration (the regular medallion boosts by 4, the upgraded super medallion boosts by 8).
- If using the Dominion medallion, it will negate the effects of reduced combat stats, as the medallion re-boosts stats periodically. However, Elvarg will still drain all of your combat stats down to 1 very quickly if the player is not using an anti-dragon shield.
- Dominion Factor for the hiscores cannot go down, so dying won't reduce the amount one gets. Players get fewer rewards from the chest and xp book for less dominion factor.
Rewards
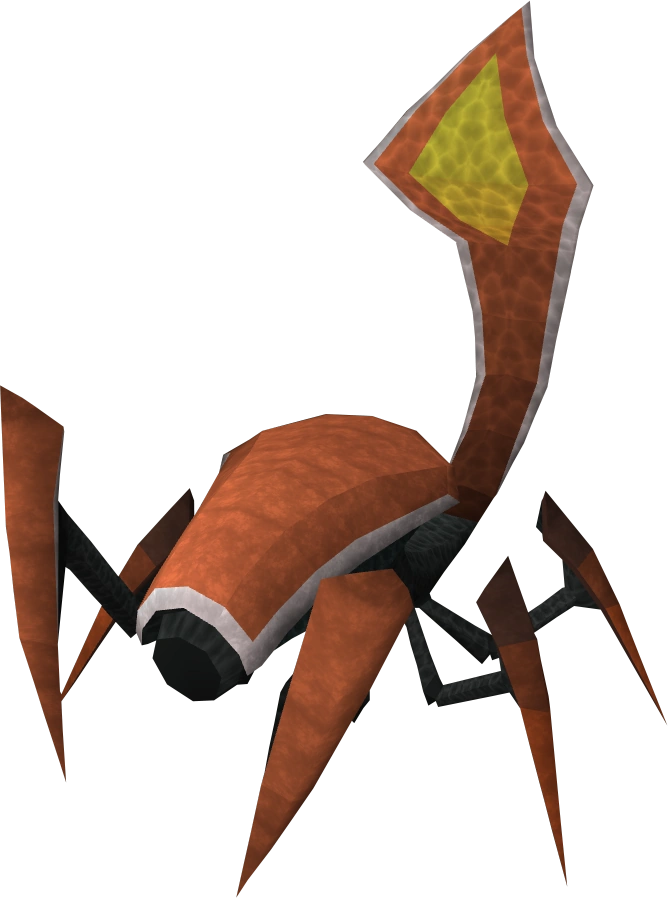
The rewards available vary in use. Perhaps the most significant rewards are the three Dominion gloves (Goliath gloves, Spellcaster gloves, and Swift gloves) - gloves, providing excellent defence and health bonuses. However, you can only store 15 rewards credits for the Dominion Gloves and Dreadnips at one time.
Other rewards, such as the dominion weapons, can only be used within the Dominion Tower, providing useful boosts for use in fights within the tower.
Reward box
The reward box is accessed after finishing a game in the tower. The reward received depends on your Dominion Factor, which is gained depending on the last fight and mode.
Possible items include dominion specific supplies, such as scorpion meat and dominion potions, as well as journal pages, unlocked power-ups (below) and certain types of ammo (arrows, runes, bolts). An Xp book will always be received, with experience dependent on the Dominion factor.
A full list of rewards can be found in the Reward box article.
Exchanging rewards for Xp books
The following rewards can be exchanged for Xp books:
- Dominion swords
- Dominion staves
- Dominion crossbows
- Dominion potions
- Diminutive bombs
- Massive bombs
- Colossal bombs
- Scorpion meat
- Help horns
To exchange rewards for books, fill your inventory with the rewards you want to exchange, right-click a rewards chest, and choose the 'Exchange' option. All reward items in inventory will be exchanged for a single Xp book.
You can also convert items to books when claiming rewards from the rewards box by clicking the 'Convert all items' button. Doing this will convert all convertible items in the box (not in your inventory) to a book. Make sure you remove any convertible items you want to keep before clicking the button.
The amount of experience gained from the book depends upon the number and type of rewards exchanged. For example, exchanging 28 pieces of scorpion meat gets a book that can provide one of the following:
- 1,410 experience in any one of Attack, Strength, Defence, or Constitution
- 1,287 experience in Magic
- 1,207 experience in Ranged
- 677 experience in Prayer
This figure may not be accurate for everyone, because the amount of experience awarded varies according to the level of the skill. (ex. A player with level 85 constitution and 80 defence would receive more experience if they spent the points on constitution) Note: Xp books can only be used on skills that are 75 or higher.
Achievement rewards
Additional rewards are received for achievements within the Dominion Tower. (Note: after unlocking a power-up, you must still receive it as a reward from the reward box.)
| Achievement | Reward unlocked |
|---|---|
| Reach floor 5 in Climber mode | An extra aggressive taunt |
| Reach floor 10 in Climber mode | An extra comedy taunt |
| Reach floor 15 in Climber mode | The Help horn power-up [1] |
| Reach floor 15 in Endurance mode | An extra submissive taunt |
| Reach floor 20 in Endurance mode | Enhancement of the Dominion medallion into the Super dominion medallion |
| Reach floor 25 in Endurance mode | The Dominion crossbow power-up [1] |
| Suffer each and every type of handicap (does not need to be done in a single Climber run) | The Dominion sword power-up [1] |
| Use the Help horn and all 3 types of bomb power-ups in the arena (special match bombs do not count) | The Dominion staff power-up [1] |
| Find half (10) of the Journal pages[2] | The Diminutive bomb power-up [1] |
| Find all (20) of the Journal pages[2] | The Massive bomb power-up [1] |
| Dominion Factor of 10,000 and all Journal pages[2] | The Colossal bomb power-up [1] |
| Kill 100 bosses | Dominion marker at stage 1 |
| Kill 200 bosses | Dominion marker at stage 2 |
| Kill 300 bosses | Dominion marker at stage 3 |
| Kill 400 bosses and fight all Special matches | Dominion mines, buyable at 10,000 coins for 10 mines |
| Kill 450 bosses and spectate a match[3] | Dreadnip, a combat ally for use outside the tower. |
| Kill 500 bosses (once claimed, must make another 500 kills to claim again) | Ascendancy mines |
| Kill all bosses in set 1 [4] and 500 bosses[3] | Goliath gloves |
| Kill all bosses in set 2 [5] and 500 bosses[3] | Spellcaster gloves |
| Kill all bosses in set 3 [6] and 500 bosses[3] | Swift gloves |
| Complete all other achievements | Dominion marker at stage 4 |
| Complete all other achievements | Ability to visit the top of the tower (Note: You do NOT receive XP for killing the monsters at the top of the tower.) |
| Kill 1600 bosses in Rumble Mode[7] | Enhancement of the Dominion medallion into the Extreme dominion medallion. |
| Survive for 45 minutes in a 4+ man Rumble Mode[7] | 'The Survivor' title |
The top of the Dominion Tower
Upon completing all Achievements, you are granted access to the top of the Dominion Tower. The top of the tower consists of an arena with various monsters. You get no XP for fighting the monsters, and your combat stats (excluding summoning and prayer) are boosted significantly. It is notable that it does not count as part of the tower, thus powerups like Dreadnips can be used, and Scorpion Meat does not function. The top of the tower is not instanced, so it is possible to bring your friends up there to fight with you.
Monsters
- The Inadequacy (only melees)

The scoreboard.
- Evil Chicken
- Koschei the Deathless (final form)
- Barrelchest
- Elvarg
- Draugen
- Jungle Demon (unupdated)
- The Kendal
- Karamel (doesn't use magic, just fires an invisible crossbow)
- Bouncer
- The Untouchable
Scoreboard
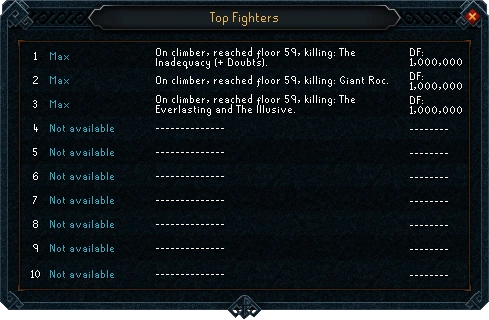
A single player with multiple entries.
For the very best of combatants in the Dominion Tower there is the possibility to get listed on the Scoreboard in the lobby of the Dominion Tower on the east side of the Strange Face.
This scoreboard will list the best 10 players in each world based on what dominion factor they have gained in one trip in any of Climber, Endurance or Rumble mode.
Achievements
- Disowned (
 40) - Defeat Vanstrom Klause in the Dominion Tower whilst wielding a reforged Sunspear and full set of House Drakan robes.
 - Do a Minion, Take Notes ( 25) - Complete the Dominion journal.
Pre-release
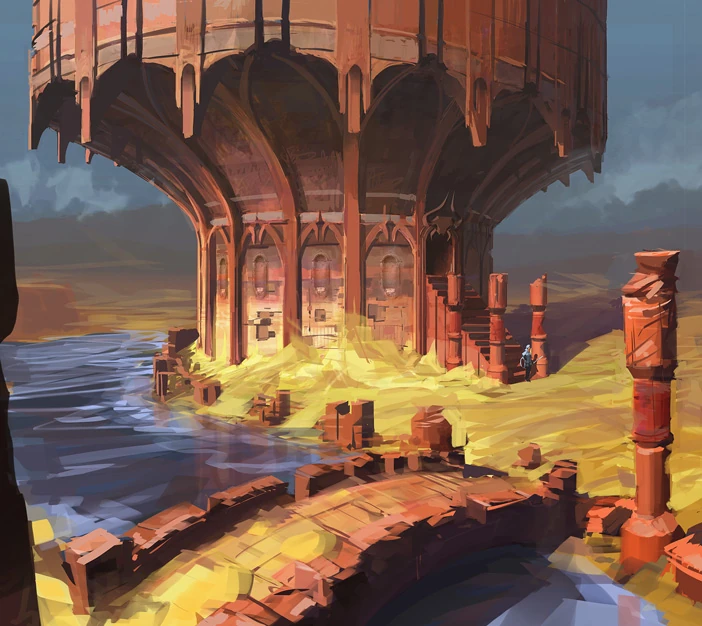

Artwork of the Tower.
| “ | For the first time in ten years of Jagex game development, we’re removing our test servers from the hidden depths of the RuneScape Studio and dropping them directly into RuneFest. Be the first to play brand new content and fight notorious bosses before we release it to the wider world. The Dominion Tower is a true test of skill and endurance as you climb ever higher in the pursuit of victory. This is high-level content, but don’t worry; you'll be using our tough-as-nails test accounts - hard enough to hold their own while you get the hang of tackling the bosses! | ” |
Attendees of RuneFest 2011 were given the chance to play-test Dominion Tower using Jagex test servers and Jmod test accounts. These attendees gave feedback and found glitches that delayed the release of Dominion Tower from the original 31 October date to the eventual 1 November date:
| “ | Hi everyone,
We just wanted to let you know that the Dominion Tower update has been moved back slightly to tomorrow, Tuesday 1 November. As you may have heard we allowed some players to try out this new content at RuneFest 2011, and as a result we received some fantastic direct feedback. Based on this, we have made the decision to delay the release slightly so that we can incorporate some of that feedback into the live content. We know that this small delay may be frustrating for those of you who are keen to see the Tower, but we hope you can understand that we always want to release the very best content we can, and when faced with such great feedback from players we'd be crazy to not listen to those views, and make some changes, where we agree that things could be even better. So the content is being revised right now, we'll have it all tested later today and some final tweaks tomorrow morning, and we hope to have you all in the Tower by tomorrow afternoon. Finally, we know we said this content would be in October, and the release will now be on the first day of November, but we felt getting the content right and reacting to player feedback was far more important than missing a calendar date by one day, we hope you agree! Steve On behalf of RuneScape Content |
” |
Music
- Dominion Lobby I
- Dominion Lobby II
- Dominion Lobby III
- Dominion Tower I
- Dominion Tower II
- Dominion Tower III
- Dominion Tower IV
- Dominion Tower V
Trivia
- On the day of release the Knowledge Base read, "The rewards were stored somewhere in the tower and the face can't find them. Come back tomorrow when he's managed to have a look around."
- The Founder who created the Dominion is likely a reference to Star Trek Deep Space Nine, which also features a Dominion created by god-like Founders.
- If you perform the dance emote while in a fight it says, "Someone likes to party!" and the Strange face comes in on the left side of the screen. Similar messages appear, if you use the think or blow kiss emotes, wear a Runefest hood or wield a fun weapon in a battle. Think gives the message "Now's not the time to think!", and blow kiss gives the message "Flattery ain't gonna help you here!".
- An update on 3 November 2014 changed the number of boss kills required for one pair of dominion gloves or a set of dreadnips was increased from 5 to 25. Dreadnips now come in batches of 500 as opposed to the previous 100.
- Many of the previously unvoiced monsters received Voice Over for their lines, but only for their appearances inside the Dominion Tower. Some also received damage, attack and death sound updates (the golems, for example).
Gallery
")
")
")
")
")
")
")
")
")
")
")
Desert settlements | |
|---|---|
|
| Team | |
| Solo |
|
| PvP |
|
| Removed |
|