mNo edit summary |
(rv) Tag: External image |
||
| (34 intermediate revisions by 13 users not shown) | |||
| Line 3: | Line 3: | ||
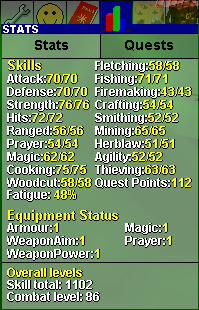
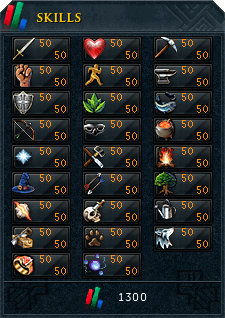
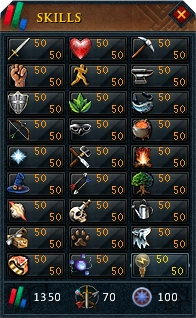
![[Skill]] screen <sub>''(Click to enlarge.)''</sub> |
![[Skill]] screen <sub>''(Click to enlarge.)''</sub> |
||
|- |
|- |
||
| + | | |
||
| − | + | [[File:Skill screen old1.png|120px]] {{Right}} |
|
[[File:Skill screen old2.jpg|120px]] {{Right}} |
[[File:Skill screen old2.jpg|120px]] {{Right}} |
||
[[File:Skill screen old3.png|120px]] {{Right}} |
[[File:Skill screen old3.png|120px]] {{Right}} |
||
| Line 11: | Line 12: | ||
[[File:Skill screen old7.png|120px]] {{Right}} |
[[File:Skill screen old7.png|120px]] {{Right}} |
||
[[File:Skill screen old8.png|120px]] {{Right}} |
[[File:Skill screen old8.png|120px]] {{Right}} |
||
| ⚫ | |||
[[File:Skill screen old9.png|120px]] {{Right}} |
[[File:Skill screen old9.png|120px]] {{Right}} |
||
[[File:Skill screen old10.gif|120px]] {{Right}} |
[[File:Skill screen old10.gif|120px]] {{Right}} |
||
| Line 20: | Line 22: | ||
[[File:Skill screen old16.png|120px]] {{Right}} |
[[File:Skill screen old16.png|120px]] {{Right}} |
||
[[File:Skill screen old17.png|120px]] {{Right}} |
[[File:Skill screen old17.png|120px]] {{Right}} |
||
| ⚫ | |||
[[File:Skill screen.png|120px]] |
[[File:Skill screen.png|120px]] |
||
|- |
|- |
||
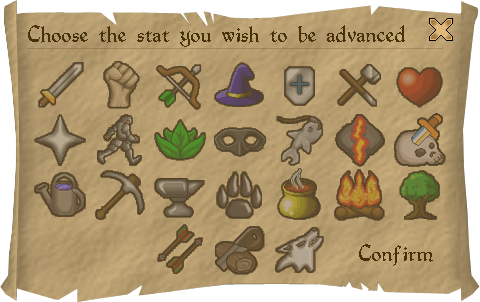
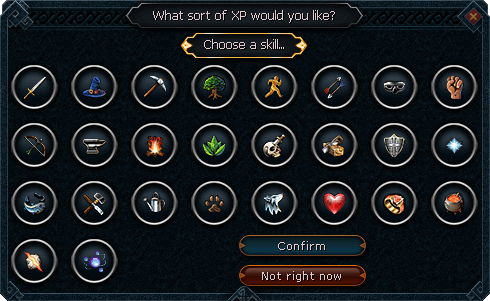
![[Experience|Level Up]] |
![[Experience|Level Up]] |
||
|- |
|- |
||
| + | | |
||
| − | + | [[File:Level up interface old1.png]] {{Right}} |
|
[[File:Level up interface old2.png|120px]] {{Right}} |
[[File:Level up interface old2.png|120px]] {{Right}} |
||
[[File:Level up interface old3.png|120px]] {{Right}} |
[[File:Level up interface old3.png|120px]] {{Right}} |
||
| Line 32: | Line 36: | ||
![[Lunar Spells]] |
![[Lunar Spells]] |
||
|- |
|- |
||
| + | | |
||
| − | + | [[File:Lunar spells interface old1.png|120px]] {{Right}} |
|
[[File:Lunar spells interface old2.png|x200px]] {{Right}} |
[[File:Lunar spells interface old2.png|x200px]] {{Right}} |
||
[[File:Lunar spells interface.png|x200px]] |
[[File:Lunar spells interface.png|x200px]] |
||
| Line 38: | Line 43: | ||
![[Prayer]] interface |
![[Prayer]] interface |
||
|- |
|- |
||
| + | | |
||
| − | + | [[File:Prayer interface old1.png]] {{Right}} |
|
[[File:Prayer interface old2.png|120px]] {{Right}} |
[[File:Prayer interface old2.png|120px]] {{Right}} |
||
[[File:Prayer interface old3.png|120px]] {{Right}} |
[[File:Prayer interface old3.png|120px]] {{Right}} |
||
| Line 44: | Line 50: | ||
[[File:Prayer interface old5.png|120px]] {{Right}} |
[[File:Prayer interface old5.png|120px]] {{Right}} |
||
[[File:Prayer interface old6.png|120px]] {{Right}} |
[[File:Prayer interface old6.png|120px]] {{Right}} |
||
| ⚫ | |||
[[File:Prayer interface.png|120px]] |
[[File:Prayer interface.png|120px]] |
||
|- |
|- |
||
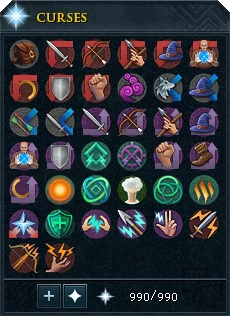
![[Ancient Curses]] |
![[Ancient Curses]] |
||
|- |
|- |
||
| + | | |
||
| − | + | [[File:Ancient Curses interface old1.png|120px]] {{Right}} |
|
[[File:Ancient Curses interface old2.png|120px]] {{Right}} |
[[File:Ancient Curses interface old2.png|120px]] {{Right}} |
||
[[File:Ancient Curses interface old3.png|120px]] {{Right}} |
[[File:Ancient Curses interface old3.png|120px]] {{Right}} |
||
| Line 56: | Line 64: | ||
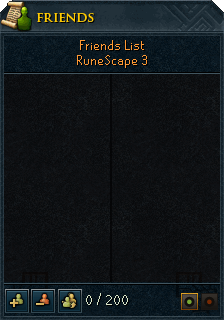
![[Friends List]] |
![[Friends List]] |
||
|- |
|- |
||
| + | | |
||
| − | + | [[File:Friends List interface old1.png|120px]] {{Right}} |
|
[[File:Friends List interface old2.png|120px]] {{Right}} |
[[File:Friends List interface old2.png|120px]] {{Right}} |
||
[[File:Friends List interface old3.png|120px]] {{Right}} |
[[File:Friends List interface old3.png|120px]] {{Right}} |
||
| Line 66: | Line 75: | ||
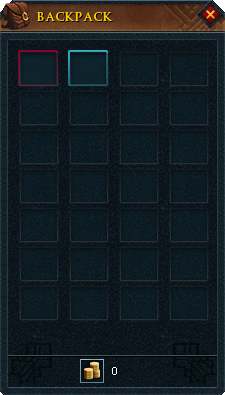
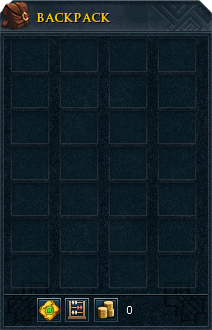
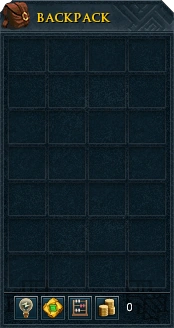
![[Inventory]] |
![[Inventory]] |
||
|- |
|- |
||
| + | | |
||
| ⚫ | |||
| ⚫ | |||
[[File:Inventory interface old2.png|120px]] {{Right}} |
[[File:Inventory interface old2.png|120px]] {{Right}} |
||
[[File:Inventory interface old3.png|120px]] {{Right}} |
[[File:Inventory interface old3.png|120px]] {{Right}} |
||
| Line 74: | Line 84: | ||
[[File:Inventory interface old7.png|120px]] {{Right}} |
[[File:Inventory interface old7.png|120px]] {{Right}} |
||
[[File:Inventory interface old8.png|120px]] {{Right}} |
[[File:Inventory interface old8.png|120px]] {{Right}} |
||
| ⚫ | |||
| ⚫ | |||
[[File:Inventory interface.png|120px]] |
[[File:Inventory interface.png|120px]] |
||
|- |
|- |
||
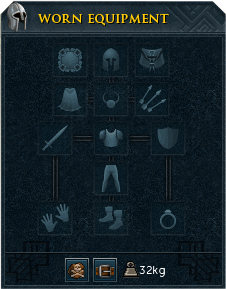
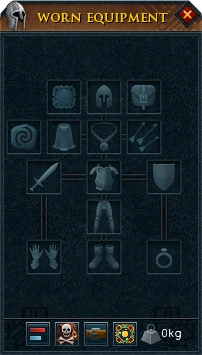
![[Worn Equipment]] |
![[Worn Equipment]] |
||
|- |
|- |
||
| + | | |
||
| ⚫ | |||
| − | [[File:Worn equipment interface |
+ | [[File:Worn equipment interface old1.png|120px]] {{Right}} |
| − | [[File:Worn equipment interface |
+ | [[File:Worn equipment interface old2.png|120px]] {{Right}} |
| ⚫ | |||
[[File:Worn equipment interface old4.png|120px]] {{Right}} |
[[File:Worn equipment interface old4.png|120px]] {{Right}} |
||
| − | [[File:Worn equipment interface old5.png|120px]] {{Right}} |
+ | [[File:Worn equipment interface old5.png|120px]] {{Right}} |
| − | [[File:Worn equipment interface old6.png|120px]] {{Right}} |
+ | [[File:Worn equipment interface old6.png|120px]] {{Right}} |
[[File:Worn equipment interface old7.png|120px]] {{Right}} |
[[File:Worn equipment interface old7.png|120px]] {{Right}} |
||
| − | [[File:Worn equipment interface old8.png|120px]] {{Right}} |
+ | [[File:Worn equipment interface old8.png|120px]] {{Right}} |
| ⚫ | |||
[[File:Worn equipment interface.png|120px]] |
[[File:Worn equipment interface.png|120px]] |
||
|- |
|- |
||
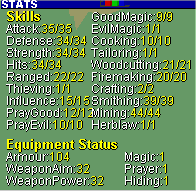
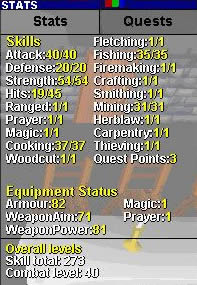
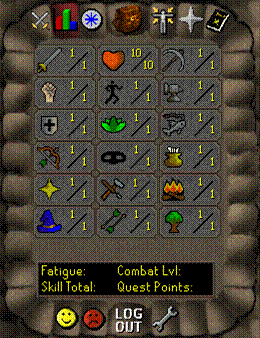
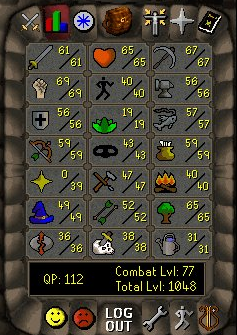
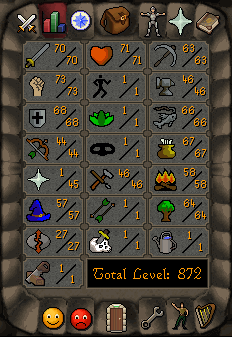
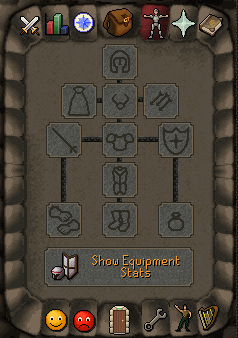
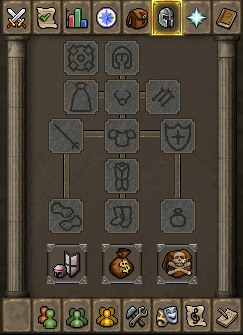
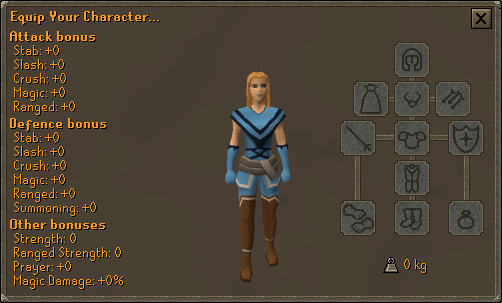
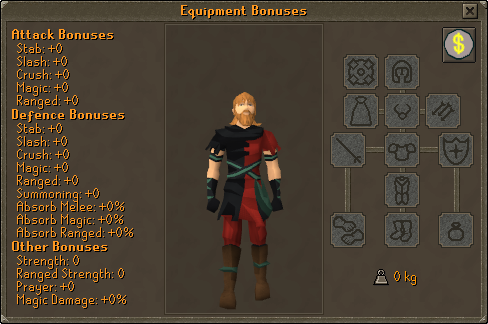
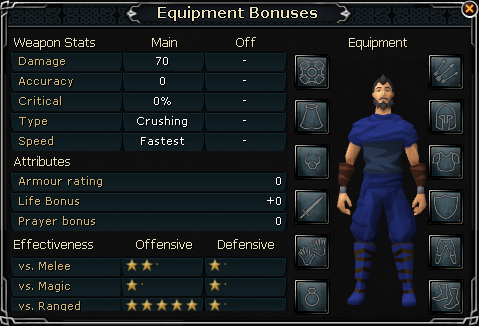
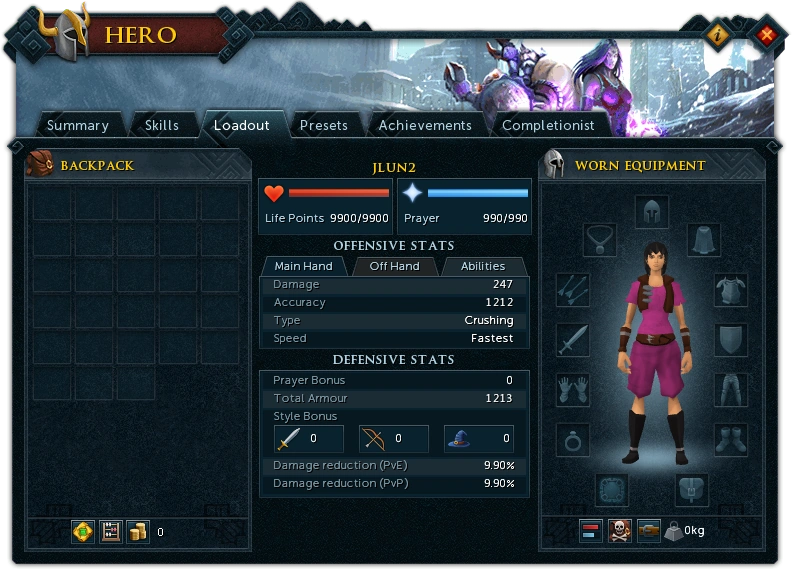
![[Equipment Stats]] |
![[Equipment Stats]] |
||
|- |
|- |
||
| + | | |
||
| ⚫ | |||
| ⚫ | |||
[[File:Combat Stats interface old2.png|200px]] {{Right}} |
[[File:Combat Stats interface old2.png|200px]] {{Right}} |
||
[[File:Combat Stats interface old3.png|200px]] {{Right}} |
[[File:Combat Stats interface old3.png|200px]] {{Right}} |
||
| Line 100: | Line 115: | ||
[[File:Combat Stats interface old9.png|200px]] {{Right}} |
[[File:Combat Stats interface old9.png|200px]] {{Right}} |
||
[[File:Combat Stats interface old10.png|200px]] {{Right}} |
[[File:Combat Stats interface old10.png|200px]] {{Right}} |
||
| − | [[File: |
+ | [[File:Hero (Loadout) interface.png|200px]] |
|- |
|- |
||
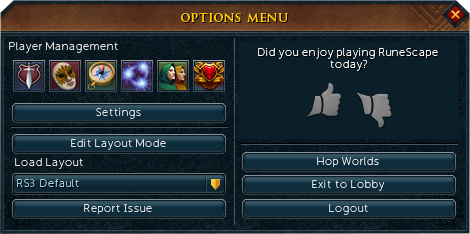
![[Options|Game options]] |
![[Options|Game options]] |
||
|- |
|- |
||
| + | | |
||
| ⚫ | |||
| ⚫ | |||
| ⚫ | |||
[[File:Options menu old2.png|120px]] {{Right}} |
[[File:Options menu old2.png|120px]] {{Right}} |
||
[[File:Options menu old3.png|120px]] {{Right}} |
[[File:Options menu old3.png|120px]] {{Right}} |
||
| Line 118: | Line 135: | ||
![[Music Player]] |
![[Music Player]] |
||
|- |
|- |
||
| + | | |
||
| ⚫ | |||
| ⚫ | |||
[[File:Music interface old2.png|120px]] {{Right}} |
[[File:Music interface old2.png|120px]] {{Right}} |
||
[[File:Music interface old3.png|120px]] {{Right}} |
[[File:Music interface old3.png|120px]] {{Right}} |
||
| Line 129: | Line 147: | ||
![[Combat styles]] |
![[Combat styles]] |
||
|- |
|- |
||
| + | | |
||
| ⚫ | |||
| ⚫ | |||
[[File:Combat styles interface old2.png|120px]] {{Right}} |
[[File:Combat styles interface old2.png|120px]] {{Right}} |
||
[[File:Combat styles interface old3.png|120px]] {{Right}} |
[[File:Combat styles interface old3.png|120px]] {{Right}} |
||
| Line 138: | Line 157: | ||
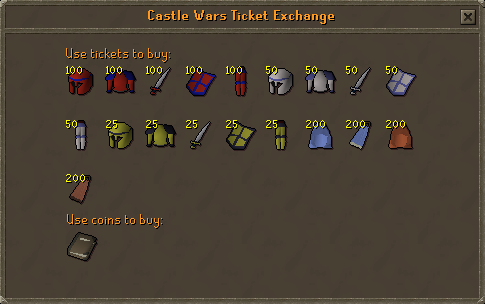
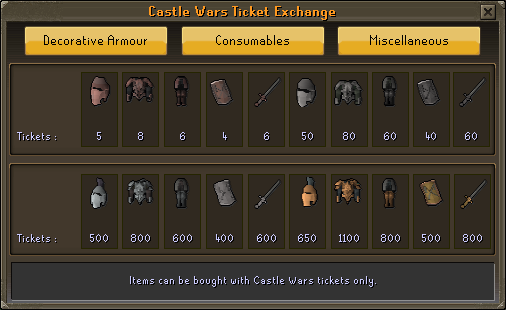
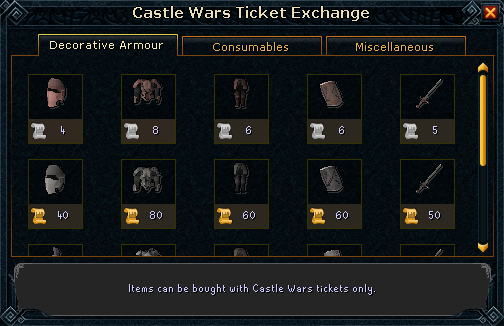
![[Castle Wars Ticket Exchange]] |
![[Castle Wars Ticket Exchange]] |
||
|- |
|- |
||
| + | | |
||
| − | + | [[File:Castle Wars Ticket Exchange old1.png|200px]] {{Right}} |
|
[[File:Castle Wars Ticket Exchange old2.png|200px]] {{Right}} |
[[File:Castle Wars Ticket Exchange old2.png|200px]] {{Right}} |
||
[[File:Castle Wars Ticket Exchange old3.png|200px]] {{Right}} |
[[File:Castle Wars Ticket Exchange old3.png|200px]] {{Right}} |
||
| − | [[File:Castle Wars Ticket Exchange ( |
+ | [[File:Castle Wars Ticket Exchange (Decorative Armour).png|200px]] |
|- |
|- |
||
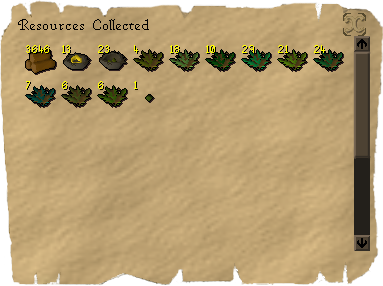
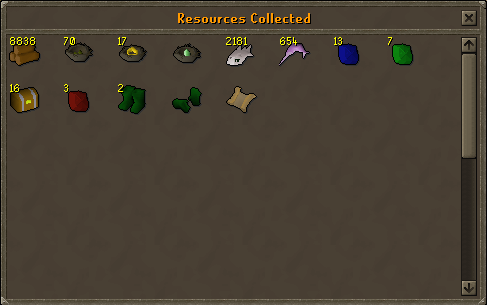
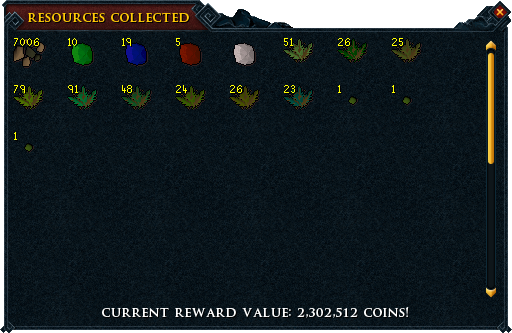
![[Managing Miscellania]] collect screen |
![[Managing Miscellania]] collect screen |
||
|- |
|- |
||
| + | | |
||
| − | + | [[File:Managing Miscellania reward old1.png|200px]] {{Right}} |
|
[[File:Managing Miscellania reward old2.png|200px]] {{Right}} |
[[File:Managing Miscellania reward old2.png|200px]] {{Right}} |
||
[[File:Managing Miscellania reward.png|200px]] |
[[File:Managing Miscellania reward.png|200px]] |
||
| Line 151: | Line 172: | ||
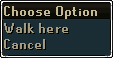
![[Walk here]] |
![[Walk here]] |
||
|- |
|- |
||
| + | | |
||
| ⚫ | |||
| ⚫ | |||
[[File:Walk here old2.png]] {{Right}} |
[[File:Walk here old2.png]] {{Right}} |
||
[[File:Walk here old3.png]] {{Right}} |
[[File:Walk here old3.png]] {{Right}} |
||
| Line 159: | Line 181: | ||
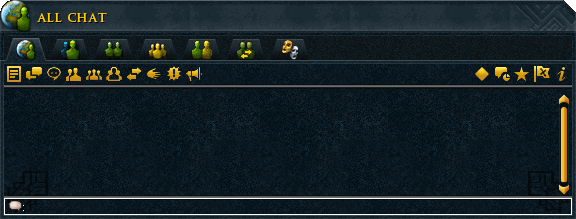
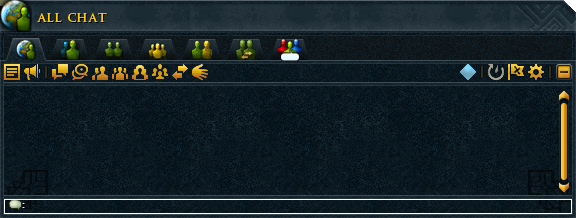
![[Chatbox]] |
![[Chatbox]] |
||
|- |
|- |
||
| + | | |
||
| ⚫ | |||
| ⚫ | |||
[[File:Chatbox old2.png|350px]] {{Right}} |
[[File:Chatbox old2.png|350px]] {{Right}} |
||
[[File:Chatbox old3.png|350px]] {{Right}} |
[[File:Chatbox old3.png|350px]] {{Right}} |
||
| Line 165: | Line 188: | ||
[[File:Chatbox old5.png|350px]] {{Right}} |
[[File:Chatbox old5.png|350px]] {{Right}} |
||
[[File:Chatbox old6.png|350px]] {{Right}} |
[[File:Chatbox old6.png|350px]] {{Right}} |
||
| ⚫ | |||
| ⚫ | |||
[[File:Chatbox.png|350px]] |
[[File:Chatbox.png|350px]] |
||
|- |
|- |
||
![[Accept Aid]] |
![[Accept Aid]] |
||
|- |
|- |
||
| + | | |
||
| − | + | [[File:Accept aid toggle button old1.png]] {{Right}} |
|
[[File:Accept aid toggle button old2.png]] {{Right}} |
[[File:Accept aid toggle button old2.png]] {{Right}} |
||
[[File:Accept aid toggle button.png]] |
[[File:Accept aid toggle button.png]] |
||
| Line 175: | Line 201: | ||
![[Shop]] interface |
![[Shop]] interface |
||
|- |
|- |
||
| + | | |
||
| ⚫ | |||
| ⚫ | |||
[[File:Shop interface old2.png|250px]] {{Right}} |
[[File:Shop interface old2.png|250px]] {{Right}} |
||
[[File:Shop interface old3.png|250px]] {{Right}} |
[[File:Shop interface old3.png|250px]] {{Right}} |
||
| Line 184: | Line 211: | ||
![[Autocast]] |
![[Autocast]] |
||
|- |
|- |
||
| + | | |
||
| ⚫ | |||
| ⚫ | |||
[[File:Autocast old2.png|150px]] {{Right}} |
[[File:Autocast old2.png|150px]] {{Right}} |
||
[[File:Autocast old3.png|150px]] {{Right}} |
[[File:Autocast old3.png|150px]] {{Right}} |
||
| Line 192: | Line 220: | ||
![[Lamp]] interface |
![[Lamp]] interface |
||
|- |
|- |
||
| + | | |
||
| ⚫ | |||
| ⚫ | |||
[[File:Lamp interface old2.png|200px]] {{Right}} |
[[File:Lamp interface old2.png|200px]] {{Right}} |
||
[[File:Lamp interface old3.png|200px]] {{Right}} |
[[File:Lamp interface old3.png|200px]] {{Right}} |
||
| Line 204: | Line 233: | ||
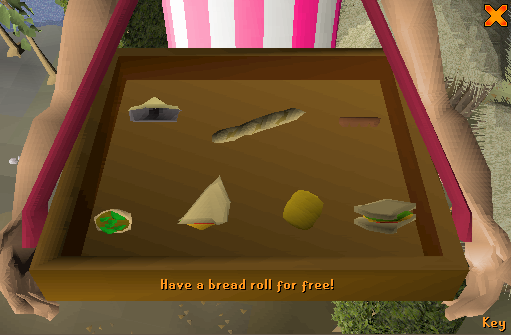
![[Sandwich lady]]'s food |
![[Sandwich lady]]'s food |
||
|- |
|- |
||
| + | | |
||
| − | + | [[File:Sandwich lady food selection old.png|200px]] {{Right}} |
|
[[File:Sandwich lady food selection.png|200px]] |
[[File:Sandwich lady food selection.png|200px]] |
||
|- |
|- |
||
![[Sandwich lady]]'s snacks' help key |
![[Sandwich lady]]'s snacks' help key |
||
|- |
|- |
||
| + | | |
||
| − | + | [[File:Sandwich lady food menu old.png|100px]] {{Right}} |
|
[[File:Sandwich lady food menu.png|200px]] |
[[File:Sandwich lady food menu.png|200px]] |
||
|- |
|- |
||
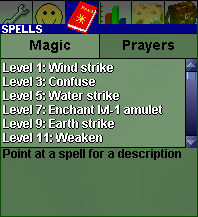
![[Spellbook|Standard Spellbook]] |
![[Spellbook|Standard Spellbook]] |
||
|- |
|- |
||
| + | | |
||
| ⚫ | |||
| ⚫ | |||
| ⚫ | |||
[[File:Standard spells old2.png|x150px]]{{Right}} |
[[File:Standard spells old2.png|x150px]]{{Right}} |
||
[[File:Standard spells old3.png|x150px]] {{Right}} |
[[File:Standard spells old3.png|x150px]] {{Right}} |
||
| Line 226: | Line 259: | ||
!Grand Exchange interface |
!Grand Exchange interface |
||
|- |
|- |
||
| + | | |
||
| ⚫ | |||
| + | [[File:Grand Exchange interface old1.png|200px]] {{Right}} |
||
[[File:Grand Exchange interface old2.png|230px]] {{Right}} |
[[File:Grand Exchange interface old2.png|230px]] {{Right}} |
||
[[File:Grand Exchange interface.png|230px]] |
[[File:Grand Exchange interface.png|230px]] |
||
| Line 232: | Line 266: | ||
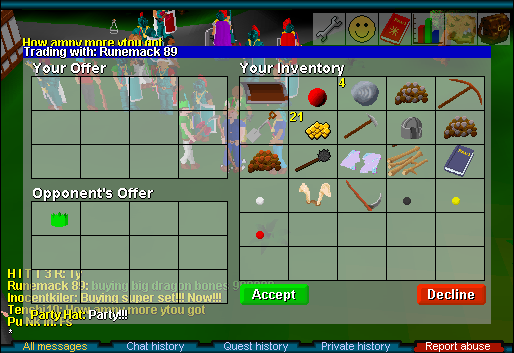
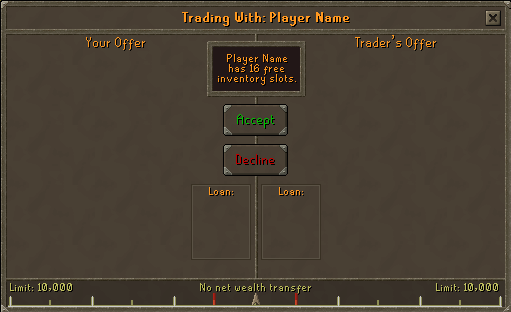
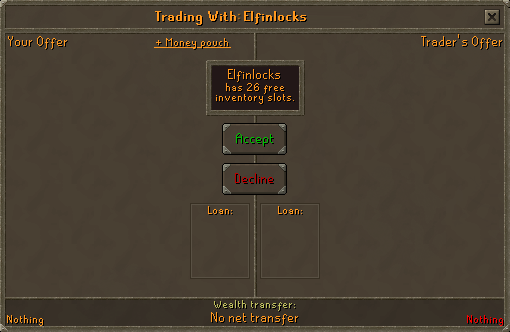
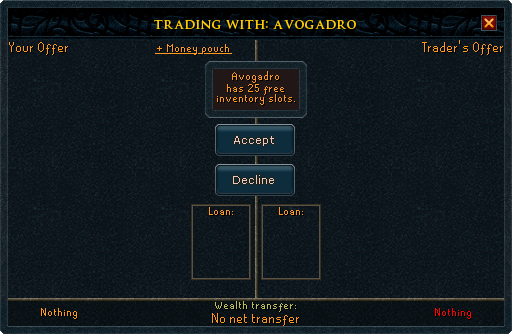
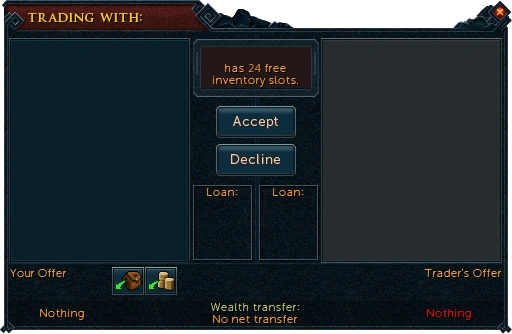
!Trade window |
!Trade window |
||
|- |
|- |
||
| + | | |
||
| ⚫ | |||
| + | [[File:Trade window old1.png|150px]] {{Right}} |
||
[[File:Trade window old2.png|150px]] {{Right}} |
[[File:Trade window old2.png|150px]] {{Right}} |
||
[[File:Trade window old3.png|150px]] {{Right}} |
[[File:Trade window old3.png|150px]] {{Right}} |
||
| Line 242: | Line 277: | ||
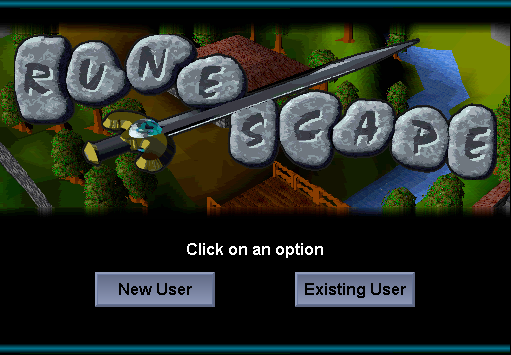
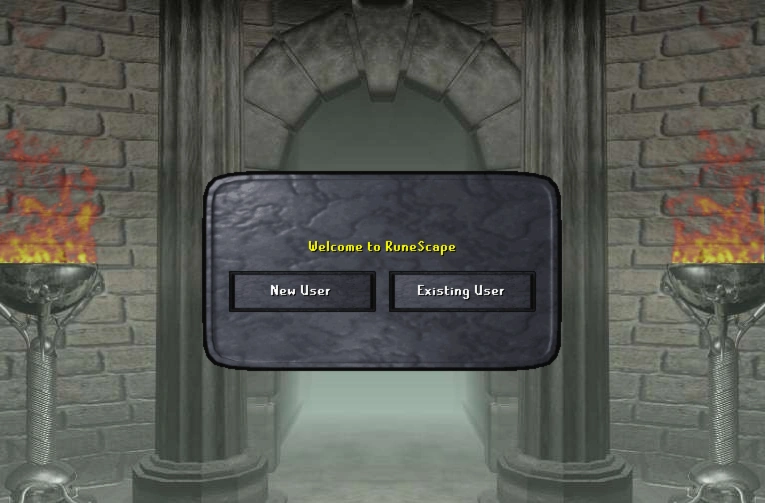
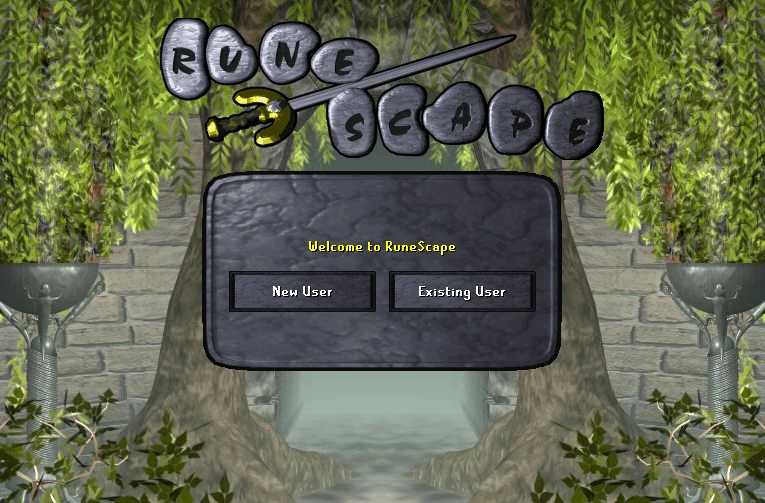
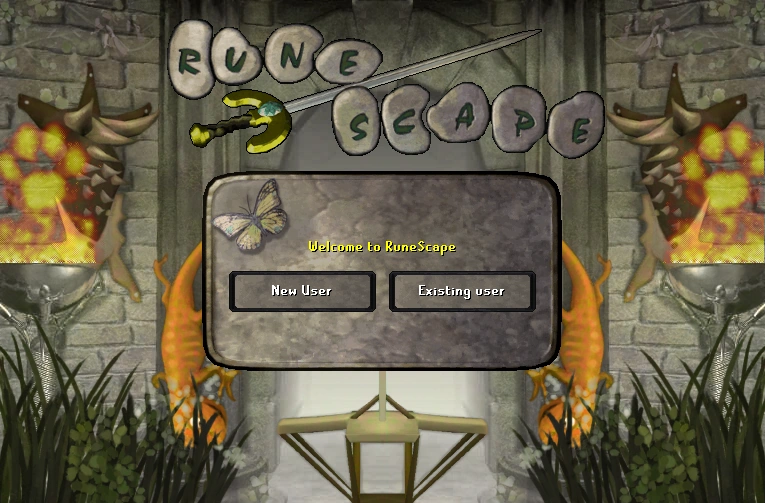
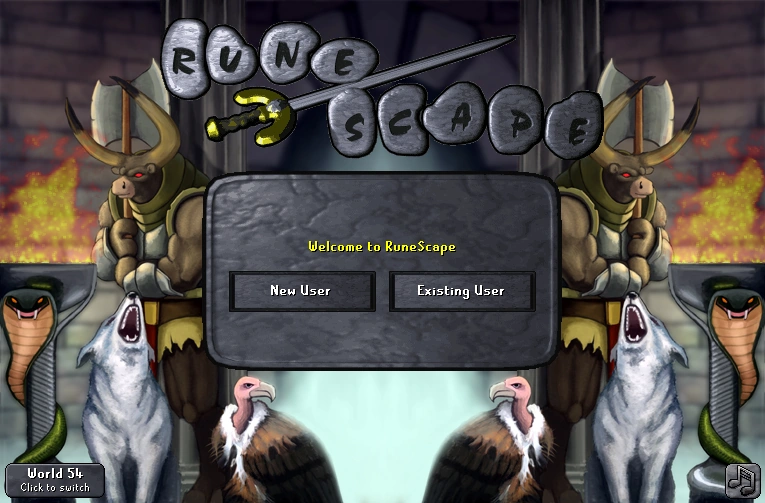
!Welcome screen |
!Welcome screen |
||
|- |
|- |
||
| + | | |
||
| ⚫ | |||
| + | [[File:Welcome message old1.png|150px]] {{Right}} |
||
[[File:Welcome message old2.png|150px]] {{Right}} |
[[File:Welcome message old2.png|150px]] {{Right}} |
||
[[File:Welcome message old3.png|150px]] |
[[File:Welcome message old3.png|150px]] |
||
| Line 250: | Line 286: | ||
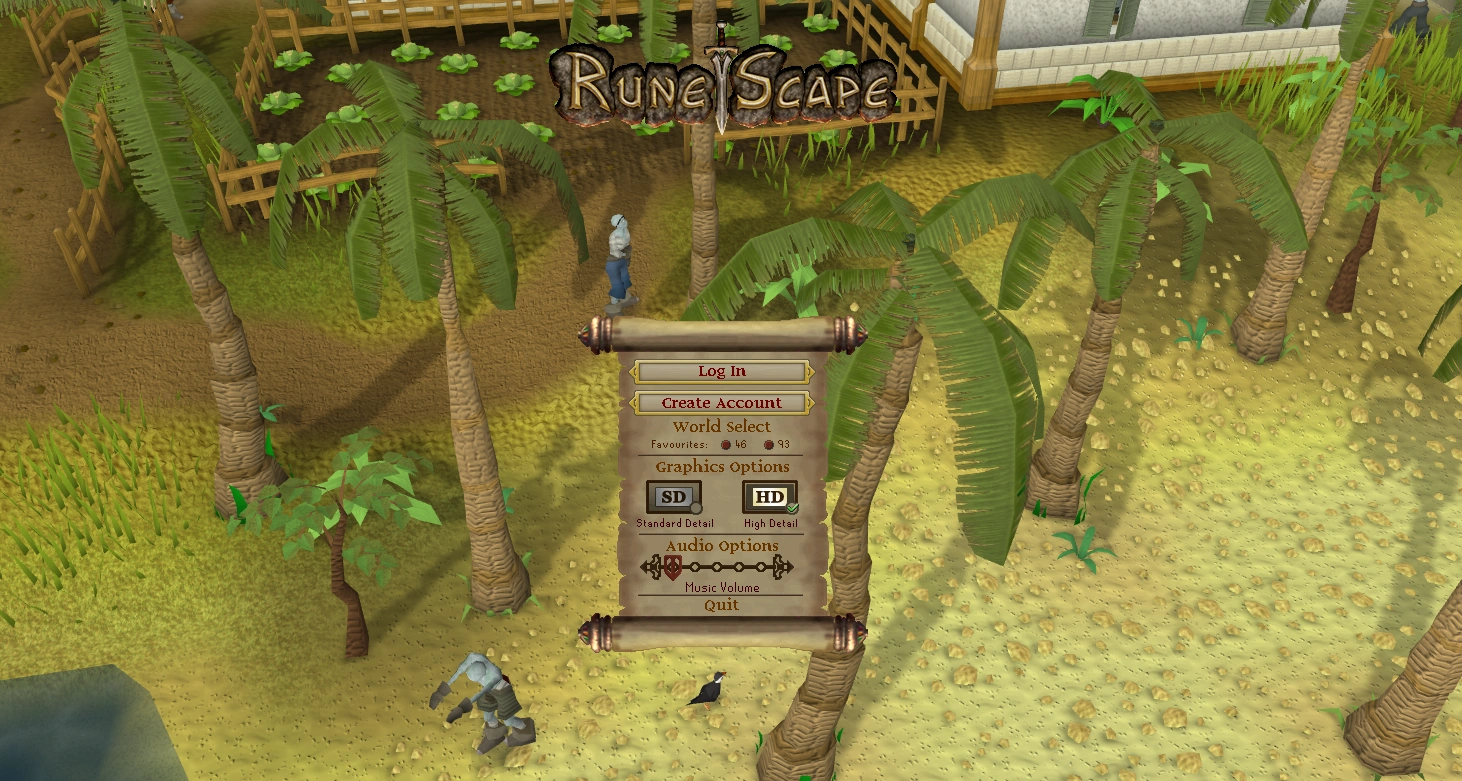
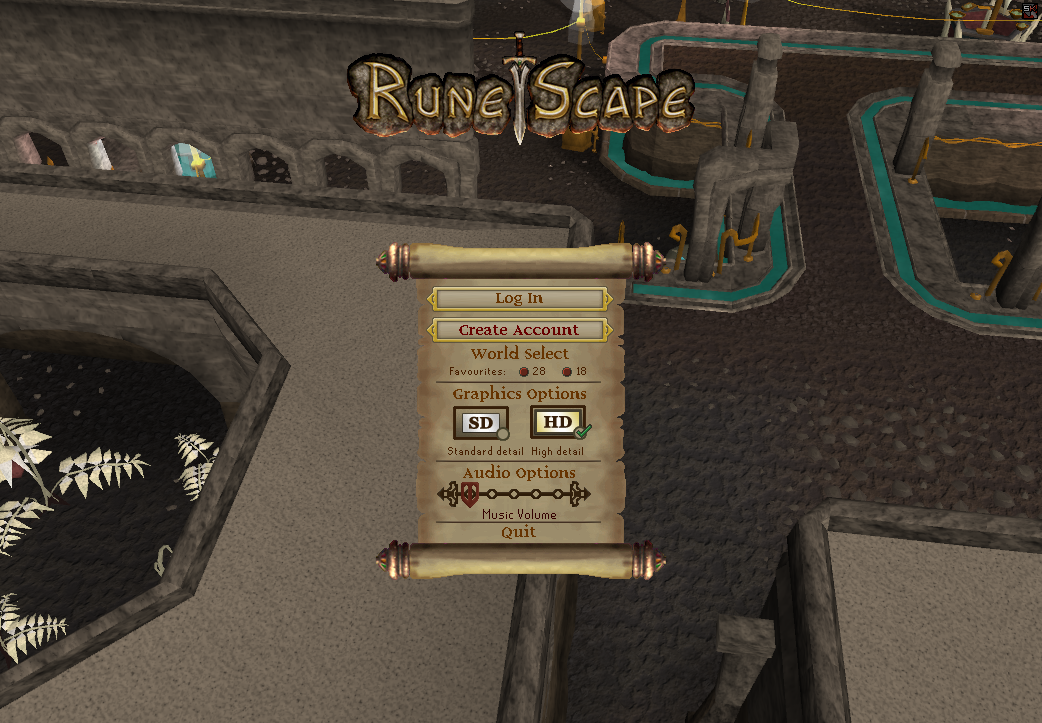
|[[File:RuneScape Lobby old1.png|150px]] {{Right}} [[File:Runescape Lobby old2.png|150px]] {{Right}} [[File:Runescape Lobby.png|150px]] |
|[[File:RuneScape Lobby old1.png|150px]] {{Right}} [[File:Runescape Lobby old2.png|150px]] {{Right}} [[File:Runescape Lobby.png|150px]] |
||
|- |
|- |
||
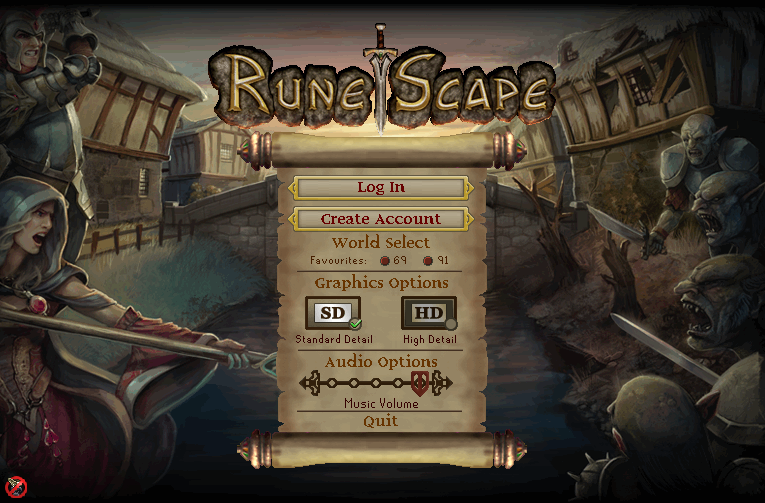
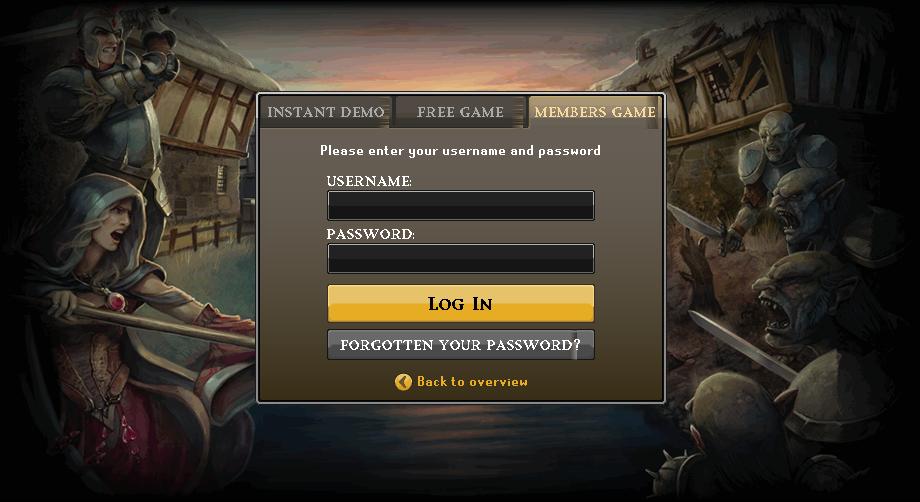
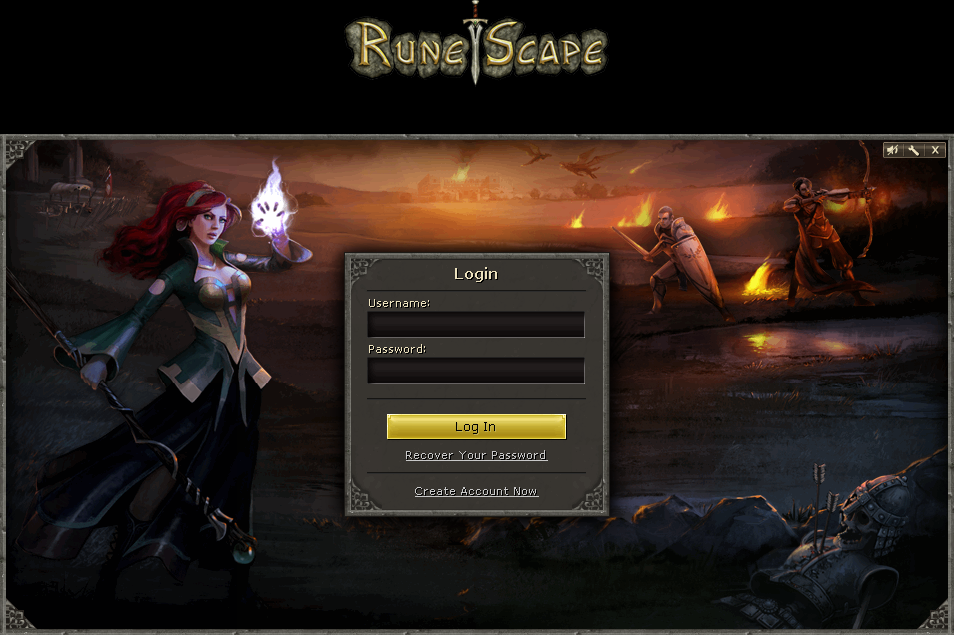
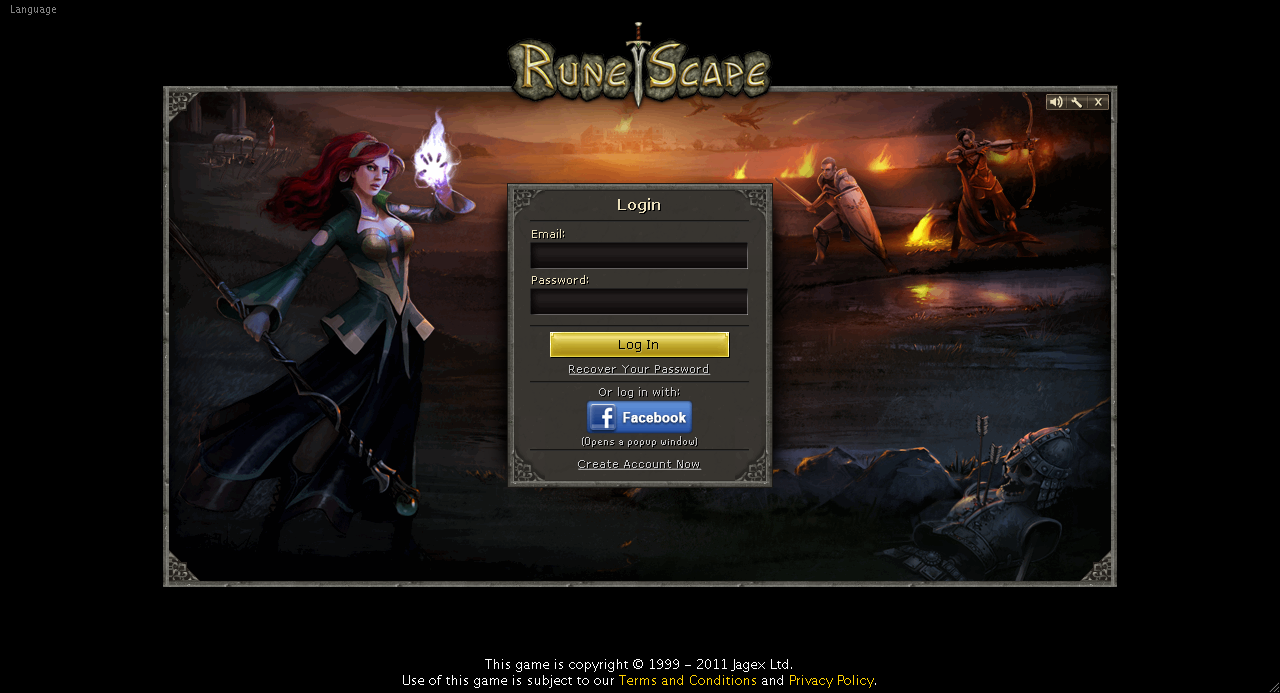
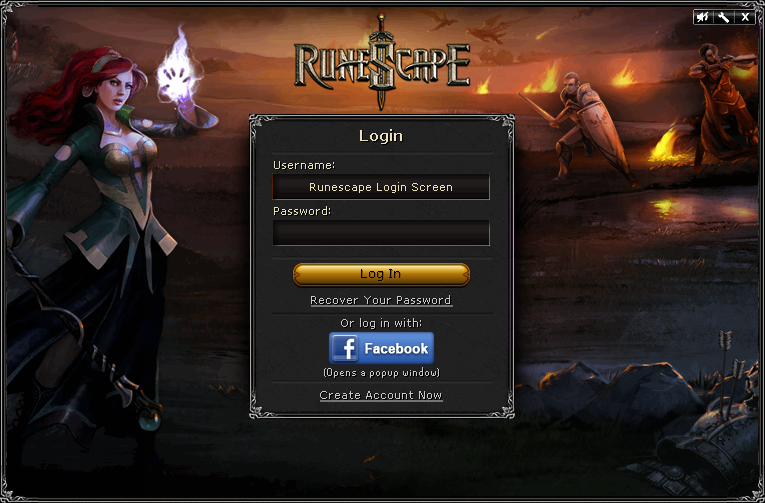
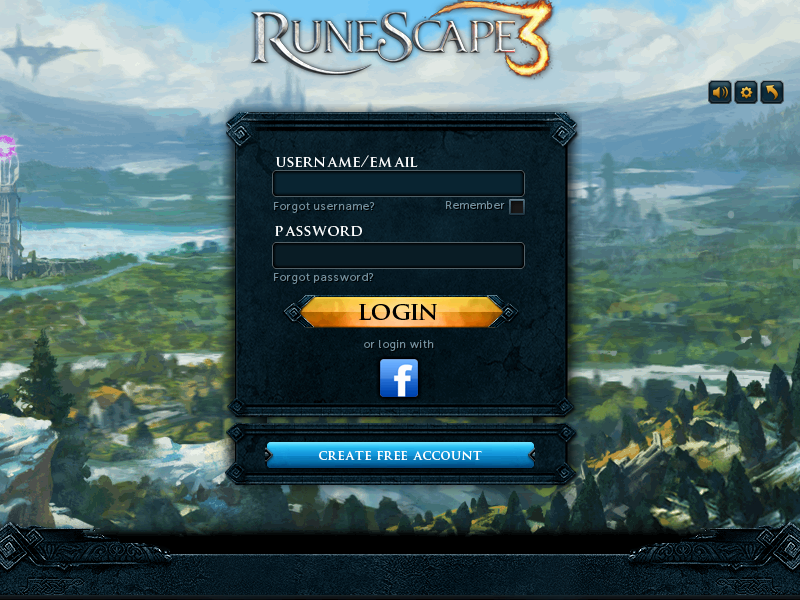
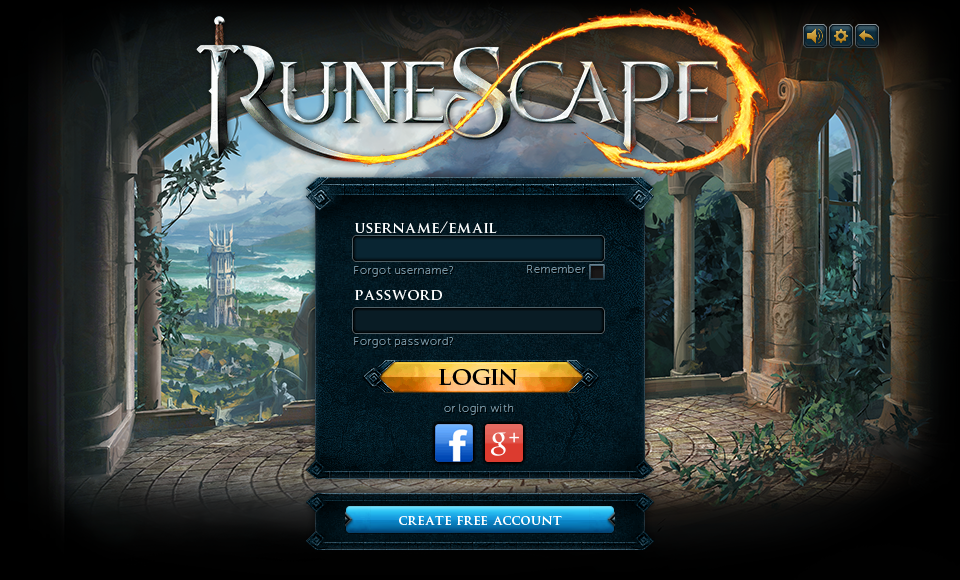
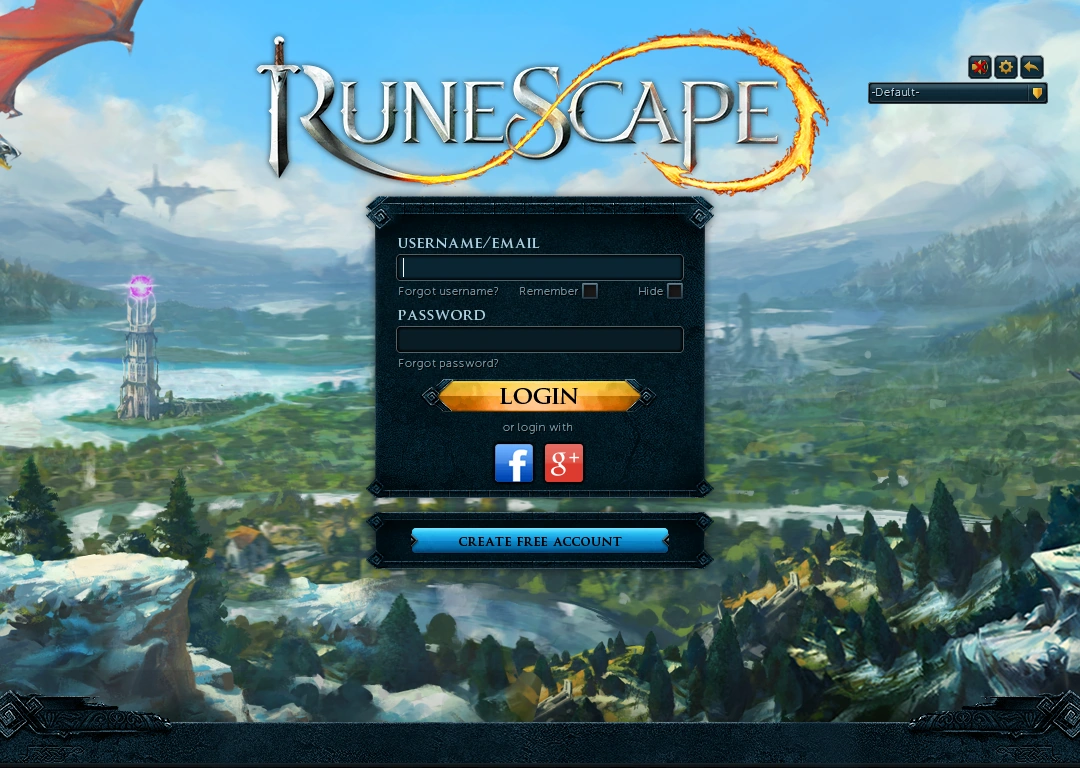
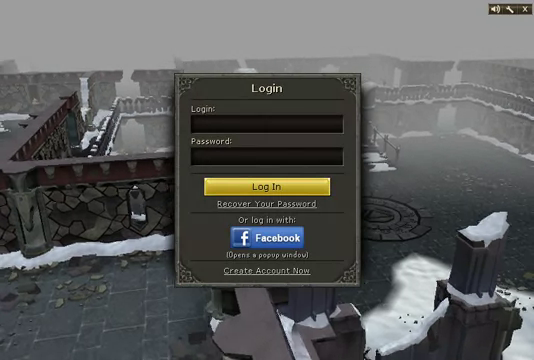
| − | ![[Login server|Login screen]] |
+ | ![[Login server|Login screen]] |
|- |
|- |
||
| + | | |
||
| − | |[[File:LoginClassic.png|150px]] {{right}} [[File:Oldloginscreen.png|150px]] {{right}} [[File:Flames of Lloigh-enn.png|150px]] {{right}} [[File:RSHD Login2.png|150px|Dorgesh'Kaan variant]]<br />{{right}} [[File:LoginRuneTek5.png|150px]] {{right}} [[File:Old Login with demo.png|150px]] {{right}} [[File:New login screen.png|150px]] {{right}} [[File:Log-in screen nov2010.png|150px]] [[File:Log-in screen 11-2011.png|150px]] {{right}} [[File:Log in Screen 22 7 2013.png|150px]] {{right}} [[File:Log in Screen 22 10 2013.png|150px]] |
||
| + | [[File:2001 login screen.png|150px]] {{Right}} |
||
| + | [[File:Login server old1.png|150px]] {{Right}} |
||
| + | [[File:Login server old2.png|150px]] {{Right}} |
||
| + | [[File:Login server old3.png|150px]] {{Right}} |
||
| + | [[File:Login server old4.png|150px]] {{Right}} |
||
| + | [[File:Login server old5.png|150px]] {{Right}} |
||
| + | [[File:Login server old6.png|150px]] {{Right}} |
||
| + | [[File:Login server old8.png|150px]] {{Right}} |
||
| + | [[File:Login server old9.png|150px]] {{Right}} |
||
| + | [[File:Login server old10.png|150px]] {{Right}} |
||
| + | [[File:Login server old11.png|150px]] {{Right}} |
||
| + | [[File:Login server old12.png|150px]] {{Right}} |
||
| + | [[File:Login server old14.png|150px]] {{Right}} |
||
| + | [[File:Login server old15.png|150px]] {{Right}} |
||
| + | [[File:Login server old16.png|150px]] {{Right}} |
||
| + | [[File:Login server old17.png|150px]] {{Right}} |
||
| + | [[File:Login server old18.png|150px]] {{Right}} |
||
| + | [[File:Login server old19.png|150px]] {{Right}} |
||
| + | [[File:Login server old20.png|150px]] {{Right}} |
||
| + | [[File:Login server old21.png|150px]] {{Right}} |
||
| + | [[File:Login server old22.png|150px]] {{Right}} |
||
| + | [[File:Login server old23.png|150px]] {{Right}} |
||
| + | [[File:Login server.png|150px]] |
||
| + | |- |
||
| + | !Animated login screen |
||
| + | |- |
||
| + | | |
||
| + | [[File:Login server animated.png|150px]] {{Right}} |
||
| + | [[File:Login server animated2.png|150px]] {{Right}} |
||
| + | [[File:Login server animated3.png|150px]] {{Right}} |
||
| + | [[File:Login server animated4.png|150px]] |
||
|- |
|- |
||
![[Loading process|Pre-login loading process]] (incomplete) |
![[Loading process|Pre-login loading process]] (incomplete) |
||
|- |
|- |
||
| − | |[[File:Original loading screen.png|300px]] {{Right}} [[File:RSC loading screen.png|300px]] {{Right}} [[File:Loading fonts.png|300px]] {{right}} [[File:Loginscreen.png|300px|One of the variants with Ozan]] {{right}} [[File:Loading process.png|300px|One of the variants with To'Kash.]] [[File:Pre log-in loading process 11-2011.png|300px]] |
+ | |[[File:Original loading screen.png|300px]] {{Right}} [[File:RSC loading screen.png|300px]] {{Right}} [[File:Loading fonts.png|300px]] {{right}} [[File:Loginscreen.png|300px|One of the variants with Ozan]] {{right}} [[File:Loading process.png|300px|One of the variants with To'Kash.]] {{right}} [[File:Pre log-in loading process 11-2011.png|300px]] |
|- |
|- |
||
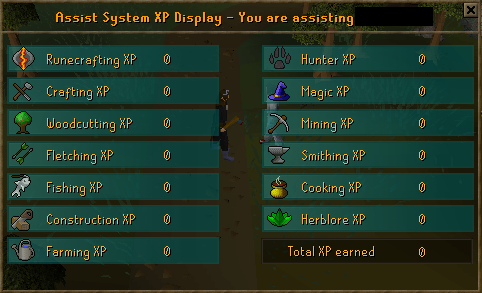
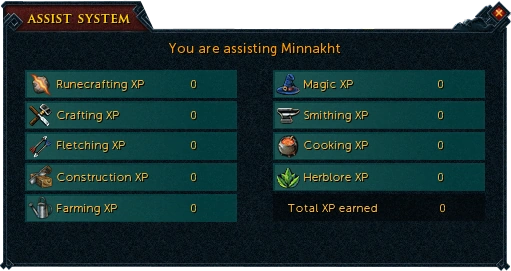
![[Assist system]] screen |
![[Assist system]] screen |
||
|- |
|- |
||
| + | | |
||
| ⚫ | |||
| + | [[File:Assist system old1.png|400px]] {{Right}} |
||
| + | [[File:Assist system old2.png|400px]] {{Right}} |
||
| ⚫ | |||
|- |
|- |
||
| − | ![[Impetuous Impulses |
+ | ![[Impetuous Impulses]] interface |
|- |
|- |
||
| + | | |
||
| − | |[[File:Impling log old.png|Implings (before)]] {{right}} [[File:Impling scroll view.png|Implings (after)]] |
||
| + | [[File:Impetuous Impulses interface old1.png|x100px]] {{Right}} |
||
| + | [[File:Impetuous Impulses interface old2.png|x100px]] {{Right}} |
||
| + | [[File:Impetuous Impulses interface old3.png|100px]] {{Right}} |
||
| + | [[File:Impetuous Impulses interface.png|100px]] |
||
|- |
|- |
||
![[Treasure Trail]] reward |
![[Treasure Trail]] reward |
||
|- |
|- |
||
| + | | |
||
| ⚫ | |||
| ⚫ | |||
[[File:Treasure trail reward interface.png]] |
[[File:Treasure trail reward interface.png]] |
||
|- |
|- |
||
!Various [[cursors]] |
!Various [[cursors]] |
||
|- |
|- |
||
| + | | |
||
| ⚫ | |||
| + | [[File:Old Cursors.png]] {{Right}} |
||
| ⚫ | |||
|- |
|- |
||
!Advanced [[graphic options]] |
!Advanced [[graphic options]] |
||
|- |
|- |
||
| + | | |
||
| − | + | {{Extimage|http://images2.wikia.nocookie.net/__cb20080713072144/runescape/images/archive/9/90/20080805122426%21Graphic_Options.PNG|Graphic Options.png|200px}} {{right}} {{Extimage|http://images1.wikia.nocookie.net/__cb20080805122428/runescape/images/archive/9/90/20081015193621%21Graphic_Options.PNG|Graphic Options.png|200px}} {{right}} {{Extimage|http://images3.wikia.nocookie.net/__cb20081015193624/runescape/images/archive/9/90/20090905135233%21Graphic_Options.PNG|Graphic Options.png|200px}} {{right}}<br />{{Extimage|http://images2.wikia.nocookie.net/__cb20091203151856/runescape/images/archive/9/90/20100202204154%21Graphic_Options.PNG|Graphic Options.png|200px}} {{right}} {{Extimage|http://images3.wikia.nocookie.net/__cb20100202204156/runescape/images/archive/9/90/20100208184457%21Graphic_Options.PNG|Graphic Options.png|200px}} {{right}} {{Extimage|http://images4.wikia.nocookie.net/__cb20100208184459/runescape/images/archive/9/90/20100304235610%21Graphic_Options.PNG|Graphic Options.png|200px}} {{right}} {{Extimage|http://images3.wikia.nocookie.net/__cb20100304235613/runescape/images/archive/9/90/20100906144920%21Graphic_Options.PNG|Graphic Options.png|200px}} {{Right}}<br />{{Extimage|http://images3.wikia.nocookie.net/__cb20100906145341/runescape/images/archive/e/ea/20101124180523%21OptionsMain.png|OptionsMain.png|200px}} {{Extimage|http://images1.wikia.nocookie.net/__cb20100906144922/runescape/images/archive/9/90/20101124175514%21Graphic_Options.PNG|Graphic Options.png|200px}} {{right}} [[File:OptionsMain.png|200px]] [[File:Settings (Graphics) interface.png|200px]] |
|
|- |
|- |
||
![[Website|<nowiki/>]]http://runescape.com (incomplete) |
![[Website|<nowiki/>]]http://runescape.com (incomplete) |
||
|- |
|- |
||
| + | | |
||
| − | |[[File:Runescape website 2002.png|300px]] {{Right}} [[File:Runescape website 2003.png|300px]] {{Right}} [[File:Summoning mainpage.png|300px]] {{right}} [[File:Runescape Homepage - Mobilising Armies.png|300px]] {{right}} [[File:Homepage nov2010.png|300px]] {{right}} [[File:RuneScape homepage.png|300px]] |
+ | [[File:Runescape website 2001.png|300px]] {{Right}} [[File:Runescape website 2002.png|300px]] {{Right}} [[File:Runescape website 2003.png|300px]] {{Right}} [[File:Summoning mainpage.png|300px]] {{right}} [[File:Runescape Homepage - Mobilising Armies.png|300px]] {{right}} [[File:Homepage nov2010.png|300px]] {{right}} [[File:RuneScape homepage.png|300px]] |
|- |
|- |
||
![[Hitsplat]] |
![[Hitsplat]] |
||
|- |
|- |
||
| + | | |
||
| ⚫ | |||
| + | [[File:Hitsplat old1.png]] {{Right}} |
||
[[File:Hitsplat old2.png]] {{Right}} |
[[File:Hitsplat old2.png]] {{Right}} |
||
[[File:Hitsplat old3.png]] {{Right}} |
[[File:Hitsplat old3.png]] {{Right}} |
||
| Line 294: | Line 374: | ||
![[Hitsplat|Auto attack hitplats]] |
![[Hitsplat|Auto attack hitplats]] |
||
|- |
|- |
||
| + | | |
||
| − | + | [[File:Auto-attack melee hitsplat old1.png]][[File:Auto-attack magic hitsplat old1.png]][[File:Auto-attack ranged hitsplat old1.png]] {{Right}} |
|
[[File:Auto-attack melee hitsplat.png]][[File:Auto-attack magic hitsplat.png]][[File:Auto-attack ranged hitsplat.png]] |
[[File:Auto-attack melee hitsplat.png]][[File:Auto-attack magic hitsplat.png]][[File:Auto-attack ranged hitsplat.png]] |
||
|- |
|- |
||
![[Hitsplat|Ability hitsplats]] |
![[Hitsplat|Ability hitsplats]] |
||
|- |
|- |
||
| + | | |
||
| − | + | [[File:Melee ability hitsplat old1.png]][[File:Magic ability hitsplat old1.png]][[File:Ranged ability hitsplat old1.png]] {{Right}} |
|
[[File:Melee ability hitsplat.png]][[File:Magic ability hitsplat.png]][[File:Ranged ability hitsplat.png]] |
[[File:Melee ability hitsplat.png]][[File:Magic ability hitsplat.png]][[File:Ranged ability hitsplat.png]] |
||
|- |
|- |
||
![[Critical]] |
![[Critical]] |
||
|- |
|- |
||
| + | | |
||
| − | + | [[File:Critical melee hitsplat old1.png]][[File:Critical magic hitsplat old1.png]][[File:Critical ranged hitsplat old1.png]] {{Right}} |
|
[[File:Critical melee hitsplat.png]][[File:Critical magic hitsplat.png]][[File:Critical ranged hitsplat.png]] |
[[File:Critical melee hitsplat.png]][[File:Critical magic hitsplat.png]][[File:Critical ranged hitsplat.png]] |
||
|- |
|- |
||
![[Hitsplat|Zero hit]] |
![[Hitsplat|Zero hit]] |
||
|- |
|- |
||
| + | | |
||
| ⚫ | |||
| ⚫ | |||
[[File:Blocked hitsplat old2.png]] {{Right}} |
[[File:Blocked hitsplat old2.png]] {{Right}} |
||
[[File:Blocked hitsplat old3.png]] {{Right}} |
[[File:Blocked hitsplat old3.png]] {{Right}} |
||
| Line 318: | Line 402: | ||
![[Hitsplat|Poison hit]] |
![[Hitsplat|Poison hit]] |
||
|- |
|- |
||
| + | | |
||
| ⚫ | |||
| + | [[File:Poison hitsplat old1.png]] {{Right}} |
||
[[File:Poison hitsplat old2.png]] {{Right}} |
[[File:Poison hitsplat old2.png]] {{Right}} |
||
[[File:Poison hitsplat old3.png]] {{Right}} |
[[File:Poison hitsplat old3.png]] {{Right}} |
||
| Line 325: | Line 410: | ||
![[Hitsplat|Disease hitsplat]] |
![[Hitsplat|Disease hitsplat]] |
||
|- |
|- |
||
| + | | |
||
| ⚫ | |||
| + | [[File:Disease hitsplat old1.png]] {{Right}} |
||
[[File:Disease hitsplat old2.png]] {{Right}} |
[[File:Disease hitsplat old2.png]] {{Right}} |
||
[[File:Disease hitsplat old3.png]] {{Right}} |
[[File:Disease hitsplat old3.png]] {{Right}} |
||
| Line 332: | Line 418: | ||
![[Hitsplat|Healing hitsplat]] |
![[Hitsplat|Healing hitsplat]] |
||
|- |
|- |
||
| + | | |
||
| ⚫ | |||
| + | [[File:Healing hitsplat old1.png]] {{Right}} |
||
[[File:Healing hitsplat old2.png]] {{Right}} |
[[File:Healing hitsplat old2.png]] {{Right}} |
||
[[File:Healing hitsplat old3.png]] {{Right}} |
[[File:Healing hitsplat old3.png]] {{Right}} |
||
| Line 339: | Line 426: | ||
|- |
|- |
||
|- |
|- |
||
| + | | |
||
| ⚫ | |||
| + | [[File:Absorption hitsplat old1.png]] {{Right}} |
||
[[File:Absorption hitsplat old2.png]] {{Right}} |
[[File:Absorption hitsplat old2.png]] {{Right}} |
||
[[File:Absorption hitsplat.png]] |
[[File:Absorption hitsplat.png]] |
||
| Line 345: | Line 433: | ||
!Misc. [[Hitsplat]]s |
!Misc. [[Hitsplat]]s |
||
|- |
|- |
||
| + | | |
||
| ⚫ | |||
| + | [[File:Cannon hitsplat old1.png]][[File:Deflect hitsplat old1.png]] {{Right}} |
||
[[File:Cannon hitsplat.png]][[File:Deflect hitsplat.png]] |
[[File:Cannon hitsplat.png]][[File:Deflect hitsplat.png]] |
||
|- |
|- |
||
| Line 354: | Line 443: | ||
![[Slayer master]] |
![[Slayer master]] |
||
|- |
|- |
||
| + | | |
||
| − | + | [[File:Slayer master old.png]] {{right}} [[File:Slayermasternew.png]] {{right}} http://images1.wikia.nocookie.net/__cb20110209223560/runescape/images/archive/b/ba/20120117151938%21Slayer master map icon.png {{right}} [[File:Slayer master map icon.png]] |
|
|- |
|- |
||
![[Holiday event]] |
![[Holiday event]] |
||
| Line 366: | Line 456: | ||
![[Grand Exchange]] map |
![[Grand Exchange]] map |
||
|- |
|- |
||
| − | |[[File:GE map old.png]] {{right}} [[File: |
+ | |[[File:GE map old.png]] {{right}} [[File:Grand Exchange map.png|353px]] |
|- |
|- |
||
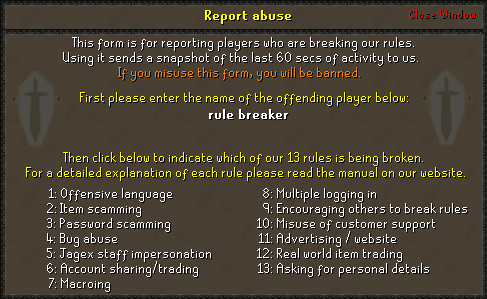
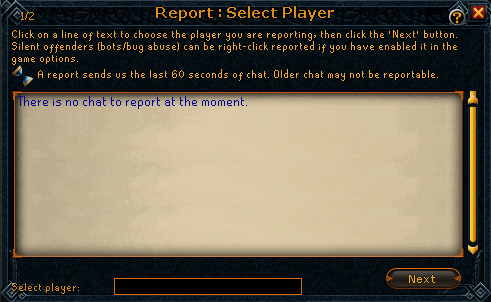
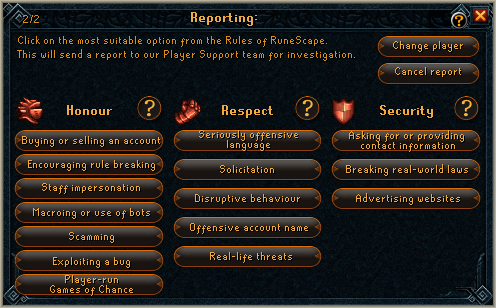
![[Report abuse]] screen |
![[Report abuse]] screen |
||
| Line 382: | Line 472: | ||
![[RuneScape]] logo |
![[RuneScape]] logo |
||
|- |
|- |
||
| + | | |
||
| − | |[[File:Runescape logo 2002.png|300px]] {{right}} [[File:Runescape logo 2003.png|300px]] {{right}} [[File:RS logo old.png|300px]] {{right}} [[File:RS logo old2.png|300px]] {{right}} [[File:RS logo old3.png|300px]] {{right}} [[File:RuneScapeLogo.png|300px]] {{right}} [[File:RuneScape 3 Logo.png|300px]] |
+ | [[File:Early RS logo.png|300px]] {{right}} [[File:Runescape logo 2002.png|300px]] {{right}} [[File:Runescape logo 2003.png|300px]] {{right}} [[File:RS logo old.png|300px]] {{right}} [[File:RS logo old2.png|300px]] {{right}} [[File:RS logo old3.png|300px]] {{right}} [[File:RuneScapeLogo.png|300px]] {{right}} [[File:RuneScape 3 Logo.png|300px]] |
|- |
|- |
||
![[Tool Leprechaun]] storage |
![[Tool Leprechaun]] storage |
||
| Line 390: | Line 481: | ||
![[Adventurer's Log]] |
![[Adventurer's Log]] |
||
|- |
|- |
||
| − | |[[File:Adventurer's |
+ | |[[File:Adventurer's Log old1.png|x250px]] {{Right}} [[File:Adventurer's Log old2.png|x250px]] {{Right}} [[File:Adventurer's Log old3.png|x250px]] {{Right}} [[File:Adventurer's Log old4.png|x250px]] {{Right}} [[File:Adventurer's Log old5.png|x250px]] {{Right}} [[File:Adventurer's Log old6.png|x250px]] {{Right}} [[File:Adventurer's Log.png|x250px]] |
|- |
|- |
||
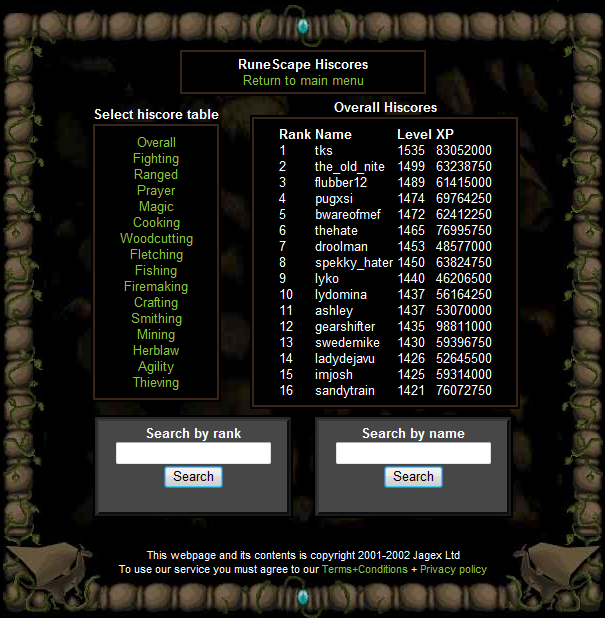
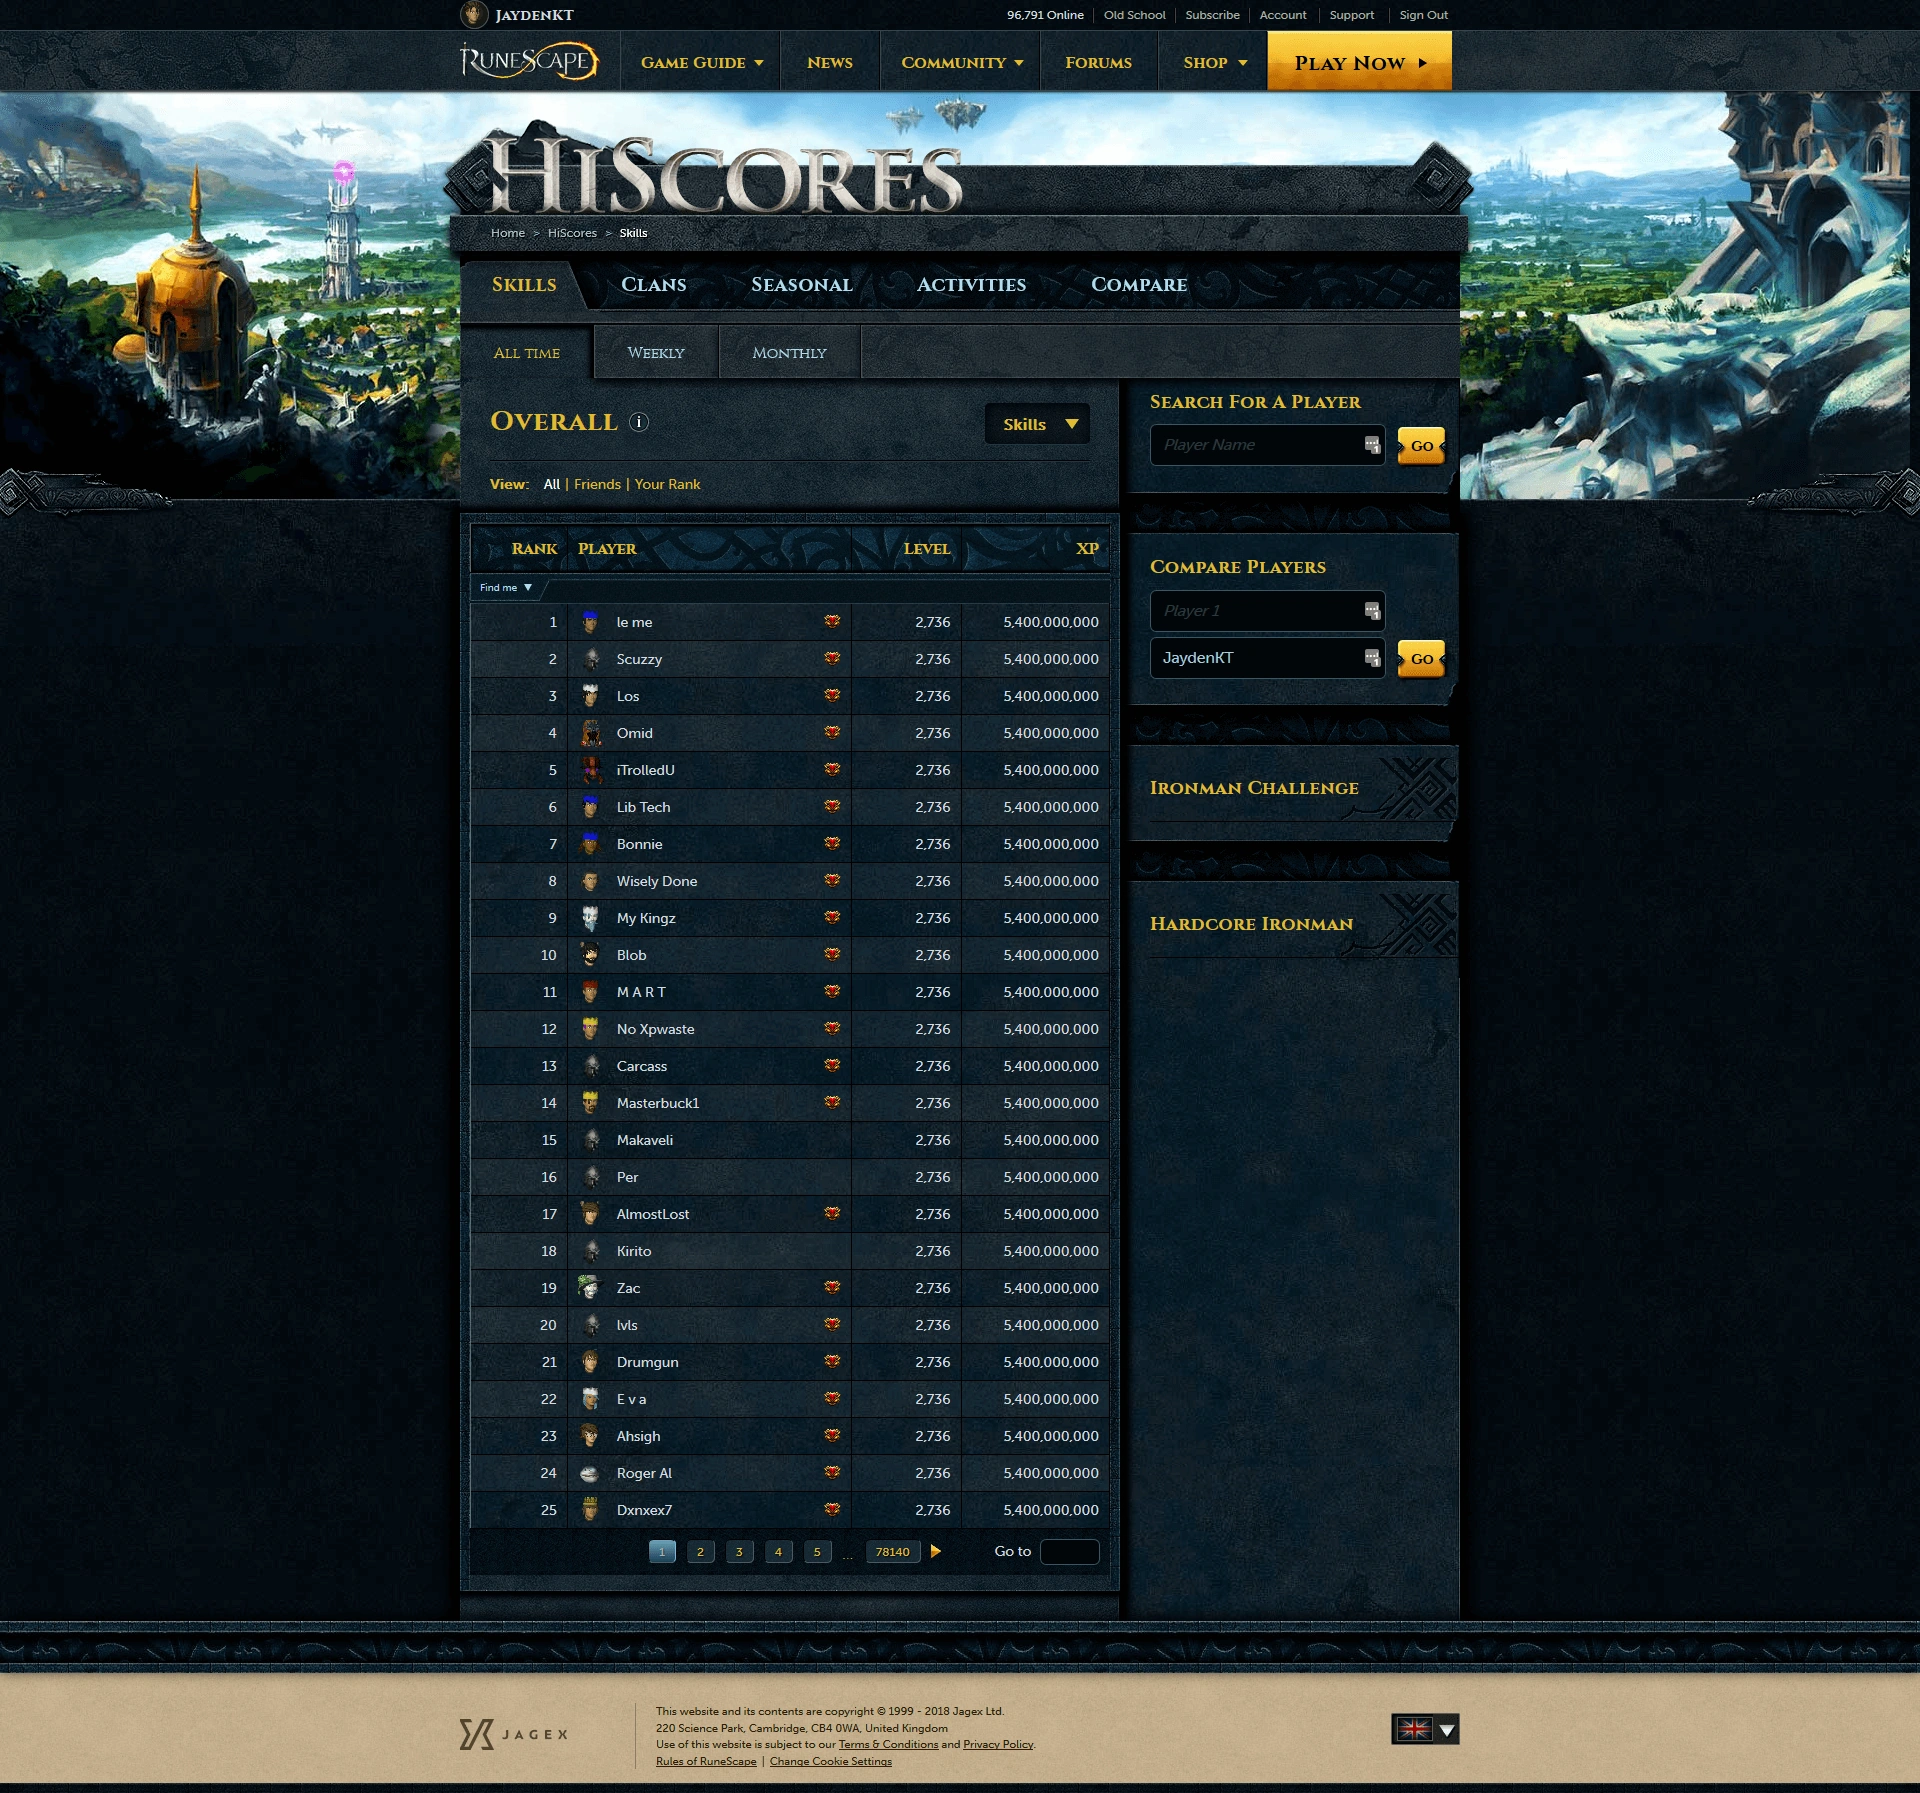
![[Hiscores]] (incomplete) |
![[Hiscores]] (incomplete) |
||
|- |
|- |
||
| + | | |
||
| − | |[[File:Runescape highscores 2002.png|300px]] {{right}} [[File:Runescape highscores 2003.png|300px]] {{right}} [[File:Hiscores January 11 2011.png|300px]] {{right}} [[File:Hiscores.png|300px]] |
+ | [[File:Runescape hiscores November 2001.jpg|300px]] {{right}} [[File:Runescape highscores 2002.png|300px]] {{right}} [[File:Runescape highscores 2003.png|300px]] {{right}} [[File:Hiscores January 11 2011.png|300px]] {{right}} [[File:Hiscores.png|300px]] |
|- |
|- |
||
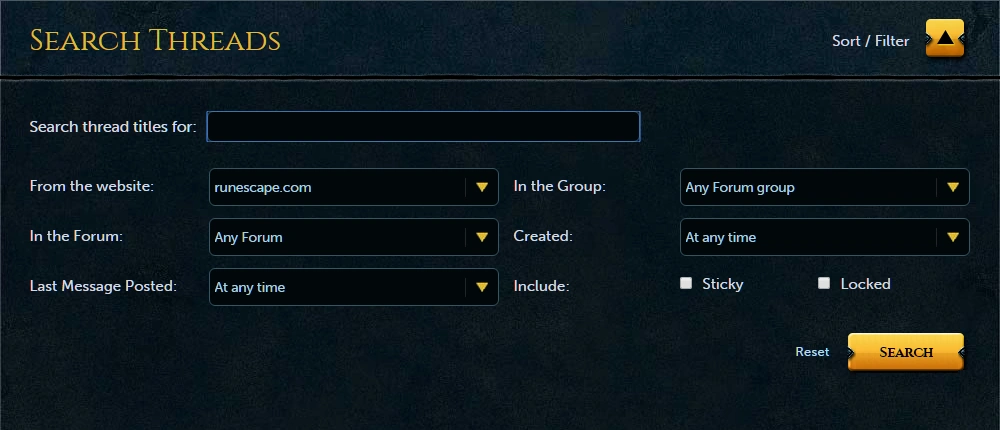
![[RuneScape Forums]] search |
![[RuneScape Forums]] search |
||
| Line 430: | Line 522: | ||
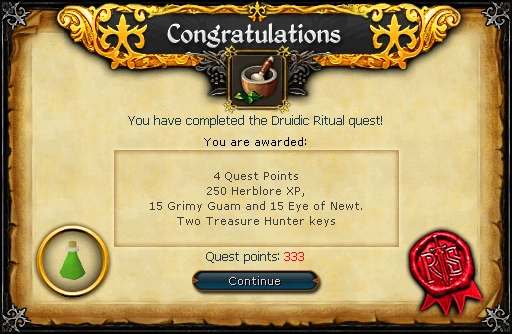
![[Quest]] reward screen |
![[Quest]] reward screen |
||
|- |
|- |
||
| + | | |
||
| ⚫ | |||
| + | [[File:Druidic Ritual reward (historical).png]]{{Right}} |
||
[[File:Druidic Ritual reward.png]] |
[[File:Druidic Ritual reward.png]] |
||
|- |
|- |
||
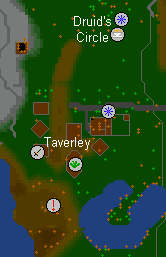
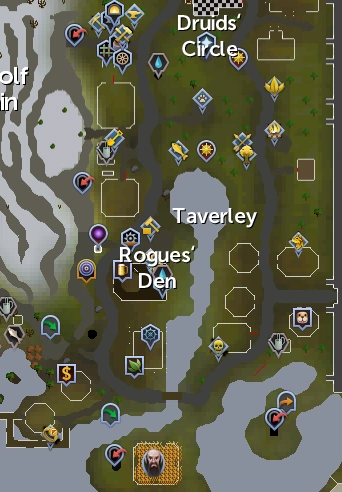
![[Taverley]] |
![[Taverley]] |
||
|- |
|- |
||
| − | |[[File:RSC taverley.png]] {{right}} [[File:Taverley map old.png]] {{right}} [[File: |
+ | |[[File:RSC taverley.png]] {{right}} [[File:Taverley map old.png]] {{right}} [[File:Taverley map.png]] |
|- |
|- |
||
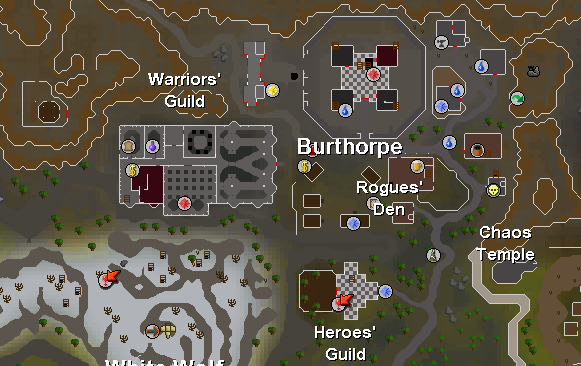
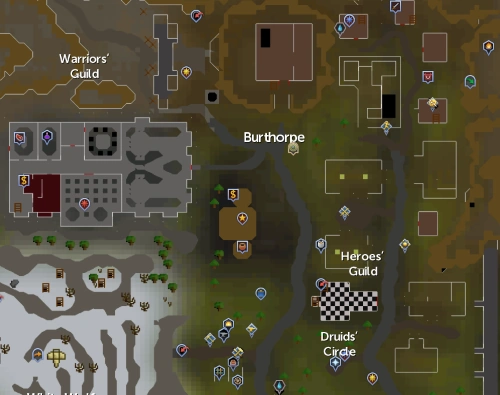
![[Burthorpe]] (incomplete) |
![[Burthorpe]] (incomplete) |
||
|- |
|- |
||
| − | |[[File:Burthorpe map.png]] {{right}} [[File:Burthorpe map |
+ | |[[File:Burthorpe map (historical).png]] {{right}} [[File:Burthorpe map.png]] |
|- |
|- |
||
![[Ring of stone]], [[bone brooch]] & [[easter ring]] |
![[Ring of stone]], [[bone brooch]] & [[easter ring]] |
||
|- |
|- |
||
| − | |http://images1.wikia.nocookie.net/__cb20080430215031/runescape/images/archive/c/c4/20091220013030%21Ring_of_Stone_interface.png {{right}} [[File:Ring of Stone interface.png]] [[File:Easter |
+ | |http://images1.wikia.nocookie.net/__cb20080430215031/runescape/images/archive/c/c4/20091220013030%21Ring_of_Stone_interface.png {{right}} [[File:Ring of Stone interface.png]] [[File:Easter ring interface.png]] [[File:Bone Brooch interface.png]] |
|- |
|- |
||
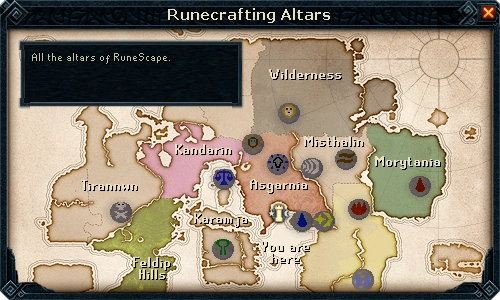
![[Runecrafting altar]] map |
![[Runecrafting altar]] map |
||
Latest revision as of 14:11, 8 June 2019
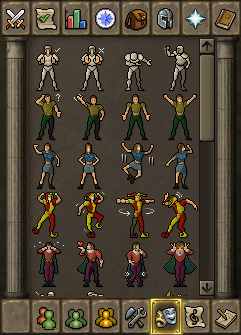
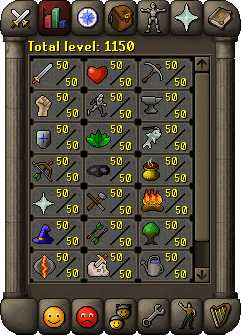
| Skill screen (Click to enlarge.) |
|---|
|
|
| Level Up |
|
|
| Lunar Spells |
|
|
| Prayer interface |
|
|
| Ancient Curses |
|
|
| Friends List |
|
|
| Inventory |
|
|
| Worn Equipment |
|
|
| Equipment Stats |
|
|
| Game options |
|
|
| Music Player |
|
|
| Combat styles |
|
|
| Castle Wars Ticket Exchange |
|
|
| Managing Miscellania collect screen |
|
|
| Walk here |
|
|
| Chatbox |
|
|
| Accept Aid |
|
|
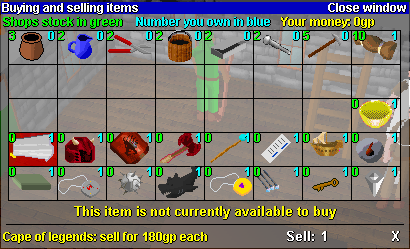
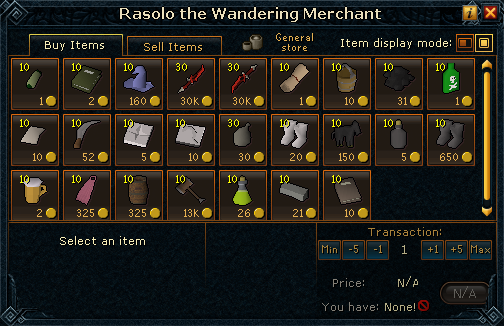
| Shop interface |
|
|
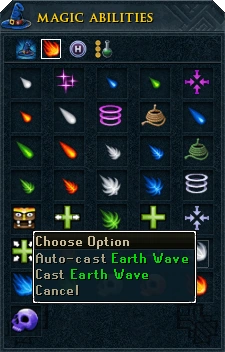
| Autocast |
|
|
| Lamp interface |
|
|
| Sandwich lady's food |
|
|
| Sandwich lady's snacks' help key |
|
|
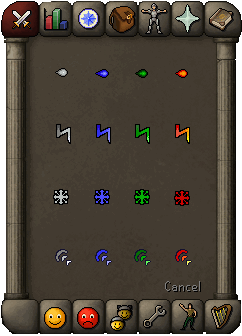
| Standard Spellbook |
|
|
| Teleblock |
| Grand Exchange interface |
|
|
| Trade window |
|
|
| Welcome screen |
|
|
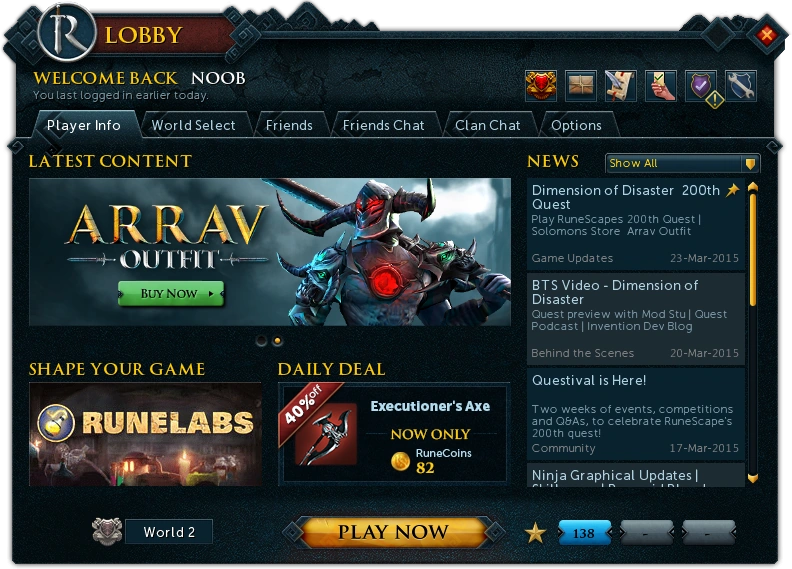
| RuneScape Lobby |
 → →  → → 
|
| Login screen |
|
|
| Animated login screen |
|
|
| Pre-login loading process (incomplete) |
 → →  → →  → →  → →  → → 
|
| Assist system screen |
|
|
| Impetuous Impulses interface |
|
|
| Treasure Trail reward |
|
|
| Various cursors |
|
|
| Advanced graphic options |
|
| http://runescape.com (incomplete) |
|
|
| Hitsplat |
|
|
| Auto attack hitplats |
|
|
| Ability hitsplats |
|
|
| Critical |
|
|
| Zero hit |
|
|
| Poison hit |
|
|
| Disease hitsplat |
|
|
| Healing hitsplat |
|
|
|
|
| Misc. Hitsplats |
|
|
| General store |
| Slayer master |
|
|
| Holiday event |
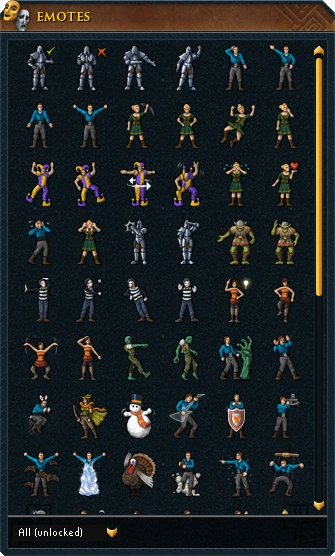
| Emote interface (incomplete - needs all emotes) |
 → → → → 
|
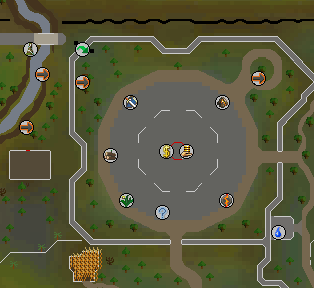
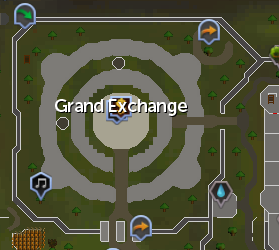
| Grand Exchange map |
 → → 
|
| Report abuse screen |
 → →  → →  
|
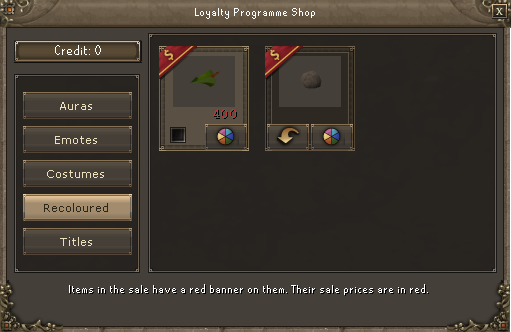
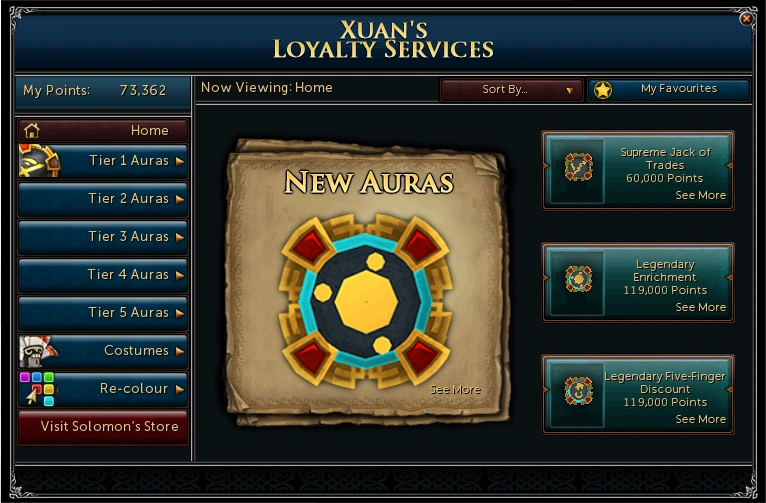
| Loyalty Programme Shop |
 → → 
|
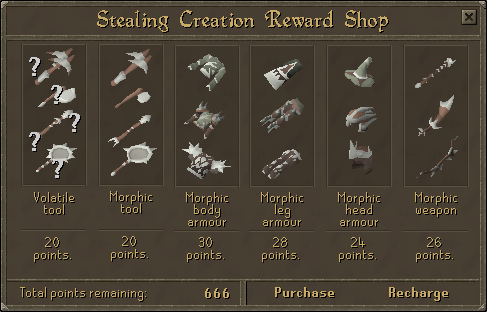
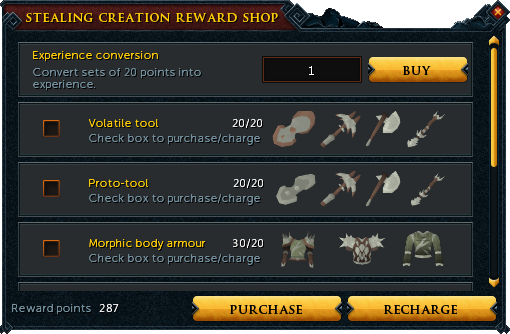
| Stealing Creation rewards |
 → → 
|
| RuneScape logo |
|
|
| Tool Leprechaun storage |
 → → 
|
| Adventurer's Log |
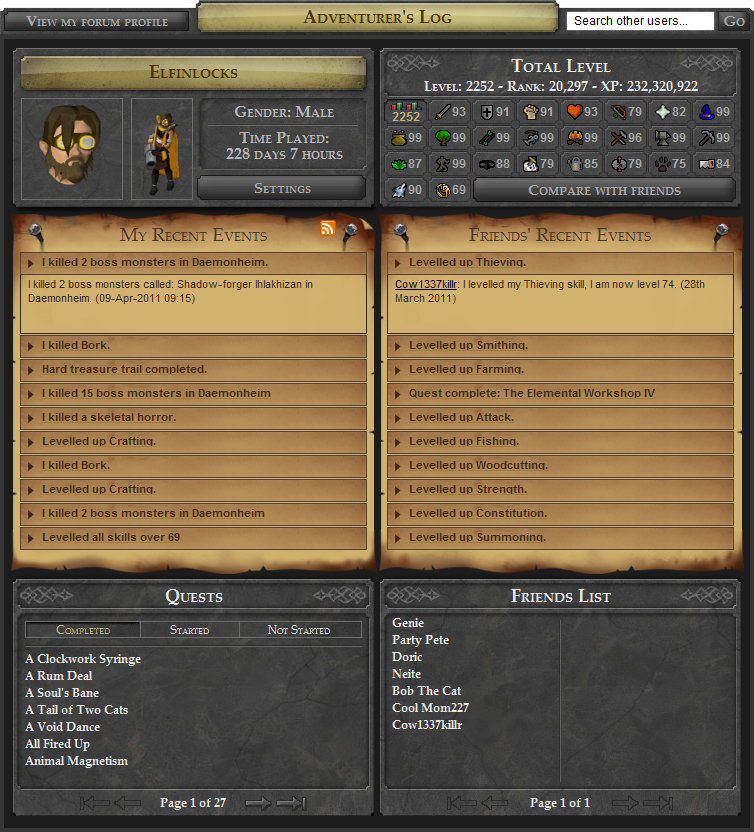 → →  → →  → →  → →  → →  → → 
|
| Hiscores (incomplete) |
|
|
| RuneScape Forums search |
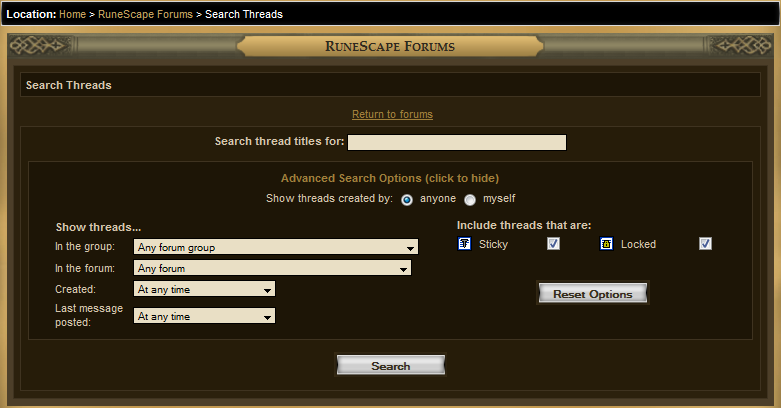 → → 
|
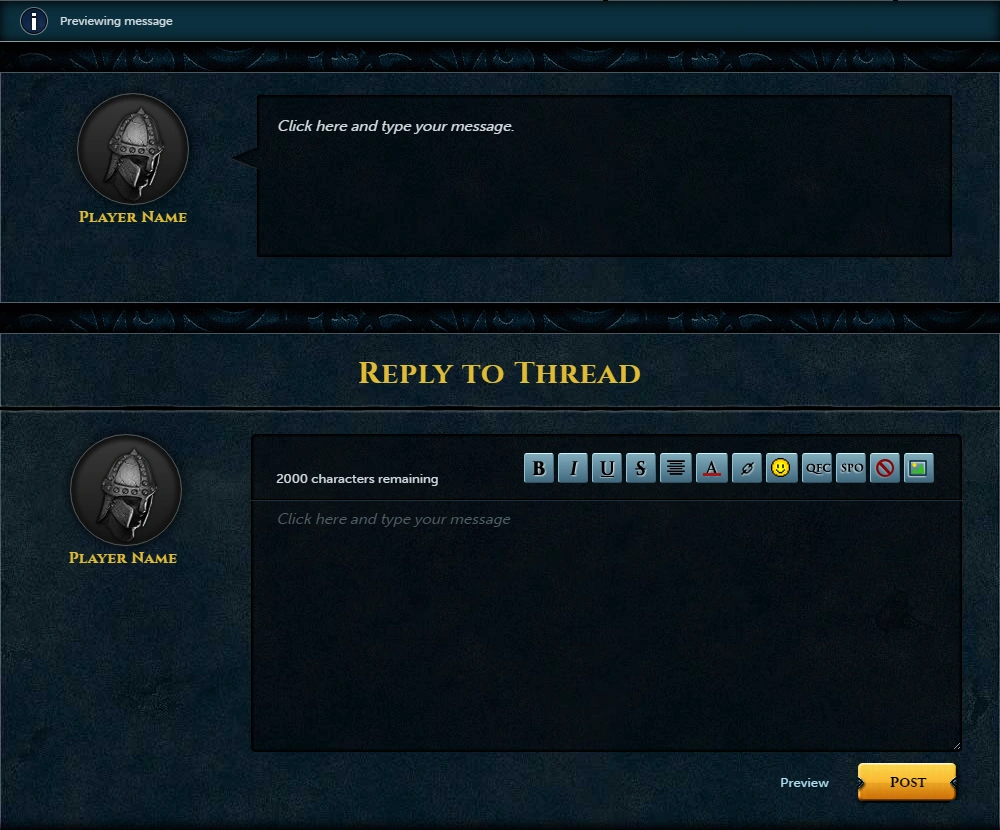
| Forums message preview |
 → → 
|
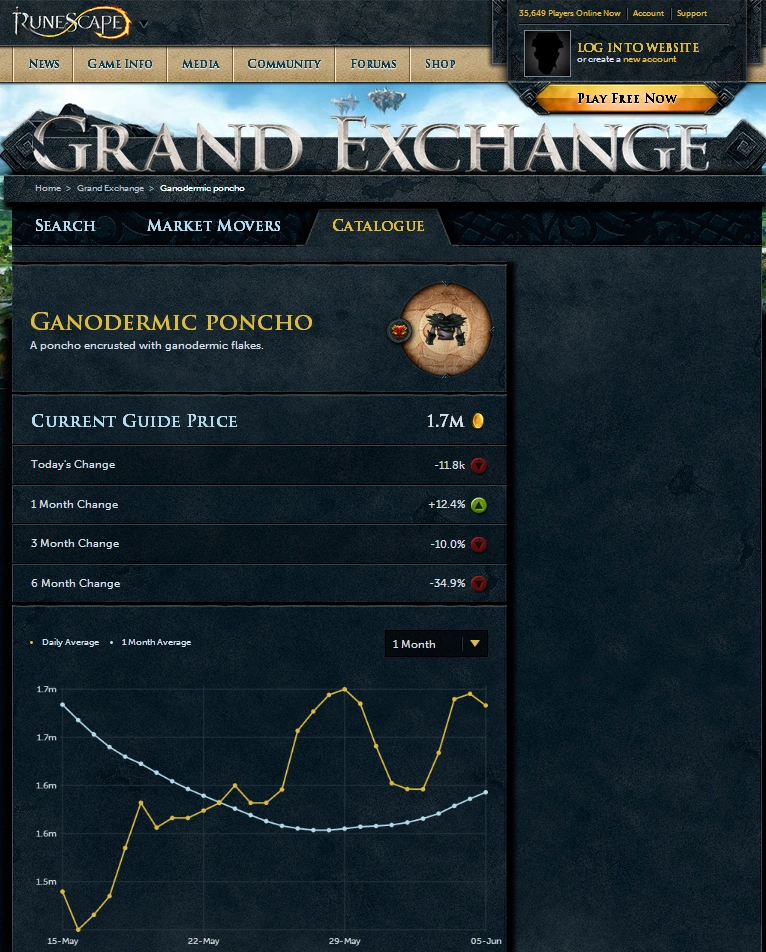
| Grand Exchange Database |
|
| Quest icon |
 map icon.png → map icon.png → |
| Bonus xp |
 → → |
| Special attack bar |
 → → |
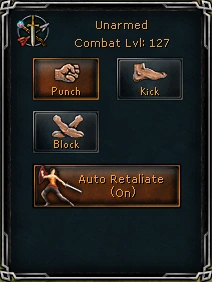
| Auto Retaliate |
 → → |
| XP Counter |
 → → 
|
| Quest reward screen |
|
|
| Taverley |
 → →  → → 
|
| Burthorpe (incomplete) |
 → → 
|
| Ring of stone, bone brooch & easter ring |
 → →   
|
| Runecrafting altar map |
 → → 
|
| Corporeal Beast warning |
 → → 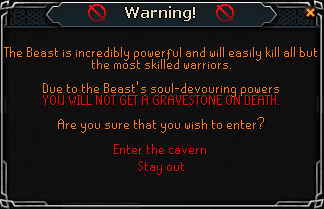
|


 master map icon.png