(→Master: It is potted, but the object is just called "plant".) |
m (cleanup) |
||
| (37 intermediate revisions by 27 users not shown) | |||
| Line 4: | Line 4: | ||
As of 26 February 2018 there are 58 hidey-holes. There are [[achievement|achievements]] for building at least 1 hidey-hole, and completing all hidey holes. |
As of 26 February 2018 there are 58 hidey-holes. There are [[achievement|achievements]] for building at least 1 hidey-hole, and completing all hidey holes. |
||
| + | |||
| + | [[File:Hidey-holes_map.jpg|thumb|A map of the locations.]] |
||
==Materials== |
==Materials== |
||
| Line 64: | Line 66: | ||
To fill all hidey-holes, the following items are required: |
To fill all hidey-holes, the following items are required: |
||
| − | {| class="wikitable mw-collapsible mw-collapsed" |
+ | {| class="wikitable mw-collapsible mw-collapsed lighttable" |
|+ class="nowrap" | Easy: |
|+ class="nowrap" | Easy: |
||
|- |
|- |
||
| Line 358: | Line 360: | ||
|} |
|} |
||
| − | {| class="wikitable mw-collapsible mw-collapsed" |
+ | {| class="wikitable mw-collapsible mw-collapsed lighttable" |
|+ class="nowrap" | Medium: |
|+ class="nowrap" | Medium: |
||
|- |
|- |
||
| Line 527: | Line 529: | ||
|} |
|} |
||
| − | {| class="wikitable mw-collapsible mw-collapsed" |
+ | {| class="wikitable mw-collapsible mw-collapsed lighttable" |
|+ class="nowrap" | Hard: |
|+ class="nowrap" | Hard: |
||
|- |
|- |
||
| Line 645: | Line 647: | ||
|- |
|- |
||
!Item |
!Item |
||
| + | !Number |
||
| − | !Cost |
+ | !Cost each |
| + | !Cost for all |
||
|- |
|- |
||
|[[Amulet of magic]] |
|[[Amulet of magic]] |
||
| + | |1 |
||
| + | |{{Coins|{{#expr: {{GEP|Amulet of magic|1}}}}}} |
||
|{{Coins|{{#expr: {{GEP|Amulet of magic|1}}}}}} |
|{{Coins|{{#expr: {{GEP|Amulet of magic|1}}}}}} |
||
|- |
|- |
||
|[[Amulet of ranging]] |
|[[Amulet of ranging]] |
||
| + | |1 |
||
| + | |{{Coins|{{#expr: {{GEP|Amulet of ranging|1}}}}}} |
||
|{{Coins|{{#expr: {{GEP|Amulet of ranging|1}}}}}} |
|{{Coins|{{#expr: {{GEP|Amulet of ranging|1}}}}}} |
||
|- |
|- |
||
|[[Ancient staff]] |
|[[Ancient staff]] |
||
| + | |1 |
||
| + | |{{Coins|{{#expr: {{GEP|Ancient staff|1}}}}}} |
||
|{{Coins|{{#expr: {{GEP|Ancient staff|1}}}}}} |
|{{Coins|{{#expr: {{GEP|Ancient staff|1}}}}}} |
||
|- |
|- |
||
|[[Asylum surgeon's ring]] |
|[[Asylum surgeon's ring]] |
||
| + | |1 |
||
| ⚫ | |||
|{{Coins|500000}}<ref name="reclaim">Reclaim cost</ref> |
|{{Coins|500000}}<ref name="reclaim">Reclaim cost</ref> |
||
|- |
|- |
||
|[[Berserker ring]] |
|[[Berserker ring]] |
||
| + | |1 |
||
| + | |{{Coins|{{#expr: {{GEP|Berserker ring|1}}}}}} |
||
|{{Coins|{{#expr: {{GEP|Berserker ring|1}}}}}} |
|{{Coins|{{#expr: {{GEP|Berserker ring|1}}}}}} |
||
|- |
|- |
||
|[[Boater]] |
|[[Boater]] |
||
| + | |1 |
||
| + | |{{Coins|{{#expr:{{Min|{{GEP|Red boater}}|{{GEP|Orange boater}}|{{GEP|Green boater}}|{{GEP|Blue boater}}|{{GEP|Black boater}}|{{GEP|Gilded boater}}}}}}}} - {{Coins|{{#expr:{{Max|{{GEP|Red boater}}|{{GEP|Orange boater}}|{{GEP|Green boater}}|{{GEP|Blue boater}}|{{GEP|Black boater}}|{{GEP|Gilded boater}}}}}}}} |
||
|{{Coins|{{#expr:{{Min|{{GEP|Red boater}}|{{GEP|Orange boater}}|{{GEP|Green boater}}|{{GEP|Blue boater}}|{{GEP|Black boater}}|{{GEP|Gilded boater}}}}}}}} - {{Coins|{{#expr:{{Max|{{GEP|Red boater}}|{{GEP|Orange boater}}|{{GEP|Green boater}}|{{GEP|Blue boater}}|{{GEP|Black boater}}|{{GEP|Gilded boater}}}}}}}} |
|{{Coins|{{#expr:{{Min|{{GEP|Red boater}}|{{GEP|Orange boater}}|{{GEP|Green boater}}|{{GEP|Blue boater}}|{{GEP|Black boater}}|{{GEP|Gilded boater}}}}}}}} - {{Coins|{{#expr:{{Max|{{GEP|Red boater}}|{{GEP|Orange boater}}|{{GEP|Green boater}}|{{GEP|Blue boater}}|{{GEP|Black boater}}|{{GEP|Gilded boater}}}}}}}} |
||
|- |
|- |
||
|[[Cape of legends]] |
|[[Cape of legends]] |
||
| + | |1 |
||
| + | |{{Coins|450}} |
||
|{{Coins|450}} |
|{{Coins|450}} |
||
|- |
|- |
||
|[[Cavalier]] |
|[[Cavalier]] |
||
| + | |1 |
||
| + | |{{Coins|{{#expr:{{Min|{{GEP|Tan cavalier}}|{{GEP|Dark cavalier}}|{{GEP|Black cavalier}}|{{GEP|Gilded cavalier}}}}}}}} - {{Coins|{{#expr:{{Max|{{GEP|Tan cavalier}}|{{GEP|Dark cavalier}}|{{GEP|Black cavalier}}|{{GEP|Gilded cavalier}}}}}}}} |
||
|{{Coins|{{#expr:{{Min|{{GEP|Tan cavalier}}|{{GEP|Dark cavalier}}|{{GEP|Black cavalier}}|{{GEP|Gilded cavalier}}}}}}}} - {{Coins|{{#expr:{{Max|{{GEP|Tan cavalier}}|{{GEP|Dark cavalier}}|{{GEP|Black cavalier}}|{{GEP|Gilded cavalier}}}}}}}} |
|{{Coins|{{#expr:{{Min|{{GEP|Tan cavalier}}|{{GEP|Dark cavalier}}|{{GEP|Black cavalier}}|{{GEP|Gilded cavalier}}}}}}}} - {{Coins|{{#expr:{{Max|{{GEP|Tan cavalier}}|{{GEP|Dark cavalier}}|{{GEP|Black cavalier}}|{{GEP|Gilded cavalier}}}}}}}} |
||
|- |
|- |
||
|[[Culinaromancer's gloves 10]] |
|[[Culinaromancer's gloves 10]] |
||
| + | |1 |
||
| + | |{{Coins|100000}} |
||
|{{Coins|100000}} |
|{{Coins|100000}} |
||
|- |
|- |
||
|[[Dagon'hai hat]] |
|[[Dagon'hai hat]] |
||
| + | |1 |
||
| + | |{{Coins|{{#expr: {{GEP|Dagon'hai hat|1}}}}}} |
||
|{{Coins|{{#expr: {{GEP|Dagon'hai hat|1}}}}}} |
|{{Coins|{{#expr: {{GEP|Dagon'hai hat|1}}}}}} |
||
|- |
|- |
||
|[[Dark bow]] |
|[[Dark bow]] |
||
| + | |1 |
||
| + | |{{Coins|{{#expr: {{GEP|Dark bow|1}}}}}} |
||
|{{Coins|{{#expr: {{GEP|Dark bow|1}}}}}} |
|{{Coins|{{#expr: {{GEP|Dark bow|1}}}}}} |
||
|- |
|- |
||
|[[Demon slayer gloves]] |
|[[Demon slayer gloves]] |
||
| + | |1 |
||
| + | |{{Coins|{{#expr: {{GEP|Demon slayer gloves|1}}}}}} |
||
|{{Coins|{{#expr: {{GEP|Demon slayer gloves|1}}}}}} |
|{{Coins|{{#expr: {{GEP|Demon slayer gloves|1}}}}}} |
||
|- |
|- |
||
|[[Dragon defender]] |
|[[Dragon defender]] |
||
| + | |1 |
||
| + | |Not sold |
||
|Not sold |
|Not sold |
||
|- |
|- |
||
|[[Dragon mask]] |
|[[Dragon mask]] |
||
| + | |1 |
||
| + | |{{Coins|{{#expr:{{Min|{{GEP|Green dragon mask}}|{{GEP|Blue dragon mask}}|{{GEP|Red dragon mask}}|{{GEP|Black dragon mask}}|{{GEP|Bronze dragon mask}}|{{GEP|Iron dragon mask}}|{{GEP|Steel dragon mask}}|{{GEP|Mithril dragon mask}}|{{GEP|Frost dragon mask}}|{{GEP|Adamant dragon mask}}|{{GEP|Rune dragon mask}}|{{GEP|Dragonstone dragon mask}}|{{GEP|Onyx dragon mask}}|{{GEP|Hydrix dragon mask}}}}}}}} - {{Coins|{{#expr:{{Max|{{GEP|Green dragon mask}}|{{GEP|Blue dragon mask}}|{{GEP|Red dragon mask}}|{{GEP|Black dragon mask}}|{{GEP|Bronze dragon mask}}|{{GEP|Iron dragon mask}}|{{GEP|Steel dragon mask}}|{{GEP|Mithril dragon mask}}|{{GEP|Frost dragon mask}}|{{GEP|Adamant dragon mask}}|{{GEP|Rune dragon mask}}|{{GEP|Dragonstone dragon mask}}|{{GEP|Onyx dragon mask}}|{{GEP|Hydrix dragon mask}}}}}}}} |
||
|{{Coins|{{#expr:{{Min|{{GEP|Green dragon mask}}|{{GEP|Blue dragon mask}}|{{GEP|Red dragon mask}}|{{GEP|Black dragon mask}}|{{GEP|Bronze dragon mask}}|{{GEP|Iron dragon mask}}|{{GEP|Steel dragon mask}}|{{GEP|Mithril dragon mask}}|{{GEP|Frost dragon mask}}|{{GEP|Adamant dragon mask}}|{{GEP|Rune dragon mask}}|{{GEP|Dragonstone dragon mask}}|{{GEP|Onyx dragon mask}}|{{GEP|Hydrix dragon mask}}}}}}}} - {{Coins|{{#expr:{{Max|{{GEP|Green dragon mask}}|{{GEP|Blue dragon mask}}|{{GEP|Red dragon mask}}|{{GEP|Black dragon mask}}|{{GEP|Bronze dragon mask}}|{{GEP|Iron dragon mask}}|{{GEP|Steel dragon mask}}|{{GEP|Mithril dragon mask}}|{{GEP|Frost dragon mask}}|{{GEP|Adamant dragon mask}}|{{GEP|Rune dragon mask}}|{{GEP|Dragonstone dragon mask}}|{{GEP|Onyx dragon mask}}|{{GEP|Hydrix dragon mask}}}}}}}} |
|{{Coins|{{#expr:{{Min|{{GEP|Green dragon mask}}|{{GEP|Blue dragon mask}}|{{GEP|Red dragon mask}}|{{GEP|Black dragon mask}}|{{GEP|Bronze dragon mask}}|{{GEP|Iron dragon mask}}|{{GEP|Steel dragon mask}}|{{GEP|Mithril dragon mask}}|{{GEP|Frost dragon mask}}|{{GEP|Adamant dragon mask}}|{{GEP|Rune dragon mask}}|{{GEP|Dragonstone dragon mask}}|{{GEP|Onyx dragon mask}}|{{GEP|Hydrix dragon mask}}}}}}}} - {{Coins|{{#expr:{{Max|{{GEP|Green dragon mask}}|{{GEP|Blue dragon mask}}|{{GEP|Red dragon mask}}|{{GEP|Black dragon mask}}|{{GEP|Bronze dragon mask}}|{{GEP|Iron dragon mask}}|{{GEP|Steel dragon mask}}|{{GEP|Mithril dragon mask}}|{{GEP|Frost dragon mask}}|{{GEP|Adamant dragon mask}}|{{GEP|Rune dragon mask}}|{{GEP|Dragonstone dragon mask}}|{{GEP|Onyx dragon mask}}|{{GEP|Hydrix dragon mask}}}}}}}} |
||
|- |
|- |
||
|[[Dragon rider amulet]] |
|[[Dragon rider amulet]] |
||
| + | |1 |
||
| ⚫ | |||
| + | |{{Coins|500,000}}<ref name="reclaim" /> |
||
| + | |{{Coins|500,000}}<ref name="reclaim" /> |
||
|- |
|- |
||
|[[Enhanced yaktwee stick]] |
|[[Enhanced yaktwee stick]] |
||
| + | |1 |
||
| + | |Not sold |
||
|Not sold |
|Not sold |
||
|- |
|- |
||
|[[Fire cape]] |
|[[Fire cape]] |
||
| + | |1 |
||
| + | |Not sold |
||
|Not sold |
|Not sold |
||
|- |
|- |
||
|[[Ghostly cloak]] |
|[[Ghostly cloak]] |
||
| + | |1 |
||
| + | |Not sold |
||
|Not sold |
|Not sold |
||
|- |
|- |
||
|[[Holy cithara]] |
|[[Holy cithara]] |
||
| + | |1 |
||
| + | |Not sold |
||
|Not sold |
|Not sold |
||
|- |
|- |
||
|[[Iban's staff]] |
|[[Iban's staff]] |
||
| + | |1 |
||
| + | |Not sold |
||
|Not sold |
|Not sold |
||
|- |
|- |
||
|[[Imphide hood]] |
|[[Imphide hood]] |
||
| + | |1 |
||
| + | |{{Coins|{{#expr: {{GEP|Imphide hood|1}}}}}} |
||
|{{Coins|{{#expr: {{GEP|Imphide hood|1}}}}}} |
|{{Coins|{{#expr: {{GEP|Imphide hood|1}}}}}} |
||
|- |
|- |
||
|[[Infinity boots]] |
|[[Infinity boots]] |
||
| + | |1 |
||
| + | |{{Coins|{{#expr: {{GEP|Infinity boots|1}}}}}} |
||
|{{Coins|{{#expr: {{GEP|Infinity boots|1}}}}}} |
|{{Coins|{{#expr: {{GEP|Infinity boots|1}}}}}} |
||
|- |
|- |
||
|[[Lab coat legs]] |
|[[Lab coat legs]] |
||
| + | |1 |
||
| + | |Not sold |
||
|Not sold |
|Not sold |
||
|- |
|- |
||
|[[Lab coat top]] |
|[[Lab coat top]] |
||
| + | |1 |
||
| + | |Not sold |
||
|Not sold |
|Not sold |
||
|- |
|- |
||
|[[Prifddinian musician's robe top]] |
|[[Prifddinian musician's robe top]] |
||
| + | |1 |
||
| + | |Not sold |
||
|Not sold |
|Not sold |
||
|- |
|- |
||
|[[Prifddinian worker's trousers]] |
|[[Prifddinian worker's trousers]] |
||
| + | |1 |
||
| + | |Not sold |
||
|Not sold |
|Not sold |
||
|- |
|- |
||
|[[Ring of devotion]] |
|[[Ring of devotion]] |
||
| + | |1 |
||
| + | |Not sold |
||
|Not sold |
|Not sold |
||
|- |
|- |
||
|[[Saradomin's murmur]] |
|[[Saradomin's murmur]] |
||
| + | |1 |
||
| + | |{{Coins|{{#expr: {{GEP|Saradomin's murmur|1}}}}}} |
||
|{{Coins|{{#expr: {{GEP|Saradomin's murmur|1}}}}}} |
|{{Coins|{{#expr: {{GEP|Saradomin's murmur|1}}}}}} |
||
|- |
|- |
||
|[[Scabaras mask]] |
|[[Scabaras mask]] |
||
| + | |1 |
||
| + | |Not sold |
||
|Not sold |
|Not sold |
||
|- |
|- |
||
|[[Spork]] |
|[[Spork]] |
||
| + | |1 |
||
| + | |{{Coins|{{#expr: {{GEP|Spork|1}}}}}} |
||
|{{Coins|{{#expr: {{GEP|Spork|1}}}}}} |
|{{Coins|{{#expr: {{GEP|Spork|1}}}}}} |
||
|- |
|- |
||
|[[Staff of light]] |
|[[Staff of light]] |
||
| + | |1 |
||
| + | |{{Coins|{{#expr: {{GEP|Staff of light|1}}}}}} |
||
|{{Coins|{{#expr: {{GEP|Staff of light|1}}}}}} |
|{{Coins|{{#expr: {{GEP|Staff of light|1}}}}}} |
||
|- |
|- |
||
|[[Toktz-ket-xil]] |
|[[Toktz-ket-xil]] |
||
| + | |1 |
||
| + | |{{Coins|{{#expr: {{GEP|Toktz-ket-xil|1}}}}}} |
||
|{{Coins|{{#expr: {{GEP|Toktz-ket-xil|1}}}}}} |
|{{Coins|{{#expr: {{GEP|Toktz-ket-xil|1}}}}}} |
||
|} |
|} |
||
| Line 819: | Line 887: | ||
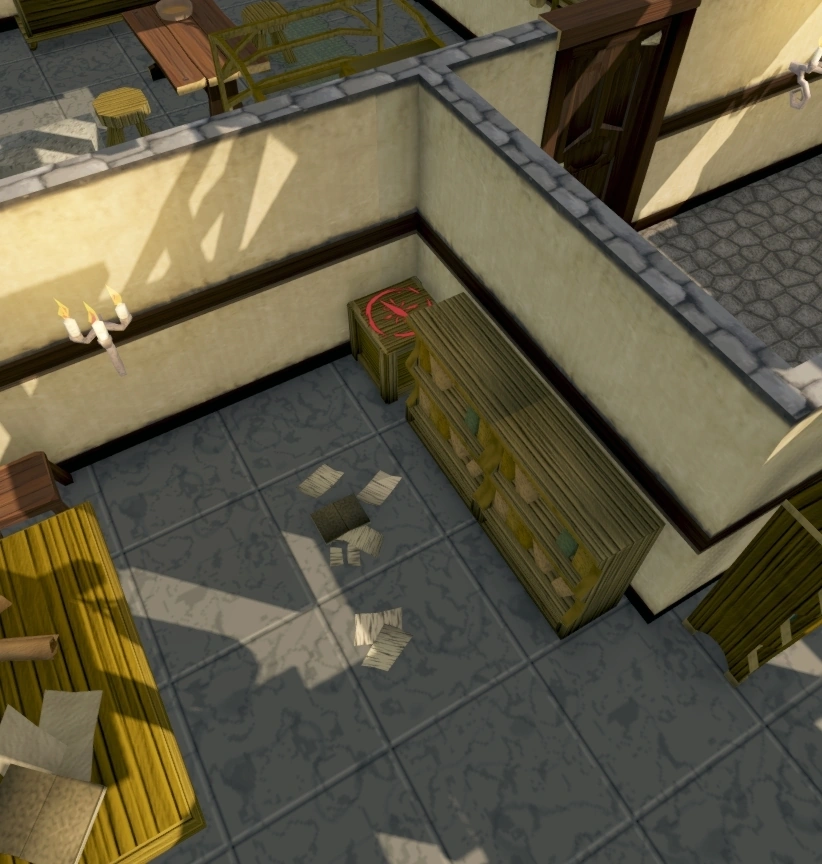
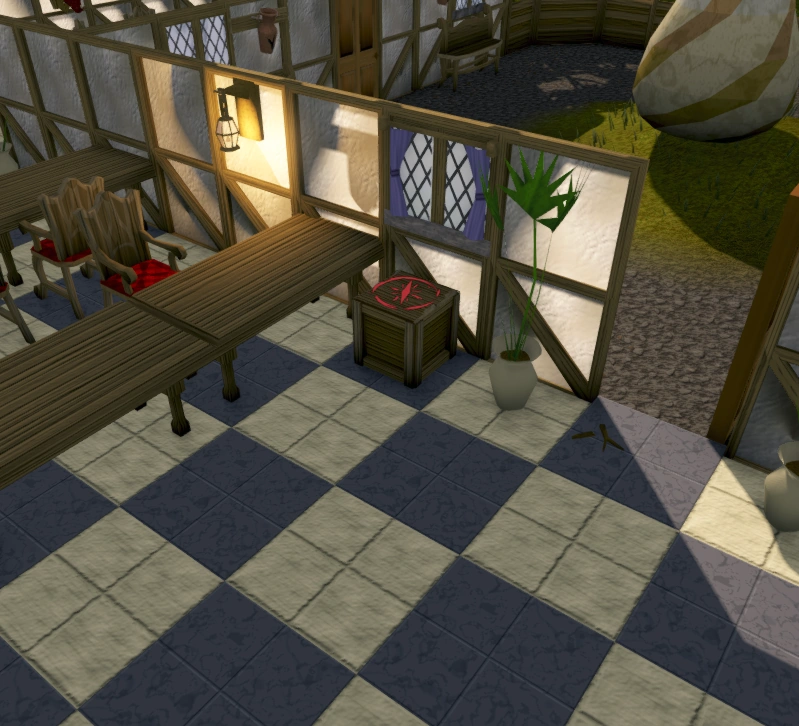
|[[File:Hidey-hole Varrock Palace Library.png|center|200px]] |
|[[File:Hidey-hole Varrock Palace Library.png|center|200px]] |
||
|- |
|- |
||
| − | | |
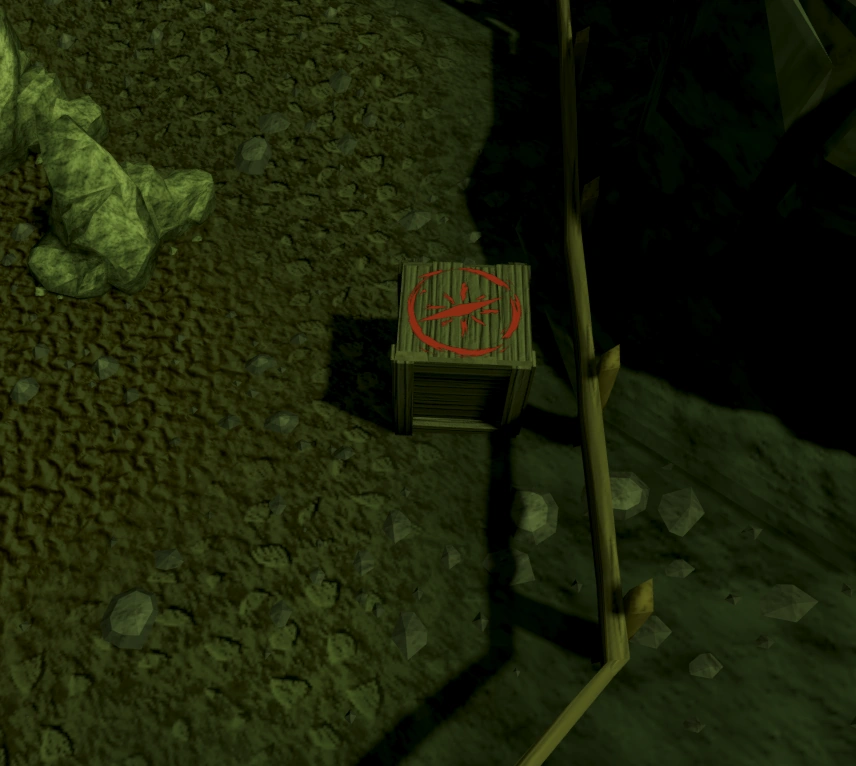
+ | |Top floor of the windmill just north of [[Manor Farm]] in [[East Ardougne]] |
|[[Tiara]], [[wood camo top]], [[emerald ring]] |
|[[Tiara]], [[wood camo top]], [[emerald ring]] |
||
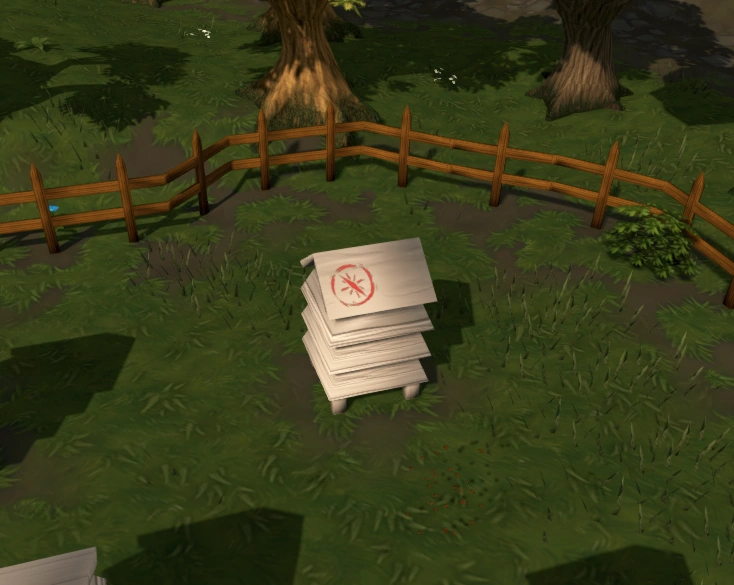
|Crate |
|Crate |
||
| Line 844: | Line 912: | ||
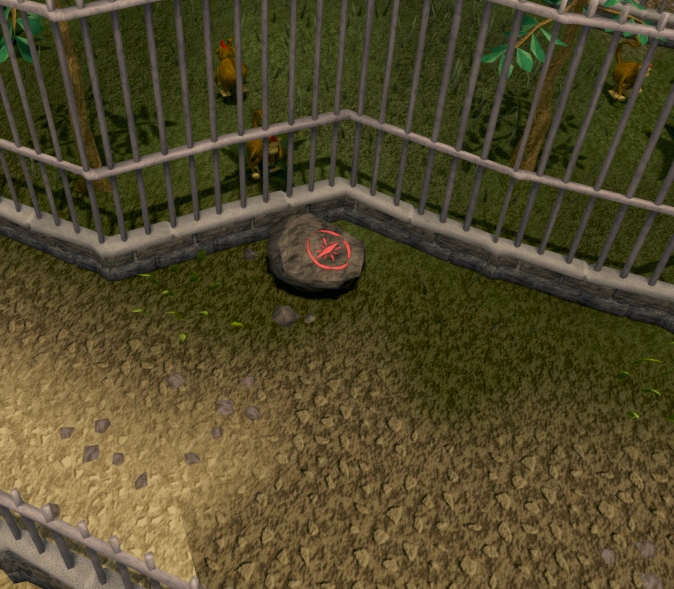
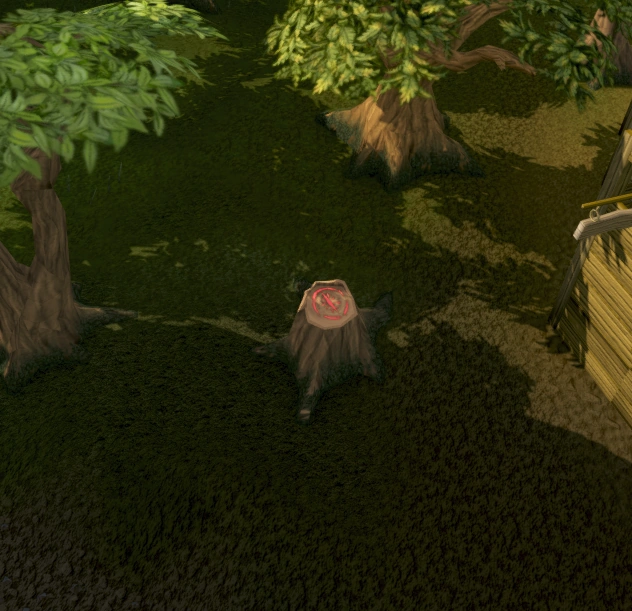
|[[File:Hidey-hole Ardougne Zoo monkey cage.png|center|200px]] |
|[[File:Hidey-hole Ardougne Zoo monkey cage.png|center|200px]] |
||
|- |
|- |
||
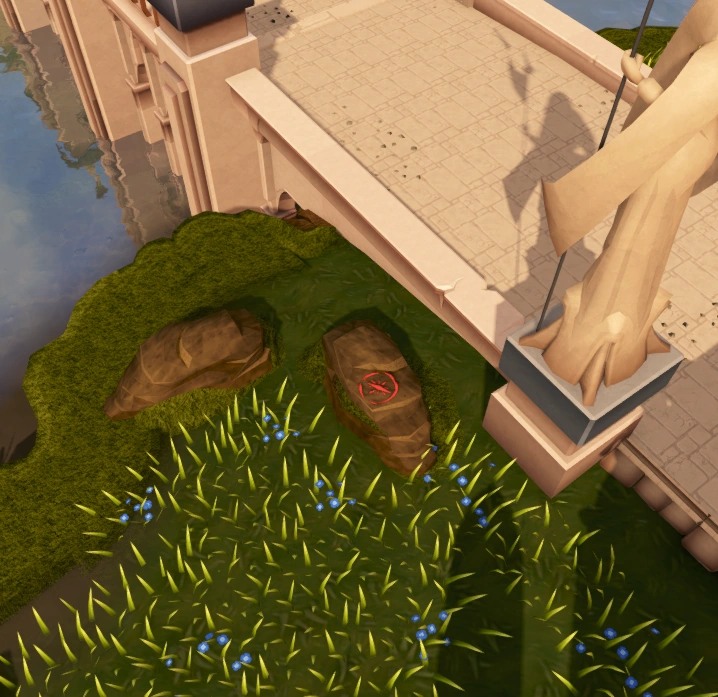
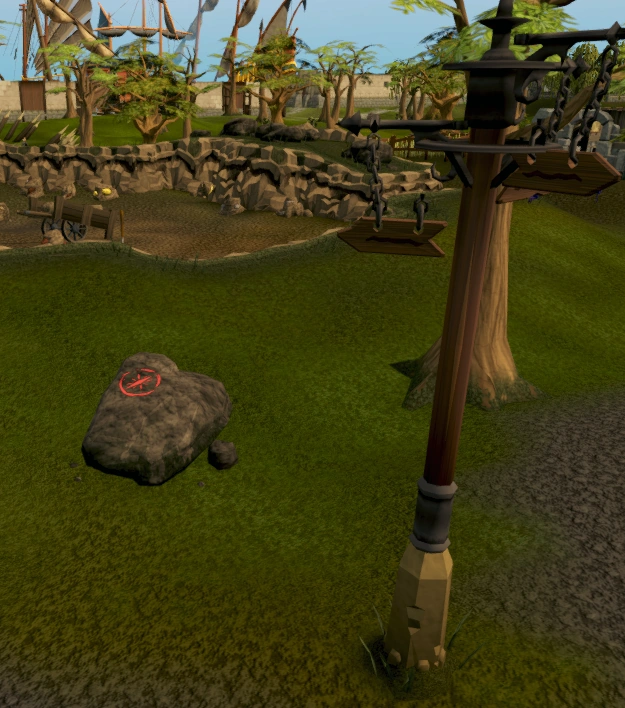
| − | | |
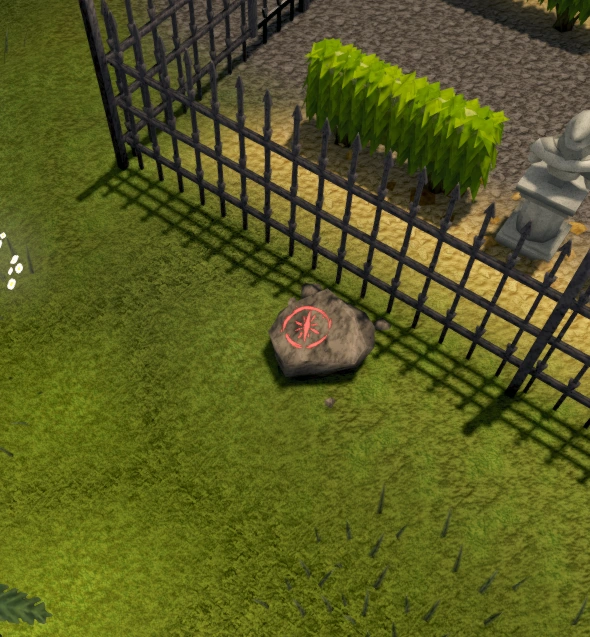
+ | |North of the [[Rimmington]] house portal, by the crossroads |
|[[Sapphire ring]], [[leather chaps]], [[yellow flowers]] |
|[[Sapphire ring]], [[leather chaps]], [[yellow flowers]] |
||
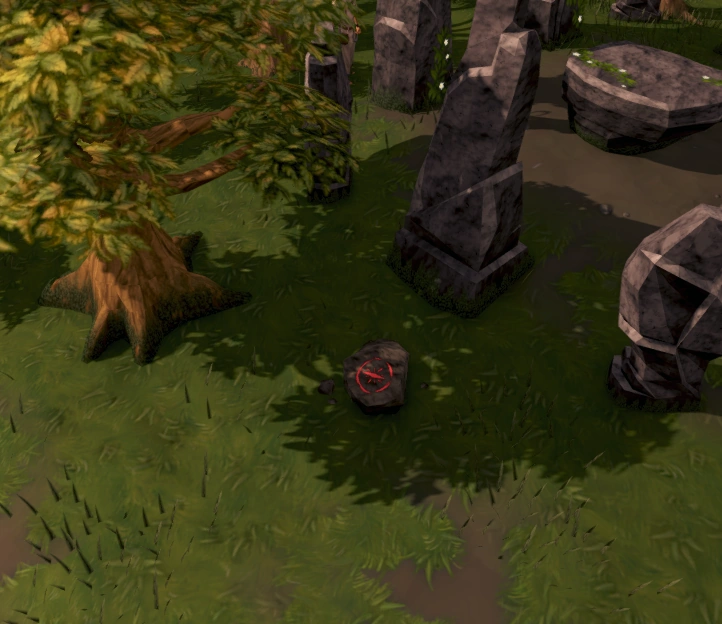
|Rock |
|Rock |
||
| Line 879: | Line 947: | ||
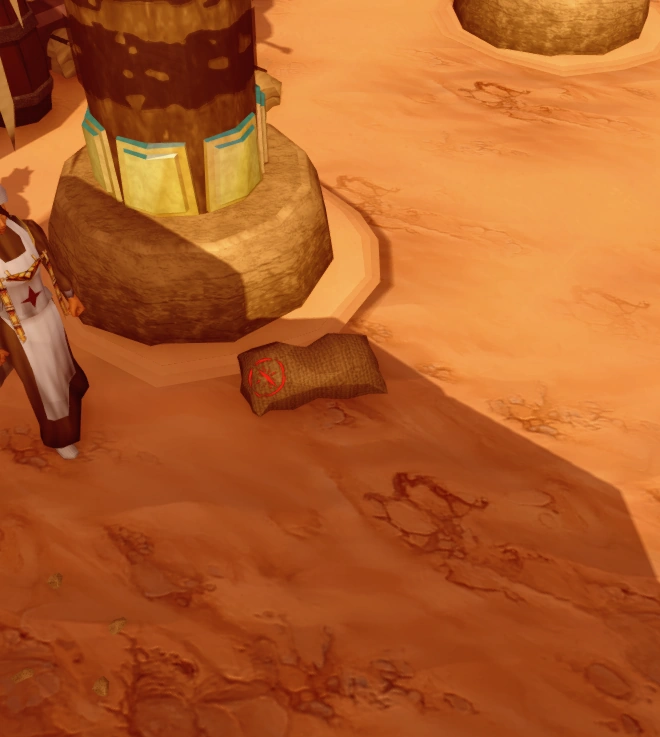
|[[File:Hidey-hole Duel Arena lobby.png|center|200px]] |
|[[File:Hidey-hole Duel Arena lobby.png|center|200px]] |
||
|} |
|} |
||
| − | <references/> |
+ | <references /> |
=== Medium === |
=== Medium === |
||
| Line 901: | Line 969: | ||
|[[Maple shieldbow]], [[mithril plateskirt]] |
|[[Maple shieldbow]], [[mithril plateskirt]] |
||
|Crate |
|Crate |
||
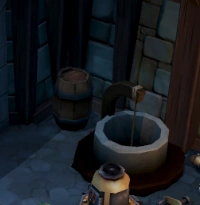
| − | |Use the [[ectophial]] to teleport to Port Phasmatys, run to the small graveyard west of the farming patch and push the eastern memorial, leading to the [[Experiment Cave]]. Run to the northwest corner of the cave to find the |
+ | |Use the [[ectophial]] to teleport to Port Phasmatys, run to the small graveyard west of the farming patch and push the eastern memorial, leading to the [[Experiment Cave]]. Run to the northwest corner of the cave to find the ladder to the mausoleum. |
|[[File:Hidey-hole Mausoleum.png|200px]] |
|[[File:Hidey-hole Mausoleum.png|200px]] |
||
|- |
|- |
||
| Line 946: | Line 1,014: | ||
|[[File:Hidey-hole Yanille bank.png|200px]] |
|[[File:Hidey-hole Yanille bank.png|200px]] |
||
|- |
|- |
||
| − | |On the top |
+ | |On the top floor of the [[Observatory|Kandarin Observatory]] |
|[[Observatory Quest|Observatory]] quest |
|[[Observatory Quest|Observatory]] quest |
||
|[[Green dragonhide chaps]], [[mithril chainbody]], [[ruby amulet]] |
|[[Green dragonhide chaps]], [[mithril chainbody]], [[ruby amulet]] |
||
|Crate |
|Crate |
||
| − | |Use the [[ring of duelling]] to teleport to [[Castle Wars]], then run north across the bridge to the three ruined houses. Climb down the stairs in the west building to reach the [[Observatory Dungeon|Observatory dungeon]]. Find your way to the other exit and then climb up another flight of stairs to reach the top floor of the [[Observatory]]. |
+ | |Use the [[ring of duelling]] to teleport to [[Castle Wars]], then run north across the bridge to the three ruined houses. Climb down the stairs in the west building to reach the [[Observatory Dungeon|Observatory dungeon]]. Find your way to the other exit and then climb up another flight of stairs to reach the top floor of the [[Observatory]]. Alternatively, if available use the rope attached to the bridge near the front door of the [[Observatory]]. |
|[[File:Hidey-hole Observatory.png|200px]] |
|[[File:Hidey-hole Observatory.png|200px]] |
||
|- |
|- |
||
| − | |By the ogres in the [[Combat Training Camp]] |
+ | |By the ogres in the [[Combat Training Camp]] north of West Ardougne |
|[[Biohazard quest]] |
|[[Biohazard quest]] |
||
|[[Green dragonhide chaps]], [[green dragonhide body]], [[steel sq shield]] |
|[[Green dragonhide chaps]], [[green dragonhide body]], [[steel sq shield]] |
||
| Line 990: | Line 1,058: | ||
!Image |
!Image |
||
|- |
|- |
||
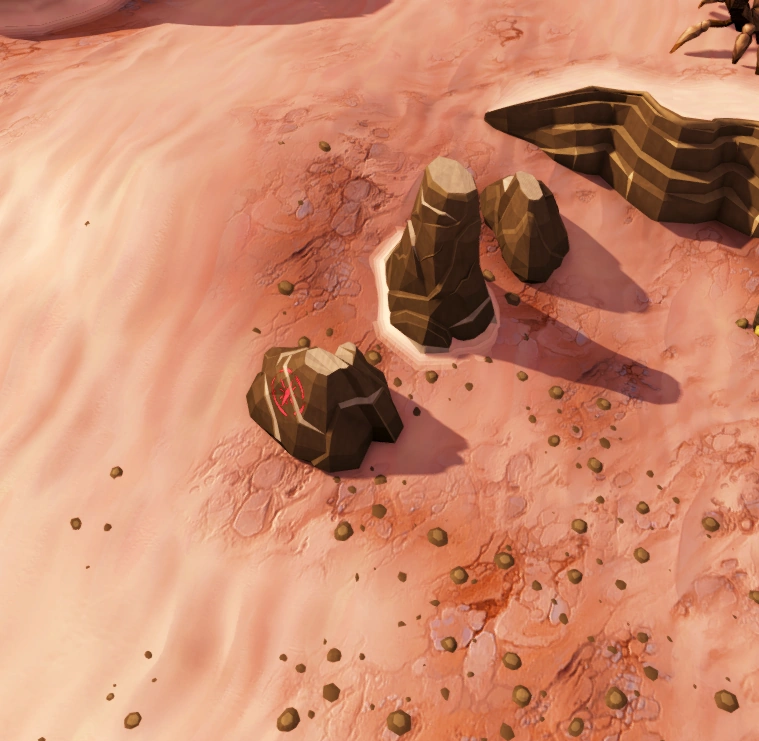
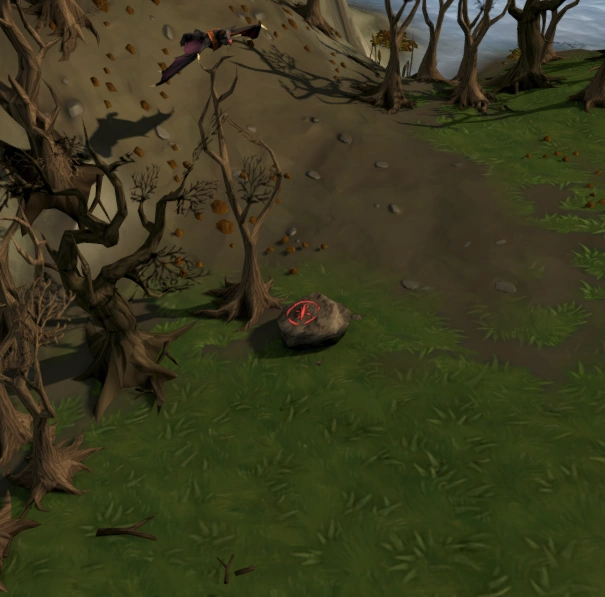
| − | |Inside the [[Chaos Temple (Wilderness)| |
+ | |Inside the [[Chaos Temple (Wilderness)|Chaos temple]] in the eastern Wilderness<ref>Level 12.</ref> |
| + | |10 steel nails (mithril nails do not work) |
||
| − | |None |
||
|[[Bronze platelegs]], [[iron platebody]], [[blue dragonhide vambraces]] |
|[[Bronze platelegs]], [[iron platebody]], [[blue dragonhide vambraces]] |
||
|Rock |
|Rock |
||
| Line 1,010: | Line 1,078: | ||
|Next to [[Jamila's Craft Stall|Jamila's craft stall]] in [[Sophanem]] |
|Next to [[Jamila's Craft Stall|Jamila's craft stall]] in [[Sophanem]] |
||
|Partial completion of [[Icthlarin's Little Helper]] |
|Partial completion of [[Icthlarin's Little Helper]] |
||
| − | |[[Adamant 2h sword]], [[ring of life]], |
+ | |[[Adamant 2h sword]], [[ring of life]], [[amulet of glory]] |
|Crate |
|Crate |
||
|[[File:Hidey-hole Sophanem.png|center|200px]] |
|[[File:Hidey-hole Sophanem.png|center|200px]] |
||
| Line 1,062: | Line 1,130: | ||
|[[File:Hidey-hole TzHaar City.png|center|200px]] |
|[[File:Hidey-hole TzHaar City.png|center|200px]] |
||
|- |
|- |
||
| − | | |
+ | |South west of the [[Charm Sprite|Charm Sprite cracked dolmen]] |
|[[The Hunt For Surok]], 72 Hunter |
|[[The Hunt For Surok]], 72 Hunter |
||
|[[Enhanced yaktwee stick]], [[Dagon'hai hat]], [[amulet of ranging]] |
|[[Enhanced yaktwee stick]], [[Dagon'hai hat]], [[amulet of ranging]] |
||
| Line 1,076: | Line 1,144: | ||
|[[File:Hidey-hole Waiko dock.png|center|200px]] |
|[[File:Hidey-hole Waiko dock.png|center|200px]] |
||
|- |
|- |
||
| − | |Near the entrance to the [[Morytania Slayer Tower]] |
+ | |Near the entrance to the [[Morytania]] [[Slayer Tower]] |
|[[Plague's End]] |
|[[Plague's End]] |
||
|[[Imphide hood]], [[Prifddinian musician's robe top]], [[amulet of magic]] |
|[[Imphide hood]], [[Prifddinian musician's robe top]], [[amulet of magic]] |
||
| + | |Crates |
||
| − | |Crate |
||
|The crate sits outside the tower. |
|The crate sits outside the tower. |
||
|[[File:Hidey-hole Slayer Tower.png|center|200px]] |
|[[File:Hidey-hole Slayer Tower.png|center|200px]] |
||
| Line 1,090: | Line 1,158: | ||
|[[File:Hidey-hole Port Phasmatys.png|center|200px]] |
|[[File:Hidey-hole Port Phasmatys.png|center|200px]] |
||
|- |
|- |
||
| − | |On the top level of the [[Grand Library of Menaphos]] |
+ | |On the top level of the - East wall [[Grand Library of Menaphos]] |
|[[Broken Home]], Partial completion of [[The Jack of Spades]] |
|[[Broken Home]], Partial completion of [[The Jack of Spades]] |
||
|[[Asylum surgeon's ring]], [[Scabaras mask]] |
|[[Asylum surgeon's ring]], [[Scabaras mask]] |
||
| Line 1,098: | Line 1,166: | ||
|- |
|- |
||
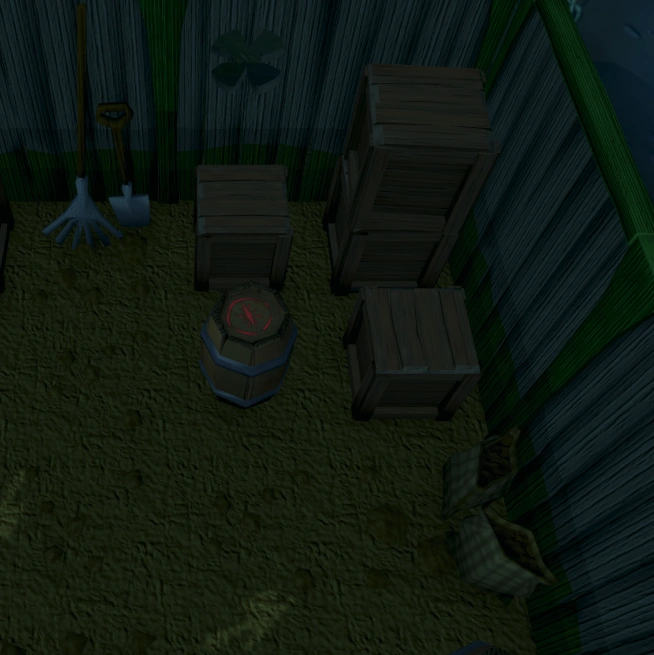
|Inside the [[Invention Guild]] |
|Inside the [[Invention Guild]] |
||
| − | | |
+ | |1 Invention |
|[[Lab coat top]], [[lab coat legs]], [[staff of light]] |
|[[Lab coat top]], [[lab coat legs]], [[staff of light]] |
||
|Barrel |
|Barrel |
||
| Line 1,106: | Line 1,174: | ||
|Inside the [[celestial dragon dungeon]] on [[Dragontooth Island]] |
|Inside the [[celestial dragon dungeon]] on [[Dragontooth Island]] |
||
|Partial completion of [[One of a Kind]] |
|Partial completion of [[One of a Kind]] |
||
| − | |[[Dragon |
+ | |[[Dragon Rider amulet]], [[dragon defender]], [[dragon mask]] |
|Rock |
|Rock |
||
|Any [[dragon mask]] will do. ([[Dragon Rider Amulet]] can be reclaimed by talking to [[Mr. Mordaut]] at the [[Varrock Museum]]). |
|Any [[dragon mask]] will do. ([[Dragon Rider Amulet]] can be reclaimed by talking to [[Mr. Mordaut]] at the [[Varrock Museum]]). |
||
| Line 1,122: | Line 1,190: | ||
|[[Prifddinian worker's trousers]], [[berserker ring]], [[ancient staff]] |
|[[Prifddinian worker's trousers]], [[berserker ring]], [[ancient staff]] |
||
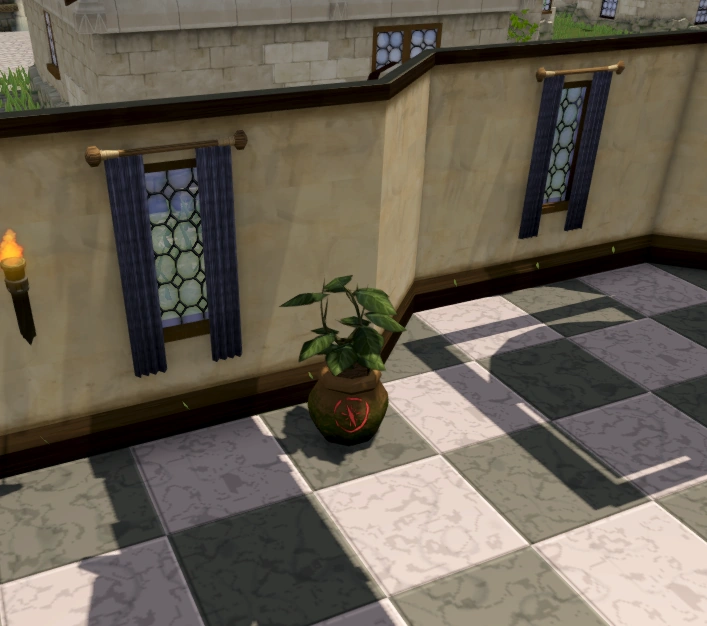
|Potted plant |
|Potted plant |
||
| − | |An [[enhanced ancient staff]] also works. |
+ | |An [[enhanced ancient staff]] also works. The Prifddinian worker's trousers are re-earnable from the Hefin Agility Course. |
|[[File:Hidey-hole Hefin agility course.png|thumb|center|200px]] |
|[[File:Hidey-hole Hefin agility course.png|thumb|center|200px]] |
||
|- |
|- |
||
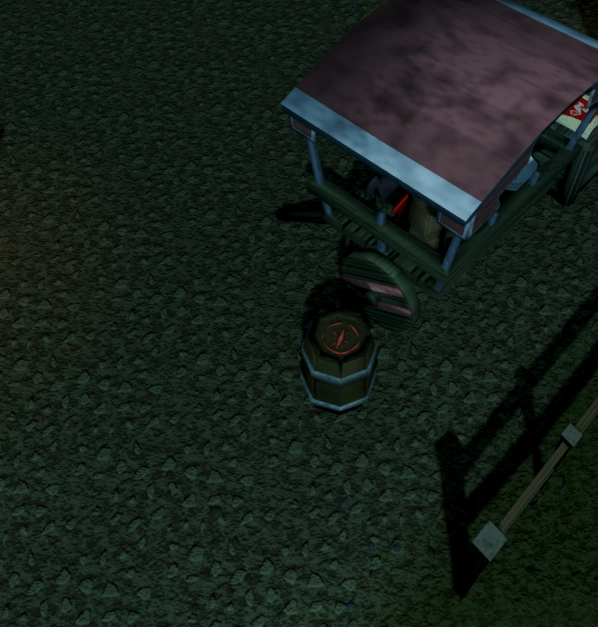
|Next to the [[Edgeville Monastery]] garden |
|Next to the [[Edgeville Monastery]] garden |
||
|[[One Piercing Note]] |
|[[One Piercing Note]] |
||
| − | |[[ |
+ | |[[Holy Cithara]], [[Saradomin's murmur]], [[ring of devotion]] |
|Barrel |
|Barrel |
||
| |
| |
||
|[[File:Hidey-hole Edgeville Monastery.png|center|200px]] |
|[[File:Hidey-hole Edgeville Monastery.png|center|200px]] |
||
|} |
|} |
||
| + | |||
| + | ==Achievements== |
||
| + | * {{Achievement|What's In The Hole?|5|Store the items required for an emote clue in a Treasure Trail hidey-hole.}} |
||
| + | * {{Achievement|Fill Them All!|25|Fill all of the Treasure Trail hidey-holes. You can find a complete list of hidey-holes at the noticeboard by Zaida.}} |
||
==Trivia== |
==Trivia== |
||
| − | * In |
+ | * In ''[[Old School RuneScape]]'', hidey-holes are called [[w:c:oldschoolrunescape:STASH|STASH]] units, an acronym for "Store Things And Stuff Here". |
| − | * The hidey-hole located by the Rimmington house portal |
+ | * The hidey-hole originally located by the Rimmington house portal could not be accessed if the [[Ticket vendor]] was in Rimmington, as it occupied the spot of the rock. This was fixed on [[26 March]] [[2018]]. |
{{Clue}} |
{{Clue}} |
||
Revision as of 12:25, 8 June 2019
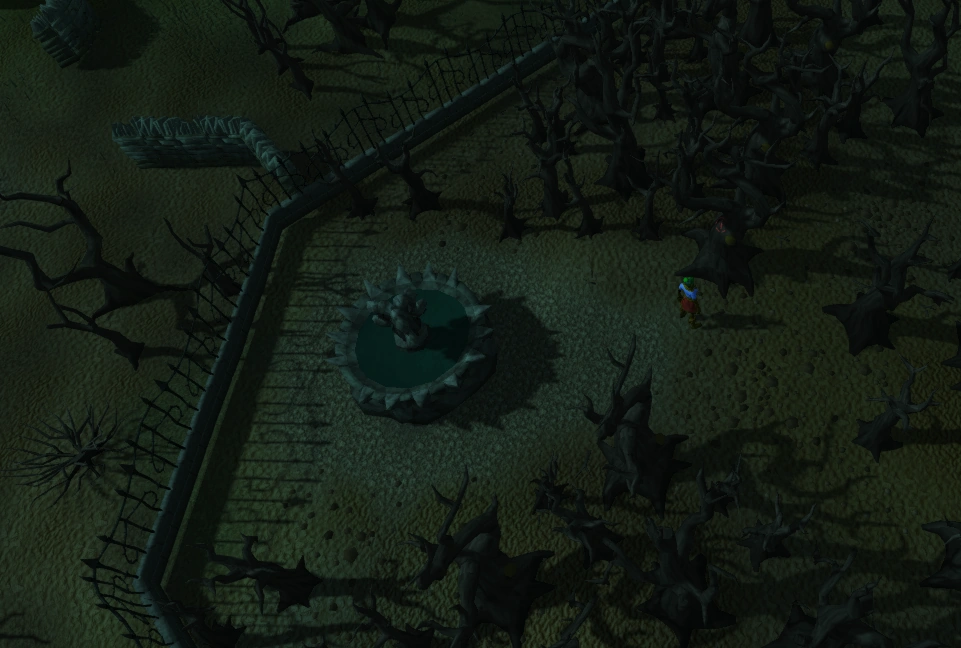
Hidey-holes are storage units, introduced on 26 February 2018 in the clue scroll overhaul update. Hidey-holes are used to store emote clue items, saving bank space and bank trips for players who do Treasure Trails frequently.
As of 26 February 2018 there are 58 hidey-holes. There are achievements for building at least 1 hidey-hole, and completing all hidey holes.
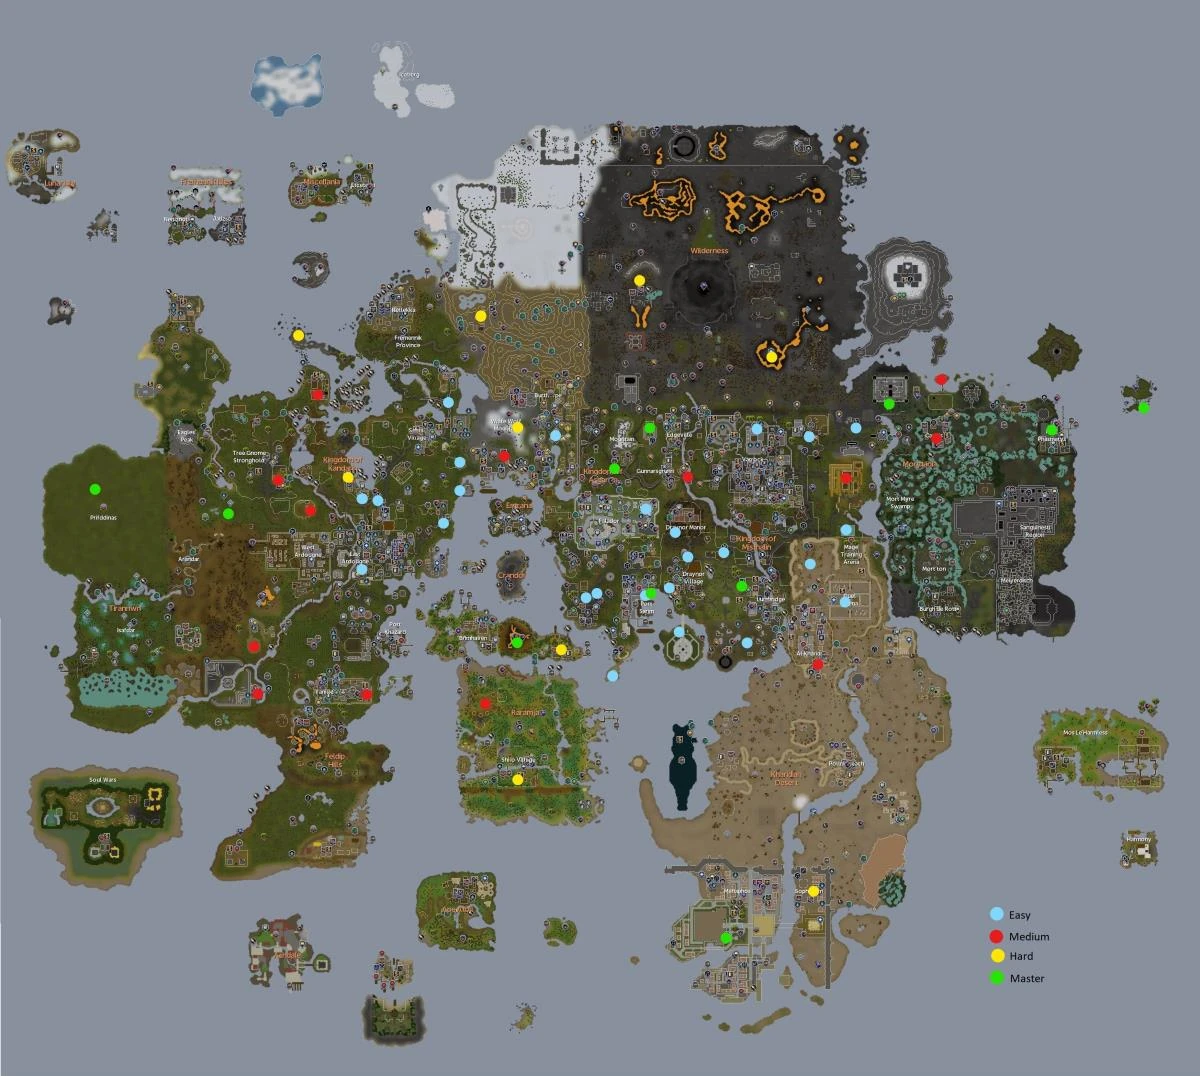
A map of the locations.
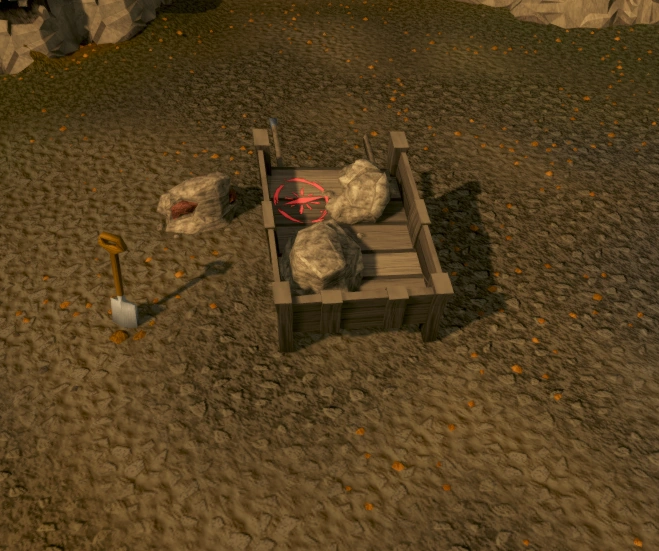
Materials
The materials and level required to convert these inconspicuous objects into hidey-holes depend on the tier of clue scroll they relate to (boosts can be used). For all tiers, any type of nail will work and protean planks may be substituted for any type of plank. (Costs in the table below assume steel nails are used; cost will vary if using another type.) Protean planks can be used in place of any of the planks below.
| Hidey-hole type | Materials | Number | Cost each | Cost for all | Experience each | Experience for all | |
|---|---|---|---|---|---|---|---|
| Easy | 27 | 4 planks, 10 nails | 25 | 3,686 | 92,150 | 500 | 12,500 |
| Medium | 42 | 4 oak planks, 10 nails | 13 | 2,714 | 35,282 | 1,000 | 13,000 |
| Hard | 55 | 4 teak planks, 10 nails | 9 | 1,978 | 17,802 | 1,500 | 13,500 |
| Master | 88 | 4 mahogany planks, 10 nails, 1 gold leaf | 11 | 141,412 | 1,555,532 | 2,500 | 27,500 |
| Total | 100 planks, 52 oak planks, 36 teak planks, 44 mahogany planks, 11 gold leaves, 580 nails | 58 | 1,700,766 | 66,500 | |||
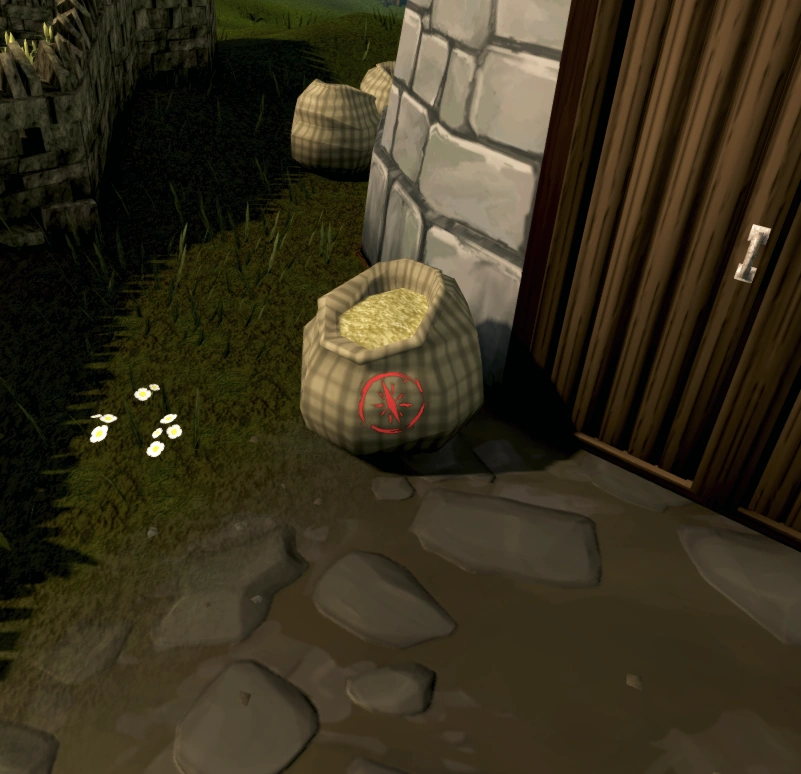
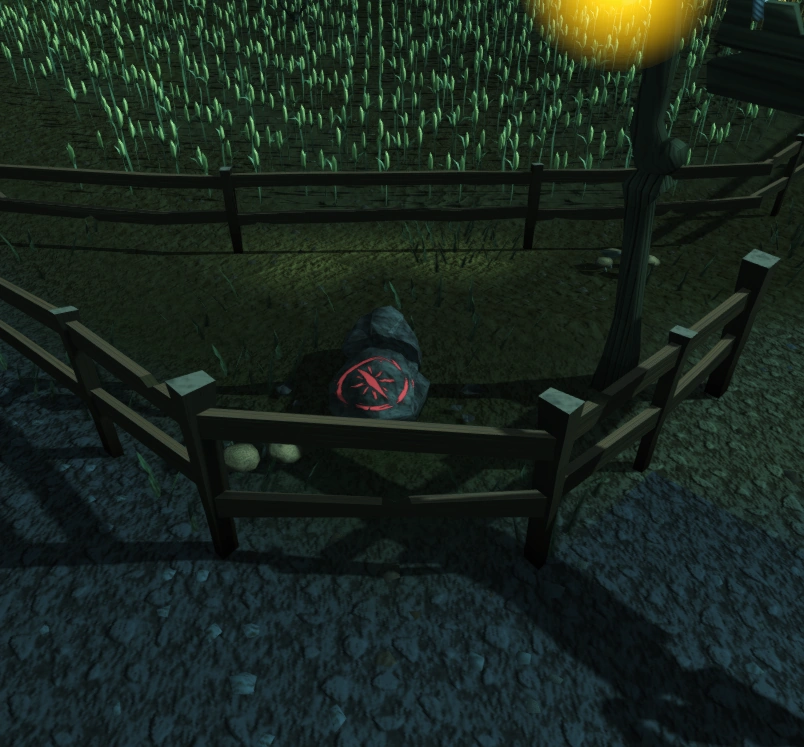
Filling hidey-holes
To fill all hidey-holes, the following items are required:
| Item | Number | Cost each | Cost for all |
|---|---|---|---|
| Air tiara | 1 | 515 | 515 |
| Amulet of strength | 1 | 4,143 | 4,143 |
| Blue flowers | 1 | 3,093 | 3,093 |
| Bronze 2h sword | 1 | 2,073 | 2,073 |
| Bronze chainbody | 1 | 971 | 971 |
| Bronze dagger | 1 | 1,173 | 1,173 |
| Bronze full helm | 1 | 451 | 451 |
| Bronze hatchet | 1 | 1,459 | 1,459 |
| Bronze platelegs | 2 | 1,043 | 2,086 |
| Bronze spear | 1 | 8,862 | 8,862 |
| Emerald amulet | 1 | 3,800 | 3,800 |
| Emerald ring | 3 | 3,438 | 10,314 |
| Gold amulet | 1 | 901 | 901 |
| Gold necklace | 1 | 987 | 987 |
| Gold ring | 3 | 1,207 | 3,621 |
| Hard leather body | 1 | 771 | 771 |
| Holy symbol | 1 | 1,716 | 1,716 |
| Iron boots | 1 | 580 | 580 |
| Iron chainbody | 2 | 4,859 | 9,718 |
| Iron full helm | 1 | 649 | 649 |
| Iron helm | 1 | 631 | 631 |
| Iron kiteshield | 1 | 3,464 | 3,464 |
| Iron platebody | 2 | 4,669 | 9,338 |
| Iron platelegs | 1 | 1,848 | 1,848 |
| Iron plateskirt | 1 | 1,025 | 1,025 |
| Iron scimitar | 1 | 4,269 | 4,269 |
| Iron warhammer | 1 | 3,341 | 3,341 |
| Leather boots | 1 | 170 | 170 |
| Leather chaps | 4 | 397 | 1,588 |
| Leather cowl | 1 | 470 | 470 |
| Leather gloves | 4 | 202 | 808 |
| Leather vambraces | 1 | 257 | 257 |
| Mud pie | 1 | 2,767 | 2,767 |
| Oak shieldbow | 1 | 623 | 623 |
| Oak shortbow | 1 | 624 | 624 |
| Polar camo legs | 1 | 19,043 | 19,043 |
| Polar camo top | 1 | 13,174 | 13,174 |
| Ruby amulet | 1 | 3,893 | 3,893 |
| Sapphire amulet | 1 | 2,120 | 2,120 |
| Sapphire necklace | 2 | 2,282 | 4,564 |
| Sapphire ring | 2 | 1,948 | 3,896 |
| Shieldbow | 1 | 1,089 | 1,089 |
| Steel full helm | 1 | 1,065 | 1,065 |
| Steel hatchet | 1 | 3,019 | 3,019 |
| Steel helm | 1 | 1,002 | 1,002 |
| Steel longsword | 1 | 1,593 | 1,593 |
| Steel mace | 1 | 993 | 993 |
| Steel pickaxe | 1 | 1,887 | 1,887 |
| Steel platebody | 1 | 1,956 | 1,956 |
| Steel plateskirt | 1 | 1,556 | 1,556 |
| Studded body | 1 | 1,275 | 1,275 |
| Studded chaps | 2 | 1,218 | 2,436 |
| Studded leather coif | 3 | 796 | 2,388 |
| Tiara | 1 | 32 | 32 |
| Unholy symbol | 1 | 4,142 | 4,142 |
| Wood camo top | 1 | 4,018 | 4,018 |
| Yellow flowers | 1 | 3,129 | 3,129 |
| Item | Number | Cost each | Cost for all |
|---|---|---|---|
| Adamant 2h sword | 1 | 8,231 | 8,231 |
| Amulet of glory (uncharged) | 1 | 12,331 | 12,331 |
| Amulet of power | 1 | 6,162 | 6,162 |
| Blue dragonhide chaps | 2 | 4,275 | 8,550 |
| Blue dragonhide body | 1 | 5,245 | 5,245 |
| Blue dragonhide vambraces | 3 | 2,077 | 6,231 |
| Bronze platelegs | 1 | 1,043 | 1,043 |
| Diamond ring | 1 | 4,714 | 4,714 |
| Elemental shield | 1 | 15,330 | 15,330 |
| Fire battlestaff | 1 | 8,011 | 8,011 |
| Iron pickaxe | 1 | 4,343 | 4,343 |
| Iron platebody | 1 | 4,669 | 4,669 |
| Iron sq shield | 1 | 3,668 | 3,668 |
| Mithril platelegs | 1 | 2,574 | 2,574 |
| Mud pie | 1 | 2,767 | 2,767 |
| Ring of life | 2 | 4,238 | 8,476 |
| Rune full helm | 1 | 20,892 | 20,892 |
| Rune hatchet | 1 | 9,120 | 9,120 |
| Rune platebody | 1 | 37,480 | 37,480 |
| Rune warhammer | 1 | 23,218 | 23,218 |
| Splitbark helm | 1 | 5,197 | 5,197 |
| Item | Number | Cost each | Cost for all |
|---|---|---|---|
| Amulet of magic | 1 | 2,223 | 2,223 |
| Amulet of ranging | 1 | 31,899 | 31,899 |
| Ancient staff | 1 | 135,580 | 135,580 |
| Asylum surgeon's ring | 1 | 500,000[1] | 500,000[1] |
| Berserker ring | 1 | 209,881 | 209,881 |
| Boater | 1 | 676,252 - 880,640 | 676,252 - 880,640 |
| Cape of legends | 1 | 450 | 450 |
| Cavalier | 1 | 740,161 - 962,894 | 740,161 - 962,894 |
| Culinaromancer's gloves 10 | 1 | 100,000 | 100,000 |
| Dagon'hai hat | 1 | 239,841 | 239,841 |
| Dark bow | 1 | 77,444 | 77,444 |
| Demon slayer gloves | 1 | 3,299,757 | 3,299,757 |
| Dragon defender | 1 | Not sold | Not sold |
| Dragon mask | 1 | 488,614 - 797,313 | 488,614 - 797,313 |
| Dragon rider amulet | 1 | 500,000[1] | 500,000[1] |
| Enhanced yaktwee stick | 1 | Not sold | Not sold |
| Fire cape | 1 | Not sold | Not sold |
| Ghostly cloak | 1 | Not sold | Not sold |
| Holy cithara | 1 | Not sold | Not sold |
| Iban's staff | 1 | Not sold | Not sold |
| Imphide hood | 1 | 567 | 567 |
| Infinity boots | 1 | 7,373,566 | 7,373,566 |
| Lab coat legs | 1 | Not sold | Not sold |
| Lab coat top | 1 | Not sold | Not sold |
| Prifddinian musician's robe top | 1 | Not sold | Not sold |
| Prifddinian worker's trousers | 1 | Not sold | Not sold |
| Ring of devotion | 1 | Not sold | Not sold |
| Saradomin's murmur | 1 | 700,235 | 700,235 |
| Scabaras mask | 1 | Not sold | Not sold |
| Spork | 1 | 2,292 | 2,292 |
| Staff of light | 1 | 1,842,145 | 1,842,145 |
| Toktz-ket-xil | 1 | 33,001 | 33,001 |
Locations
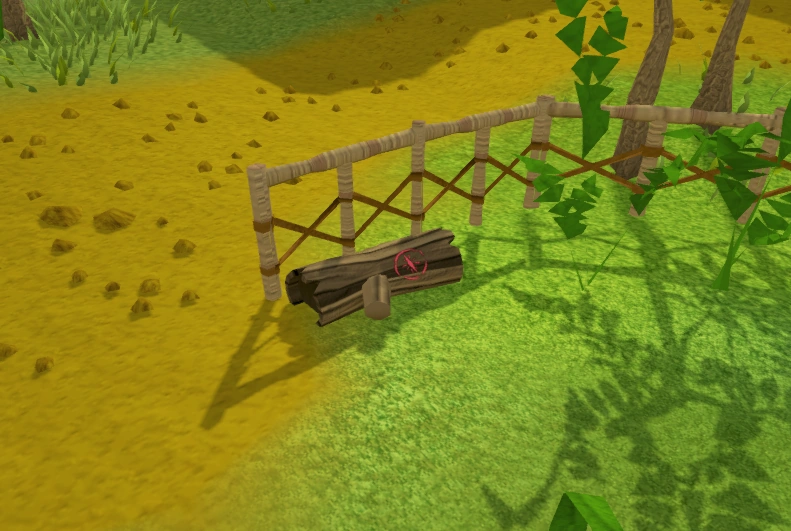
Easy


- ^ Start of Druidic Ritual.
Medium
| Description | Requirements | Items required | Type | Notes | Image |
|---|---|---|---|---|---|
| Outside The Hair Of The Dog Tavern in Canifis | Access to Canifis | Mithril platelegs, spiny helmet, iron 2h sword | Barrel | A lodestone is the quickest way here. | 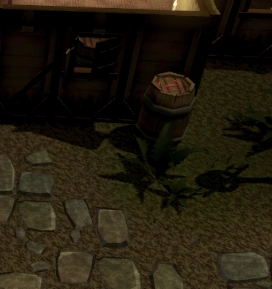
|
| Mausoleum off the Morytania coast | Partial completion of Creature of Fenkenstrain | Maple shieldbow, mithril plateskirt | Crate | Use the ectophial to teleport to Port Phasmatys, run to the small graveyard west of the farming patch and push the eastern memorial, leading to the Experiment Cave. Run to the northwest corner of the cave to find the ladder to the mausoleum. | 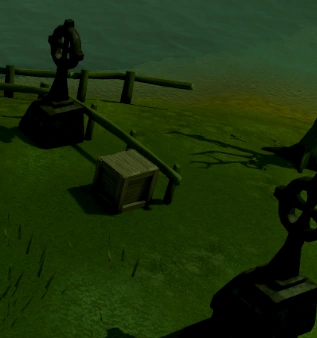
|
| East of the Barbarian Village bridge | None | Mithril full helm, steel kiteshield, iron hatchet | Rock | A skull sceptre can be used to get to the village quickly. | 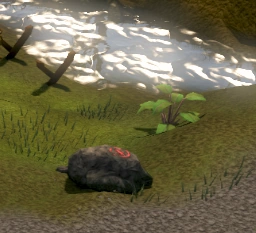
|
| Inside the entrance of Tai Bwo Wannai village | None | Mithril helm, green dragonhide chaps, ring of duelling | Crate | A Tai Bwo Wannai Teleport takes the player right into the village. Alternatively, players may use the Karamja lodestone. | 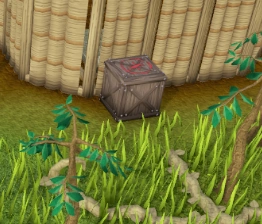
|
| Next to the Castle Wars bank | None | Ruby amulet, mithril scimitar, iron sq shield | Stone blocks | Stone blocks just northeast of the bank chest. Using the ring of duelling teleports the player right in the lobby. | 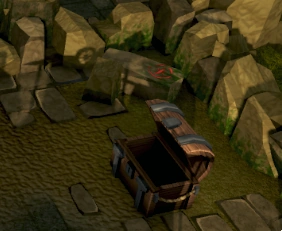
|
| Inside the Barbarian Outpost agility training area | Bar Crawl miniquest, 35 Agility | Steel platebody, maple shortbow, bronze boots | Barrel | Players may use the Games necklace to teleport to the Barbarian Outpost. | 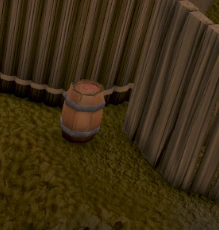
|
| Halfway up the tree in the Gnome Stronghold agility course | None | Green dragonhide chaps, steel kiteshield, ring of forging | Tree stump | The tree stump is located next to the tree branch that leads to the advanced portion of the agility course. | 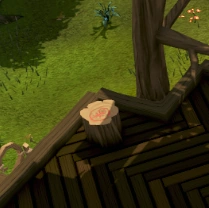
|
| Inside the Yanille Bank | None | Snakeskin chaps, iron crossbow, adamant helm | Crate | The crate can be found next to the deposit box. Use the Yanille lodestone to reach the area. | 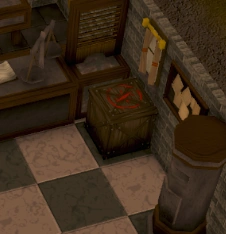
|
| On the top floor of the Kandarin Observatory | Observatory quest | Green dragonhide chaps, mithril chainbody, ruby amulet | Crate | Use the ring of duelling to teleport to Castle Wars, then run north across the bridge to the three ruined houses. Climb down the stairs in the west building to reach the Observatory dungeon. Find your way to the other exit and then climb up another flight of stairs to reach the top floor of the Observatory. Alternatively, if available use the rope attached to the bridge near the front door of the Observatory. | 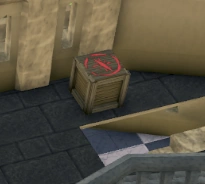
|
| By the ogres in the Combat Training Camp north of West Ardougne | Biohazard quest | Green dragonhide chaps, green dragonhide body, steel sq shield | Crate | 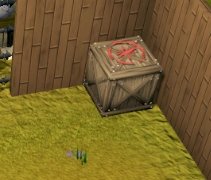
| |
| Next to the eastern Digsite winch | None | Snakeskin boots, blood'n'tar snelm (pointed), iron pickaxe | Barrel | A digsite pendant can bring you west of it. | 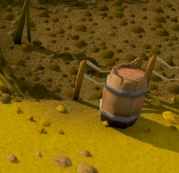
|
| Outside Hickton's Archery Emporium in Catherby | None | Blood'n'tar snelm (round), hard leather body, silver sickle | Crates | 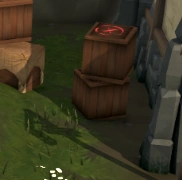
| |
| Near the entrance to Shantay Pass | None | Bruise blue snelm (pointed), staff of air | Crate | Next to entrance for Al Kharid | 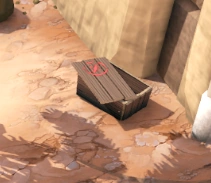
|
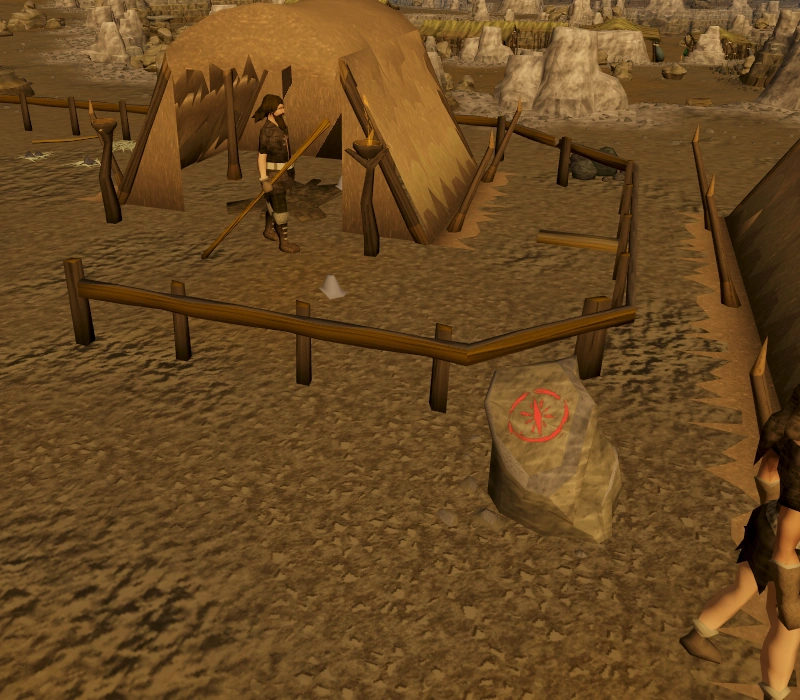
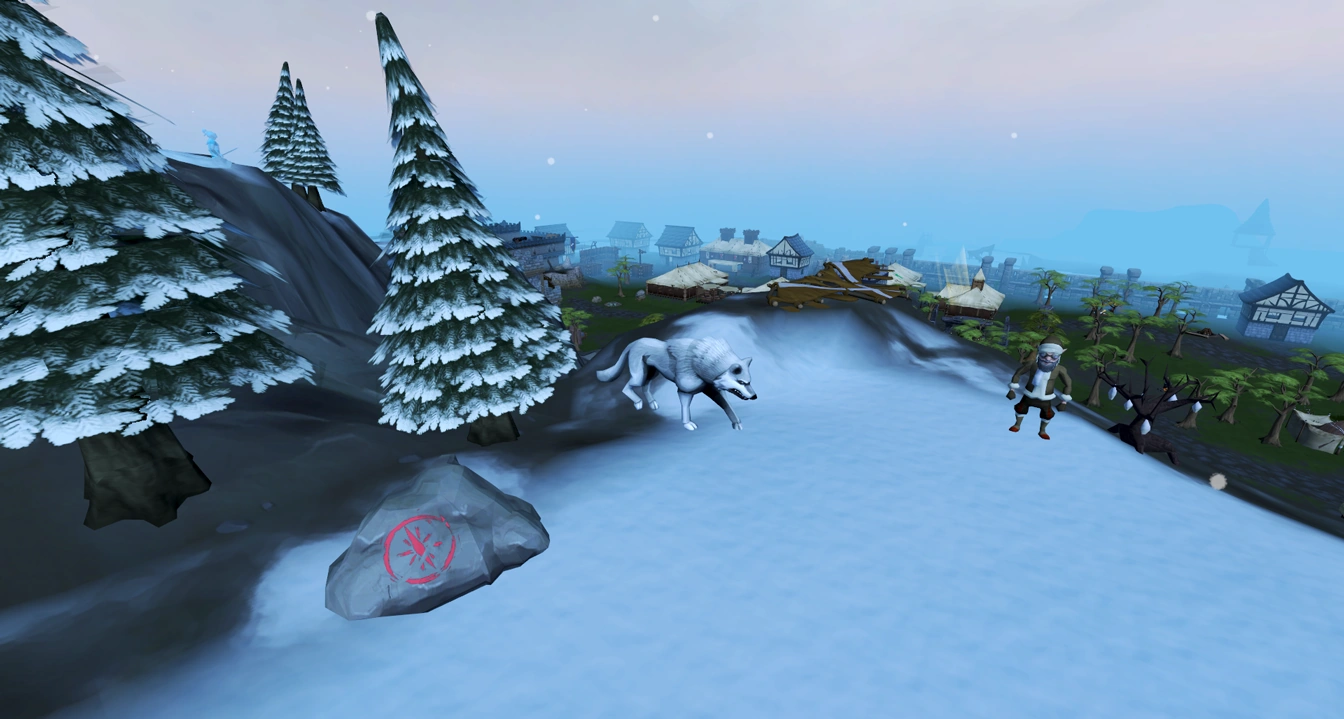
Hard

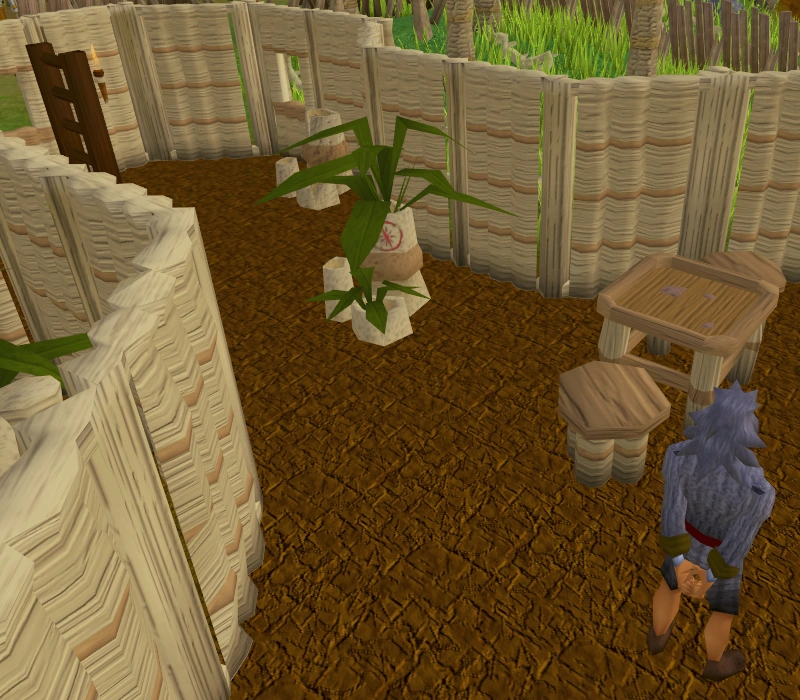
Master


Achievements
- What's In The Hole? (
 5) - Store the items required for an emote clue in a Treasure Trail hidey-hole.
 - Fill Them All! ( 25) - Fill all of the Treasure Trail hidey-holes. You can find a complete list of hidey-holes at the noticeboard by Zaida.
Trivia
- In Old School RuneScape, hidey-holes are called STASH units, an acronym for "Store Things And Stuff Here".
- The hidey-hole originally located by the Rimmington house portal could not be accessed if the Ticket vendor was in Rimmington, as it occupied the spot of the rock. This was fixed on 26 March 2018.