Template:2007 page Template:RSC page
| |||||||||||||||||||||||||
| Release date | 20 August 2003 (Update) | ||||||||||||||||||||||||
|---|---|---|---|---|---|---|---|---|---|---|---|---|---|---|---|---|---|---|---|---|---|---|---|---|---|
| Members | Yes | ||||||||||||||||||||||||
| Voice Over | No | ||||||||||||||||||||||||
| Official difficulty | Master | ||||||||||||||||||||||||
| Quest series | Karamja series Guild series | ||||||||||||||||||||||||
| Age | Fifth Age | ||||||||||||||||||||||||
| |||||||||||||||||||||||||
Legends' Quest is the 50th quest, in which the player is sent by Guildmaster Radimus Erkle to explore and map the Kharazi Jungle on the southern part of Karamja. This quest was also the first quest to be rated master.
Official description
| “ | Only the elite are allowed to call themselves a Legend of RuneScape. Do you have what it takes to make it into the guild? | ” |
Walkthrough
| Start point | |||
|---|---|---|---|
| Member requirement | |||
| Official difficulty | |||
| Official length | Long (1-2 hours, depending on your degree of preparation) | ||
| Requirements | Skill requirements are not boostable unless marked with a [B] for boostable.
(Temporary boosts DO work for all of the above skills, although none of the skill requirements need to be met to start the quest) Recommended:
| ||
| Items required | Items from the tool belt are not listed unless they do not work or are not automatically added.
Recommended:
| ||
| Enemies to defeat |
|
Outsourced

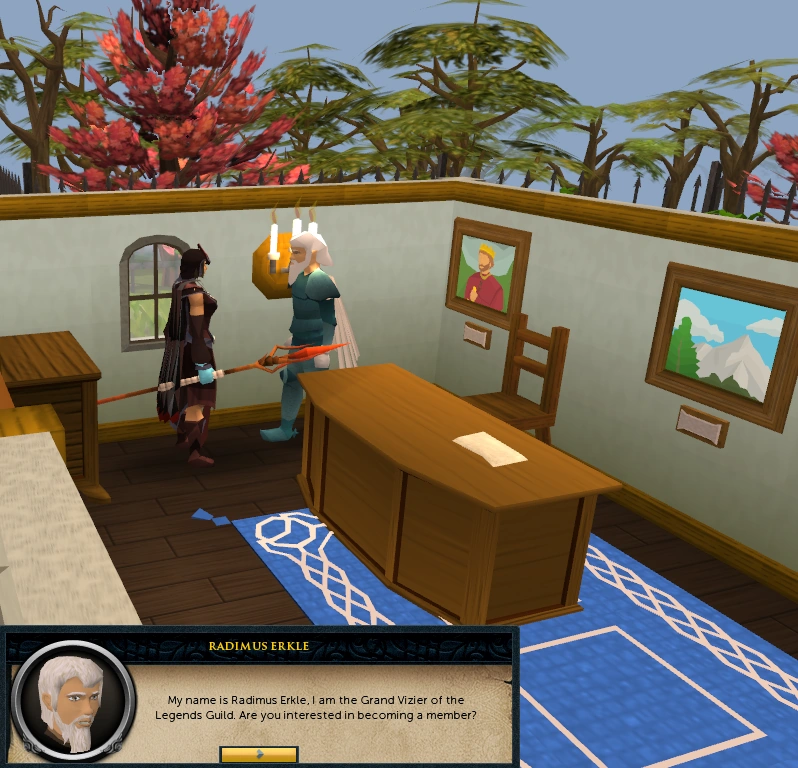
To begin, talk to the guards outside the Legends' Guild, east of Ardougne and a few paces from the fairy ring code blr. If they think you're worthy of becoming a member of the guild, they'll let you through the gates to meet up with Grand Vizier Radimus Erkle.

Meeting up with Radimus Erkle.
Radimus is housed in the building just outside the guild. Being responsible for the admittance of adventurers into the guild, he wants you to prove yourself worthy first. He'll give you some notes and send you on an assignment to Karamja, your mission comprising of:
- Complete the map of the Kharazi Jungle.
- Meet up with the local friendly natives.
- Bring a gift from the jungle locals to be displayed in the guild.
Before leaving, grab at least 3 papyrus from the desk to use for mapping the jungle.
Cartography
Items/Skills needed: Radimus notes, 3-5 papyrus, 3-5 charcoal (the general store in Shilo Village sells some) and 50 Crafting.
|
1–4 - Entrances to the jungle |
7 - Totem |
Head to the entrance of the Kharazi Jungle in Karamja, and just south of Shilo Village. You can take the cart transport from Brimhaven for a small fee, or use fairy ring code ckr and run south. To get into the Kharazi jungle, you must cut through the overgrown jungle vegetation; the quicker routes into the jungle are through the ones marked 1 and 4 on the map above.
Once inside, you must now re-create each section of the map on a sheet of papyrus. This can be done by right-clicking the Radimus notes and choosing "Complete Radimus Notes" in each part of the jungle (west, centre, and east). It is possible to fail marking a section, destroying one papyrus and one charcoal in the process.
Forging Relations
Items needed: Radimus notes.

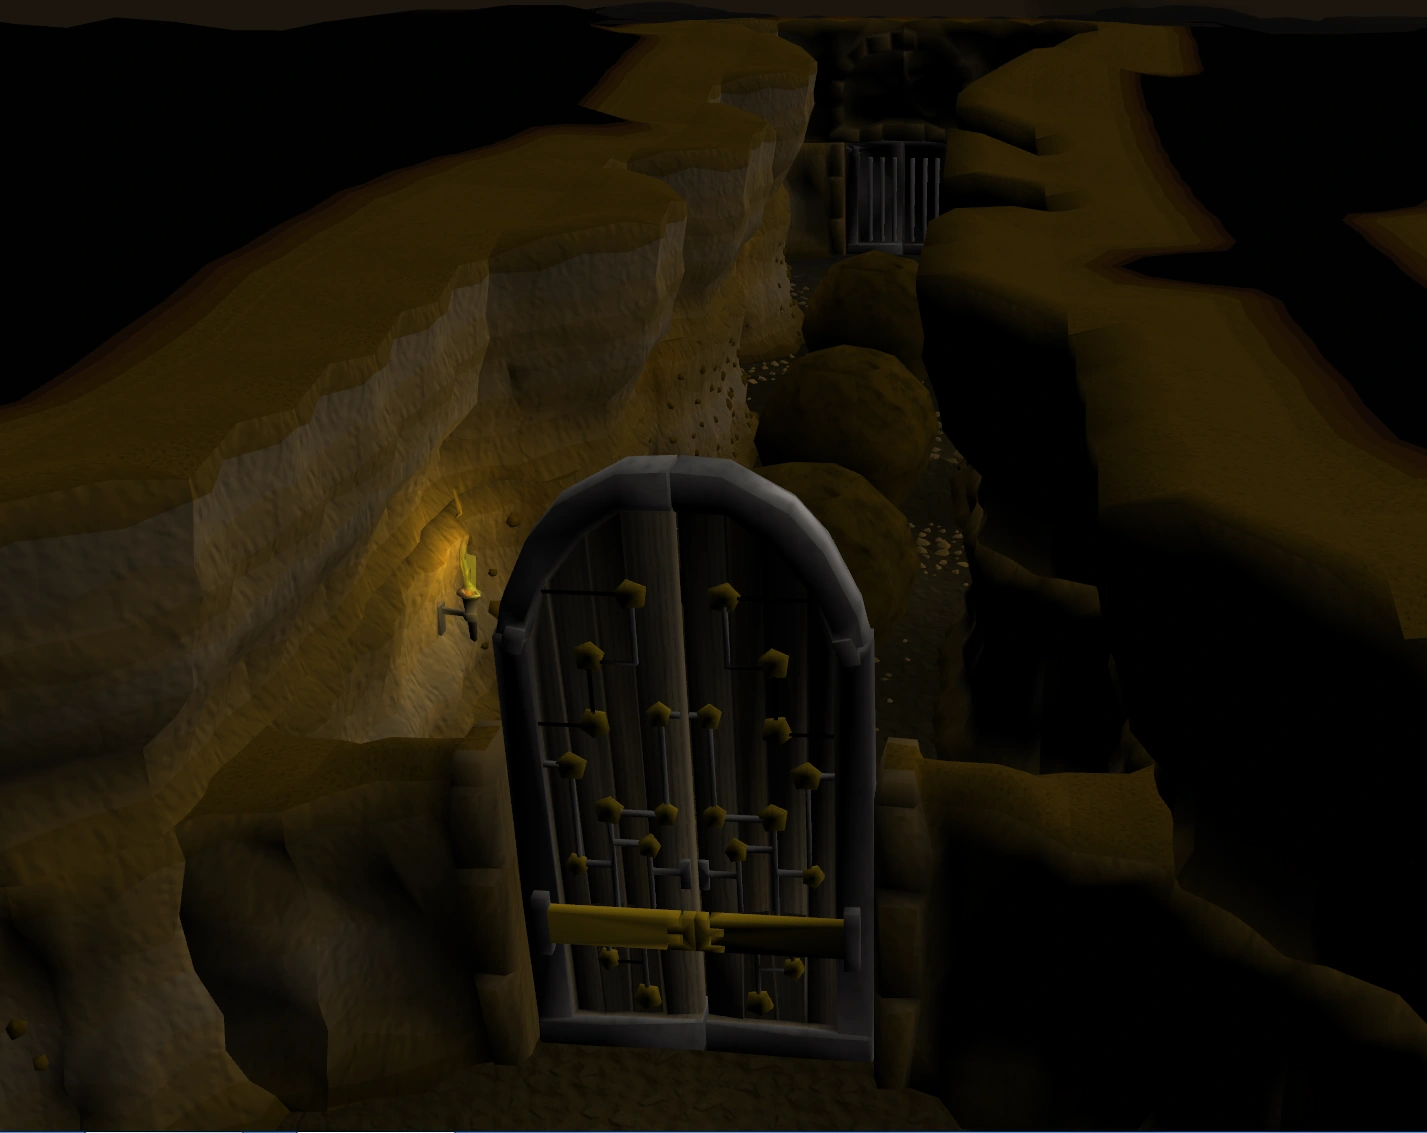
Entrance to the cave.
Head back out of the Kharazi jungle, and speak to one of the jungle foresters nearby about natives. They'll offer to help, if you can bring back a completed map of the Kharazi jungle. Hand over the completed notes to the forester in exchange for a bull roarer, a tool which can be used to call a native inside the jungle. If you lose it, you will need to get a new one by giving an oomlie wrap to a forester.
Re-enter the Kharazi jungle and swing the bull roarer to summon a local named Gujuo. Explain to him that you wish to make friends with the jungle locals, and he'll tell you about his tribe.
Gujuo's tribe, the Kharazi, have lost their totem to a powerful demon. Although the tribe's shaman, Ungadulu, is in possession of some special Yommi tree seeds that could be used to construct a new totem pole, he is trapped in a cave somewhere in the jungle; agree to help Ungadulu.
Hellfire
Skills needed: 50 Agility.


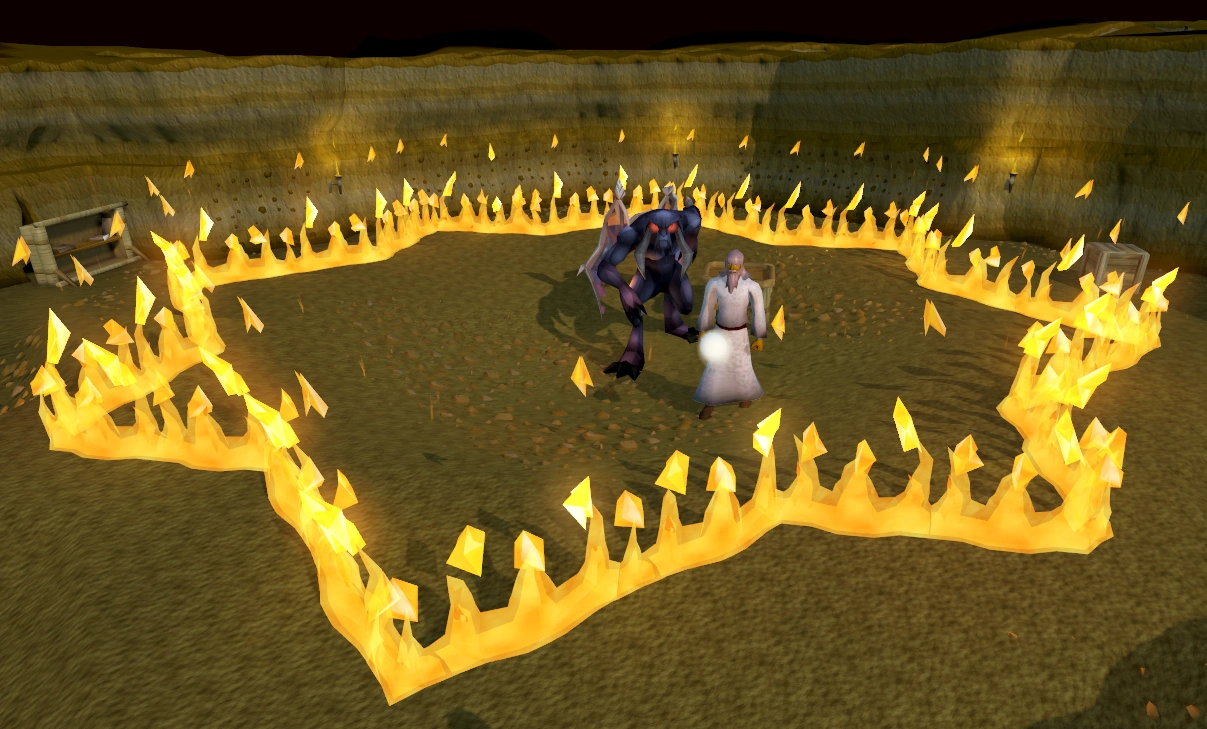
Ungadulu caged in a ring of magical fire.
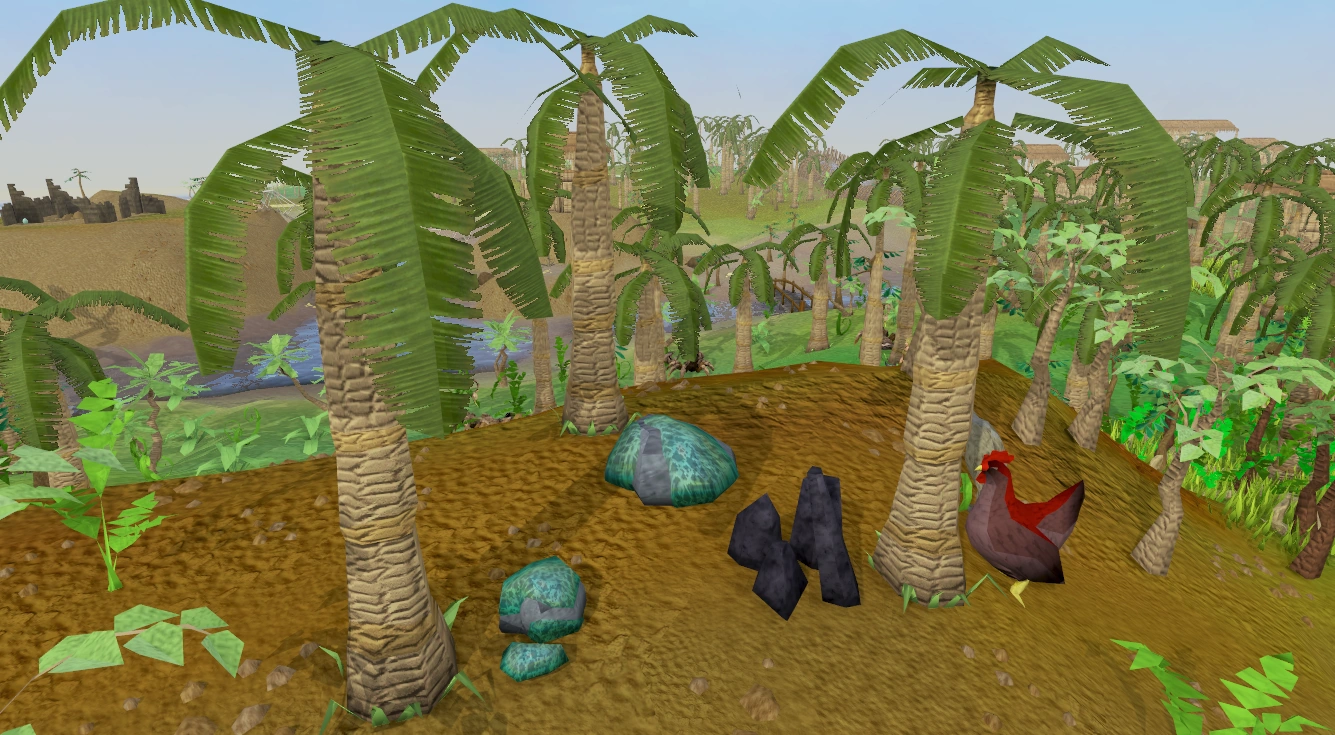
At the northwest edge of the jungle are three rocks that form a triangle (5); search one of the rocks to crawl through a narrow opening. If you succeed, you'll find yourself in a cave with the shaman in the centre, surrounded by a flame wall.
Investigate the ring of fire and talk to Ungadulu, who informs you that only pure water can extinguish the flames. Next, search the various items in the cave to obtain Ungadulu's notes: a scrawled note from the crate; a scribbled note on the table; and a scrumpled note on the bed. Reading them tells you how the shaman had prepared to summon his ancestors and pay homage to them, but fell prey to an evil presence in the cave.
Go back outside the cave, and call Gujuo with the bull roarer again. Being a local, he directs you to a pool of sacred water at the heart of the jungle. The water, however, should only be carried in a special vessel made of 'sun metal', the instructions for which he sketches for you.
Jungle Trek Into Darkness
Items/Skills needed: Radimus notes, several lockpicks, cut gems - opal, jade, red topaz, sapphire, emerald, ruby and diamond, and runes to spell SMELL (soul, mind, earth, 2 law runes for the English version), 50 Thieving, 52 Mining and 50 Strength.
|
1 - Ungadulu |
7 - Old gate |
T - Topaz |
Return to the cave and search for a crevice hidden behind the north-east bookshelves. Squeeze through it and cross the cavern to the large, ancient gate; the gate must be picked to proceed forward.

The tests of thieving, mining and strength.
Failure causes the lockpick to break, so be sure to bring extras; a hair clip has a higher success rate than a lockpick. A possible trick is to click away when the message tells you that you failed, just before the lockpick would break, preventing it from being destroyed.
Once the gate is unlocked, "smash-to-bits" the boulders in your path to reach a second gate. Failure temporarily reduces your Mining level. This next ancient gate must be forced open using raw strength. Failure temporarily reduces your Strength level.
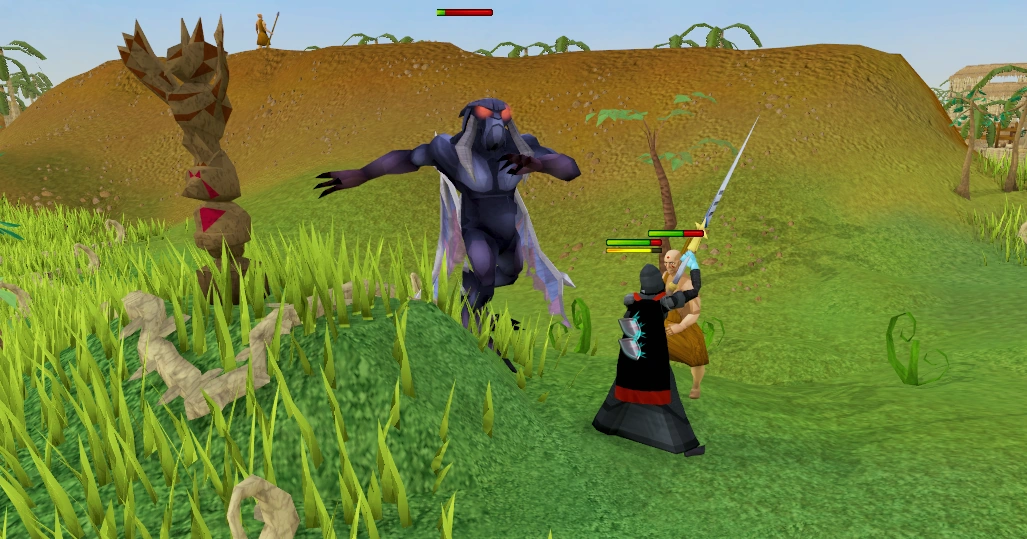
Beyond the door are level 110 death wings. Killing one is not necessary to finish the quest, but it accomplishes a hard Karamja task.
Magick Vials
Head further into the cave, and jump over the low, jagged wall. On the south-west section of the cavern is a marked wall; study the wall to discover a riddle:
| “ | Place the five in order to pass or your life will dwindle until the last. All five are stones of magical power, Place them wrong and your fate will sour. "First is the spirit of man or beast, Second is the place where thoughts are born, Third is the soil from which good things grow, Four and five are the rules all men should know." | ” |
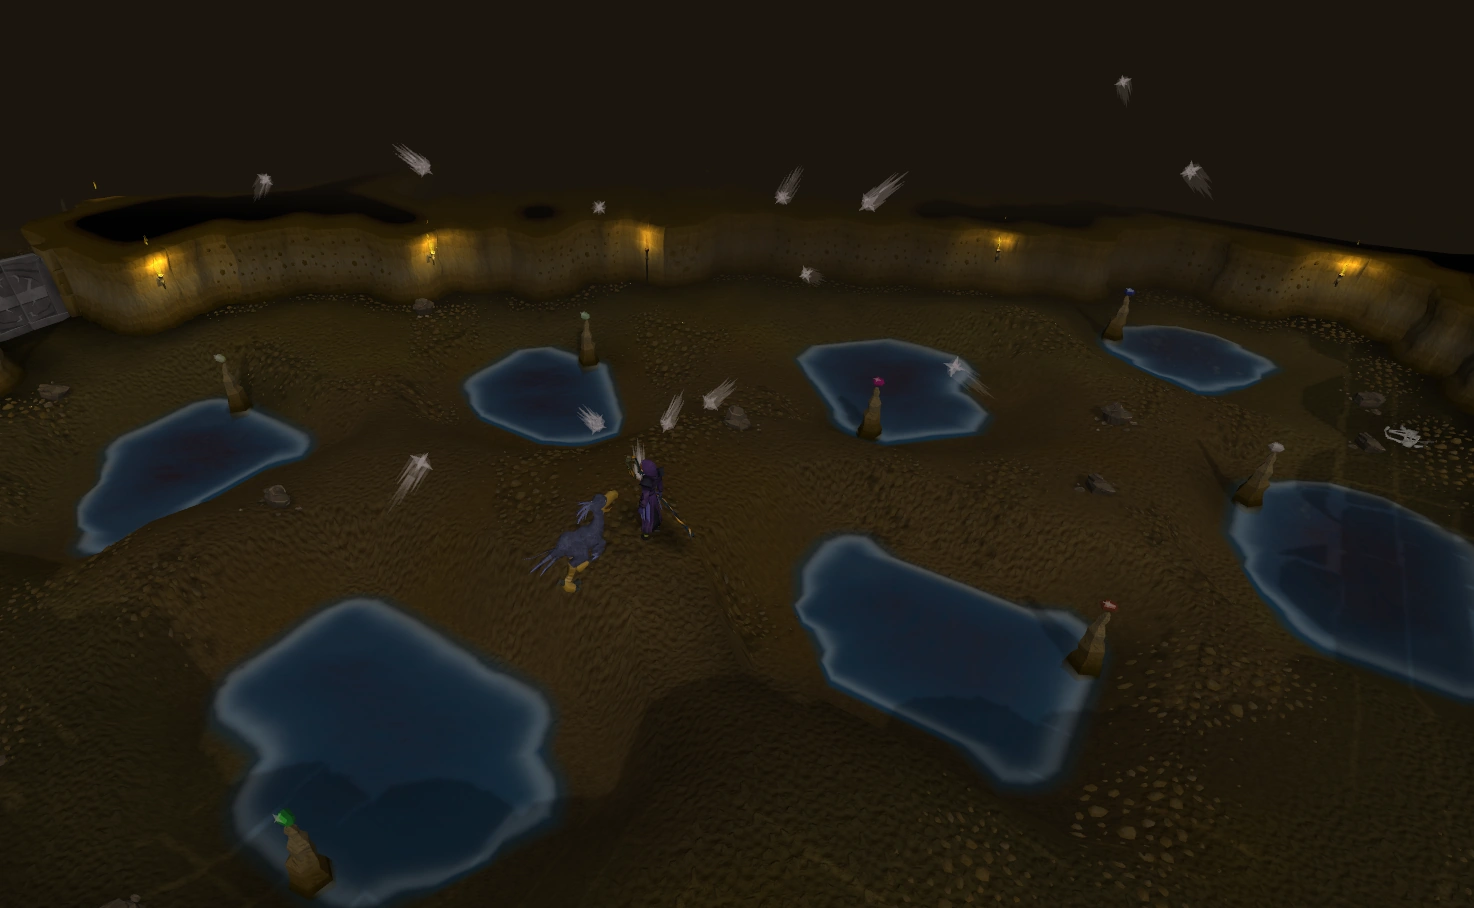
Use, in this specific order, a soul, mind, earth and two law runes on the wall; the wall-door unlocks and you can now pass through it. On the other side of the door is a large cavern, composed of a number of stalagmites sitting in several pools of water.

Retrieving the binding book.
Search one of the stalagmites to uncover another riddle. This time, you must use a certain gem on each stalagmite (See map in the previous section for the layout).
A quicker way of doing this is to drop the gem directly next to the rock and it will automatically glide towards the rock. A message saying "As you drop the gem, it slowly glides over to the sharp rock. And gently floats above it, rotating slowly. The "gem name" glows and starts spinning as it hovers above the rock. The gem soon begins to fade."
When all of the gems are in place, you are levitated to the centre of the cavern and treated to a light show that leaves behind a book of binding. This book allows players to bless vials, enabling it to hold pure water, and also counts as a stackable ranged projectile useful for fighting demons.
Holy Vessel


Blessing the golden bowl through a sacred ritual, only known to the natives of the Kharazi Jungle.
Items/Skills needed: 2+ gold bars, bull roarer, 50 Smithing.
After obtaining the binding book, head back up to the surface; it is recommended to teleport out to the Karamja lodestone. With at least two gold bars in the inventory, go to any anvil - the closest is in Safta Doc's hut north of Tai Bwo Wannai - and try to forge a gold bowl. It is possible to fail, so you may need to bring more bars.


The pool containing pure water.
To hold pure water without corrupting it, the bowl must be purified. Use the bull roarer, while in the Khazari jungle, to call Gujuo again and ask him to bless it for you. Failing this will reduce prayer points by 50.
Now, go to the pool of pure water in the center of the jungle (6). Chop the reeds along the edge to get some hollow reeds and use these to siphon some water into the bowl. With a full golden bowl, up to 10 blessed vials can be filled with pure water.
Note that the water can evaporate in the jungle heat, and if you plan to use ranged attacks, it is recommended to enchant some vials and fill them with pure water. Although doing so drains your prayer and magic.
Arcana, Defeati
Items needed: A blessed gold bowl filled with pure water, book of binding, combat gear and prayer potions. The silverlight/darklight and some vials of holy water may be helpful.

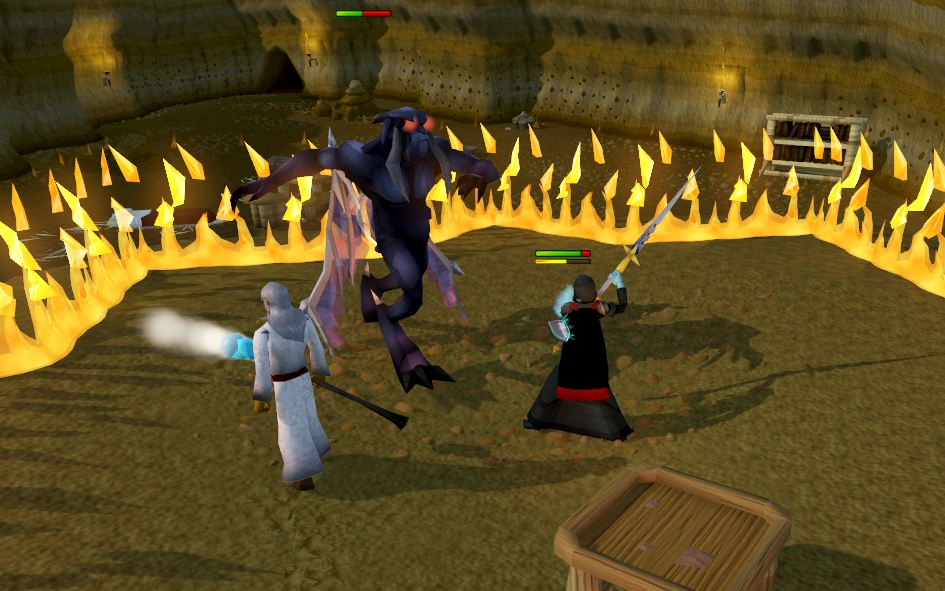
Nezikchened, the demon possessing Ungadulu.
Prepare for the battle ahead and head back to Ungadulu's cave. Pour the bowl of pure water on the octagram fire to step through unharmed and use the binding book on the shaman to release him from the demon, namely Nezikchened. Do not talk to Ungadulu before fighting the demon, or your melee stats will be drained.
Nezikchened is level 120 and drains prayer at the beginning of the battle.
- Players can lower its stats by attacking it with a silverlight/darklight (melee) or some vials of holy water (ranged).
- The demon casts a fire blast spell just before dying, which will allow players to freely pass through the fire, without the constant use of holy water.
Once Nezikchened is defeated, speak to Ungadulu, who rewards you for your efforts with some Yommi tree seeds.
- It is a good idea to use the drop trick to obtain at least six Yommi tree seeds, as the seeds often do not grow on the first attempt.
Finally, ask him how to get out safely and he'll cast a spell to protect you from the eternal fire.
So Close, Yet So Far
Items needed: A vial of water, rope, ardrigal and snake weed, blessed gold bowl, Yommi tree seeds, lockpick(s), bull roarer, an unpowered orb (or 2), runes to cast any charge orb spell (you must be on the standard spellbook) and combat gear. Prayer potions and good food are recommended.
The locations of the herbs for the bravery potion.
Head back up to the surface and call Gujuo, for directions on crafting a new totem. He instructs you to plant the seeds in fertile soil and germinate it in pure water.
After germinating the seeds, try to siphon some water into your bowl, and you'll be told that the pool has run dry; summon Gujuo again and inform him of your predicament. He says that the underground source has probably been blocked off by the evil spirits. Apparently, the source resides in a very dark, scary place, guarded by undead adventurers who also sought the fountain of pure water.
Gujuo tells you to create a bravery potion, made from ardrigal and snake weed, before trying to replenish the water pool. If you don't have them, collect the required herbs and mix them into a vial of water to make a bravery potion, consumed in a single dose. Do not drink the potion yet.
The Dragon's Eye

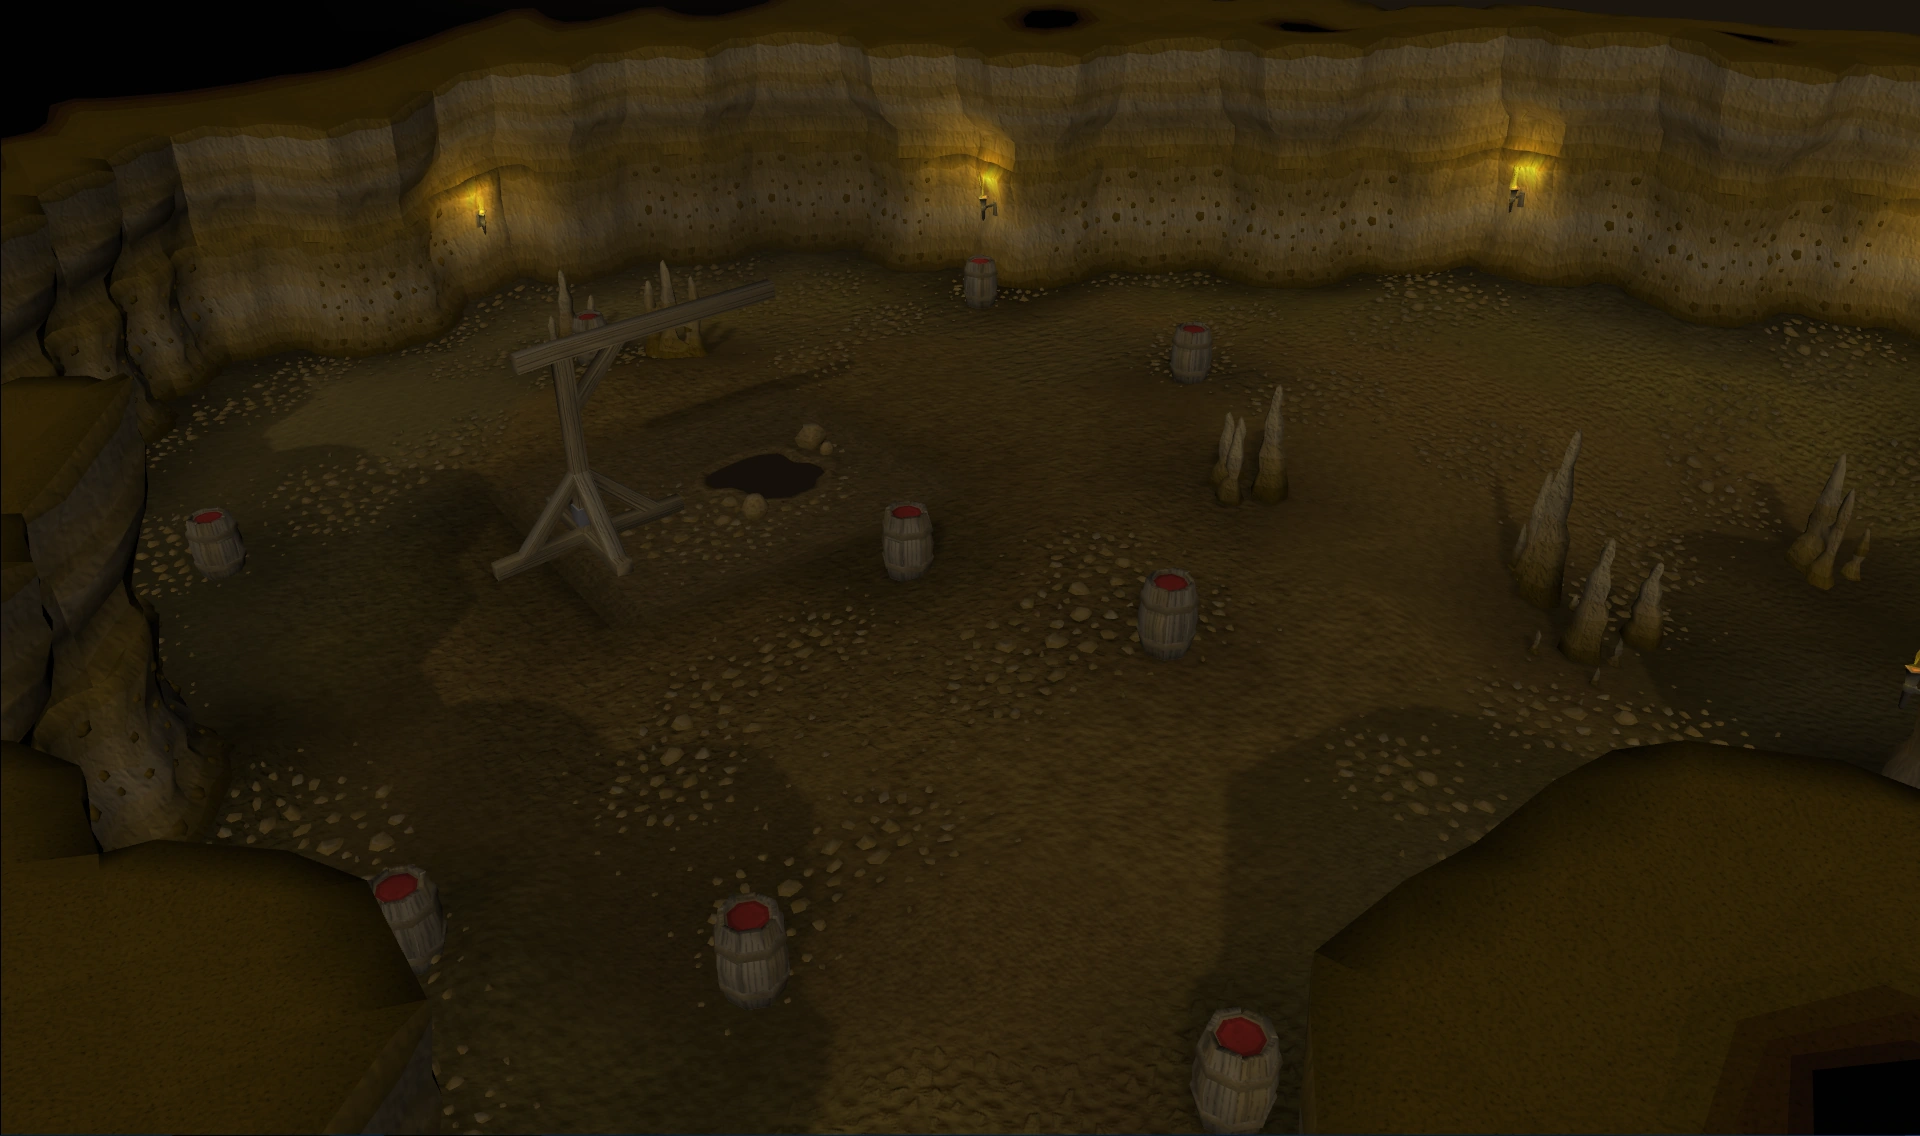
The test of courage, and some barrels.
Go back to Ungadulu's cave and past all the obstacles to the chamber where you found the binding book. Head north to the door and investigate it for yet another riddle. Cast any charge orb spell on the door, until it opens, and walk through it.
Beyond the door is a room with a winch and several barrels in it. Smashing the barrels yields various outcomes, ranging from items like ropes, stat-reduction, minor damage, etc., though plays no part in the quest. Use a rope on the winch, drink the bravery potion, and climb down the rope; you may fail and slip doing so, taking 180 points of damage.
If you attempt to climb down the rope without first drinking the bravery potion, your character will refuse to climb down and the rope will disappear. However, you do not need to get another rope; simply search the winch to unwind the original rope.
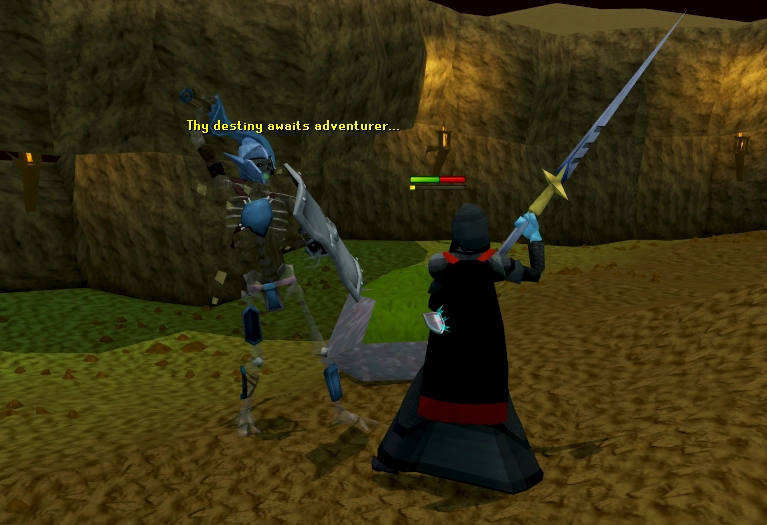
You should find yourself on top of a long, winding ridge, sprinkled with rocky projections. Attempting to take the blue hat at the top invokes a skeletal apparition of Viyeldi, a wizard cursed to protect the source, after dying in search for it.
|
1 - Rope and blue hat |
4 - Dragon's eye |
The noble dead.
Climb over the rocky ledges to get to the bottom of the ridge. Failure results in one of the following:
- Falling off the ridge and major points of damage (can be over 3000)
- Slipping off the particular obstacle for less damage, but incuring a temporary reduction in agility.
Once at the bottom, you must defeat three spectral monsters named Ranalph Devere (level 90), Irvig Senay (level 100), and San Tojalon (level 100). Talk to each of them to engage in combat; using protect from melee makes the battles fairly easy. You should get a lump of crystal, chunk of crystal, and a hunk of crystal after defeating all three of them.
Take the pieces of crystal to the furnace (3) in the northeast part of the chamber and use each one on it to make a heart crystal. "Look-at" the heart crystal to read the next clue - "Bring life to the dragon's eye."
Test of Endurance
The section of the caves mapping a dragon's head.
Head to the mossy rock surrounded by crumbling walls (4), just southwest of the furnace, and place the heart crystal on it. This should activate the crystal, allowing it to be used in the heart-shaped recess near the barrier to the south (5). On the other side of the barrier is, finally, the source of the pure water.
Pass across the barrier and west past the lesser demons until you reach the stream, blocked by three boulders. Try to push one, and a spirit named Echned Zekin appears, saying that he's being tortured and begs you to help him by killing Viyeldi.
You may notice that "Echned Zekin" is an anagram of "Nezikchened."; agree to help anyways and he'll give you a dark dagger to kill Viyeldi with. At this point, there are two paths you can choose between.
- The Short and Hard Path:
Killing Viyeldi.
This path involves complying with Echned Zekin's request. It takes a shorter time to complete as players do not need to exit the dungeon. However, it makes the upcoming battles a little harder, because the demon is still able to drain your prayer and can summon the three guardians in the third battle against him.
Go back to the ridge and walk back up to the very top. Wield the dagger and stab Viyeldi, killing him and changing your weapon to a glowing dagger. Once he is dead, head back and push a boulder to get Echned Zekin to appear. Use the glowing dagger on him; he reveals himself to be Nezikchened and attacks you, draining your prayer.
- The Long and Easy Path:
This path involves reneging on the agreement with Echned Zekin. It takes a longer amount of time to complete, and another orb and charge orb spell to return because players must exit the caves.
Leave the cave; if necessary, go to a bank and get another unpowered orb and runes for the charge orb spell, and restock food and potions. Return to Ungadulu back at the entrance and use the dagger on him. He recognises the evil in the dagger and uses it to create a holy force, which can be used on the demon to prevent it from draining your prayer.
Head back to Echned Zekin's cave and push a boulder to make him appear. Use the holy force to compel Echned Zekin to reveal itself to be Nezikchened, making him attack you.
Nezikchened attacks with both magic and melee this time, so you should switch prayers accordingly if you are using them. After you defeat him, push the boulders out of the way of the water's flow, restoring the surface pool. You can refill your golden bowl with sacred water right here - after you push aside the boulder, a spring of sacred water appears.
Quicktree
Items/Skills needed: Bull roarer, Yommi tree seeds, golden bowl, Radimus notes, hatchet (rune or better, toolbelt will work), combat gear for the third battle, 45 Herblore and 50 Woodcutting.


The Yommi Tree.
Make sure your bowl is filled; if necessary, use the seeds on the bowl to grow them into saplings, and fill the bowl again. Each set of seeds can produce three saplings, so there are three chances to get the following right.
Go back to the surface and head to the water pool. Plant a sapling in any one of the brown, fertile soil spots around the jungle - there's one just northwest of the pool. Water the sapling with pure water to make it grow. If you need to refill your bowl, you can reuse the pool as it is no longer blocked by a boulder.
- If you don't water it timely, the Yommi tree sapling will die shortly after being planted. If this happens, you'll have to remove the dead Yommi tree by using a hatchet on it, and wait for the "damaged earth" to turn back fertile - takes roughly a minute - before trying again.
The tree should grow in about ten seconds. Once the tree gets to full size, immediately chop it down and shape it by using your hatchet, before it rots. Keep chopping the fallen tree until it becomes a Yommi totem. When you're done, "lift" the totem pole into your inventory.
Legendary
Once you have the totem, prepare for a fight and go to any of the locations of the older, possessed totems; one is located just east of the pool, but there are some all around the forest.

Finishing at the totem.
- Players who chose the long path should turn on protect from melee, then replace the new Yommi totem with the old one. Nezikchened appears and immediately attacks the player.
- If a player chose the short path, they must fight the three guardians first, one at a time. The demon appears after the three guardians are defeated.
Nezikchened, once again, drains prayer when he fights you, and uses relatively more effective melee and magic attacks.
- The demon gets several free blows before players can respond. This lag is intended and can result in a swift death, especially for lower-levelled players - protect from melee negates some damage from his attacks.
- Using range, magic, or a halberd from between the trees with protect from magic activated allows players to defeat it without losing much health.
Once Nezikchened falls for the last time, use the new totem on the impure totem again. Gujuo appears and rewards the player with a gilded totem. Go back to the guild with the completed Radimus notes and the gilded totem, and hand them over to Radimus Erkle in his office. He wants you to meet him in the main hall, so enter through the guild doors and talk to him again to be admitted into the legends' guild.
Congratulations, quest complete!
Rewards

- 4 Quest points.
- Access to the Legends' Guild (including a shop to buy the cape of legends).
- 7,650 experience each in four skills of your choice amongst the following - Attack, Defence, Strength, Constitution, Prayer, Magic, Woodcutting, Crafting, Smithing, Herblore, Agility, and Thieving.
- Binding book.
- Bull roarer, used to summon Gujuo to bless more golden bowls.
- Ability to wield a dragon square shield.
- Ability to make holy water.
- Access to the Kharazi Jungle and red gecko pets.
- 2 Treasure Hunter keys and 2 Hearts of Ice
Music unlocked
Required for completing
Completion of Legends' Quest is required for the following:
- The Branches of Darkmeyer
- Recipe for Disaster/Freeing Sir Amik Varze (You simply need to talk to Radimus Erkle about the quest)
- While Guthix Sleeps
- Karamja Tasks:
- Hard: "I'd Be Kharazi to Eat This", "Deadwing" and "A Palm For Each Finger"
- Ardougne Tasks:
- Hard: "Brace Yourself" and "Shadow Boxing"
Transcript
Trivia
- This was the first master quest, and the only one released on RuneScape Classic.
- During the RuneScape 2 beta, Radimus was temporarily replaced by a non-player character named Erasmus. After RuneScape 2 was officially released, Radimus once again became the starting point for the quest.
- This quest requires 56 Magic although Family Crest is listed as a quest requirement, which requires 59 Magic to complete. This is possibly an oversight from Jagex.
- After the quest is completed, the adventure log will say "To gain access to the Legends' Guild, I explored the depths of the Kharazi Jungle and defeated the demon Nezikchened. The locals rewarded me with a totem pole."