| |||||||||||||||||||||||||
| Also called | MEP2 | ||||||||||||||||||||||||
|---|---|---|---|---|---|---|---|---|---|---|---|---|---|---|---|---|---|---|---|---|---|---|---|---|---|
| Release date | 17 October 2005 (Update) | ||||||||||||||||||||||||
| Members | Yes | ||||||||||||||||||||||||
| Voice Over | No | ||||||||||||||||||||||||
| Official difficulty | Master | ||||||||||||||||||||||||
| Quest series | Elf | ||||||||||||||||||||||||
| Age | Fifth Age | ||||||||||||||||||||||||
| |||||||||||||||||||||||||
Mourning's End Part II (The Temple of Light) is the seventh quest in the Elf quest series. This quest is often perceived as being extremely challenging, owing to it having arguably the most difficult quest puzzle in the game, being comparable to Elemental Workshop III.
Official description
This chapter of the quest takes our hero deep under the mountains of Arandar to put a stop to the evil plans of the mourners. If our hero is to succeed, they must solve one of the most complicated puzzles in all of Gielinor.
Walkthrough
| Start point | |||
|---|---|---|---|
| Member requirement | |||
| Official difficulty | |||
| Official length | Very Long | ||
| Requirements | Skill requirements are not boostable unless marked with a [B] for boostable.
Recommended:
| ||
| Items required | Items from the tool belt are not listed unless they do not work or are not automatically added.
Recommended:
| ||
| Enemies to defeat | None, although you must be able to handle attacks from numerous, aggressive shadows (level 95) |
Back to the Mourners

After infiltrating the mourners, return to Lletya to speak with Arianwyn. Report that they are seeking access to an old temple, to which Arianwyn shockingly realises that they have rediscovered the Temple of Light and that you need to stop them at all costs. Agree to do so and return to the mourner base to see whether the key required to access the adjacent tunnels is ready yet.
Raiders of the Lost Temple
Items recommended: A crystal teleport seed and combat gear

Return to the Mourner Tunnels. The entrance is located in the north-easternmost house of West Ardougne - having full mourner gear equipped is required to enter. Once downstairs, speak to the head mourner. He will inform you that the guard has finally returned with the key he had to forge, albeit with ten times as many as needed. You will ask about the task he was going to give you, and he will ask you to find out what has happened to a missing dig team. He will also warn you about powerful beasts that the diggers have accidentally disturbed before giving you the key to the tunnels. Should you lose it, you may search the head mourner's desk for another one.

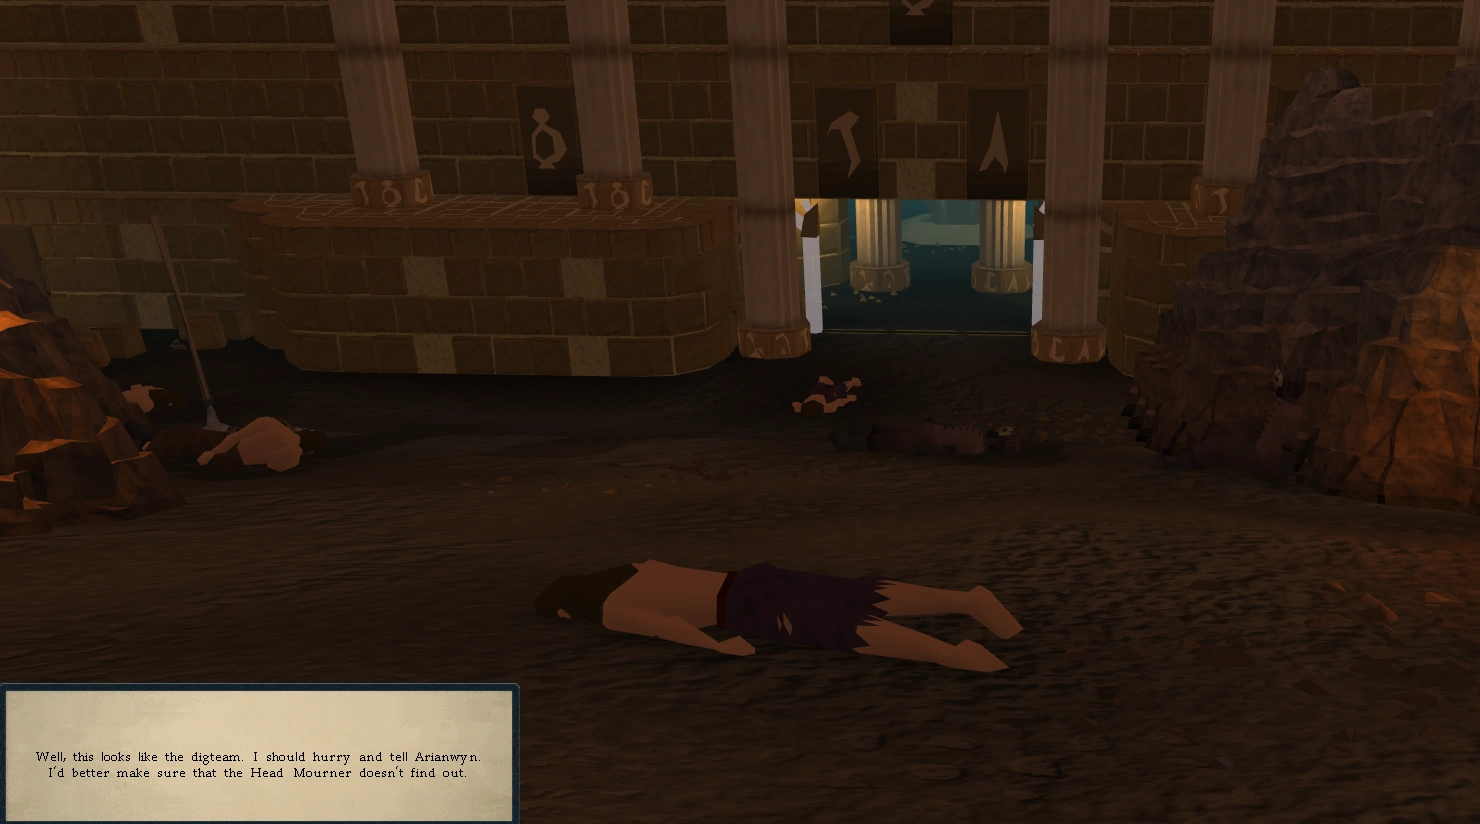
Dead mourners and slaves.
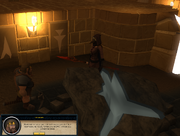
Open the door and head west. Be careful when passing the dark beasts, as they are powerful creatures. Eventually, you will reach the entrance of a very large structure; the Temple of Light. Watch out for the pair of aggressive shadows lurking here; they hit high, but only have 100 life points, so they can be slain easily. You will also notice several corpses lying around as you approach the temple, both dead mourners and slaves. Search them to identify them as the dead dig team. You will realise you have to tell Arianwyn while keeping the head mourner in the dark.
One of the dead mourners will carry a colour wheel and his journal. Read it to find out his identity, Nissyen Edern. The journal details how he joined the mourners and left Prifddinas for West Ardougne. The colour wheel will become necessary later on. After examining the dig team, you will be prompted to return to Lletya and speak to Arianwyn.
Into the Light
Items recommended: A crystal teleport seed, death talisman or omni talisman or wicked hood (for the final puzzle), armour and some food
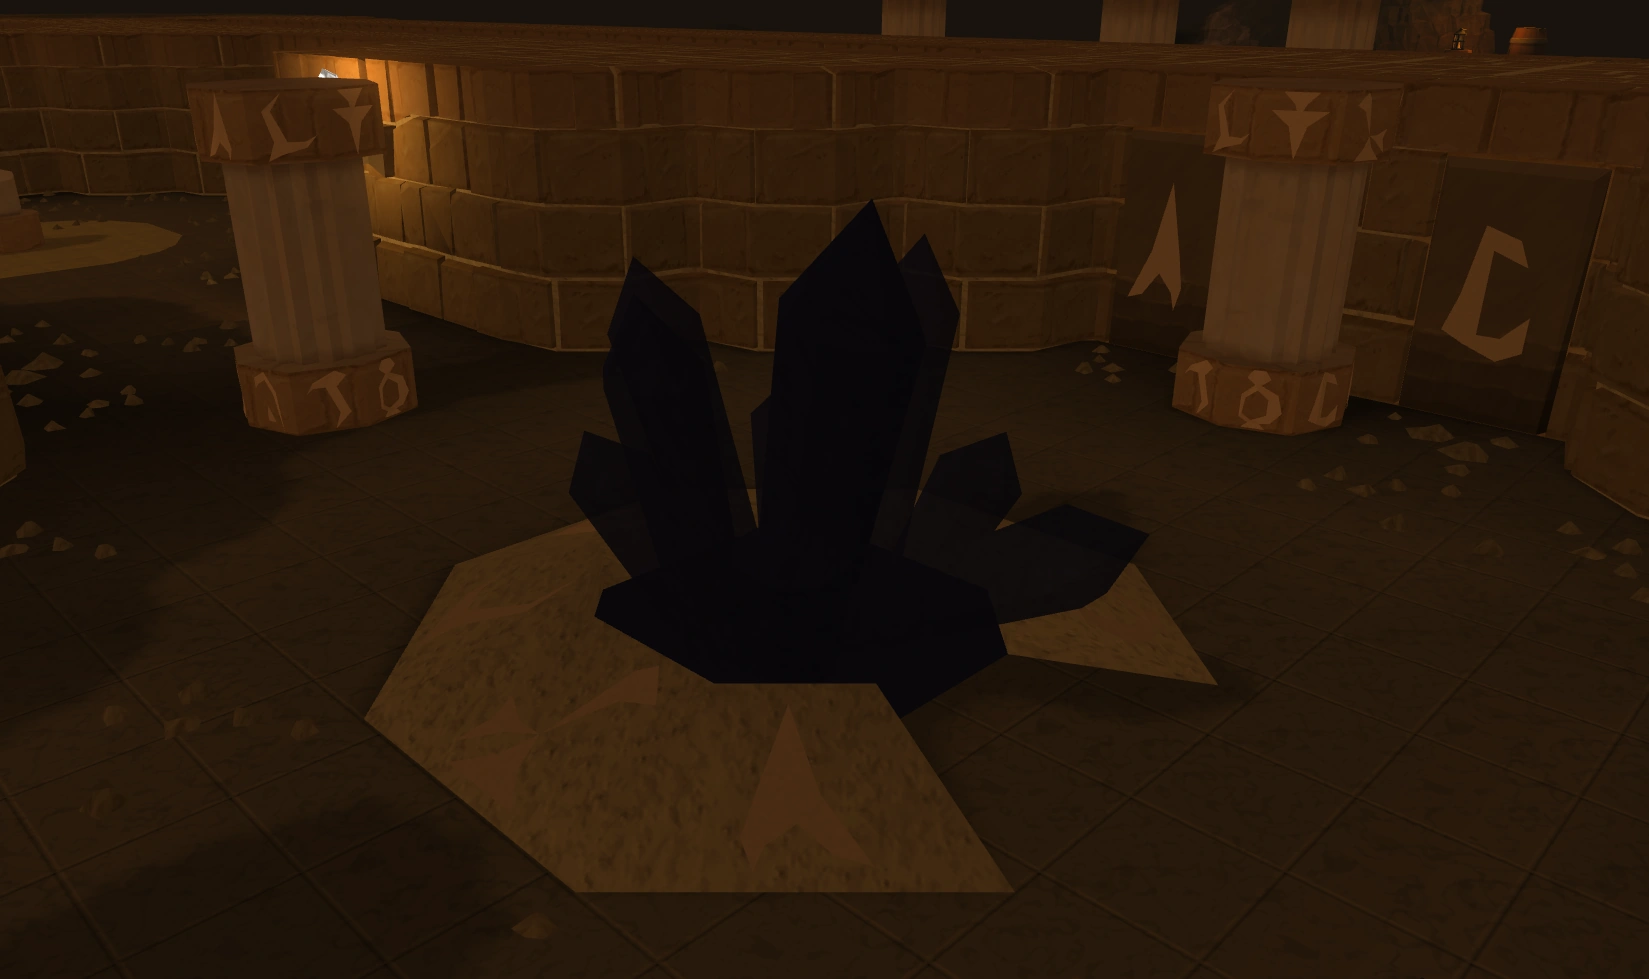

.png)
The blackened crystal

Arianwyn will realise that the safeguard of the temple, built millennia ago to protect an ancient altar, has failed, which means the shadows have become free to roam outside its perimetres. He will ask you to return to the temple to find a very large darkened crystal, and return a sample of it to him.
After speaking to Arianwyn, head back to the Mourner Tunnels in West Ardougne. The dark crystal is located on the top floor. First, ascend the stairs that are west of the entrance where you found the dead bodies and head south until you reach a ladder going up. Ascend these and head north again, then head east until you are right above the entrance to the temple. The crystal is located here. Chisel a chunk off it then return to Arianwyn any way you see fit.
Arianwyn concludes from the sample that a skilled crystal chanter should be able to make a replacement so he summons Eluned, who will agree to chant a new one. Use the sample on her to show it to her and she will proceed to create a replacement. Speak to Arianwyn again, who will tell you that you need to reach the altar in the temple and imbue the newly made crystal with its power, then placing it into the original crystal, thus restoring the safeguards and preventing the mourners from accessing the temple.
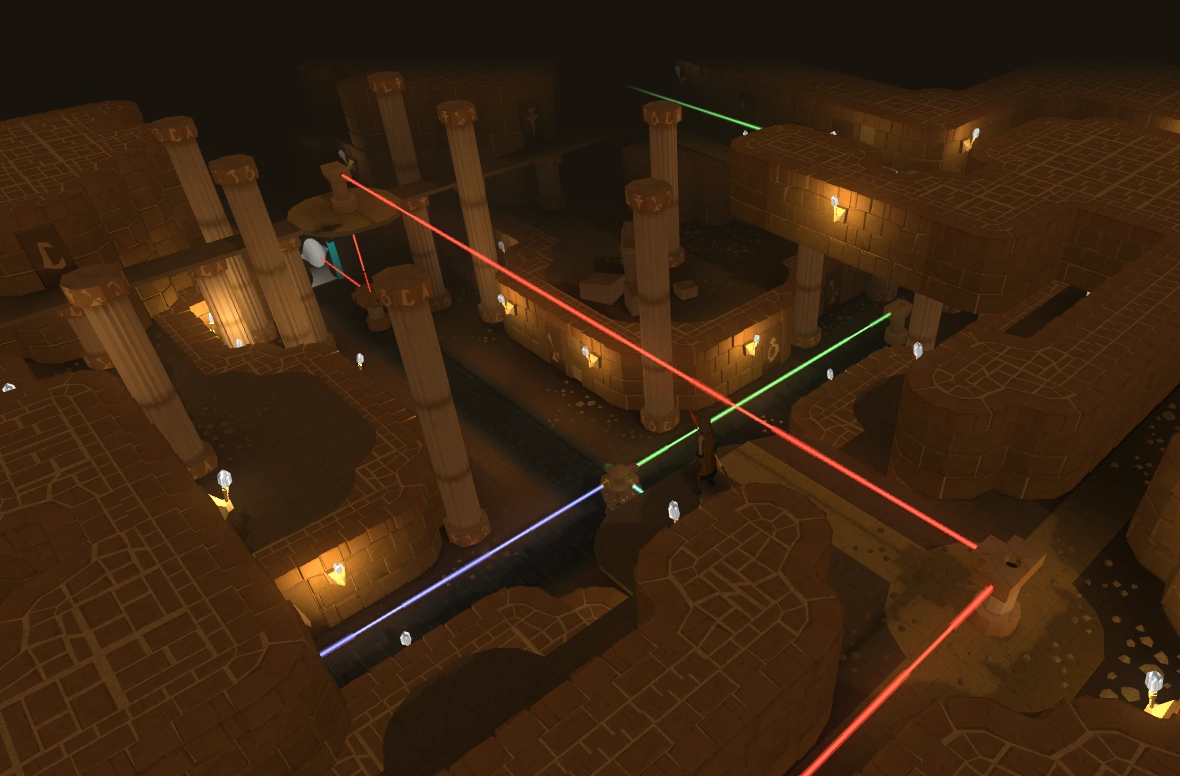
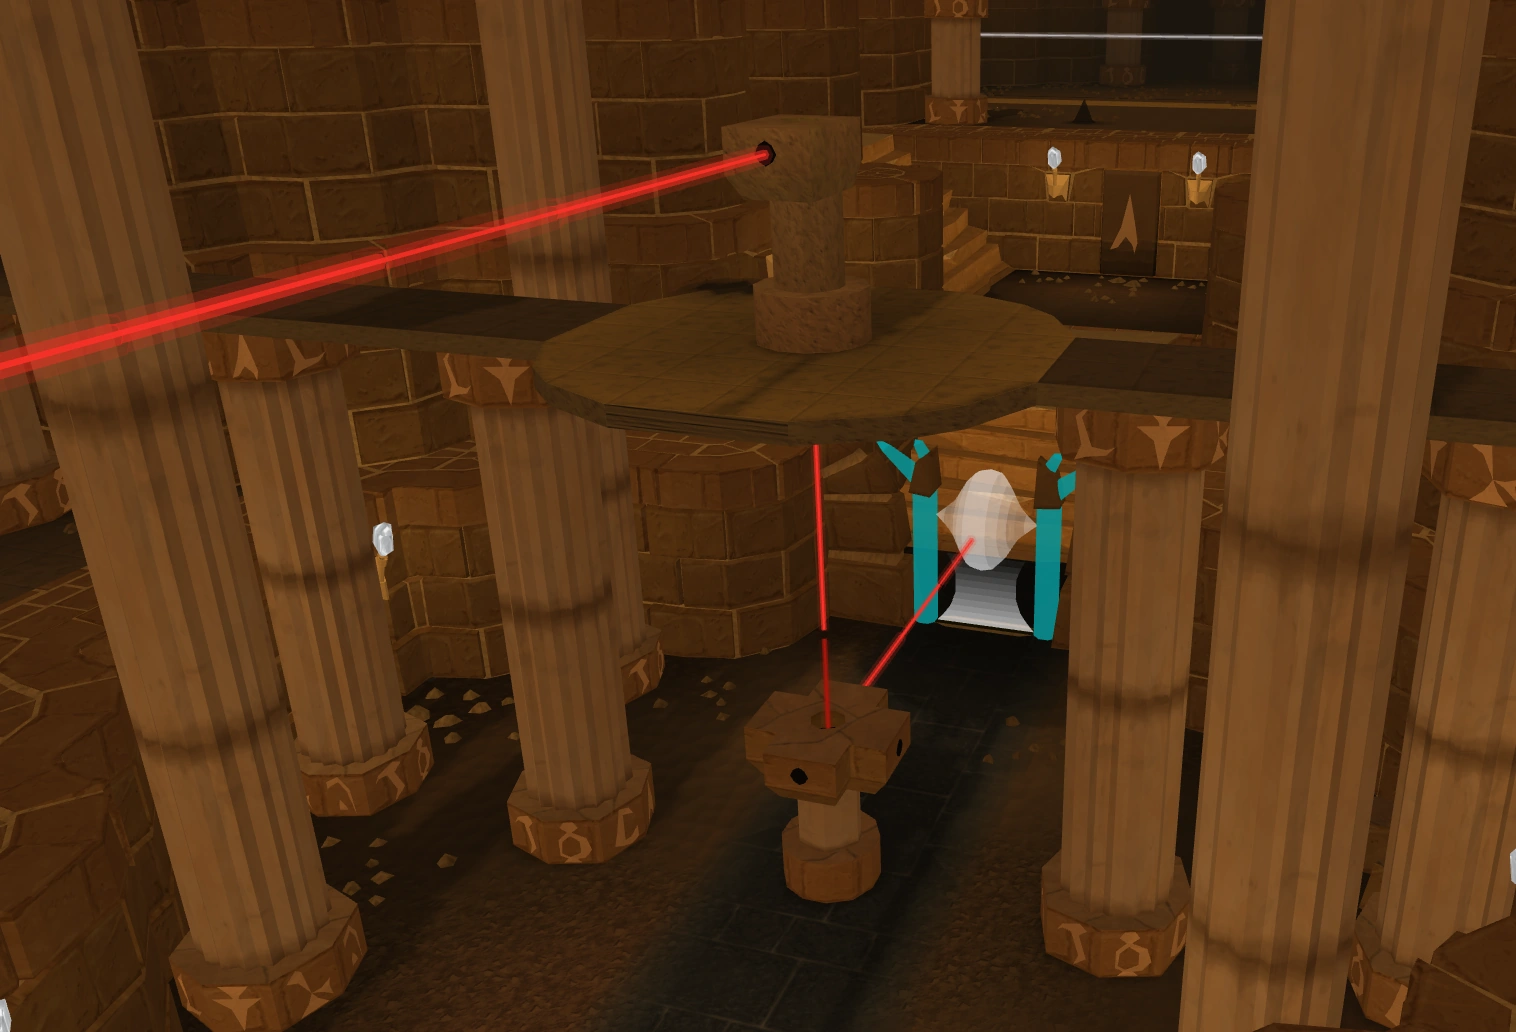
Return to the Temple of Light. You now have to reach the altar, but the entrance is blocked by an impassable door of light. To open it, you will have to direct a light beam to it. This, however, is not as easy. In order to be able to do this, you will first have to unlock several other doors by directing beams of light at them in order to get the crystals and mirrors necessary to make the light beam reach the final door. Beware of the shadows while doing this. Several important things to note:

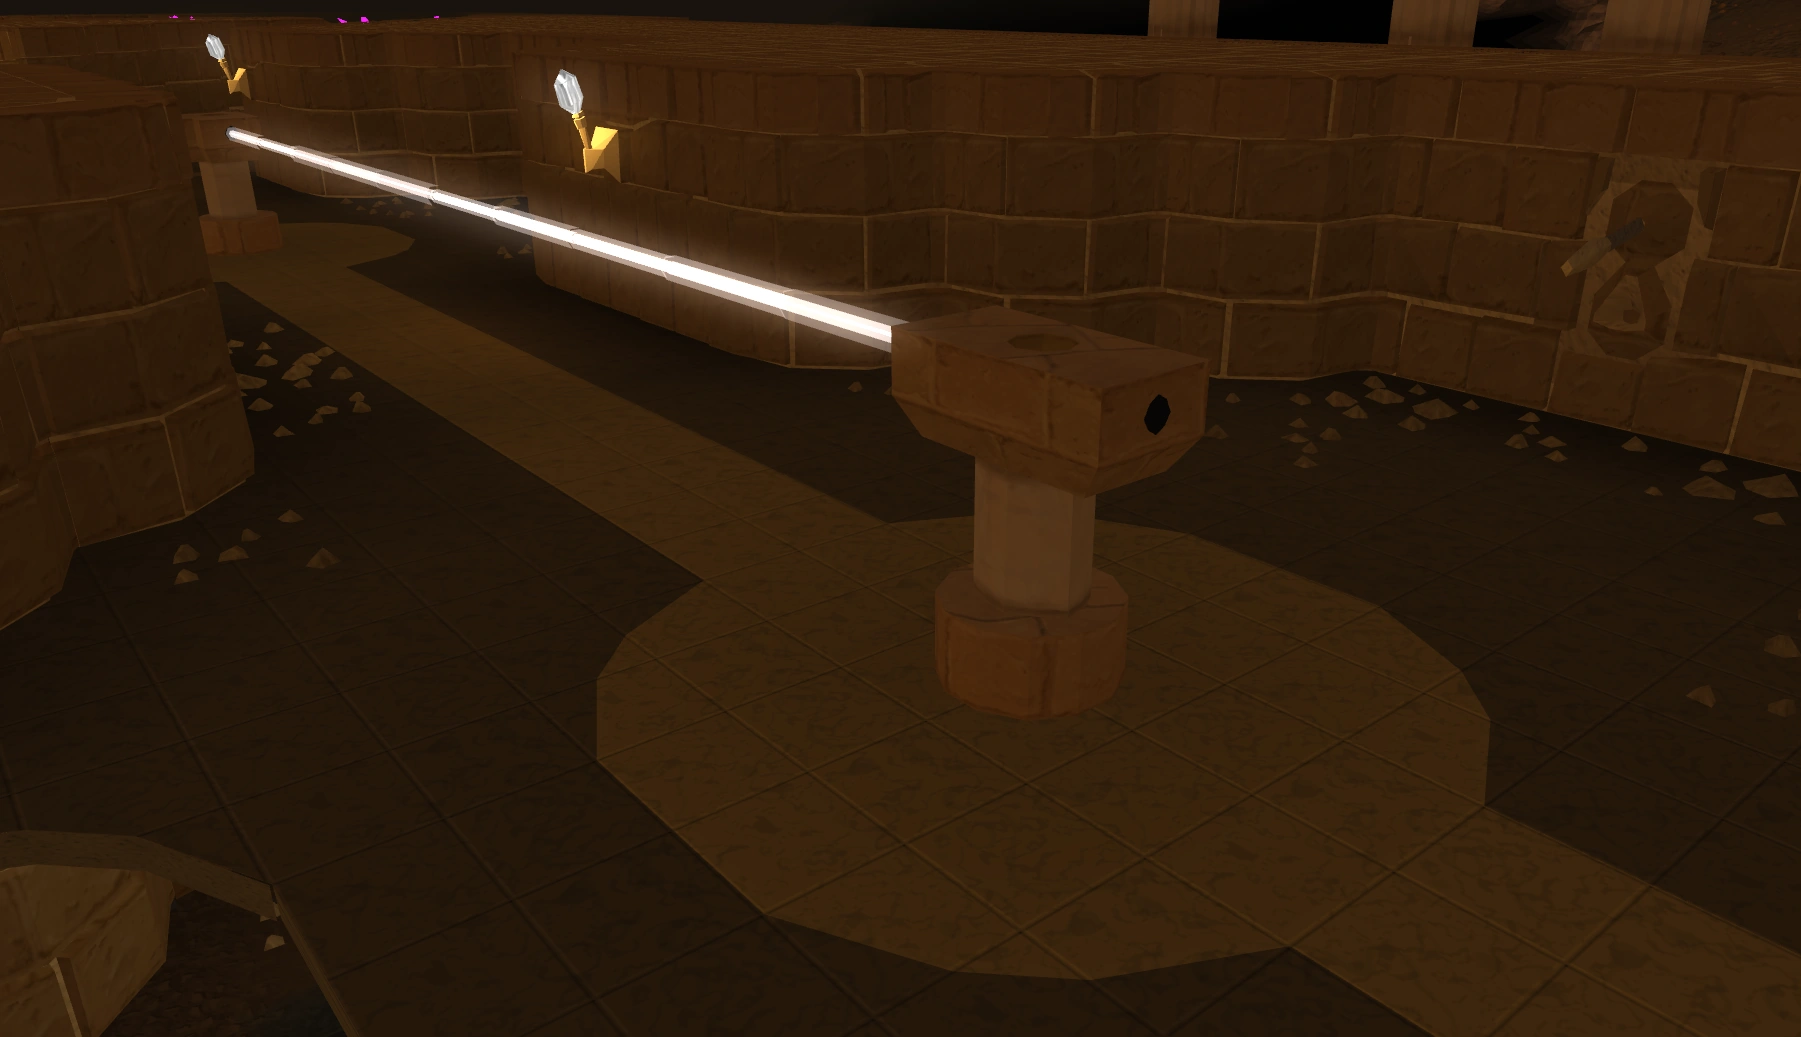
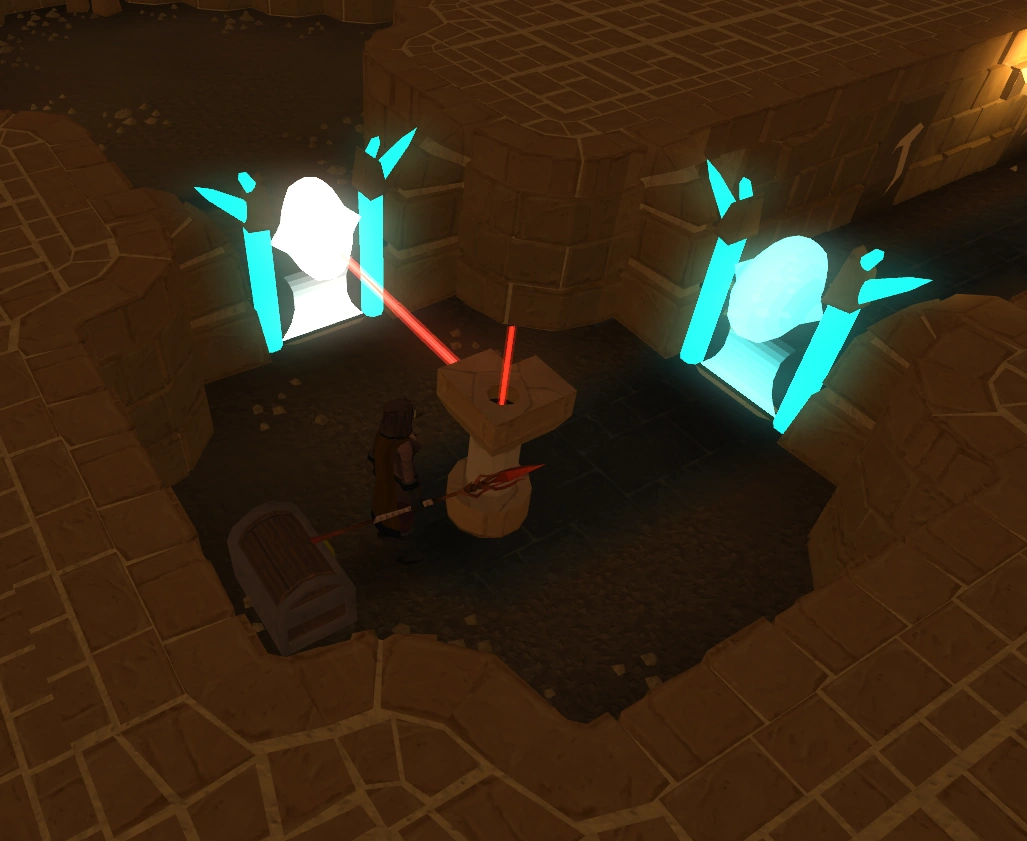
The crystal collector (right, on the wall) and the light emitting pillar.
- The light beam starts at an emitter which is by the eastern wall on the 1st floor[UK]. Next to it is a crystal collector with a lever. By pulling the lever, you are able to collect several mirrors and/or coloured crystals. After unlocking a door, you need to return to this starting point and collect more items to progress.
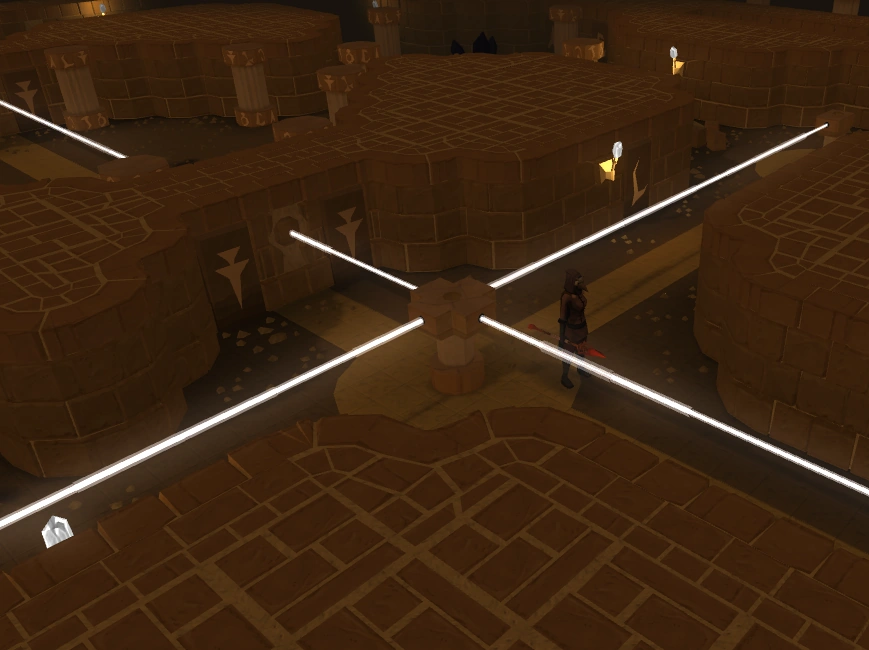
- You need to use the mirrors to redirect light beams inside special pillars of light, which are scattered throughout the temple, by rotating them. A beam can be directed north, east, south, west, up, or down. If no mirror is placed inside a pillar, the beam will not be redirected (provided that the pillar has an opening at the other side). Sometimes, a beam needs to be sent through a hole in the wall.
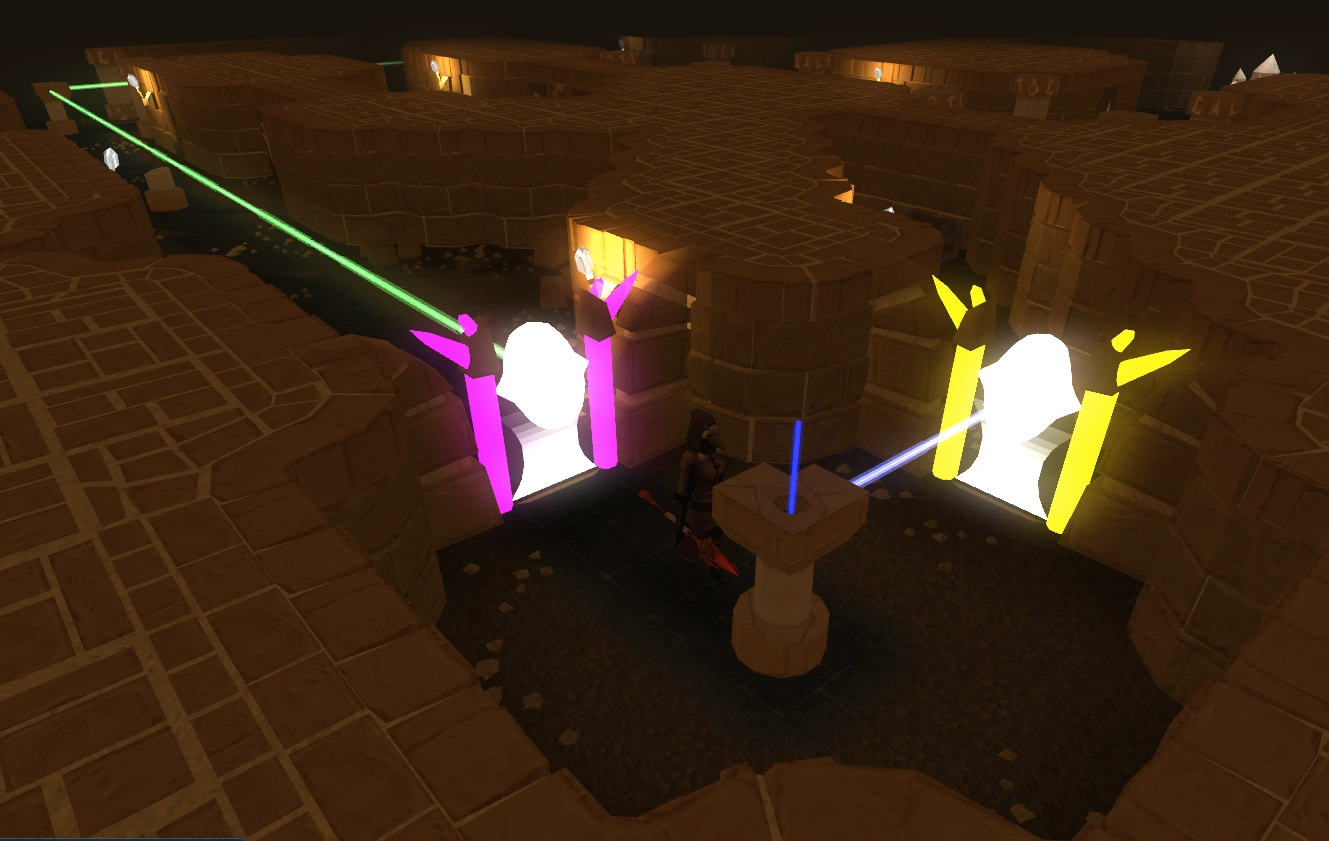
- You are able to unlock light doors by hitting them with a beam consisting of only the door's complementary colour. Use the colour wheel to determine which colours are complementary (opposite one another on the wheel). For example, a yellow door would be unlocked by a beam of blue light.
- Crystals can be placed inside light pillars to change the light beam's colour. The emitter by the collection point emits white light; placing a crystal of a certain colour inside a pillar on the beam's path will turn the light into that colour. Multiple crystals can be placed in a row to mix colours. However, crystals of opposite or directly adjacent colour to the beam (using the colour wheel) will block the beam entirely.
- After passing a light door, you will find a chest. Remember to search it and take all of its contents with you before returning to the collector. Should you lose any of these items, they can be retrieved from the crystal collector. Therefore it is not needed to re-unlock light doors and search the chests again.
- There are a few spots without any shadows in the temple, allowing you to rest safely. One of these is by the crystal collector. Another is the space between the stairs that lead down from the third floor.
- Since the shadows only have 100 life points, you may be able to reduce or eliminate the need for food by one-hitting them before they can damage you at all, even with low-level air spells to conserve runes. Using fast cool-down magic abilities (Revolution recommended) will also quickly gain 10% adrenaline per shadow, making Regenerate a surprisingly viable option for healing, especially for those without access to Enhanced Excalibur or high-level healing equipment.
Upon returning to the Temple, ascend the stairs and head to the crystal collector to the east. Pull the lever to get four hand mirrors and a yellow crystal. Yellow is complementary to blue according to the colour wheel, so you will have to use it to unlock the blue door. Since you are provided with only four mirrors, the light beam's path will be relatively short. After finding the blue door, use the mirrors and the pillars to direct the light beam (coloured yellow by the crystal you placed inside one of the pillars) onto it, thus making in passable.
Think like this while solving the puzzle. Sometimes, you will need to use multiple crystals to mix colours in order to open a certain door. Below is a step-by-step guide of how to unlock each door, but you should be able to work it out yourself using the above tips.
- If you do not get the mirrors and crystal the first time, go up and down the stairs to reset the floor, checking the Crystal collector every time until you get them. You will need five free inventory spaces to do so. Click down, then click back up the stairs, when you run towards the Crystal collector click to open it before you get to it, this forces the system to load the proper menu, enabling you to get the items.
Maze of Light
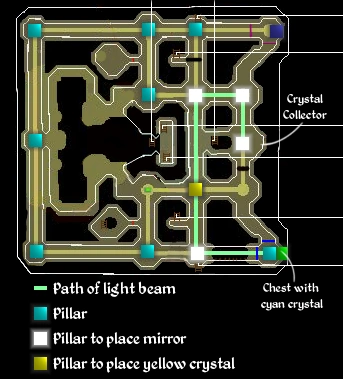
Blue door

The blue door, guarded by the infamous handholds.
|
|
|
|
|
|
|
|
Magenta door
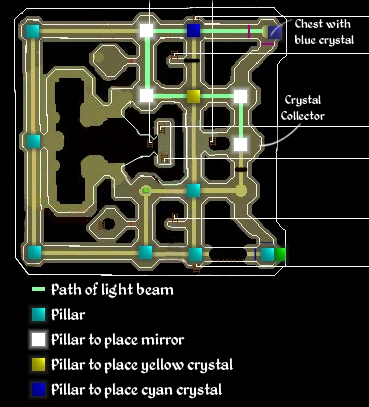
Go back to the crystal collector and pull the lever. Collect all of the items (5 total). You should now have 2 crystals (yellow and cyan) and 6 mirrors. Should you not be able to collect the crystals and the mirrors from the tray by pulling the lever, the problem can be usually solved by climbing down and up the nearby stairs (resetting the floor). Click down, then click back up the stairs, when you run towards the Crystal collector click to open it before you get to it, this allows the proper menu to load.
You have already opened the blue door; the complementary colour to cyan is red, but there is no red door. Therefore you will need to mix cyan with yellow light, creating green light, of which the complementary colour is magenta. You will have to unlock the magenta door with it.
|
|
|
|
|
|
|
Cyan door

The cyan door opened.
Go back to the crystal collector and pull the lever. Collect all of the items (10 total).
|
|
|
|
|
|
|
|
|
|
Yellow door
|
|
|
Magenta and yellow doors
Using the fractured crystal to split the beam.
You now need to open two doors, a new magenta door and a new yellow door using the fractured crystal. Go back to the crystal collector, pull the lever and collect all of the items (14 total).
|
|
|
|
|
Magenta door
|
|
|
Yellow door

The yellow and magenta doors now open.
|
|
|
|
|
Cyan and black doors
You now need to open two doors: A new cyan door and a huge black door, using everything you have (13 mirrors, 5 crystals and one more green crystal which is already placed in a pillar). Go back to the crystal collector and pull the lever, collecting all of the items.
|
|
|
|
|
|
Green beam
|
|
|
Blue beam
|
|
|
|
|
|
Red beam


The three lights merge into a single bright white one, unlocking the door to the Death Altar.
|
|
|
|
|
|
|
The power of death

The light configuration for the penultimate door leading to the death altar.
You can skip most of this section if you already have a death talisman, omni-talisman, or wicked hood fed with either. Simply enter the death altar and go to here.

After you go through the final door, talk to the dwarf Thorgel. You will ask each other how you got to the altar, and he will reveal there is a passage from the Underground Pass created by him and his companions. You will ask if he knows Klank, after which he will realise you are the one who slew Iban. Because of this, he agrees to trade you a death talisman in return for some supplies.

You finally reach the Death Altar, and meet Thorgel, who offers you a Death Talisman.
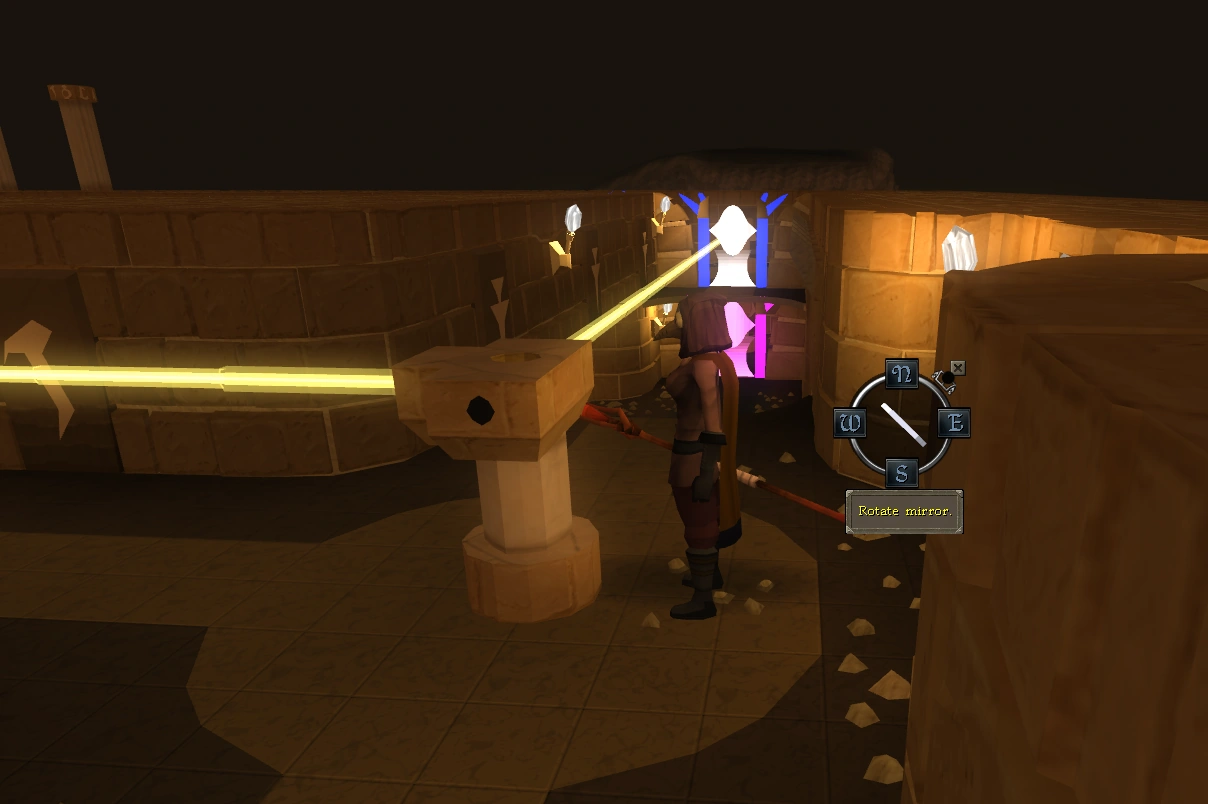
Don't leave the Temple of Light by teleportation before rotating the mirror 180 degrees to direct the beam to the cyan (entrance) door again. Otherwise, you will have to go through the Underground Pass to the dwarven camp and squeeze through the crevice Thorgel described, or alternatively repeat the final puzzle of the quest.
He gives you an item list that tells you what you need to get him. By bringing Thorgel each of the fifty items on the list, you will be able to obtain a death talisman. You do not need to bring him the items and can instead just bring your own talisman to enter the death altar.
The items on the list are as follows:
|
|
|
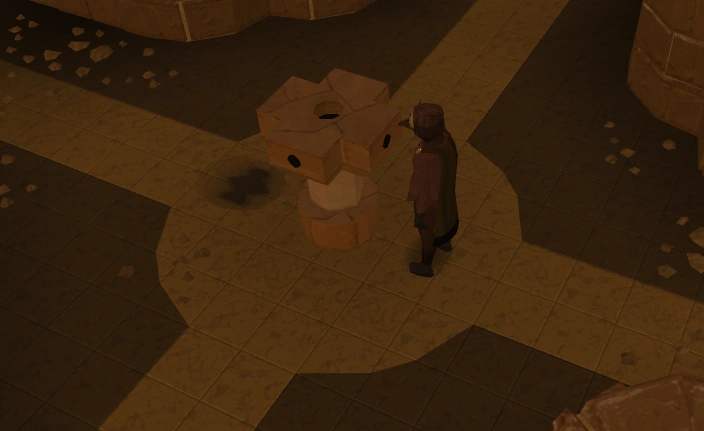
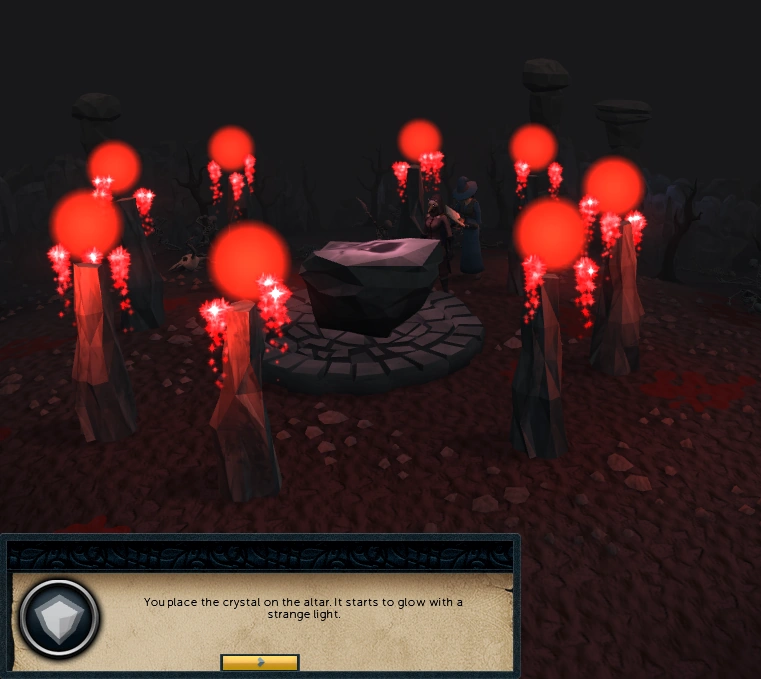
Placing the crystal atop the Death Altar
You can give these items in more than one load (only a pack yak or a friend would allow you to bring the items in one go). Before you teleport out, make sure you turn the mirror towards the cyan door. Otherwise, you'll lock yourself out and you'll have to go through the Underground Pass and enter the tunnel near the dwarf camp, redo the final puzzle or use a teleport to the death altar.
Using the death talisman
Once you have obtained a death talisman, use it to enter the death altar. Once there, use Eluned's crystal on the death altar to imbue it with death power. Leave the altar and take the imbued crystal to the black crystal on the top floor and place it there to restore the temple's safeguard.
Finally return to Arianwyn and report your success. He will be content, stating that the Temple would no longer be accessible by the enemy for thousands of years. He will be surprised to hear of Thorgel's presence at the death altar, however. Nevertheless, he is confident that the mourners are never going to enter the Underground Pass, fearing it immensely as a result of a long ago battle, and prepares to send an envoy to the dwarves to discuss an alliance. He rewards you for your efforts by giving you a crystal trinket, which allows you to enter the Temple of Light safely in spite of the restored security.
Congratulations, quest complete!
Rewards
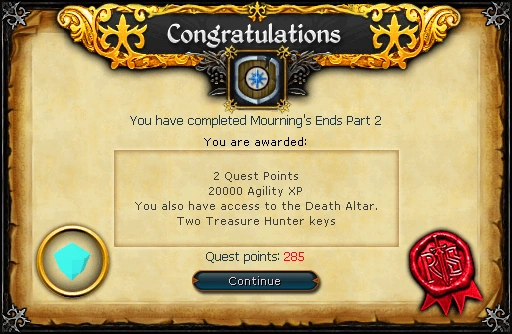
- 2 quest points
- 20,000
 experience
 - A crystal trinket (allows you access to the Temple of Light)
- Access to the death altar (Includes via the abyss)
- Access to Dark Beasts (quest completion not required)
- 2 Treasure Hunter keys and 2 Hearts of Ice
- Music unlocked
Required for completing
Completion of Mourning's End Part II is required for the following:
Transcript
Tips and Tricks

A trapped shadow behind a pillar.
- You can trap shadows behind the pillars to give you time to rotate mirrors.
- Although shadows will not become aggressive towards you if you are rotating a mirror, they will continue to attack if they already have. You can use this by killing any attacking shades and then quickly rotating a mirror to give yourself effective immunity, allowing you time to figure out what to do next.
- Should you not be able to collect the crystals and the mirrors from the tray by pulling the lever, the problem can be usually solved by climbing down and up the nearby stairs (resetting the floor).
- When trying to return to Thorgel, using the Underground Pass is much faster. Teleport to the Tirannwn lodestone and then make your way to the cave. From there climb down the well, and go through the big doors. Then you can either walk south to the stairs down to the dwarf camp where Klank is, or you can take a fall from crossing the narrow bridges. Falling makes you lose around 20% of your life points, but you can always talk to Kamen for food, if you can risk lowering your agility for a while. Once in the dwarf camp, there are stairs on the south wall leading down to Thorgel and the entrance to the death altar.
- If you have completed As a First Resort quest, you can use the saltwater pool to save energy potions and the sulphur pool for a prayer boost.
- It is fine to log out, or restock on supplies, during this quest. All the crystals and mirrors will be in the same place you left them in.
- Use ranged or magic weapon to kill the shadows at range (Revolution is recommended), and use Regenerate, Rejuvenate, or Guthix's Blessing to heal. This will greatly reduce the amount of food required.
Trivia
- Placing the imbued crystal into the large black crystal will always yield a chat message saying "Nothing interesting happens.", even though it is done correctly.
- The quest completion dialogue shows a picture of the cyan crystal, which is also the only crystal remaining after the puzzle is completed.
- When the quest was first released, Jagex asked major fansites to abstain from posting a quest walkthrough for at least the first week.
- If you refuse to give Thorgel one of the three keys he asks you for, he will say "Pretty please with a Blood Talisman on top??", then you would say "A 'Blood' Talisman?!?", and then Thorgel would reply "Oops, I mean a 'Death' Talisman!" This was a hint to the blood talisman which was later released along with blood rune crafting and Legacy of Seergaze in 2008.
- Upon completion of the quest, the Adventurer's Log states: I managed to get access to the Temple of Light, where I reactivated the temple's defences after solving a giant puzzle involving light.
- The fail rate of the handholds have been decreased by 92% if the player has at least level 70 Agility since the 20 June 2016 update.
Mourning's End Part II | |||||
|---|---|---|---|---|---|
| Part 7 of the Elf quest series | |||||
| NPCs | |||||
| Enemies |
| ||||
| Items |
| ||||
| Locations |
| ||||
| Music |
| ||||
| Miscellaneous |
| ||||
| Main series |
|
| Related quests |
|
| Quest recollector |
|