Walkthrough[]
| Start point | |||||
|---|---|---|---|---|---|
| Member requirement | |||||
| Official difficulty | |||||
| Official length | Long | ||||
| Requirements | Skill requirements are not boostable unless marked with a [B] for boostable.
The following quests take place before Nomad's Elegy and are recommended if you wish to avoid spoiling them, but they are not requirements.
| ||||
| Items required | Items from the tool belt are not listed unless they do not work or are not automatically added.
| ||||
| Recommended |
| ||||
| Enemies to defeat |
|
Beginning[]
- Speak to Zimberfizz in the Soul Wars area. (
 •)
•) - Investigate Nomad's tent to the east.
- Investigate the throne, some crystals to the west, and sticky goo south of that.
- Investigate the footprints to the east and you will be sent to Death's Realm.
- Go through the dialogue and travel through Death's door to the north.
Bandosian afterlife[]
- Make sure you have combat equipment from this point. If you die, you will be returned to Death's office and will have to leave and re-enter to resume progress with the quest.
- Speak to Death again. ( •)
- Embark on the Bloodstained Jetty to the north-east. ( )
- Defeat oncoming waves of Bandosians to protect the cave goblins. There are 3 waves, with progress being saved after each wave (aggression potions will help greatly).
Limbo[]
Items needed: 2 free inventory spaces
- Embark on the Dusty Jetty to the north-west. ( )
- Speak to Astrid/Brand.
Jessika/Korasi[]
- Speak to Korasi/Jessika in the house north of Bob's axes.
- Travel to the south-west of Lumbridge Castle grounds and speak to Wizard Grayzag for half of Korasi's/Jessika's memories. ( •••••)
- Travel to the 1st floor[UK] of the Lumbridge Castle battlements (south tower) and speak to the person you saved in The Void Stares Back to recover the other half of Korasi's/Jessika's memory.
- Combine the memory halves.
- Return Korasi's/Jessika's completed memory to her north of Bob's axes.
Hazelmere[]
- Talk to Hazelmere on the 1st floor[UK] of Lumbridge castle.
- Find and talk to him again on the 1st floor[UK] and above where the bank normally is on the 3rd floor[UK].
- Climb either of the two tower ladders of the castle gate; he'll be on the 2nd floor[UK].
- Speak to Hazelmere in what would normally be Bob's Axes shop.
- Speak to Hazelmere west of Lumbridge Castle.
- Speak to Hazelmere next to Astrid/Brand. ( )
Xenia[]
- Speak to Xenia in the Lumbridge Castle ground floor[UK]. ( )
- Attempt to open the chest in the northern room on the 1st floor[UK].
- Kill Guilt and open the chest using the key for a Xenia memory half.
- Climb to the 2nd floor[UK] and attempt to open the chest in the room.
- Kill Shame and open the chest using the key for a other Xenia memory half.
- Combine the memory halves and return the completed memory to Xenia.
- Talk to Astrid/Brand. ( )
- Enter the portal to leave.
Assistance[]
Interrogation[]
- Plan the war table in the centre area.
- Begin torturing Legio Septimus. ( )
- Keep choosing [Threaten him] until ['Remove' crystal] appears.
- Keep choosing ['Remove' crystal] until he dies.
- If Remove Crystal doesn't appear, go back and fourth between 'ask him about subject' and charming him until sanity has reached about 50% or try using Threat often enough until remove crystal option appears.
Battering ram[]
- Click the war table and select any two companions.
- Collect 25 wood and 25 metal; your companions can help you.
- Leave through the exit once complete.
- Build the battering ram to the north.
- Return to the war table.
- Slowly walk the battering ram across the bridge and through the doors.
- Suggestion 1: Put Zanik north-west by battering ram, Death north-east and the remaining four block off the start of the bridge while fighting.
- Suggestion 2: Place your companions three on each side of the ram, and stand on the bridge's edge blocking off all the monsters while using an aggression potion which requires level 82 Herblore. Fight or withstand the attacks untill the ram is done.
- Choose to either assault the fortress head-on, or detour to the side.
- Once inside, you'll have to fight Nomad.
Fighting Nomad and Gielinor[]
Items needed: Combat equipment and high healing food
Items recommended: High tier shield for the use of resonance, stat boosting potions, Guthix Staff, debuff spells, beast of burden, power armour (armour value doesn't matter)
Items recommended: High tier shield for the use of resonance, stat boosting potions, Guthix Staff, debuff spells, beast of burden, power armour (armour value doesn't matter)
- If at any point you wish to leave, go back to the entrance and select "quick leave". When you return, you will resume the fight at the beginning of that phase.
If you die, your gravestone spawns outside Death's Hourglass.
First combat phase[]
- Dwindle away Nomad's health, and move away from the centre of the bridge to avoid Gielinor's hand. Also move away from shadows that appear on the ground to avoid rapid powerful magic attacks.
Xenia[]
- Run around the area and constantly use the 3 abilities made available.
- Fire Blast when Rorarii are present
- Shield Dome when Gladii are present
- Shadow Stalk when Scutarii are present
- Target Capsarii last as they can heal Xenia when no other targets are available.
Second combat phase[]
- In addition to the previous phase's attacks, when Nomad teleports you near him and orders you to 'face his wrath', switch to your shield to use Resonance to negate any and all damage from the attack.
Death[]
- Go directly north, south, east and west of Gielinor. Each time provoking him and quickly getting out of the way, to then use Scythe on the hand, and finally claim the released spirit.
Third combat phase[]
- In addition to the previous phases' attacks, Nomad will create a clone of himself when he reaches half health. Kill them both (you might kill Nomad first, in which case you will move on).
Icthlarin[]
- Quickly and without stopping, run around the area anti-clockwise, releasing the souls as you get in the middle of a group of them. Make sure to get over half of the initial total number of spirits. The more souls you release, the more powerful the attack reflected onto Gielinor will be. Once all souls have been released, continue circling until Gielinor stops firing the beam, then shield yourself from Gielinor's attack with the ability, in order to reflect the damage onto Gielinor. You will have to repeat this process a few times.
Final combat phase[]
- In this phase, Nomad will only be using rapid melee attacks. Kill him by any means, if using Ranged or Magic, then you can run around the room to avoid damage from Nomad, using Surge to gain distance. Watch out for Gielinor's attacks.
Aftermath[]
- Choose who ends Gielinor.
- Decide Nomad's fate.
- After the cutscene, speak with Death.
- Choose Zanik's fate.
- Quest complete!
Rewards[]
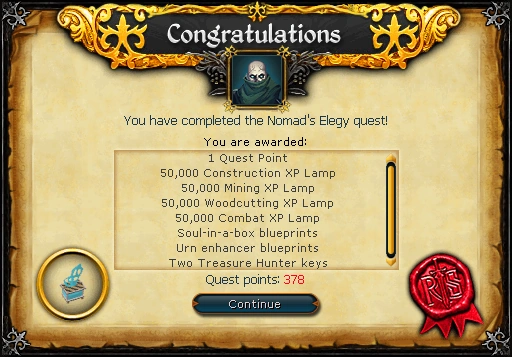
- 1 quest point
- 50,000 experience Construction Lamp
- 50,000 experience Mining Lamp
- 50,000 experience Woodcutting Lamp
- 50,000 experience Combat Lamp
- If your inventory space is full, the lamps can be claimed from your respective Soul Wars host, depending on your choice at the end of the quest.
- Invention blueprints for soul-in-a-box and urn enhancer, both of which require level 24 Invention.
- Access to Memory of Nomad Distraction & Diversion
- 2 Treasure Hunter keys and 2 Hearts of Ice
- Music unlocked
| Part 3 of the Sliske quest series | |||||||
| NPCs | |||||||
| Enemies |
| ||||||
| Items |
| ||||||
| Rewards |
| ||||||
| Locations |
| ||||||
| Music |
| ||||||
| Miscellaneous |
| ||||||