| Line 179: | Line 179: | ||
As soon as Nomad heals and then gets to 1/4th hitpoints, he goes berserk, hitting as fast as [[Zilyana]] but much less accurately than usual and only within melee range. [[Protect from Melee]] or [[Deflect Melee]] seems to reduce the number of times he hits at this time. |
As soon as Nomad heals and then gets to 1/4th hitpoints, he goes berserk, hitting as fast as [[Zilyana]] but much less accurately than usual and only within melee range. [[Protect from Melee]] or [[Deflect Melee]] seems to reduce the number of times he hits at this time. |
||
| − | Another useful tactic is along with the BoB, bring a Kyatt pouch. After you use up the stored food from your BoB, dismiss the BoB and summon Kyatt so that it stands between you and Nomad. Using a Helmet of Neitiznot or other enchanted helm filled with ambush scrolls. Kyatt attacks Nomad so fast he basically freezes; not healing at 1/4, going berserk, or changing styles. This I'm sure will be fixed soon by Jagex; so take advantage of it |
+ | Another useful tactic is along with the BoB, bring a Kyatt pouch. After you use up the stored food from your BoB, dismiss the BoB and summon Kyatt so that it stands between you and Nomad. Using a Helmet of Neitiznot or other enchanted helm filled with ambush scrolls. Kyatt attacks Nomad so fast he basically freezes; not healing at 1/4, going berserk, or changing styles. This I'm sure will be fixed soon by Jagex; so take advantage of it while you can. |
If you find yourself dieing a lot at Nomad, do not get discouraged or upset. Many players didn't beat him on their first try. Just keep on experimenting with different inventories, different armor and weapons, and different techniques. Eventually, you will find a way and beat Nomad. |
If you find yourself dieing a lot at Nomad, do not get discouraged or upset. Many players didn't beat him on their first try. Just keep on experimenting with different inventories, different armor and weapons, and different techniques. Eventually, you will find a way and beat Nomad. |
||
Revision as of 01:35, 23 January 2010
Details
| Start point | |
|---|---|
| Member requirement | |
| Official difficulty | Unknown edit |
| Official length | Medium - Very long; depending on combat stats. |
| Requirements | Skill requirements are not boostable unless marked with a [B] for boostable.
Boosts cannot be used
Recommended:
|
| Items required | Items from the tool belt are not listed unless they do not work or are not automatically added.
Optional:
|
| Enemies to defeat |
|
Walkthrough
Notes:
- The temple under Soul Wars is very dangerous, even players with high Agility can exhaust their run energy if they try to run all the time. Players are advised to bring items that can restore energy.
- If you log out while in the temple, you will be in the Soul Wars entry area when you next log in. This can be used as a quick way to exit the temple when deep inside it.
- If you do not log out or leave the dungeon, the spectral enemies will not respawn.
Starting off
First arcane door map.
To start the quest, speak with Zimberfizz at Soul Wars. After speaking with him, inspect Nomad's tent and climb down to see a cutscene of Nomad fighting an elite dark warrior, elite dark mage, and elite dark ranger in a ruined temple. Pay attention during this scene! It shows off some of Nomad's magical attacks, and what he does before casting them.
Talk to Zimberfizz again, and he will tell you to go down and talk to Nomad. Alternatively you can just talk to Nomad after his fight without going back to Zimberfizz. Nomad will tell you not to return again. Search the ex-adventurer's bag near the entrance to obtain a bronze pickaxe. (The other items in the pack are useless, although the cooked herring can be used as food if you wish.)
Return and talk to Zimberfizz, and he will tell you to return to Nomad's Temple and thwart whatever evil scheme Nomad is up to. Down there, you must find a way to enter the arcane doorway (the white gateway) in the main room. This is done by disabling the power source for both cables.
Moving statues
The second pillar must be pushed to get the water flowing.
This is not the only combination, but it does work.
- Go in the south-west room. Here, water must be directed to flow a certain way by moving statues. However, water must first be sent to this room. (If you move the statues before directing water to this room, the statues reset when you leave the room.) Beware of the aggressive Spectral attendants in this room. (look at the top of statue, it'll tell the direction of the water)
- Go up the ladder in the south-east part of the room. Pull both levers and mine the rubble on the east wall. Beware of the spectral attendants in this room.
- Go up the ladder in the north-east part of the room and push both pillars to cover the drains. Again, beware of the spectral attendants in this room.
- Go down to the middle floor and check that water is flowing to the south channel in the room. If it is not, work the levers until it is.
It is best to do the next puzzle without the spectral attendants attacking you. An easy way to take them out is to run around the room, so you got attention from all five of them. Trap them behind a drain and they can be safe-spotted.
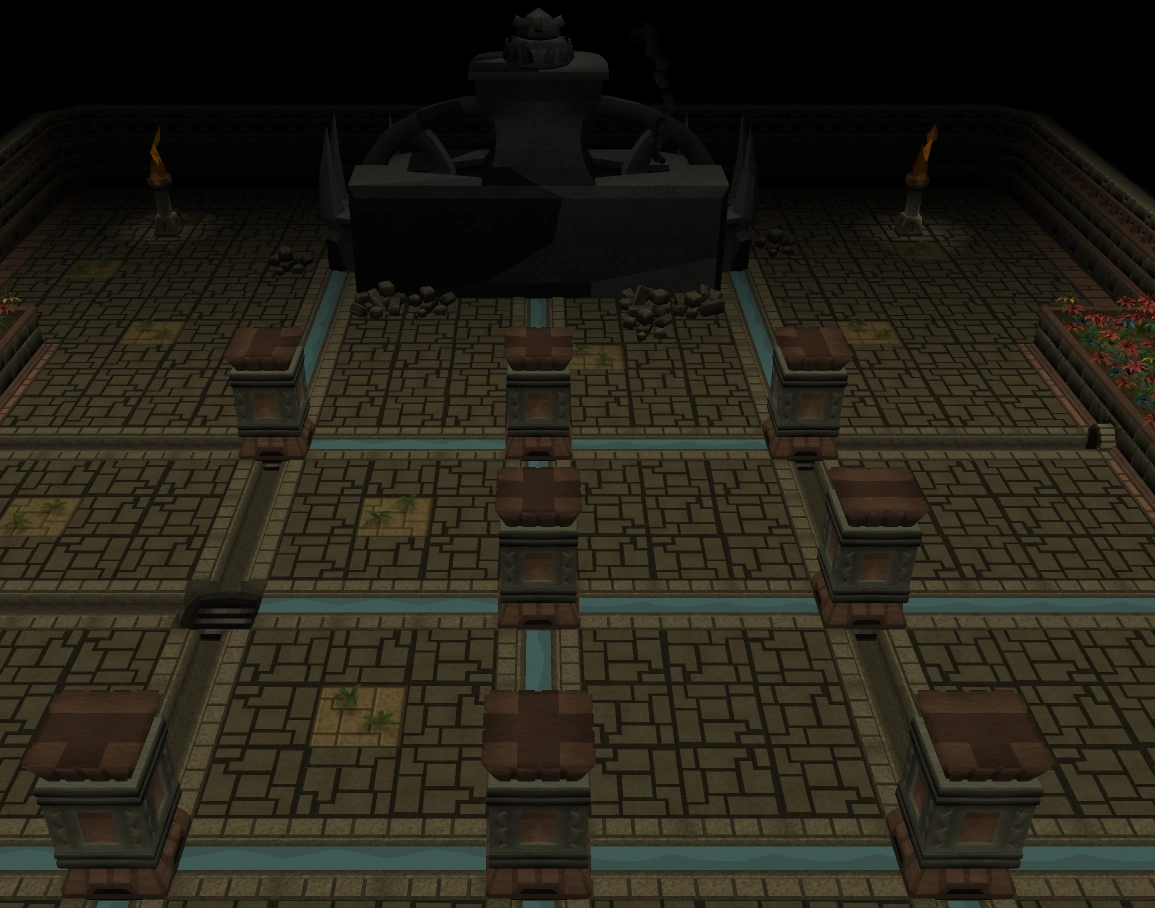
- Go down to the bottom room and push the statues to direct the flow of water to the three channels running under the machine. There are multiple ways to do this. Note that the shapes on the top of the statues show the direction of the water flow. You can use this to predict which ways the statues will redirect the water. It is possible to trap all of the spectral attendants on the north side of the room behind the device so you don't have to waste prayer and food because of them. When you get the 'Yes, the device looks to be out of order now' message in the chatbox then you have disabled the device.
Elemental creatures under the waterfall
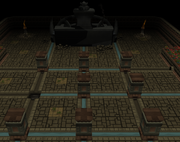
The second half of the temple dungeon.
A player luring a elemental creature under the waterfall and killing it.
One of the four roots that must be destroyed.
Go back to the middle floor and pull the south lever once to change the water flow to the east channel. This will cause a waterfall to form in the south-east room, as it is no longer needed in the south-west room because the machine is broken. Note: If there is only a trickle of water coming out of the ceiling in the south-east room, you have not worked the levers correctly. Go back to the second floor of the south-west room and pull the levers until water is flowing into the rubble you mined earlier.
Then go to the south-east room and get several pieces of elemental fuel out of the fuel hopper. The Spectral tenders in this room are not aggressive, unlike the spectral attendants in the other rooms. If you do not have room, bank your food - it is not needed here.
Use the fuel to lure the three elemental creatures out of the device in the room and onto the water flowing out of the ceiling. Only one creature can be lured at time. To lure a creature, place a piece of fuel on the floor near the machine. As it comes out and eats it, place another piece of fuel nearer the waterfall. You can easily space the food 4 squares apart - even diagonally. Continue luring the creature until you can place a piece of fuel right in the waterfall itself (right click the waterfall's square and choose 'Walk here' to get there) or simply place a piece of fuel on the other side of the waterfall. The water destroys the creature. If a creature eats a piece of fuel before you place the next piece, you have only 2–3 seconds to place the fuel before it gives up and returns to the device. In this case you must begin again with the creature. It is possible to start with the piece of fuel under the waterfall and work your way backwards, thus avoiding the timeout problem. Be aware that the creatures try to move in straight lines to the fuel, so obstacles like walls between the fuel and the creature will cause the creature to get stuck. Repeat this procedure until all three creatures are destroyed.
Roots and the Decaying Avatar
Safe spot against the avatar.
Return to the room with the arcane door and go through the door. In this new room, there is another arcane door to the north, again protected by two power cables that must be turned off. Beware of the aggressive Spectral worshippers in this area.
Go west and go through a door in the west wall. Go west down a corridor until you come to the first room. Beware of the aggressive Spectral cultivators in this area. A set of animated roots guard the power device, preventing you from getting to it. If you try to attack the roots, you discover that they are unassailable when bunched like this. You must find a way to unbunch them.
Continue west following the vines on the floor. Beware of the spectral cultivators. In four places, find and destroy the individual roots that stick up from the ground. You hear a loud roar when you destroy the fourth root.
Return to the room with the power device. A level 525 Decaying avatar has appeared there. Kill it. When fighting the avatar, it will try to heal using roots that grow from the floor during the battle. Destroy the root before it can eat it and it won't heal. If it eats a root, it heals to full health, prolonging the battle. (The first root appears when the avatar reaches 3/4 hitpoints, the second at 1/2, and the third at 1/4.) Don't worry too much if the avatar does get to the roots, after the third root, no more appear. The roots appear in the following order: NW, SE and NE of the room. A good tip would be to position yourself in between the area the root will appear and the avatar when fighting him. This way you have a good chance to melee the root and destroy it before the avatar gets to it. When the avatar is killed, the waving roots disappear and the power device is automatically damaged. Another good tip would be to use the Protect from Melee or Deflect Melee prayer and use enchanted ruby bolts, since that can deal up to 200 damage. Since the avatar does not hit through prayer, one only has to bring prayer potions and simple melee gear to defeat the avatar.
If you leave the fight before killing the avatar (for example, by teleporting out of the temple), you will have to start the fight from the beginning again, but you won't have to destroy the four roots to get the avatar to appear. However, if you log out of the game in the avatar arena, it resets and you have to destroy all the roots again to face the avatar.
Return to the arcane door area and go east. At the doorway in the east wall, talk to the dying knight and then examine his body when he dies. You get a clue about being pious, which means the Piety prayer will help you in the next room, so high prayer boosting gear is recommended. If you want to use Piety here, make sure your prayer book is set to normal. Now turn on Piety (optional but highly recommended) and enter the east room. Without Piety, every half a second the haze in the east room drains one hitpoint as well as prayer and other stats. A facemask does not protect you, but Piety prevents damage and stat drain. Collect the slabs in the room and build a bridge across the central pool, at the point where two slabs are already in the pool. To build, go to the current edge of the bridge and select 'Place slab'.
The western part of the room contains several aggressive Corruption beasts, and Protect from Melee or Deflect Melee negates their attacks. You do not have to kill the beasts, but each time you kill one 'your spirits are lifted' and your prayer points are recharged.
When the bridge is built, cross to the eastern part of the room. No beasts are here, so turn off your protection prayer. Cast a Fire Wave spell on the explosive barrels to detonate them and destroy the machine. If you do not use Piety, you may need to bring restore potions with you to restore your magic level enough to cast Fire Wave. (Other fire spells cannot be cast on the barrels.)
Return to the arcane door area. You can now enter the next arcane doorway and face Nomad. If you are not ready, go stock up first.
Fighting Nomad
A level 525 Decaying Avatar attacking.
- Note: you can't bring a Dwarf multicannon to fight Nomad.
- Fighting Nomad is somewhat safe, for if you die, you spawn in Soul Wars next to your grave and can collect your items immediately. It is dangerous if your internet connection is unreliable, and you cannot log back in before the gravestone decays. Also, any items that don't appear at your grave are lost. If you have no Barrows items that you would lose upon death, or any items that wouldn't appear at your gravestone, and a reliable internet connection, there is no real need for concern because you'll be able to collect your items if you die.
- Fighting Nomad can be expensive if you use Barrows equipment, as it will degrade to 0 upon your death. However, if you have run out of supplies, and know you are going to die, run behind a pillar and safe spot. When Nomad heals to full hp he will no longer auto attack you. You can then safely walk out of the room without having to die and repair Barrows equipment.
- When fighting Nomad, it is recommended to use either ranged with Ruby bolts (e) and have auto-retaliate turned on (switch to Diamond bolts (e) when Nomad goes berserk), or use a high hitting melee weapon such as the Saradomin godsword (or any godsword; the Saradomin godsword's healing special effect is minimized by the large amounts of damage Nomad often inflicts).
- It's also recommended that you use the spring pools at Oo'glog if you have done As a First Resort... to boost your Prayer and Hitpoints.
- Since protection prayers do not work, Soul Split is a great alternative.
- A Bandos godsword is greatly suggested since it can lower the defence of Nomad and make the fight much easier. If you don't have one, Darklight is a good alternative to lower Nomad's defence. The best weapon use to lower Nomad's defence would be using the special attacks of the Statius's warhammer, but that weapon is very expensive to use.
Suggested inventory, BoB, armour / weapon and prayer
The suggested inventory is very simple but expensive.
- 12 super restore potions (4)
- Rest Saradomin brews (4)
It also counts for summoning
- War tortoise filled with
- 18 Saradomin brews (4)
- set Left-click option to Take BoB
Armour and weapon
- Helm of neitiznot / Verac's helm
- Amulet of fury
- Black d'hide body / Karil's leathertop
- Black d'hide chaps / Karil's leatherskirt
- Dragon boots / Snakeskin boots
- Barrows gloves
- Rune crossbow
- Ruby bolts (e)
Select these prayers in your quick prayers menu.
- Level 37 Protect from magic
- Level 44 Eagle Eye
- Level 70 Piety
Or, use leach curses if you have completed The Temple at Senntisten.
And when Nomad goes berserker switch your Magic Protection to Protect from Melee. Alternatively some players have had much success with Sap and leech curses. The reason being that they drain the nomad's defence as well as magic and melee attacks. Sap/leech melee and mage is therefore recommended.
Nomad attacks the player
Nomad is very powerful and uses several different types of attack, including some that kill you instantly if you are unable to get away in time or even have your hitpoints reduced to just one point (e.g. If you have a Hitpoints level of 96, Nomad will hit you for 95 damage). Protection prayers have little if any effect. One attack spreads explosive mines on the floor that deal 40 damage and drop your energy to 0, so make sure not to step on them.
Trying to Safe spot Nomad for long periods of time is futile. Other than trying to avoid his 75-damage attack, you only get a few seconds in a safe spot. He will then say "Face me!", and a few seconds afterwards will teleport you back to the centre of the room and heal himself fully. You will however have enough time in a spot (such as behind a pillar) to sip some potions or eat some food. Just be sure to run out and let him attack you at least once every time he shouts "Face Me!".
His normal attacks are magic-based melee (attacking with his staff) as well as distanced magic attacks when not in range. This means that high magic defence armour is best. Dragonhide armour is recommended, as using Barrow's high-magic-defence armour can be expensive due to your frequent deaths.
Nomad has an Ancient Magicks-like ice attack that doesn't do damage, but freezes you until after his hp -1 attack. When you are frozen, quickly heal to keep your hitpoints at or above maximum (Rocktails or Saradomin brews are recommended) and, if you are not already ranging Nomad, switch to a ranged weapon to continue damaging him.
If he says 'You can't hide from my wrath!', you actually can and should. Immediately, and carefully, click out of the circle of mines to dodge them and click on your minimap to hide behind a pillar.
Nomad will occasionally teleport. When he does, three illusions appear and also attack (but they only hit about 5 each). If you attack an illusion and hit it, it disappears. When you attack the real Nomad, all illusions disappear. A way to discover the real Nomad is that if you watch carefully, the real Nomad will attack just a fraction of a second after the rest.
When Nomad teleports and the 3 illusions appear you can simply hide behind the pillars for around 30 to 45 seconds and wait for the illusions to disappear saving food and/or potions. Once the illusions are gone reengage him in combat either before or when he shouts "Face Me!".
- The order of Nomad's attacks is as follows:
- Talk/Attack.
- Lays down mines all around the fight.
- Charges the 75-damage attack and then launches it - this is evadable.
- Teleports himself and creates 3 illusions.
- Teleports you to the centre and freezes you - you cannot move but can eat food and use ranged if so equipped. This is followed by an attack which deals your max hp minus one. A player with a Hitpoints level of 85 would be dealt 84 damage.
- Repeat from #2.
It is suggested that if you are using Saradomin brews you restore to max hp while Nomad is charging for either high hitting attack. Do NOT drink to restore until after he hits you with the attack as restoring beforehand is simply a waste of potions, seeing as you will have to brew back up again after his high hit. This is an effective way to save restore doses. You will need less restores in general, and you'll be able to take more brews.
Nomad's mine attack.
A tactic that may help users finding it difficult to evade the 75 hp attack (for whatever reason) is to hug a pillar just inside the "safe spot" range: that way you only have a few spaces to move when you need to hide. This of course only works if you are ranging - mines can sometimes make this more difficult.
Another useful tactic when fighting Nomad is to bring a BoB, (Beast of Burden) such as a war tortoise or pack yak stockpiled with food, and force dismissing it at the very beginning of the fight (right click dismiss and hit the second option). This will leave your rocktails or other high healing food on the ground, giving you a chance to pick it up as need be, while allowing you to summon another familiar such as a combat familiar or a unicorn stallion.
A third useful tactic for those players who have unlocked the ancient curses is to utilize the soul split prayer during the majority of the fight. This will heal players 1/5 of damage inflicted to Nomad, around 250 hp through out the fight, (Until Nomad goes berserk, at which point melee protect is the best option.) Soul Split will heal you 1/5 of what you hit, and as Nomad is resistant to any protection prayer (until he goes berserk), this is the best option for those with 95+ prayer as it heals a huge amount. A Saradomin godsword is also a useful option.
A great tactic to use while fighting Nomad is that before he sets up the flame vortexes (the landmine that does 40 damage), get near a pillar. And range Nomad from there. Preferably, you use ruby bolts (e) as they can do a lot of damage to Nomad. When he charges his attack that does 75 damage (the special attack right after the landmines), get behind the pillar and it'll block the 75 damage attack. While you are behind the pillar, you have some time to quickly drink some saradomin brews if your health is low and drink super restore to counter the saradomin brew effects and restore prayer. You can also get rid of empty vials and restock from your beast of burden if you have one. This will save you a lot of saradomin brews that are more useful later on.
As soon as Nomad drops below 1/5th hitpoints, he heals himself back to half hitpoints, giving himself a total of 1250 hp. As soon as Nomad heals and then gets to 1/4th hitpoints, he goes berserk, hitting as fast as Zilyana but much less accurately than usual and only within melee range. Protect from Melee or Deflect Melee seems to reduce the number of times he hits at this time.
Another useful tactic is along with the BoB, bring a Kyatt pouch. After you use up the stored food from your BoB, dismiss the BoB and summon Kyatt so that it stands between you and Nomad. Using a Helmet of Neitiznot or other enchanted helm filled with ambush scrolls. Kyatt attacks Nomad so fast he basically freezes; not healing at 1/4, going berserk, or changing styles. This I'm sure will be fixed soon by Jagex; so take advantage of it while you can.
If you find yourself dieing a lot at Nomad, do not get discouraged or upset. Many players didn't beat him on their first try. Just keep on experimenting with different inventories, different armor and weapons, and different techniques. Eventually, you will find a way and beat Nomad.
After you defeat Nomad, you will appear outside Nomad's tent. Talk to Zimberfizz and watch the ending cutscene. Quest complete!
Reward
- 3 Quest points
- 70 Zeal points
- Soul Wars cape
- Ability to set your respawn point to Soul Wars
Music
Music tracks unlocked:
Trivia
- At first, the spoilers were not hidden in the RuneScape Game Guide. This was intentional[1].
- This is the second Grandmaster quest released, after While Guthix Sleeps.
- On the quest's forum thread, Mod Rathe's avatar resembled Nomad.
- Nomad is revealed to be level 699 during this quest, making him the strongest attackable quest monster, taking the title from the Balance Elemental.
- During and after the quest, Zimberfizz takes the role of Nomad for Soul Wars.
- After completing the quest, the 'Quest complete' text in the Adventurer's Log reads: I foiled Nomad's secret plans behind Soul Wars, leaving the battleground in the hands of Zimberfizz.
- When you set this quest as an objective, it reads: Discover the shocking truth behind Soul Wars. Gives Soul Wars Zeal and your own Soul Wars cape.
- This is one of the few quests that do not give experience as a reward, although, you can exchange the zeal earned by completing this quest for experience.
- After the quest, Zimberfizz's examine text changes to: 'minion no more!'
- While building the bridge with slabs, if you jump on the one you're on, you jump in a circle and say "Ta-da".
- When fighting Nomad, after you finish the fight, if you have an aggressive familiar and it hits nomad, nomad 'dies' again and bones appear. Strangely enough his body remains at the throne in the cutscene at the end.
- During the first Cutscene you can see the Elite Dark Warrior saying "I'll give you a challenge, traitor!" Which could prove that due to his previous appearance he was an elite dark mage who left Zamorak.
- "Only the pious will survive." is possibly a play on the phrase, "only the strongest will survive."
- There is a glitch where at the first machine when you look from top view and down into the smoke of the broken machine where you see through it and not just the machine.
- Nomad teleports away in the final cut-scene with Zimberfizz; implying a sequel. This has been confirmed in videos posted depicting the fight sequence.
- This quest was foretold by the Chaos Elemental in the Letter 13 Briefcase.
- On the first day of release, a Ring of life was able to teleport the player away at the normal time. Since you spawn at Soul Wars along with your grave, it serves little purpose, and the ability for them to work was removed.
- It is possible to see a memory of Nomad after the quest if you speak to Zimberfizz and ask him for a tutorial of Soul Wars.
- There is a glitch where the quest does not show up in quest help and only shows that there is only 161 quests.