mNo edit summary |
(need to right-click if only want to exchange less than all points) |
||
| (42 intermediate revisions by 27 users not shown) | |||
| Line 1: | Line 1: | ||
| + | {{Infobox interactive scenery |
||
| ⚫ | |||
| + | |name = Offering stone |
||
| ⚫ | |||
| ⚫ | |||
| ⚫ | |||
| + | |release = [[12 July]] [[2011]] |
||
| ⚫ | |||
| + | |members = Yes |
||
| + | |quest = No |
||
| + | |examine = '''Empty''': A big, flat stone.<br />'''Filled''': A big, flat stone. Jadinkos have deposited things on it to thank you.<br />'''Completely Filled''': A big, flat stone. Jadinkos have deposited many things on it to thank you. |
||
| + | |location = Jadinko Lair |
||
| + | |map = |
||
| ⚫ | |||
| ⚫ | The '''offering stone''' is a table found in the [[Jadinko Lair]], north and across the river from Herblore Habitat. Once inside, head southeast of the entrance, east of the [[Jadinko Queen]]. Players can spend [[jadinko points]], earned from various activities in the Lair, on a few types of rewards. |
||
| ⚫ | |||
* '''Fruits only''': 13 points each. Gives random fruits for use within the Jadinko Lair. |
* '''Fruits only''': 13 points each. Gives random fruits for use within the Jadinko Lair. |
||
| − | * '''Seeds and teleport bags''': 40 points each. Gives random seeds and [[juju teleport spiritbag]]s. |
+ | * '''Seeds and teleport bags''': 40 points each seed and 80 points each teleport bag. Gives random seeds and [[juju teleport spiritbag]]s. |
| ⚫ | |||
| − | |||
| ⚫ | |||
| + | It is possible to spend all points at once or exchange just a few at a time. |
||
| + | *The default is 'Withdraw-all rewards'. |
||
| + | *To spend less points, right click on offering stone to select 'Withdraw-X rewards'. |
||
| ⚫ | There is a cap of 2000 points, so it is encouraged to spend the points when they near that amount. How many points you have is shown on the upper left hand corner. A convenient [[bank deposit box]] can be found through the [[shortcut]] on the other side of the [[Jadinko Queen]] (requires 40 [[Woodcutting]] to use). |
||
| ⚫ | |||
{| class="wikitable" |
{| class="wikitable" |
||
!Action |
!Action |
||
| Line 16: | Line 28: | ||
!Notes |
!Notes |
||
|- |
|- |
||
| − | |Burning a [[ |
+ | |Burning a [[curly root]] in a [[Firepit (Jadinko Lair)|firepit]] |
| − | |83 [[File:Woodcutting-icon.png|Woodcutting]] |
+ | |83 [[File:Woodcutting-icon.png|Woodcutting]]<br />83[[File:Firemaking-icon.png|Firemaking]] |
|2 |
|2 |
||
|Roots burned by an [[inferno adze]] do not give points. |
|Roots burned by an [[inferno adze]] do not give points. |
||
| Line 26: | Line 38: | ||
|Near Jadinko Queen. -1 point for chopping a healthy vine. |
|Near Jadinko Queen. -1 point for chopping a healthy vine. |
||
|- |
|- |
||
| + | |Lighting a firepit on a dry patch |
||
| ⚫ | |||
| + | |83[[File:Firemaking-icon.png|Firemaking]] |
||
| ⚫ | |||
| + | |Needs to be lit with a curly root. |
||
| + | |- |
||
| ⚫ | |||
|80 [[File:Slayer-icon.png|Slayer]] |
|80 [[File:Slayer-icon.png|Slayer]] |
||
|3 |
|3 |
||
| + | | |
||
| − | |It is not recommended you use this method if you haven't come properly prepared. |
||
|- |
|- |
||
| − | |Killing a [[ |
+ | |Killing a [[mutated jadinko guard]] |
|86 [[File:Slayer-icon.png|Slayer]] |
|86 [[File:Slayer-icon.png|Slayer]] |
||
|7 |
|7 |
||
| + | | |
||
| − | |It is not recommended you use this method if you haven't come properly prepared. |
||
|- |
|- |
||
| − | |Killing a [[ |
+ | |Killing a [[mutated jadinko male]] |
|91 [[File:Slayer-icon.png|Slayer]] |
|91 [[File:Slayer-icon.png|Slayer]] |
||
|10 |
|10 |
||
| + | | |
||
| − | |It is not recommended you use this method if you haven't come properly prepared. |
||
|} |
|} |
||
==Rewards== |
==Rewards== |
||
| − | === |
+ | ===Jadinko fruit=== |
{{DropsTableHead}} |
{{DropsTableHead}} |
||
| − | {{DropsLine|Name=Common fruit|Quantity=1|Rarity=Common|gemw=no |
+ | {{DropsLine|Name=Common fruit|Quantity=1|Rarity=Common|gemw=no}} |
| − | {{DropsLine|Name=Shadow fruit|Quantity=1|Rarity= |
+ | {{DropsLine|Name=Shadow fruit|Quantity=1|Rarity=|gemw=no}} |
| − | {{DropsLine|Name=Igneous fruit|Quantity=1|Rarity= |
+ | {{DropsLine|Name=Igneous fruit|Quantity=1|Rarity=|gemw=no}} |
| − | {{DropsLine|Name=Cannibal fruit|Quantity=1|Rarity= |
+ | {{DropsLine|Name=Cannibal fruit|Quantity=1|Rarity=|gemw=no}} |
| − | {{DropsLine|Name=Aquatic fruit|Quantity=1|Rarity= |
+ | {{DropsLine|Name=Aquatic fruit|Quantity=1|Rarity=|gemw=no}} |
| − | {{DropsLine|Name=Amphibious fruit|Quantity=1|Rarity= |
+ | {{DropsLine|Name=Amphibious fruit|Quantity=1|Rarity=|gemw=no}} |
| − | {{DropsLine|Name=Carrion fruit|Quantity=1|Rarity= |
+ | {{DropsLine|Name=Carrion fruit|Quantity=1|Rarity=|gemw=no}} |
| − | {{DropsLine|Name=Diseased fruit|Quantity=1|Rarity= |
+ | {{DropsLine|Name=Diseased fruit|Quantity=1|Rarity=|gemw=no}} |
| − | {{DropsLine|Name=Camouflaged fruit|Quantity=1|Rarity= |
+ | {{DropsLine|Name=Camouflaged fruit|Quantity=1|Rarity=|gemw=no}} |
| − | {{DropsLine|Name=Draconic fruit|Quantity=1|Rarity= |
+ | {{DropsLine|Name=Draconic fruit|Quantity=1|Rarity=|gemw=no}} |
| − | {{DropsLine|Name=Saradomin fruit|Quantity=1|Rarity= |
+ | {{DropsLine|Name=Saradomin fruit|Quantity=1|Rarity=|gemw=no}} |
| − | {{DropsLine|Name=Guthix fruit|Quantity=1|Rarity= |
+ | {{DropsLine|Name=Guthix fruit|Quantity=1|Rarity=|gemw=no}} |
| − | {{DropsLine|Name=Zamorak fruit|Quantity=1|Rarity= |
+ | {{DropsLine|Name=Zamorak fruit|Quantity=1|Rarity=|gemw=no}} |
| + | {{DropsTableBottom}} |
||
| ⚫ | |||
===Seeds=== |
===Seeds=== |
||
{{DropsTableHead}} |
{{DropsTableHead}} |
||
| − | {{DropsLine|Name=Red blossom seed|Quantity=1|Rarity= |
+ | {{DropsLine|Name=Red blossom seed|Quantity=1|Rarity=Common}} |
| − | {{DropsLine|Name=Blue blossom seed|Quantity=1|Rarity= |
+ | {{DropsLine|Name=Blue blossom seed|Quantity=1|Rarity=Common}} |
| − | {{DropsLine|Name=Green blossom seed|Quantity=1|Rarity= |
+ | {{DropsLine|Name=Green blossom seed|Quantity=1|Rarity=Common}} |
| − | {{DropsLine|Name=Lergberry seed|Quantity=1|Rarity= |
+ | {{DropsLine|Name=Lergberry seed|Quantity=1|Rarity=Common|gemw=no}} |
| − | {{DropsLine|Name=Kalferberry seed|Quantity=1|Rarity= |
+ | {{DropsLine|Name=Kalferberry seed|Quantity=1|Rarity=Uncommon|gemw=no}} |
| − | {{DropsLine|Name=Erzille seed|Quantity=1|Rarity= |
+ | {{DropsLine|Name=Erzille seed|Quantity=1|Rarity=Common|gemw=no}} |
| − | {{DropsLine|Name=Argway seed|Quantity=1|Rarity= |
+ | {{DropsLine|Name=Argway seed|Quantity=1|Rarity=Uncommon|gemw=no}} |
| − | {{DropsLine|Name=Ugune seed|Quantity=1|Rarity= |
+ | {{DropsLine|Name=Ugune seed|Quantity=1|Rarity=Uncommon|gemw=no}} |
| − | {{DropsLine|Name=Shengo seed|Quantity=1|Rarity= |
+ | {{DropsLine|Name=Shengo seed|Quantity=1|Rarity=Uncommon|gemw=no}} |
| − | {{DropsLine|Name=Samaden seed|Quantity=1|Rarity= |
+ | {{DropsLine|Name=Samaden seed|Quantity=1|Rarity=Uncommon|gemw=no}} |
| − | {{DropsLine|Name=Apple tree seed|Quantity=1|Rarity= |
+ | {{DropsLine|Name=Apple tree seed|Quantity=1|Rarity=Rare}} |
| − | {{DropsLine|Name=Banana tree seed|Quantity=1|Rarity= |
+ | {{DropsLine|Name=Banana tree seed|Quantity=1|Rarity=Rare}} |
| − | {{DropsLine|Name=Orange tree seed|Quantity=1|Rarity= |
+ | {{DropsLine|Name=Orange tree seed|Quantity=1|Rarity=Rare}} |
| − | {{DropsLine|Name=Juju teleport spiritbag|Quantity=1|Rarity= |
+ | {{DropsLine|Name=Juju teleport spiritbag|Quantity=1|Rarity=Uncommon}} |
| + | {{DropsTableBottom}} |
||
| ⚫ | |||
| + | |||
| + | ====Seed reward mechanic==== |
||
| + | The Seeds and Teleport option on the offering table is completely influenced by what is currently being attracted in herblore habitat. The seeds obtained at the offering stones will be the same types that are normally dropped by the jadinko that you currently have attracted at the hunter area on the surface. You will not obtain a seed type if the jadinkos on the surface do not drop that seed when caught. If you do not have specific jadinkos attracted on the surface, only blossom seeds can be found. Therefore, when you are ready to collect a reward, make sure you are attracting a jadinko with good seed drops, such as diseased jadinkos. It may also be prudent to shoo away Common Jadinkos with a [[Striped vine|Striped Vine]], to eliminate low-level seeds from the reward pool. |
||
==Trivia== |
==Trivia== |
||
| Line 82: | Line 102: | ||
* The most expensive option may be the most efficient for obtaining herb seeds, because the random option, though cheaper, tends to give more fruit and lower-level seeds. |
* The most expensive option may be the most efficient for obtaining herb seeds, because the random option, though cheaper, tends to give more fruit and lower-level seeds. |
||
* The offering stone will not have fruit on it for players who do not have enough jadinko points for any of the rewards. |
* The offering stone will not have fruit on it for players who do not have enough jadinko points for any of the rewards. |
||
| − | * The Seeds and Teleport option on the offering table is completely influenced by what is currently being attracted in herblore habitat. |
+ | * The Seeds and Teleport option on the offering table is completely influenced by what is currently being attracted in herblore habitat. Also, the Jadinkos you have attracted will occasionally come down from Herblore Habitat and put their seeds on the offering table, afterwards making their way to the queen and burrowing into the ground. |
| − | {{ |
+ | {{Jadinko Lair}} |
| − | [[Category:Interactive scenery]] |
||
| ⚫ | |||
Latest revision as of 23:02, 1 September 2018
| |
| Release date | 12 July 2011 (Update) |
|---|---|
| Members | Yes |
| Quest | No |
| Location | Jadinko Lair |
| Examine | Empty: A big, flat stone. Filled: A big, flat stone. Jadinkos have deposited things on it to thank you. Completely Filled: A big, flat stone. Jadinkos have deposited many things on it to thank you. |
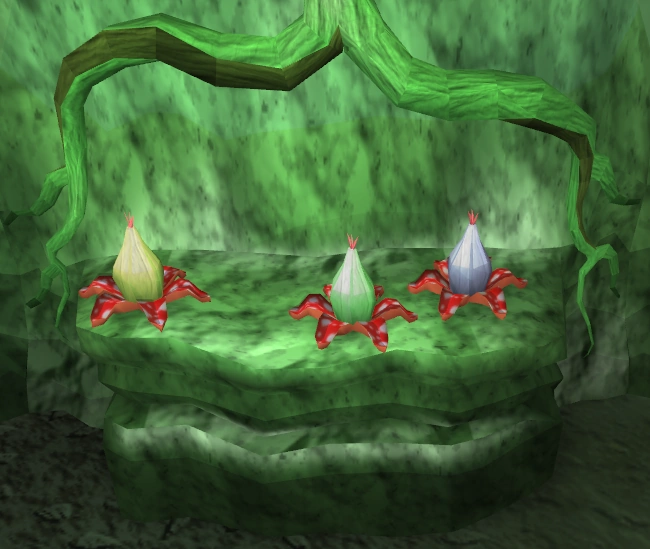
The offering stone is a table found in the Jadinko Lair, north and across the river from Herblore Habitat. Once inside, head southeast of the entrance, east of the Jadinko Queen. Players can spend jadinko points, earned from various activities in the Lair, on a few types of rewards.
- Random mix: 10 points each. Gives random fruits and seeds for Herblore Habitat, as well as juju teleport spiritbags.
- Fruits only: 13 points each. Gives random fruits for use within the Jadinko Lair.
- Seeds and teleport bags: 40 points each seed and 80 points each teleport bag. Gives random seeds and juju teleport spiritbags.
It is possible to spend all points at once or exchange just a few at a time.
- The default is 'Withdraw-all rewards'.
- To spend less points, right click on offering stone to select 'Withdraw-X rewards'.
There is a cap of 2000 points, so it is encouraged to spend the points when they near that amount. How many points you have is shown on the upper left hand corner. A convenient bank deposit box can be found through the shortcut on the other side of the Jadinko Queen (requires 40 Woodcutting to use).
Point values
| Action | Required | Points | Notes |
|---|---|---|---|
| Burning a curly root in a firepit | 83 83 |
2 | Roots burned by an inferno adze do not give points. |
| Chopping a mutated root | 83 |
2 | Near Jadinko Queen. -1 point for chopping a healthy vine. |
| Lighting a firepit on a dry patch | 83 |
3 | Needs to be lit with a curly root. |
| Killing a mutated jadinko baby | 80 |
3 | |
| Killing a mutated jadinko guard | 86 |
7 | |
| Killing a mutated jadinko male | 91 |
10 |
Rewards
Jadinko fruit
| Item | Quantity | Rarity | GE price | |
|---|---|---|---|---|
| Common fruit | 1 | Common | Not sold | |
| Shadow fruit | 1 | Unknown | Not sold | |
| Igneous fruit | 1 | Unknown | Not sold | |
| Cannibal fruit | 1 | Unknown | Not sold | |
| Aquatic fruit | 1 | Unknown | Not sold | |
| Amphibious fruit | 1 | Unknown | Not sold | |
| Carrion fruit | 1 | Unknown | Not sold | |
| Diseased fruit | 1 | Unknown | Not sold | |
| Camouflaged fruit | 1 | Unknown | Not sold | |
| Draconic fruit | 1 | Unknown | Not sold | |
| Saradomin fruit | 1 | Unknown | Not sold | |
| Guthix fruit | 1 | Unknown | Not sold | |
| Zamorak fruit | 1 | Unknown | Not sold |
Seeds
| Item | Quantity | Rarity | GE price | |
|---|---|---|---|---|
| Red blossom seed | 1 | Common | 187 | |
| Blue blossom seed | 1 | Common | 456 | |
| Green blossom seed | 1 | Common | 222 | |
| Lergberry seed | 1 | Common | Not sold | |
| Kalferberry seed | 1 | Uncommon | Not sold | |
| Erzille seed | 1 | Common | Not sold | |
| Argway seed | 1 | Uncommon | Not sold | |
| Ugune seed | 1 | Uncommon | Not sold | |
| Shengo seed | 1 | Uncommon | Not sold | |
| Samaden seed | 1 | Uncommon | Not sold | |
| Apple tree seed | 1 | Rare | 290 | |
| Banana tree seed | 1 | Rare | 171 | |
| Orange tree seed | 1 | Rare | 163 | |
| Juju teleport spiritbag | 1 | Uncommon | 3,897 |
Seed reward mechanic
The Seeds and Teleport option on the offering table is completely influenced by what is currently being attracted in herblore habitat. The seeds obtained at the offering stones will be the same types that are normally dropped by the jadinko that you currently have attracted at the hunter area on the surface. You will not obtain a seed type if the jadinkos on the surface do not drop that seed when caught. If you do not have specific jadinkos attracted on the surface, only blossom seeds can be found. Therefore, when you are ready to collect a reward, make sure you are attracting a jadinko with good seed drops, such as diseased jadinkos. It may also be prudent to shoo away Common Jadinkos with a Striped Vine, to eliminate low-level seeds from the reward pool.
Trivia
- Depending on a player's stats, it may be faster to gather seeds through burning curly roots or chopping mutated roots than through hunting in Herblore Habitat.
- The most expensive option may be the most efficient for obtaining herb seeds, because the random option, though cheaper, tends to give more fruit and lower-level seeds.
- The offering stone will not have fruit on it for players who do not have enough jadinko points for any of the rewards.
- The Seeds and Teleport option on the offering table is completely influenced by what is currently being attracted in herblore habitat. Also, the Jadinkos you have attracted will occasionally come down from Herblore Habitat and put their seeds on the offering table, afterwards making their way to the queen and burrowing into the ground.