Walkthrough
| Start point | |||
|---|---|---|---|
| Member requirement | |||
| Official difficulty | |||
| Official length | Long | ||
| Requirements | Skill requirements are not boostable unless marked with a [B] for boostable.
Recommended:
| ||
| Items required | Items from the tool belt are not listed unless they do not work or are not automatically added.
| ||
| Enemies to defeat |
|
Getting Started
- Left click the House Portal.
- Postie Pete will appear and give you a letter.
- Read the letter. (
 )
)
Back to the Rock
- Go to the Customs Office in Rimmington, (if you have any items on you deposit them all in the locker in the customs office), then talk to the Customs Sergeant. ( 1•4•). You will be sent to the Rock
- Note: if you log out, lobby, or otherwise leave The Rock, return to the customs office, and chose option 1, finish the dialogue and you will be sent back, you will have to complete any steps again.
Escape The Rock (Again)
- Talk to Bill Teach in the next cell over untill dialogue ends, then talk to Two-Eyed Eric and ask him for a hand ( 3). He'll give you a spare hook.
- Use the hook on the bed to tear off some cloth, then combine the cloth with the hook to get Eric's hook attached to cloth.
- Go outside and use the cloth-hook on the fishing spot to acquire a fish and a sharp hook. Use the fish on the perch rock to summon a seagull.
- Use the fish on the door to have the seagulls distract the guards, then pick the lock with the hook. (Note: There are some funny chat options if you use the fish on the rock just outside of the cell. Not required to complete the quest.)
- Push the barrels of black stone by the door to block out the guards, then investigate the pile of crates to take a smaller crate.
- Use the hook on Bill Teach's cell door. You will lose the hook.
- Search the desk and locker to get a cheese sandwich, pineapple, wooden spoon, and custom's uniform. Put the uniform on.
- Use the spoon on the crate to make a trap, then use the sandwich on it to bait it.
- Place the trap by the mouse hole (can be very hard to see on certain graphics settings) in Bill Teach's cell, opposite the entrance to the cell. If you cannot see it, (if possible) turn graphics to ultra for this step, then restore them to your usual settings.
- You will catch Wilson
- Reassure and comfort Wilson, and ask if he has something to help. ( 3•4•2•4)
- You will receive the Guard's Keys. Use these on any remaining cell door to release the other prisoners.
- Attempt to open the door in the middle of the prison (leading to the stairs).
- Talk to Madame Shih who will mention a ward is voice activated to open the door that leads to the stairs.
- Talk to Jimmy the Parrot.
- Attempt to open the door in the middle of the prison, again, this time it will open.
- Read the poster next to the stairs then go up. A neutral Crassian guard is here who will not attack, but will prevent you from going upstairs.
- Search the lockers (to the north) to find some 'Rum'. Use the pineapple on the puddle of slime in the corner, then use it on Wilson.
- Use the Pineapple Wilson on the door to the south room, the guard will be distracted.
- Enter the room and investigate the East bed to find First floor keys. If you do not receive the keys, head back downstairs and read the poster next to the stairs, then try again.
- Open the North door on the First floor.
- Use the 'rum' on the pod and set it on fire. Note: The rum has a left-click drink option. If you accidentally drink it, search the lockers on the First floor to obtain another
- Speak to anybody then run to the docks and dive off.
- Speak to anybody, then accept to sail to Mos Le'Harmless.
- Use the chair in the northeast corner of the small bar and go into the basement.
- After a conversation, speak with the zombie head, and choose "kind interrogation." Agree to its (her) requests, and grab your two pieces of leather, gold bar, and the drinks listed in the required items (they can be premades).
- To find her a friend, first speak to Gertrude, then to her child, then go to the sawmill and search the westernmost jiggling crate to find Wilson again. You will craft a collar for him and then finish this portion.
- The spot she describes to watch the sunset is south-southwest of the Karamja lodestone, northwest of the general store. Amusing dialogue is given if you already have the drinks on you.
- Next, go back to the basement of the pub in Mos Le'Harmless and speak with the head again. Prepare for a fight. It is recommended to take a reasonable amount of food for your level, and the Ectophial, just in case.
- The fight is very similar to the one from A Shadow over Ashdale. It uses nearly identical mechanics, albeit the boss' special attacks seem to be less frequent and it seems to be significantly stronger overall.
- When it shields itself from attacks, move away or suffer massive damage. It will do this twice, and will be particularly deadly the second time as it will use this attack in rapid succession. Of particular note, when it is near death it will use a rapid series of this special attack wherein you must keep moving to avoid massive damage, shadows will appear before acid rains down on you. It will occassionally summon Crassian scouts that will attack you **The best strategy seems to be to ignore and outheal them, as they have a lot of health but low offensive capability, while the boss will continue attacking you. Death is *not* safe. If you die, your gravestone will appear just by the docks at Mos Le'Harmless (you will have kept the ectophial).
- After the fight, you will need to perform various tasks around Mos Le'Harmless as it is being invaded by Rabid Jack's zombie army. It is fairly easy to do so, and the bank, despite not being manned, is still open if you need more food.
- After the fight, you will need to perform various tasks around Mos Le'Harmless as it is being invaded by Rabid Jack's zombie army. Taking too long will cause certain areas to regenerate their invaders. It is fairly easy to do so, and the bank, despite not being manned, is still open if you need more food.
- After dealing with the invasion, head to Braindeath island. Go down the stairs, to the far west, up some stairs to the room with bunks, speak to Davey, and listen at the window by the northern end of the distillery. Speak with Davey again put on the barrelchest disguise, then talk to Captain Donnie who is outside. Tell him he needs to chop up Luke.
- (optional) Talk with Luke (or just go through the gate and ignore him). He is now named "66.6...% Luke". You can suggest names for him. It will go on for a few minutes, at which point the suggestions will loop back.
- Go through the gate and to the top of the mountain to reunite with the seagull you met at Rock Island. Talk with him, he will say he needs some explosives.
- Talk to Barrelchest Mk. I and then talk with Captain Donnie again while wearing the barrelchest disguise. Tell him Mi'Gor wants to see him, and you will overhear him giving the Barrelchest Mk. I the password you need to get past him.
- Give Mk. 1 the password while wearing the disguise. At this point, you don't need to wear it anymore. Go upstairs and do two things: grab both of the barrels of rum (they are items with a red dot on the minimap and resemble miniaturized barrels, in the western corners), and block and overload the pressure pipe nearby.
- Give the barrels to the seagull. You may need to talk to Davey and head back to the seagull again. The bombing commences.
- Steer the seagull near the entrance of the dungeon. A pad of flight controls appears on your screen; depending on your configuration, it may be off the screen somewhat, resize your window if this happens. Bomb it three times, then watch the cutscene.
- (Some more things happen in between this and the fight with Rabid Jack, needs to be edited later, nothing terribly guide-worthy occurs)
- The fight with Rabid Jack is straightforward, though you will likely take a lot of damage. Like with the first boss fight, bring as much food as you can. Boosts and prayers are suggested.
- You will need to defeat him four times. He uses melee and is level 200 with 35,000 life points and seems to have a maximum hit of a little over 1,000. Each time you kill him, sever one of the chains in the corners of the arena. The fourth time, this will be done automatically. You will occasionally be attacked by illusions, if this happens drink from a 'rum' barrel or two, three to stave them off for longer. Do not drink from too many (seemingly 6+ in rapid succession) barrels! If you do this, you will get a message saying "You kill yourself from alcohol poisoning" and be damaged for over 90% of your maximum/current life points (it is unclear if this will actually kill you by itself or if it is similar to Nomad's near-instant-death attack). When he is defeated for the fourth time, a cutscene will ensue. Go back to the basement in Mos Le'Harmless and finish the quest.
Rewards
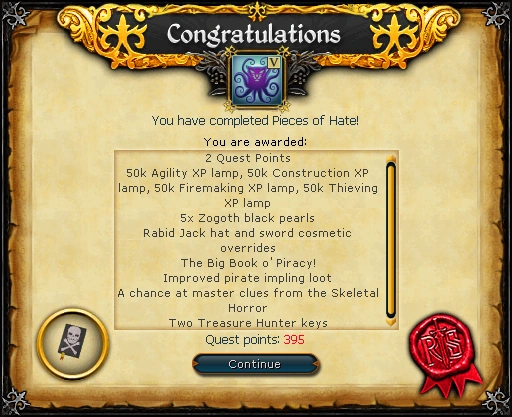
- 2 quest points
- 50,000 experience lamp
- 50,000 experience lamp
- 50,000 experience lamp
- 50,000 experience lamp
- 5 Black pearl (Zogoth)
- Rabid Jack hat, sword and off-hand variant cosmetic overrides
- Big Book o' Piracy
- Improved pirate impling loot
- An improved chance at master clues from the skeletal horror
- Holy wrench will now work with Dungeoneering prayer necklaces
- 2 Treasure Hunter keys and 2 Hearts of Ice
- Early bird bonus
Gold Premier Club members could obtain 500 pieces of eight from the Guardian of the Vault after completion of the quest until 1 April 2018.
- Additional rewards/activities
- You may return to Ulthven Kreath to decipher all 4 murals. Each one grants one time 50,000 experience in Agility, Construction, Firemaking and Thieving. This is a requirement for the master quest cape and unlocks Roake Kal achievement.
- Music unlocked