(→Trade goods: tengu gives chi, not lacquer) Tag: sourceedit |
m (update the possibility of changing captain traits) Tags: Visual edit apiedit |
||
| Line 244: | Line 244: | ||
Story voyages can be attempted several times until successful, and only one high-level voyage attempted at any one time using the highest crew. However, once this is done, the Trade Goods are very valuable and are worth "farming" as a regular exercise. No trade goods can be sold directly, but crafting bones into tradeable Scrimshaws values each ancient bone over 100K GP each, and it is quite possible to gather more than 20-25 bones per week (plus similar amounts of the other equally valuable trade goods!), for very little effort per day. In order to do this efficiently, the Crew Roster needs to be optimised to undertake several Trade Voyages (and scroll missions) simultaneously, all with a high probability of success. |
Story voyages can be attempted several times until successful, and only one high-level voyage attempted at any one time using the highest crew. However, once this is done, the Trade Goods are very valuable and are worth "farming" as a regular exercise. No trade goods can be sold directly, but crafting bones into tradeable Scrimshaws values each ancient bone over 100K GP each, and it is quite possible to gather more than 20-25 bones per week (plus similar amounts of the other equally valuable trade goods!), for very little effort per day. In order to do this efficiently, the Crew Roster needs to be optimised to undertake several Trade Voyages (and scroll missions) simultaneously, all with a high probability of success. |
||
| − | Choose trait upgrades for the Captains with care, and wait for the best traits (+1% skills). Once each Captain has four traits, they |
+ | Choose trait upgrades for the Captains with care, and wait for the best traits (+1% skills). Once each Captain has four traits, they can only be changed with difficulty. |
Note: All merchants (Trader to Terracotta Merchant) increases resources and trade good yields if the voyage is successful. After multiplying (up to 1.33x with Terracotta Merchant), it ROUNDS UP, which is very beneficial for trade good voyages. |
Note: All merchants (Trader to Terracotta Merchant) increases resources and trade good yields if the voyage is successful. After multiplying (up to 1.33x with Terracotta Merchant), it ROUNDS UP, which is very beneficial for trade good voyages. |
||
Revision as of 00:49, 2 October 2016
This strategy guide is used for optimal efficiency in obtaining all possible rewards. Adjust it to your specific circumstance and personal goals.
Maximum stats at end of level
This strategy prioritizes maximum chance of success for voyages with the goal of starting each new area with the highest stat totals possible. The general plan in each new region is to buy rudder, upgrade some/all crew, purchase all ship upgrades, then purchase all port upgrades. It is best to use merchants on every resource voyage, excluding the merchant bought in Arc region.
Upgrading captains and crew
Although the first few regions are fairly forgiving, there is a sharp increase in the crew level needed going from the Scythe to the Bowl. Plan accordingly. Ending the Scythe with captains and crew with levels of at least 6 to 7 will make the transition dramatically easier. Similarly, ending the Bowl with captains and crew with levels of 8 to 9 will prepare you well for entering the Pincers.
Because captains and crew have stats that increase with experience gained by completing voyages, the earlier you buy them, the more beneficial they are. Buying crew first when you enter a new area means that you will have the highest possible stat total when making the transition out of that area. Upgrading captains and crew should be your first priority when entering a new area.
Crew members available for hire are kept through reset. Whenever you are hiring crew members, you should use your crew rerolls to find the crew you wish to hire whether you currently have the resources to buy them or not.
Captains
Free captains should be replaced by 100-chime captains as soon as they become available, regardless of their main stat. The base stat of the 100-chime captain is as high as the main stat of a free captain, and they will contribute more total stat points and more speed than a free captain.
You may very rarely be able to skip the 2,500-chime captains completely. You advance fairly quickly through the Skull, where they are the best available captain upgrade. Oftentimes, due to the rarity of 10,000 chime captains even in the Bowl Region, you will need to purchase a 2500 chime captain or be stuck with the 100 chime captains. Considering you have a surplus of chimes by the time you hit regions after the Bowl such as the Pincers where 10,000 chime captains become more popular, the 2500 chime captains are well worth it. You will very rarely be lucky enough to get a 10,000 captain before the Bowl region.
Once unlocked, 10,000-chime captains are available and the sooner you buy them, the more time they will have to level up. Your goal will be to eventually have one of them for each ship you have available. Because the total boost to your Seafaring total from ship upgrades will always lag behind Morale and Combat, Seafaring-based captains are the most useful, followed by Morale and Combat.
Do not buy speed-based captains. One exception is if you are waiting for a better captain and you have extra chimes; a 2500 chime speed based captain will beat out a 100 chime captain in all stats.
35,000-chime captains become available in Shield region. 10K chime captains progressively get more common as you progress through the regions, being most common in Shield region.
You should save your captain rerolls until 10,000-chime captains are available in the Hook region; however, they are very rare and newer regions have higher chance. Even with captain rerolls available, it may be a long wait between good captains. It is probably better to take the first captains you see until all of your ships have 10,000-chime captains and then look for captains with the specialty you want later rather than passing up the opportunity to upgrade a captain while you wait for the perfect match.
Captains only have 4 slots available for traits, and once a trait has been taken, it cannot be changed. Voyages to add captain stats become available beginning in the Skull. The voyages offering the best traits only become available as you progress deeper into the Wushanko Isles. You should not add low-value traits to captains that you intend to keep for a long time. Traits unlocked in the Scythe can improve a captain's experience gain or odds of surviving a failed voyage. In Pincers, Loop, and Shield regions, players can find the +1% traits (Leader, Seafriend, Tactician) and multi talented from standard missions, the best traits in the entire game, with 1% a lot better since they keep improving as you improve.
Core crew
To achieve the highest possible chance of success for a single-stat voyage, you will need 5 of the crew with that stat from the current region. Your core crew, therefore, will consist of 5 each of the Morale, Combat, and Seafaring crew members.
You should plan on swapping out this core group each time you enter a new level. This may take 15 to 25 voyages at the lowest resource payout, depending on the region you are in. You may be able to reduce this number by completing more difficult voyages or by purchasing goods from the Black Marketeer. Although the crew you carry forward from the previous area may have higher stats than those you can purchase in the new region, they will have passed their peak growth and the new region's crew will surpass them after gaining a few levels.
At every area, your Seafaring total lags behind Morale and Combat. If you have a choice between upgrading a Seafaring crew member or one of the other types, you should probably upgrade Seafaring first.
Running four ships will require more core crew members unless one ship is only used to run voyages to areas that can be completed by your support crew. Adding more core crew will also give additional flexibility to complete multiple missions to your most difficult region.
Two-skill crew
In addition to specialists in one skill, the first four regions have two-skill crew requiring a voyage to unlock. Four of these two-skill crew members - the Cyclops, Siren Whalerider, Feral Chimera, and Sea Witch - have a major stat at least as high as the corresponding specialist from that region, with a substantial score in a secondary stat. These two-skill crew should be hired over the corresponding specialist when possible. For example, the Cyclops has 150 Combat and 100 Morale and is thus clearly more versatile than a Brimhaven Pirate from the same region.
In addition, the Siren Whalerider, Feral Chimera, and Sea Witch have high enough stats that they can continue to be effective mainline units through the level after they are unlocked. For example, although the Siren Whalerider from the Skull has a lower Seafaring stat than a Storm Riders Clansman from the Hook (350 vs. 500), it actually has higher total stats (550 vs. 500). This means that its total stat growth will be slightly higher, and it will actually contribute more points to a voyage requiring both Combat and Seafaring than a crew member from the Hook of the same level. These crew can be hired in place of specialists in their region and used as mainline units for multi-stat voyages in the next region, but on moving to the next region should be downgraded to support crew.
Support crew
The remaining 10 spots in your roster (or fewer if you have added more core crew) can be filled with crew members that you want primarily for their abilities or for use in multiple-skill missions rather than for their stats in a single area.
Units with Rallying Cry are useful to purchase for their stats and because they remain useful through 2 areas. As dual-stat units, they can also be useful for balancing stat totals on multi-stat voyages. The bonus experience they grant is valuable for quickly levelling new units and for granting extra experience to captains, who level more slowly than regular crew members. However, if you have more than 4 crew members that you are trying to level up and the unit with Rallying Cry is not one of them, you will have to weigh the greater individual gain for the captain and 4 crew members against the greater total experience gain from including another crew member who needs experience instead of the unit with Rallying Cry. (If you don't need the experience for the unit providing the boost, you are giving a 10% bonus to up to 5 units, for a maximum of 5.5 times the experience value of the voyage going to useful units, including a boost for the captain, whereas a full roster of units that need experience would gain a total of 6 times the experience value of the voyage, but no bonus for the captain. How useful the bonus experience is depends on how many units on the voyage need experience, how soon they'll be replaced, and how high a value you place on the units receiving the bonus.)
Units with Solidarity are most useful on voyages with Adversity in multiple stats. Because the Solidarity bonus will push up their total contribution to multi-stat voyages (the captain and the solidarity unit itself are included in the number of unique units, so they will contribute a minimum of their base stats plus three times their Solidarity bonus), they will also be useful mainline units in the following area, but their slower stat growth will limit their usefulness at later levels.
Units with Merchant can increase the reward from voyages and those with Good Fortune can increase the number of random events received, but their stats are so low that you must choose wisely when to use them. If you fail a voyage because you included a merchant, it will take many voyages' worth of bonuses to make up for the resources lost, although almost always, especially for higher regions, the merchant will give much more bonus resources than what will on average be lost due to decreased stats.
To make back the chimes and resources spent on the unit, they will have to successfully complete voyages worth an amount equal to their cost divided by the bonus (or to put it another way, the inverse of the bonus times the cost: a 1/10 bonus would require voyages worth 10 times the cost to pay for itself). The break-even amounts are shown in the table below along with the minimum rewards for voyages in their home area and the number of those minimum-reward voyages it would take to pay off the unit. Using them on voyages with greater rewards will pay them off faster. Of course, they may also be used in later stages and trading resources from an old area for resources from the new area is a great deal.
| Cost | Break-even point | Minimum per voyage | Voyages to pay off | ||||||
|---|---|---|---|---|---|---|---|---|---|
| Name | Chimes | Resource | Bonus | Chimes | Resource | Chimes | Resource | Chimes | Resource |
| Ardougne Shopkeeper | 60 | 30 |
10% | 600 | 300 |
40 | 40 |
15 | 7.5 |
| Trader | 400 | 160 |
20% | 2000 | 800 |
250 | 80 |
8 | 10 |
| Merchant | 500 | 220 |
25% | 2000 | 880 |
200 | 125 |
10 | 7.04 |
| Jade Merchant | 1200 | 450 |
30% | 4000 | 1500 |
300 | 120 |
13.33 | 12.5 |
Golems have Staunch and can sacrifice themselves to protect another unit if a voyage fails. However, they are more expensive than your core crew and because they have lower primary stats than your core crew, including one will usually increase the chance that the voyage fails, especially for single-stat voyages. The Lifeboat effect from the Port Random events is a better way to protect crew members because it does not take up a crew slot, allowing you to use a crew member that makes a greater contribution to success. Although they have lower total stats than the corresponding unlockable two-stat crew members, they may be used as a low cost alternative to provide a way to balance stats on multi-stat voyages.
Speed-only units are generally not needed. If you are keeping up with purchasing hull and rudder upgrades and have a captain of a reasonable level for the region you are in, you are probably close to exceeding the speed cap for your current region and over the cap for previous regions. With few exceptions, including a speed unit will generally not significantly decrease the time required to complete a voyage.
Resurrect units are able to recover dead crew as the undead; however, as the mechanic doesn't work properly at the time of writing and produces inferior copies of those crew without abilities or level advancement, it is generally not recommended to get a Sea Witch or Oxhead and Horseface based on this ability alone. By the time you are able to purchase these units, you may already have enough lifeboats to prevent crew loss anyway, and as of the time of writing, they do not expire, meaning that you will not have to replace the boats either.
Upgrading ships
Your Seafaring total can only be boosted by upgrades to your hull and deck hotspots. Because your Morale and Combat can also be boosted by upgrades to the Ram/Figurehead spot, your Seafaring total will always be the lowest total of the three. The Deck upgrades give you the largest bonus per resource spent of any of the hotspots, and the most flexibility in how to apply the upgrades. Although your needs may depend on which voyages you receive, your Morale and Combat totals will generally be higher than your Seafaring, so that will usually be the first deck upgrade you should upgrade.
Unless you badly need the bonus provided by the Ram/Figurehead spot to complete a mission, Hull upgrades should be your next upgrades purchased. They give a better bonus per resource spent than rams or figureheads. There is an exception to this general rule in the Bowl. Purchasing the Hull of Glory is a better Morale investment than Eastern Treasures, although this does depend on your problems. Two Eastern Treasures is equal to 2,400 Morale; however, there is no Morale based hull other than the Golden Hull.
Because they directly affect your ability to successfully bring back resources, all ship upgrades should be purchased before moving on to port upgrades, apart from upgrades to the Office, which unlock additional ships and allow you to complete more voyages per day.
Upgrading buildings
By the time you reach the Scythe, you will not be able to complete all of the voyages available each day using only 2 ships. Office upgrades let you increase the number of voyages that you can complete in a day, increasing the resources you bring in and the number of captains and crew members who can gain experience, boosting your stat totals. Upgrading the office should be a very high priority.
The Shipwright is the only port upgrade that directly affects the success or failure of your voyages. The effect is small at first, but will amount to hundreds of points by the time you reach the Scythe and beyond. You should purchase all upgrades up to and including the Nautical Shipwright. However, your Seafaring stat will always have the lowest maximum bonus of the three that determine success. The Pincer-level upgrades do not improve the overall bonus, and shift the extra 2% off the stat that needs it most.
If you are swapping out crew at the start of each new level, the Lodgings upgrades are an investment in the quality of crew you purchase in the next area. You should be sure to purchase each lodging update up to Daredevil Lodgings before you begin purchasing crew in the next area.
Bar upgrades give you better captains, but if you play your cards right, you won't be buying very many captains. The bigger benefit is to increase the port's attractiveness to adventurers. Attracting more adventurers means that you will have more days with two adventurers, giving you more options for special voyages. Upgrading the bar should be your next priority after upgrading lodgings.
The Workshop upgrades are really only useful after you have collected a complete scroll and the trade goods to build the reward. Until then, don't upgrade the workshop if you need the resources for anything else. A bank deposit chest is nice, but Edgeville bank is only a home teleport away.
The Warehouse upgrades do not pay for themselves within a useful time frame. The break-even point for a 5% bonus to resource rewards is 20 times the resource investment. In every area after the Arc, 20 times the resource cost for the warehouse upgrade is more than the combined cost of all ship and port upgrades using that resource. With a 5% return, you will only recoup the cost of the upgrade after there is nothing left to spend it on. After entering the next area, upgrading the warehouse again will halve the remaining resources needed to reach the break-even point for the previous region's resource, but it does so at the cost of delaying more useful purchases in the current area. The break even point for a 1% net increase in chime reward is 100 times the chime cost of the upgrade. If you choose to upgrade the warehouse, you should upgrade it last. Only the Refitted Warehouse actually pays for itself when you still need the resource you have spent.
Levelling captains and crew
The current experience of each crew member can be seen in the Crew Roster interface. Each level requires more experience than the last. This means that all captains and crew members begin levelling quickly and then slow quite a bit. When choosing crew for a voyage, use the lowest-levelled crew member that does not adversely affect your chances of successfully completing the voyage, because they will be the most likely to level up and increase your stat total.
The other thing to remember is that captains level more slowly than crew members. There is no great remedy for this except to do more voyages. It is, however, worth remembering that captains can unlock the trait Fast Learner in the Scythe, and you need a lot of cherry wood for upgrades, so you will be doing a lot of voyages there. It may be a good idea to leave one trait slot open so you can take advantage of this to help offset the captain's greater experience requirements.
Experience gained by captains and crew appears to be proportional to distance. Although exact numbers are unavailable, a level 0 crew member will gain 3 levels on one trip to the Bowl (base distance 4800) or on two trips to the Scythe (base distance 2400 each). However, if you are in the Bowl, the two trips to the Scythe will generate only half the distance toward unlocking the next area. This can increase your level gain before entering the next level and give you more chances to complete special voyages. See the Scroll Hunting section for a discussion of the potential benefits.
The progression from Arc to Shield
Once you reach the Scythe, you will find that you can no longer put new crew members directly into mainline service without taking a hit to your chances of success. Fortunately, you should have upgraded to three ships while you were in the Hook. By using your port focus settings (Found under Port Management at the top of the screen, the click an arrow to move to the Region Focus option), you can use two ships to gather resources to hire new crew, while the third ship trains the new crew that you've hired on a safer, less difficult voyage. Once all new crew have caught up, you can stop making milk runs until the next area is unlocked.
In the Scythe and Bowl, voyages to the previous region should take roughly half the time that a voyage to the current region does, so two voyages there will put your third ship roughly back on a schedule similar to your other ships. Using the port management settings, set the port's focus to the previous region (in the Scythe, set it to the Hook; in the Bowl, set it to the Scythe) and send out two of your ships to gather resources from your current region. This will not always work, but you should hopefully have at least one voyage to the previous region. If both voyages were replaced by easier voyages, return your port focus to the current region so that your milk run will hopefully be replaced by a resource mission for the current region, otherwise leave it on the previous region. Whatever the previous results, be sure to change your port focus back to the current region before launching your second milk run.
Because the previous region will generally offer voyages of lower difficulty, you will probably be able to include a unit with Rallying Cry to make the experience gain greater. You may even be able to include a merchant-type unit, but your priority on the milk run is to gain experience. Extra resources from the previous area are your secondary objective.
Once you are in the Bowl, if you have been following this guide, you will probably need to gain about 3 levels to catch a new unit up the crew you carried over from the Scythe. One voyage to the Scythe with an experience-boosting unit aboard will generally raise a level 0 unit directly to level 2. A second voyage to the Scythe will usually get them up to level 3. When they get back from that mission, your ships should be roughly in sync again and your new units should be ready to transfer into mainline service. The experience gain will not be as great when doing this in the Hook/Scythe, but you also won't need to gain as many levels for them to catch up.
Rushing strategy
When pursuing a rushing strategy, your goal is to reach the Pincer as quickly as possible by increasing your total distance as quickly as possible. Since you get distance whether you complete a voyage successfully or fail a mission, it is always better to send voyages in your highest region than sending voyages in other regions.
Upgrade priorities
Pursuing a Rushing strategy requires that you follow a different upgrade strategy than previously outlined. In Rushing, upgrading your Office to get more ships generating distance takes precedence over everything else.
The Office upgrade should be built before ship upgrades in the Hook and Bowl. You will need a reserve of 3,000 bamboo to upgrade the Office in the Hook; only purchase ship upgrades in the Arc if it will not take you below this level. In the Scythe, you should keep 8,000 cherry wood in reserve to complete the Office upgrade in the Bowl.
Levelling priorities
Voyages to your current region will earn approximately the same amount of experience as two voyages to the previous region, but will generate twice as much distance toward unlocking the next area. Unless you need resources for an Office upgrade, you should always send voyages to the current region.
Choosing special voyages
Scroll hunting
Although the return from trade good voyages is better the farther you progress, the reward for a Forgotten Scroll voyage in the Skull is exactly the same as the reward for a Forgotten Scroll voyage in the Pincers. You can maximise your return on voyages by earning scroll fragments in the earlier regions, and focusing your efforts on trade goods when the reward is greatest. NOTE: scroll missions scale to the highest region unlocked. Having access to the Shield and trying to do scroll missions in the Skull will make no difference from doing them in the Shield.
One can gain scrolls starting at the Skull Region. Scroll requirements vary for your adventurer. It is impossible to get high success rates for scroll voyages when you have just unlocked a new region. For example, you are unlikely to complete a scroll voyage offered by the Assassin in the Scythe region with units from the Hook due to their combat levels and ship upgrades. With a decent Speed rating, one can bring down the time needed to obtain the scroll. Decent speed in the Scythe region, by having units with decent speed, hull and rudder can bring down the timer on a Scythe scroll by 1 hour.
Since scroll missions scale their requirements and time to complete to the highest region unlocked, and don't add to the total distance travelled, it is most time efficient to get a decent crew in the Skull and only do scroll missions until most fragments are gotten, before unlocking the next region. An alternative is only getting far enough to build telescopes, and then not progressing until most scrolls are completed.
Trade goods
Trade goods are gained in the Hook region. Their requirements are hard for your current region; however, one can focus from previous regions if they are not given by an adventurer. Trade good voyages last just as long as the Scroll/Trade good voyages offered by an adventurer. Trade goods also require a large time to get, each varying by the version, and can be affected by speed. Here are the goods and their descriptions:
- Plate:
 Used for making Tetsu armour and the superior version. Plate can be gained from The Whaler and The Memory's voyages, and a reward from the final storyline (individually) of The Missionary and The Convict. It can also be offered in the Hook, Scythe, Bowl, Pincers, Loop, and Shield regions, each giving 1, 2, 3, 5, 6, 8 plate respectively.
 - Lacquer: Used for making Death lotus armour and the superior version. Lacquer can be gained as a reward from the final storyline of The Assassin, and from The Convict and The Exile's special voyages. It can also be offered in the Hook, Scythe, Bowl, Pincers, Loop, and Shield regions, each giving 1, 2, 3, 5, 6, 8 lacquer respectively.
- Chi: Used for making Sea singer robes and the superior version. Chi can be gained from The Occultist and The Tengu's special voyages, as well as from completing the Memory's storyline. It can also be offered in the Hook, Scythe, Bowl, Pincers, Loop, and Shield regions, each giving 1, 2, 3, 5, 6, 8 chi respectively.
- Spices: Used for making Rocktail soup. One can gain it from The Assassin's voyages, and from the final storyline of The Whaler. It can also be offered in the Hook, Scythe, Bowl, Pincer, Loop, and Shield regions, each awarding 10, 15, 20, 30, 35, and 40 spices respectively. Spices are gained in greater numbers than other trade goods.
- Ancient bones: Used for making Scrimshaw. One can gain it from The Biologist and The Missionary's voyages. It can also be gained from the final storyline of The Biologist. It can also be offered in the Hook, Scythe, Bowl, Pincers, Loop, and Shield regions, each giving 1, 2, 3, 5, 6, 8 ancient bones respectively.
- Koi Scale: Used for making Reefwalker's Cape/Superior reefwalker's cape. Requires 80/100 respectively, and 90 crafting.
- Pearls: Used for making Leviathan ring/Superior leviathan ring. Requires 80/100 Respectively, and 90 crafting.
Other tips
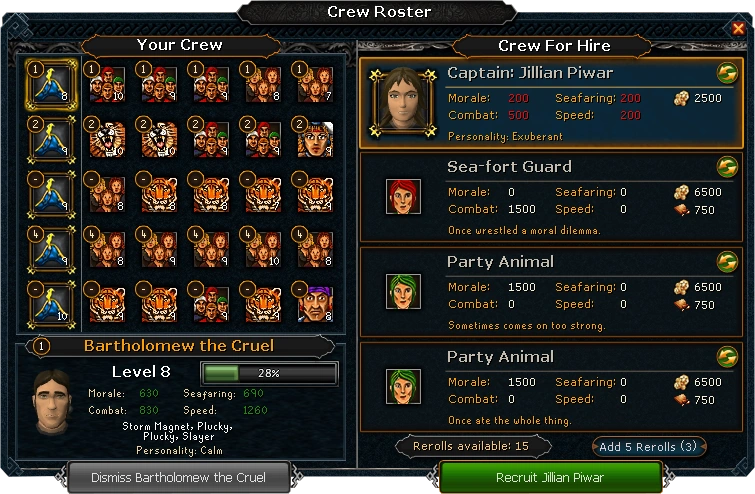
Players who start off get a few units, and a free captain as shown above. When hiring captains, you should try to see which captains will fit your needs. You should have at least 1 Morale, Combat and Seafaring captain to make sure missions go smoothly. Speed captains are not required because it only affects the voyage time, which is not helpful in higher voyages. Arc captains are usually free (unless you get the 100/200 stats which is 100 Chimes). When hiring crew, see which part of the group is low/missing. For example, if you have a large number of Brimhaven pirates, it is recommended to get Varrock chefs or Catherby fishermen to account for the combat.
Make sure you have crewmembers that you think will be useful for your port. For example, units with the "Merchant" ability will bring in more resources from a successful voyage. Units with the "Stauch" ability will protect another crew member at the cost of their life. Units with the "Good Fortune" ability improve your chances of receiving a Port Random, which usually rewards the players with helpful bonuses like Lifeboat. Units have their own personal boost, but this may not happen sometimes. It does give a minor bonus to the ship's stats, but the personal boosts will never level up. Personal boosts can go onto any stat, including speed.
Avoid units that hinder the ship's capabilities. Sometimes, players may receive units that have problems. For example, it is possible for a Crow's Nest Sniper (Scythe) to have the Cowardly trait. This prevents it from levelling up stats and has a decreased combat rating, which is not helpful to you; however, some negative traits' effects are so small, it's best to keep them and just work towards next region. Units with good traits should be kept until you reach the next region. For example, a Multi-Talented unit helps the ship in all of the ship's stats.
Traits to look for in units are:
- Leader, Tactician, Seafriend, Multi-Talented, Workhorse
Traits to avoid for in units are (think about dismissal if you can afford it):
- Gluttony, Cursed, and negative traits that give -1%
Voyages
When a player unlocks a region, the starting voyages are typically easy to finish with requirements that you should be able to pass. As your crew grows and you gain upgrades, the voyages become much harder. You should avoid doing voyages with a low success rate, as if you fail the ship is more likely to take damage and potentially lose a crew member or captain.
Some voyages cannot be partially completed. This example is shown in Experience voyages (Hook+ with 90+ in Runecrafting, Slayer, Fishing, Herblore, Thieving or Prayer). Forgotten scrolls (Skull+) cannot be partially failed as the player only receives 1 part of the scroll.
Some voyages can be done with a partially completed mission. This, however, reduces chimes and the mission's resource reward. Partially successful missions only give 20% reward and an additional 12% for every opportunist trait on board the mission.
Voyages also depend on the region and how much you have travelled in total distance (miles). If you are on the Bowl Region, but focusing on the Scythe with decent units (mainly Bowl region units), the Scythe region will not offer easy voyages but voyages that match to your crew. This means instead of low single stat or double stat voyages (5,500 for early Scythe voyages), the Scythe region will begin to offer high level single stat voyages (11,000 or 13,000) and high level double voyages (6,500 or 8,000). If you unlock a new region and decide to go back to old regions, only the 2 most rewarding (hardest) tiers of missions will be available for back trackers, but also trade good missions from the previous region.
Try to pick which voyages will be the most helpful for you. For example, it is best to do a few of the recently unlocked region's voyages, then do the previous region once you've hired units from the unlocked region so that they can level up to improve the success rate for future voyages.
There are trade good voyages, which are voyages that involve the gaining of trade goods, but they usually have the highest or 2nd highest requirements of missions in the region. They can also require an adventurer to be present in port. The difference between one from standard and from the special is shown. Standard trade good voyages are somewhat rare to find, while the adventurer one happens roughly every other day.
Both, however, have the same timer. A trade good voyage from the Hook will take just as long as an adventurer's trade good voyage. However, the requirements can vary with the adventurers you have at your disposal. For example, gaining Spice from the Hook region has a requirement of 10,000 Morale, while for the Assassin's mission it only requires 7,500 Combat. However, in Pincers, Loop, and Shield region, the difficulty level of standard and adventurer's trade good missions are the same.
Players should focus on the most rewarding single stat missions, as they are the easiest to complete. Once the crewmembers have improved, try doing duo-stat missions and finally do trio-stat missions as they are the hardest out of the three.
Ship upgrades
Ship upgrades are very expensive. It is up to the player to decide if units or ship upgrades should go first. Here is a comparison between units and ship upgrades:
- Ship upgrades are permanent and cannot be lost unlike units.
- Ship upgrades cost a large amount of chimes and the resource.
- Units may have traits to improve the ship's capabilities.
There are 5 ship upgrades:
- Rams/Figureheads (improves Combat or Morale) The best morale hull also has a +100 Sea boost. The rams/figureheads are usually bought last.
- Deck Items (improves Morale, Seafaring or Combat) These are usually better buys than hull since you can put up to 2 deck items, and are usually bought first.
- Hull (a Hull is an all-rounder depending on its name. Some have a strong Morale, Combat or Seafaring stat. Speed stats on the hulls of the same tier remain the same; it increases for every new hull unlocked from the new region)
- Rudder (improves the speed of the ship, lowering the time it takes to finish) Rudders are usually the first buy whenever in a new region, since it allows you reach optimum speed rates easier, such as 4020+ speed for Shield region.
If a player wants to do a combat mission, it is best to buy the cannons. However, for the best success rate in the long term, buy all ship parts and buy all port upgrades.
Farming trade goods
"Completing" Player Owned Ports (max port score: 3766) takes enormous effort and dedication - at least 3–6 months of daily effort to get the all level 10 crew/captains, with the captains all being tier 35K (Shield tier). However, once completed and with an optimized crew, it can be seen as a very high-level Throne of Miscellania minigame, generating millions of GP per week for 5 minutes of gameplay per day.
Story voyages can be attempted several times until successful, and only one high-level voyage attempted at any one time using the highest crew. However, once this is done, the Trade Goods are very valuable and are worth "farming" as a regular exercise. No trade goods can be sold directly, but crafting bones into tradeable Scrimshaws values each ancient bone over 100K GP each, and it is quite possible to gather more than 20-25 bones per week (plus similar amounts of the other equally valuable trade goods!), for very little effort per day. In order to do this efficiently, the Crew Roster needs to be optimised to undertake several Trade Voyages (and scroll missions) simultaneously, all with a high probability of success.
Choose trait upgrades for the Captains with care, and wait for the best traits (+1% skills). Once each Captain has four traits, they can only be changed with difficulty.
Note: All merchants (Trader to Terracotta Merchant) increases resources and trade good yields if the voyage is successful. After multiplying (up to 1.33x with Terracotta Merchant), it ROUNDS UP, which is very beneficial for trade good voyages.
Maximum ship upgrades
The following table contains an overview of the maximum contribution of the best ship upgrades to the success rate of a voyage.
| Figurehead | Hull | Deck Item 1 | Deck Item 2 | Total | |
|---|---|---|---|---|---|
| Morale | 950 | 1400 | 2000 | 2000 | 6350 |
| Combat | 1100 | 1400 | 1750 | 1750 | 6000 |
| Seafaring | 100 | 1700 | 2000 | 2000 | 5800 |