
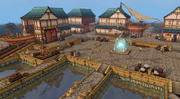
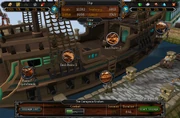
The docks of the Player-owned ports.
The Player-owned port is a high-level members minigame that was released on 11 December 2012, as announced in the December 2012 Behind the Scenes news post. Borrowing elements from the Managing Miscellania minigame, this minigame involves players building their own port in order to manage a fleet of ships, staffed by recruited crew members. These ships explore the Eastern Lands (otherwise known as the "Wushanko Isles" by the port Navigator) on the player's behalf and return with exotic items and supplies that are otherwise unavailable. Players can start by heading to Port Sarim. South-west of the Rusty Anchor pub is a portal that players can use to enter their port.
Getting started
Level requirements
Access to your player-owned port has no requirements, but playing the minigame requires level 90+ in at least one of the following skills: Fishing, Slayer, Runecrafting, Herblore, Prayer, or Thieving. More content is unlocked for each of the requirements met. Some content has no level requirement and thus is available to all members such as Meg, a Distraction and Diversion.
Tutorial
Starting the tutorial requires level 90+ in either Fishing, Slayer, Runecrafting, Herblore, Prayer, or Thieving. Upon entering the port for the first time, players will see a cut-scene followed by a brief interactive tutorial. It is recommended to play through the tutorial, because it teaches the mechanics of hiring crew, equipping your ships, sending them out on voyages, upgrading your port, and collecting rewards. At the end of the tutorial the player's character receives a Captain's log, which can be used to check progress and status of many aspects of the minigame when not actually in port, and then proceeds to the actual minigame play proper.
How it works
Player-owned ports is a management-based minigame in which the player manages a port by sending out crew members to complete missions in an effort to reach the Eastern Lands. Players must choose crew members and ship fittings for each voyage to tailor to the needs of the voyage. The green indicator bars on the voyage and shipyard interfaces need to be as high as possible for the best outcome. The higher the numbers, the higher chance the mission will be successful. If a mission is not successful, the ship may be damaged, the crew may be drained of energy or even lost overboard at sea, and resources will not be gained. Voyages, crew for hire, and the Black Marketeer's resources all renew daily at first login after 00:00 UTC. Special voyages cannot be carried over to the next day, regular voyages can.
Each voyage will have a combination of one or more of the following requirements: Morale, Combat, and Seafaring. For the best chance of success, players should choose their crew members and ship components so that all of the requirement indicators are filled as fully as possible with the combined statistics of available crew members, ship modifiers, and effects applied, remembering that the overall success potential of the voyage is equal to the least filled indicator. Thus, it will more likely be a successful mission if all indicators are showing 75% of necessary requirements than if two are showing 100% and one was showing 56%. Only indicators which affect the outcome of the voyage are shown. Speed is a fourth stat which is different from the other three. The speed does not affect the success of a voyage, but affects the amount of time that it takes to complete a voyage.
Resources gained from voyages may be used to upgrade the fittings on your ships, upgrade the port buildings, or hire more crew. Ship upgrades and a varied crew roster allow for more varied and more difficult voyages to be successfully completed. Port upgrades allow you to have more ships operating at a time, boost resources gained from successful voyages, boost ship stats, or hire better captains, crew and special adventurers.

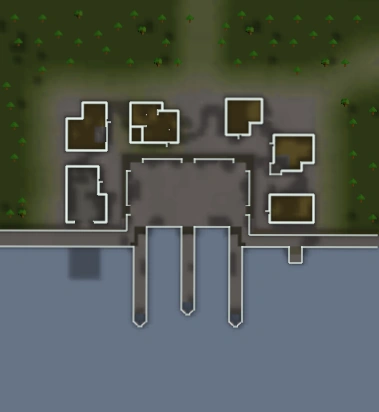
A map of the port.
The Port
Buildings
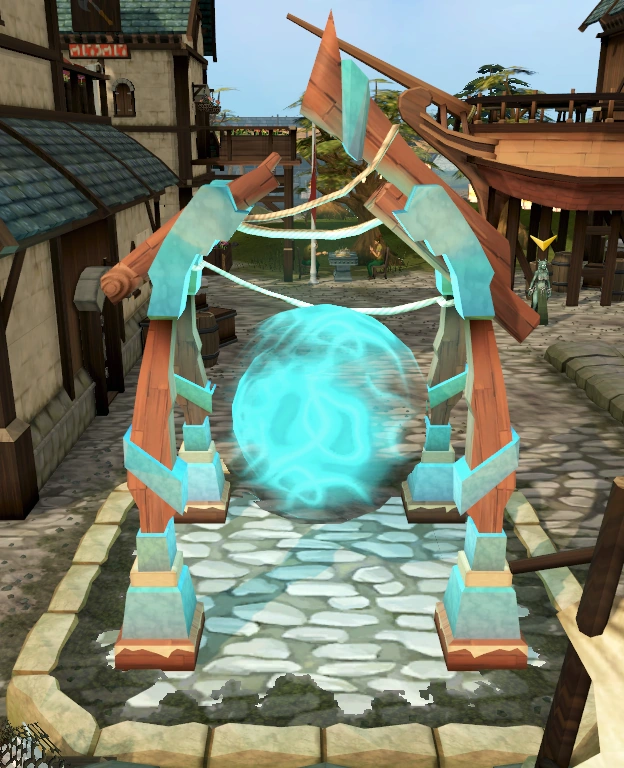

.png)
The Port Sarim portal used to enter the port
Buildings and decorations can be built or upgraded to offer bonuses to different areas of the port's operations.
- Bar: Upgrading the Bar increases the chances of attracting adventurers and attracting better captains.
- Office: Upgrading the Office unlocks additional ship slots.
- Workshop: Upgrading the Workshop unlocks the ability to make reward items. The first level also requires that Zone 3 (The Hook) on the archipelago map has been unlocked.
- Lodgings: Upgrading the Lodgings increases the chances of attracting higher quality crew.
- Shipwright: Upgrading the Shipwright boosts the base stats of your ships.
- Warehouse: Upgrading the warehouse increases the rewards from voyages.
- Totem Hotspots (4): Building a totem allows the player to choose a bonus, depending on which totem is built: extra chance of scroll missions; increased xp from missions; increased rewards from voyages; increased chances of a port random event; or increased trade-related goods received.
- Icon Hotspots (3): Building an icon increases the chances that a specific adventurer will appear, depending on which icon is built.
- Portal: Upgrading the portal is simply a cosmetic change.
Interfaces
The port interfaces can be seen at the top of the screen while at the port. Players can use the buttons to set up their voyages, upgrade buildings, check their resource stock, and see how far they've advanced with the map.
NPCs
- John Strum, The Partner, is the former portmaster
- Duncan, The Navigator, helps with the management of the port
- Surula, The Barmaid, sells beer and "gossips" (gives a high level bonus voyage) every Thursday
- Felix, The Black Marketeer, sells resources to the player for gold coins
- Meg, The Adventurer, seeks the player's advice
- Seasinger Umi, a siren training to become a seasinger
Random port events (Minigames)
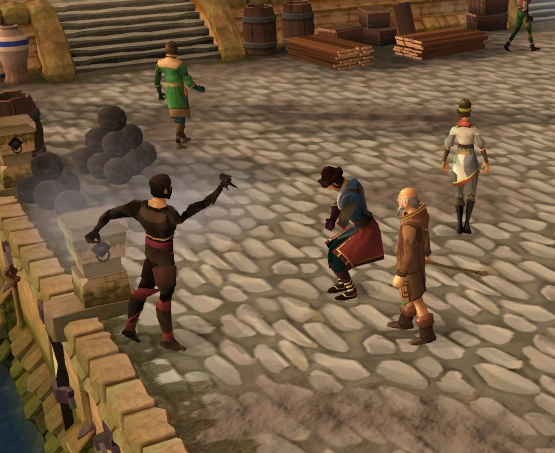
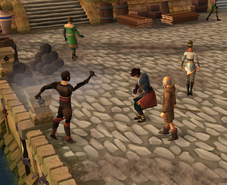
A Death Lotus member assassinating their target.
When the player receives a random event, they will be alerted by a message in the chat box, immediately after a successful voyage. Depending on which event is received, the player will have to go and talk to either Surula The Barmaid or Felix the Black Marketeer to start the event. Disconnecting or logging out during a Random port event, will cause you to lose the event, you will not get to continue again after logging back in! Be sure to have a good connection before attempting your events!
Each of these minigames gives minor rewards in the manner of "effects" (see below) which can be added to ship characteristics before a voyage.
Note: If the player has a Solomon's Store pet at the time that they are awarded the opportunity to play, they will be presented with the standard dialogs, but after clicking "Yes" in the confirmation dialog asking if they want to play, nothing happens. Once the pet is "sent home" (via right-clicking on the pet), clicking the "Yes" button in the confirmation dialog will then take the player into the mini-game as normal. If the player has a regular pet following them, they will recieve a message in chat stating that they cannot have a follower or summoning familiar while playing the mini-game. It is unknown yet if this is a bug/glitch or is intended behaviour. This applies for Surula's minigame, "Last Orders", and for the Felix the Black Marketeer's minigame, "A Simple Favor", as well.
Felix The Black Marketeer: A Simple Favour
Felix's random event presents the message: "The Black Marketeer had a little trouble with some assassins. Speak to him to relive the event." In this minigame, the player helps the Black Marketeer work off his debt to the Death Lotus Assassins. The player takes control of Felix and must first search for one of 5 ninjas hiding in various barrels around the dock. Note that a ninja may appear in a barrel that a previous ninja appeared in. If the player doesn't find a Ninja within a set period of time, an arrow will appear pointing to one.
Once the player has found a ninja, the ninja will give a clue hinting at who the intended victim is (one of the Wandering Strangers). Only one assassin's victim can be searched for at a time. The player, still controlling Felix, must then identify the correct victim, or continue to search out their targets through a series of further clues given if the victim is misidentified. Clues can specify what the target is wearing ("The target is wearing a hat"), colour or style of clothing ("No, the top is the wrong color", "That's not my target, the top was a different style", or gender ("Well, that's not right. Completely the wrong gender for a start"). If desired, the player can ignore the clues and simply try all the wandering strangers, as there are no penalties for failing.
Surula's Bar: Last Orders
"Help Surula serve her rowdy bar patrons
Surula, the barmaid, has a number of Patrons desperately in need of a nice cold pint of beer. Unfortunately she only has two hands.
Take control of Surula and serve all the patrons in as short time as possible. Visit the bar where Surula normally stands, to stock up on delicious beer, then serve any patrons who are still waiting on their order.
There are 20 patrons in total to serve and they are all over inside the bar, both on the ground floor and upstairs, and immediately outside. Once you have served a patron, the option to serve them again will vanish.
You must serve all patrons to complete the event."
Surula's random event presents the message: "The Barmaid had a tricky time while the Ship was away. Speak to her to relive the events." For this minigame, the player takes control of Surula and has to serve beer to 20 clients in the bar area, upstairs, and nearby outside, all in fewer than 10 minutes. Surula can hold only 2 beer glasses at once and over the time she serves the clients, she will have to keep getting more from her bar in order to continue, as there are twenty clients to be served.
Random event rewards
- Effects (one-time boosts for the ship/crew, which may be applied before the voyage by clicking the "Add Effects" button when choosing a ship from the Voyage List interface. Many of these effects stack, thus you may use 2 Seasinger's Cry for +20% Seafaring):
| Name | Bonus | Stacks? | 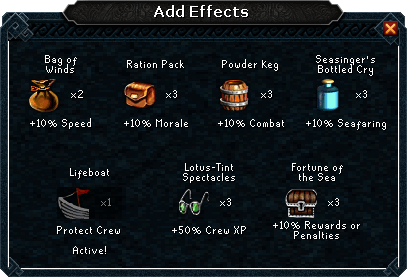 |
|---|---|---|---|
| Bag of Winds | +10% speed | Yes | |
| Ration Pack | +10% morale | Yes | |
| Powder keg | +10% combat | Yes | |
| Seasingers Bottled Cry |
+10% seafaring | Yes | |
| Lifeboat | Protects crew | No | |
| Lotus-Tint Spectacles |
+50% crew XP | No | |
| Fortune of the Sea |
+10% rewards (or penalties) |
No |
- Port resources
- Crew rerolls (1 Captain or 5 Crew members)
- Voyage rerolls (Adds 5 voyages/rerolls)
- Adventurer rerolls
Adventurer Rerolls are useable even if you already did your daily Special Voyages, giving you additional Special Voyages. Rerolls will always replace the item appearing at the time, and decrease the available remaining item (voyages, crew, etc.) by one, effectively losing one item per reroll.
Note: The rewards on the second row appear to continue to affect the ship to which they were applied indefinitely.
The Ship
Modifying a ship
The Name
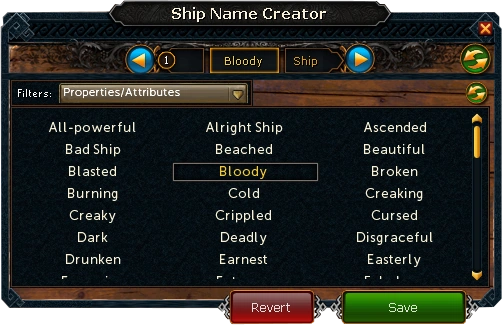
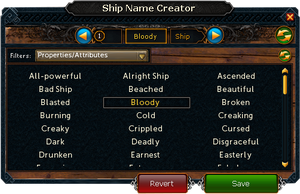
Ship Name Creator Interface
The player may customise each ship's name by bringing up an interface by clicking on the pencil icon next to that ship's icon. Ths can be done whether the ship is in port or at sea. Each name has three parts that can be changed individually, either manually or randomly. The list of available names and the interface by which changes are made and applied are shown on their respective pages above.
Upgrades
Once unlocked, ships are already built for the player. Using resources, players can upgrade their ships using five customizable hotspots:
- Rams/Figureheads (bonus to Combat or Morale)
- Deck Items 1 (bonus to Combat, Morale, or Seafaring)
- Deck Items 2 (bonus to Combat, Morale, or Seafaring)
- Rudders (bonus to Speed)
- Hulls (bonuses to Combat, Morale, Seafaring, and Speed)
Clicking on the hotspot gives players a list of possible upgrades. Each option

The five hotspots.
shows its specific stats, its resource costs to buy, and either a grey or gold padlock if the upgrade has not been purchased, or a green check-mark if it has been purchased and is currently in use on that ship (purchased, currently unequipped upgrades will show neither padlock or checkmark). The stats displayed are coloured green if the upgrade would improve that stat from the current equipment, white if there would be no change in that stat, or red if it would cause a degradation in a particular stat.
Once an upgrade is purchased, players can use them on any ship, even at the same time. Upgrades do not have to be purchased in the order displayed in the interface. If the player has the resources to purchase an upgrade, the padlock symbol will be gold. If the player has insufficient resources, then the padlock symbol will be grey. The upgrade options for the two deck hotspots are identical, and upgrades unlocked in one hotspot are automatically unlocked in the other.
Captain & Crew
A player may have a maximum of 5 captains and 25 crew members at any given time.
Your Crew
The crew roster shows your currently recruited units on the left and a recruiting interface on the right. You may get more information about individual captains or crew members by selecting them in the crew display. Information on the selected captain or crew member is shown below your crew display. If the unit is not on a voyage, it may be dismissed from the roster by clicking on the icon and then clicking on the red button in the bottom left corner.
Statistics
Each captain and crew member has statistics in Morale, Combat, Seafaring, and Speed. These are determined by four factors:
- The base stats of the particular type of unit, which are shown in the recruiting interface. The base stats alone determine the xp gain of the unit.
- The level of the unit.
- Any traits that the unit has.
- Random bonuses specific to an individual unit. These do not appear in the crew roster until the unit has been recruited.
When a captain or crew member has been highlighted in the Crew Roster interface, if you hover your mouse over the Stat name ("Morale", "Combat", "Seafaring", or "Speed"), you can see how much of the Stat value is due to base value, level boost, personal bonus, or named traits.
Level
Each captain and crew member has a level, which starts at 0 and can be increased by sending them on voyages. When a captain or crew member gains a level, their stats are increased by 10% of their base stats. This does not take into account any increases due to previous level-ups, individual bonuses, or traits. Therefore, for example, a Smuggler will always gain 7 Seafaring and only 7 Seafaring per level, no matter what.
Traits
Captains and crew members may have between zero and four traits, which are permanent modifiers given in addition to the unit's base statistics. It is possible to have the same trait in multiple trait slots, thereby stacking the trait's effect.
Some crew member types start with specific inherent traits, such as the Merchant trait for the Ardougne Shopkeeper, or the Staunch trait for Golems. Only inherent traits are shown in the recruiting interface under the picture of the crew member prior to recruitment. All other traits are only shown after recruitment.
Captains tend to have a much higher chance of having traits at recruitment than crew members. Traits may also occasionally be acquired as a listed (in this case not random) reward from some voyages.
Effects of the traits can be seen when hovering over the trait. The possible traits are:
- No trait - No bonuses
- Albatross - Ship speed -1%
- Awe-Inspiring - Improved Morale (+100 morale)
- Cowardly - Reduced Combat (-40 combat)
- Cursed - all stats reduced
- Eager - Improved morale (+40 morale)
- Eagle-Eyed - Improved seafaring (+40 seafaring)
- Fast Learner - +10% experience gain
- Feeble - Increased risk of death
- Good fortune - Increases the chance of gaining a random event on completing a voyage (does not stack)
- Glutton - Reduced speed (-150 speed)
- Gloombringer - Ship morale -1%
- Landlubber - Reduced seafaring (-100 seafaring)
- Leader - Ship morale +1%
- Liability - Ship combat -1%
- Lookout - Ship speed +1%
- Loyal - Chance to prevent captain death
- Merchant - Improve the goods retrieved from a mission by 10%, 20% or 25% (does not stack)
- Misery Guts - Reduced morale (-40 morale)
- Multi-talented - All stats improved (+50 morale, +50 combat, +50 seafaring, +100 speed)
- Mutinous - Increased risk of Captain's death (Captains can also have this trait)
- Opportunist - Better returns from partial mission success
- Pacifist - Reduced Combat (seems bugged, gives -100 morale instead)
- Pilferer - Reduced chance of partial mission success
- Plucky - Improved combat (+40 combat)
- Quick-Footed - Improved speed (+80 speed)
- Rallying Cry - All exp gains for this crew member's boat are increased by 10% (does not stack)
- Resurrects - Crew lost on a mission are returned from beyond to serve you in death
- Seafarer - Improved Seafaring (+100 Seafaring)
- Seafriend - Ship seafaring +1%
- Short Sighted - Reduced Seafaring (-40 seafaring)
- Slayer - Improved combat (+100 morale)
- Slow - Reduced speed (-80 speed)
- Slow-Witted - 10% reduced XP gain
- Solidarity - Gives +25, +50 or +75 to all stats per unique crew member aboard (does not stack)
- Staunch - Will give its own life to save a crewman in distress
- Storm Magnet - Ship seafaring -1%
- Tactician - Ship combat +1%
- Tough as Nails - Chance to avoid death
- Vapid - Reduced morale (-100 morale)
- Workhorse - Improved speed (+150 Speed)
The effects appear to be processed by crew placement from left to right, which can be important for abilities that do not stack. For example if you have a First Mate and an Eastern Overseer on a single voyage (both with Solidarity), if the First Mate is to the left of the Eastern Overseer, his lower Solidarity bonus will be applied first and the Eastern Overseer's higher bonus will be ignored.
Captains
A ship must have one and only one captain before it can go on a voyage. Until a captain has been assigned to a ship, crew cannot be assigned to it and previously assigned crew will not be shown.
Captains have base stats determined by their quality. Their base stats are the same for 3 stats while a fourth stat will have a higher stat, namely their specialty. The better the captain is, the more expensive they will be to hire. The starting captain is of the lowest quality. The first two tiers of captains are available from the start. Better captains are unlocked when The Hook is unlocked.
| Base stats (3) | Specialty | Cost | Unlocked |
|---|---|---|---|
| 50 | 100 | 0 | The Arc |
| 100 | 200 | 100 | The Arc |
| 200 | 500 | 2,500 | The Hook |
| 350 | 700 | 10,000 | The Hook |
Some high-level bar upgrades increase your chance of attracting captains with particular specialties.
Personalities
In addition to their basic statistics and traits, each captain has a given personality listed under their trait. These do not seem to affect game play, but they do affect the appearance and dialogue of the captain. The personalities are:
- Abrasive
- Approachable
- Calm
- Cruel
- Eccentric
- Exuberant
- Vicious
Crew members
Up to 5 crew members may be assigned to a ship. Only crew members assigned to a ship have an effect on that ship's voyage.
Not all crew types are available to the player at the start of the minigame. Once the player accomplishes certain voyages, or unlocks certain areas, more (and often better) crew types will become available. For example, one of the first additional unlocks is the Cyclops, which is received when the Island of Cyclosis voyage is successfully completed.
The base statistics, costs, and other data for the crew types are listed in the table below.
Do note that if you have a full listing of crew members, you will be unable to recruit more even if one is earned while on a voyage.
For the single-stat crew members, the dominant colour of the icon can be used to tell what type of crew member they are; green is morale, red is combat and blue is seafaring.
| Crew Type | Statistics | Cost To Recruit | Unlock Area or Task |
Inherent Trait(s) | |||||
|---|---|---|---|---|---|---|---|---|---|
| Morale | Combat | Seafaring | Speed | ||||||
Drunk |
70 | 0 | 0 | 0 | - | - | - | The Arc | |
| 0 | 70 | 0 | 0 | - | - | - | The Arc | ||
| File:Smuggler (POP).png Smuggler | 0 | 0 | 70 | 0 | - | - | - | The Arc | |
| 150 | 0 | 0 | 0 | 80 | - | - | The Arc | ||
Pirate |
0 | 150 | 0 | 0 | 80 | - | - | The Arc | |
Fisherman |
0 | 0 | 150 | 0 | 80 | - | - | The Arc | |
| Dwarven Engineer |
0 | 0 | 0 | 400 | 60 | 30 | - | The Arc | |
Shopkeeper |
50 | 0 | 0 | 0 | 60 | 30 | - | The Arc | Merchant (+10%) |
| 60 | 100 | 0 | 0 | 60 | 30 | - | The Arc | Staunch | |
| 50 | 50 | 50 | 0 | 100 | 100 | - | The Arc | Solidarity (+25) | |
| File:Cyclops (Player-owned ports).png Cyclops* | 100 | 150 | 0 | 0 | 300 | 200 | - | Cyclosis | Rallying Cry |
| Morale | Combat | Seafaring | Speed | Area / Task | Trait(s) | ||||
Bannerman |
350 | 0 | 0 | 0 | 250 | - | 80 | The Skull | |
Musketeer |
0 | 350 | 0 | 0 | 250 | - | 80 | The Skull | |
| 0 | 0 | 350 | 0 | 250 | - | 80 | The Skull | ||
Enthusiast |
0 | 0 | 0 | 800 | 100 | - | 120 | The Skull | |
| 0 | 0 | 200 | 0 | 100 | - | 120 | The Skull | Good Fortune | |
Golem |
170 | 200 | 0 | 0 | 100 | - | 120 | The Skull | Staunch |
Overseer |
120 | 120 | 120 | 0 | 400 | - | 300 | The Skull | Solidarity (+50) |
Whalerider* |
0 | 200 | 350 | 0 | 600 | - | 300 | Siren's Shell | Rallying Cry |
| Morale | Combat | Seafaring | Speed | Area / Task | Trait(s) | ||||
Clansman |
500 | 0 | 0 | 0 | 600 | 120 | - | The Hook | |
Clansman |
0 | 500 | 0 | 0 | 600 | 120 | - | The Hook | |
| Storm Riders Clansman |
0 | 0 | 500 | 0 | 600 | 120 | - | The Hook | |
| Fireworks Expert |
0 | 0 | 0 | 1200 | 400 | 160 | - | The Hook | |
| 150 | 0 | 0 | 0 | 400 | 160 | - | The Hook | Merchant (+20%) | |
| 0 | 0 | 300 | 0 | 400 | 160 | - | The Hook | Good Fortune | |
| 250 | 300 | 0 | 0 | 400 | 160 | - | The Hook | Staunch | |
| File:Feral chimera.png Feral Chimera* | 350 | 500 | 0 | 0 | 1200 | 400 | - | Chimera Straits | Rallying Cry |
| Morale | Combat | Seafaring | Speed | Area / Task | Trait(s) | ||||
| 750 | 0 | 0 | 0 | 1000 | - | 140 | The Scythe | ||
| Crows' Nest Sniper |
0 | 750 | 0 | 0 | 1000 | - | 140 | The Scythe | |
| 0 | 0 | 750 | 0 | 1000 | - | 140 | The Scythe | ||
| Explosive Expert |
0 | 0 | 0 | 2000 | 500 | - | 220 | The Scythe | |
| 250 | 0 | 0 | 0 | 500 | - | 220 | The Scythe | Merchant (+25%) | |
Golem |
300 | 500 | 0 | 0 | 500 | - | 220 | The Scythe | Staunch |
| 250 | 250 | 250 | 0 | 1200 | - | 500 | The Scythe | Solidarity (+75) | |
| File:Seawitch.png Sea Witch* | 350 | 0 | 750 | 0 | 2000 | - | 600 | The Winds' Home | Resurrects |
| ? | ? | ? | ? | ? | ? | ? | The Winds' Home | ? | |
.png)
.png)
.png)
* Only 3 of this type at one time
Voyages

After equipping and crewing a ship, players send it out into the Eastern seas to attempt to accomplish a voyage. The length of a voyage varies depending on the distance traveled, difficulty of the voyage, and the combined speed statistics of the ship and crew. The estimated time of arrival (ETA) for each ship on a voyage can be seen by clicking on the vessel or by checking the logbook item while outside the port. With the proper setup, some voyages only take 15 minutes while others last hours.
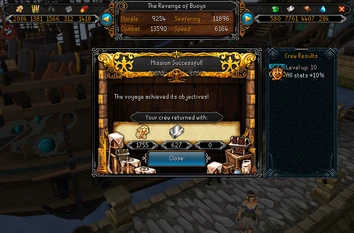
Once a ship has returned, players receive a notification in their chatbox. Players must return to their port to check on the success of the voyage. Voyages can be successful or unsuccessful. Some successful voyages bring back resources such as Chimes, Bamboo, Black Slate, and Jade. Other voyages may bring back trade goods such as Ancient Bones, Spices, Chi, Plate, or Lacquer. Other successful voyages bring adventurers to the port, unlock new islands, or bring back parts of elusive scrolls for high level armour, food, or scrimshaws. A failed voyage does not bring back any reward, although it is still possible to have crew members level up. In addition, failed voyages may result in damage to the ship, loss of a crew member (including the Captain), or both. Equipping a ship with a Lifeboat increases the chance that a crew member lost overboard makes it back to Port.
Standard voyages
Players are given 15 new standard voyages each day. The voyage reroll counter is reset at 00:00 UTC. Rerolls may not be carried over day to day, but any standard voyages left in the three voyage slots do carry over to the next day. A list of the standard voyages can be found on the main page.
A Barmaid's Tip
Once every Thursday you can visit your ports bar and speak with the barmaid to hear some gossip about a standard voyage with increased rewards. This voyage will take the place of the third slot in the standard voyage interface. If there was a voyage already in that slot, it cannot be recovered. The missions you can receive are as follows:
| Difficulty | Morale | Combat | Seafaring | Rewards |
|---|---|---|---|---|
| Template:Voyage difficulty | 800 | 800 | 800 | 300 250 |
| Template:Voyage difficulty | 2000 | 2000 | 2000 | 700 350 File:Gunpowder (Player-owned ports).png |
| Template:Voyage difficulty | 3500 | 3500 | 3500 |
1200 |
| Template:Voyage difficulty | 5000 | 5000 | 5000 |
1400 |
.png)
Note: This does not seem to be a guaranteed event, even though the game specifically says to talk to the barmaid on Thursday. Some players have reported she has nothing to tell them, even if the last time they talked to her was the previous Thursday. It is currently unconfirmed as to exactly what circumstances can cause you to "miss" this weekly event.
Special voyages
Special Voyages require the "assistance" of one of six potential "Visiting Adventurers" that may appear daily in port and show in the "Visitors" dropdown interface. The various Adventurers are only available if the player's skill is 90+ in the same proficiency as their own, and their appearance that day is still not a guaranteed event even so. For example, the Missionary requires a 90+ in Prayer before he will randomly make an appearance, and the Biologist requires 90+ in Herblore. Adventurers can be attracted more often by building the appropriate Icons via the Building Upgrade interface. However only 3 icons can be made at one time, so a choice must be made as to which three are most important, should the player choose to build the icon(s).
A list of the names of the special voyages and type of reward:
| Title | Character | Skill |
|---|---|---|
| Meet the Missionary Go Among the Heathens Spreading the Word Voices Raised in Lamentation The Divine Claim A Divine Lesson |
The Missionary | |
| Meet the Convict A Bank Heist A Place Called Respite Brushing Up on Old Cons Return Mail |
The Convict | |
| Meet the Biologist A Fine Expedition Documentary Evidence Specimens In The Wild Studying Science |
The Biologist | |
| Meet the Assassin A Daring Raid To Gain Through Death A Jade Frog in the Throat The Death Lotus Honing her Craft |
The Assassin | |
|
Meet the Whaler |
The Whaler | |
|
Meet the Occultist |
The Occultist | |
| A Joint Acquisition A Joint Effort |
The Biologist and The Whaler | |
| A Joint Acquisition A Joint Effort |
The Assassin and The Convict | |
| A Joint Acquisition A Joint Effort |
The Missionary and The Occultist |
Another type of special voyage is called "The Forgotten Scrolls." Successful completion of this voyage rewards the player with one segment of an Eastern Scroll. This special voyage can appear on the mission list with any of the six adventurers. Players can change which scroll segment will be awarded by selecting the sought scroll in the Port Management menu. Even when the voyage is already on the mission list, players are able to modify the scroll piece awarded upon the successful completion of the journey. However, once a ship has been sent off to the scroll-awarding voyage, changing the sought scroll in the Port Management menu will NOT change the reward. Players need to make sure to select the desired scroll before starting the journey.
Sometimes the same adventurer will be required by multiple special voyages. Players can only send each adventurer out once per day. This means that the player may only complete one of the the voyages that require the same adventurer. For example, if you choose to take one voyage with the Biologist which gives resource rewards, any other voyage that requires the Biologist will disappear from the list of possible voyages. As such, players need to prioritize between the potential gain of resources, a scroll piece, or furthering a storyline, as well as take into account the disparity between the requirements of these special voyages in order to find out the most desirable one.
It appears there is one story voyage for each region, after which you will no longer receive story voyages while exploring that region. Also for example if you had The Missionary in your port who has a Skull region resource voyage and you then unlock the Hook region he will retain the Skull resource voyage however he will also have the Hook story voyage.
The list of special voyages is refreshed daily at first login after 00:00 UTC.
Regions
Error: Image is invalid or non-existent.
Players begin with only The Arc unlocked. Progress toward unlocking additional regions advances as your ships undertake voyages, logging more distance traveled. Distance is traveled and progress is made regardless of the success or failure of a voyage.
Each region unlocked is progressively further away than the last. For example, to unlock the Skull region, a distance of 5,000 must be traveled; however, to unlock the Hook region, a distance of 40,000 must be traveled. The Captain's log, given by navigator Duncan, shows your total distance traveled on the Port statistics page.
As each additional region unlocked is farther from the port, their voyages have higher requirements for success and longer voyage times, but give better resources to reward success. Unlocking a region also unlocks new crew members from that region, with better base stats to help overcome the higher adversity.
| Region | Total Distance to Region |
Distance to next |
Distance per voyage[1] |
Voyages to unlock next[2] |
Voyages time with 0 speed[3] |
Voyages time with max speed |
|---|---|---|---|---|---|---|
| The Arc | - | 5,000 | 175-325 | 16-28 | 35 min | 26 min |
| The Skull | 5,000 | 35,000 | 520-600[4] | 59-67 | 71 min | 53 min |
| The Hook | 40,000 | 100,000 | 840-960[5] | 104-119 | 142 min | 106 min |
| The Scythe | 140,000 | 230,000 | 1020-1205 | 190-225 | 284 min | 213 min |
| The Bowl | 370,000 | 490,000 | ? | ? | ? | ? |
| The Pincers | 880,000 | - | ? | ? | ? | ? |
Strategies
In the early stages, focus on completing every voyage successfully. Because there are a limited amount of standard and special voyages per day, it's more important to complete the voyages that pose the least risk first, before attempting higher risk voyages later in the day. In other words, maximize your success rates for the voyages you can manage (90% or more success rate) and leave others until more upgrades are acquired or until crew members level up from easier voyages. You should try to always have 3 or less voyages remaining before the port resets to ensure you do not lose any voyages. If you have no voyages left which you can get over 50-60% it is better to send out expendable crewmembers than to lose a voyage because a failed voyage still progresses your exploration to unlock new areas. In some cases, a failed voyage could also mean the death of a potentially skilled and valuable crew member, which is why it is not recommended to send you best guys on a voyage with less than 50% success. Also a failed voyage can result in expensive and time-consuming damage to your ship, the black marketeer can fix your ship without you having to wait the required time but for a hefty price. As of this time, rerolling voyages is never a good idea as it will take away from your total voyages for the day.
Increasing voyage success rate means using the right combination of crew member and ship upgrades. Voyages require 1 or more of the following stats: Morale, Seafaring, or Combat. Using crew members, ship upgrades, or items that affect those stats will increase the success rate.
Crew members are particularly important for the success of a voyage. In general, the strongest skill of basic crew members can be identified easily by looking at the color of their bandana. Red bandanas indicate a crew member with mainly combat stats, blue bandanas indicate seafaring, and green bandanas indicate morale. Using a Brimhaven Pirate with only 150 Combat won't increase the success rate of a voyage which requires Morale. However, if success rate is adequate, even without a full crew, it still may be beneficial to include additional crew members to fill the voyage. Any crew member that is part of a successful voyage gains experience and can level up, increasing their stats. Those bolstered stats can improve the success rate on future voyages, so it's useful to try to level up your crew members whenever possible. In order to maximize crew experience it is best to try and focus on better crew members quickly, it is more effective to have a level 3 catherby fisherman with 200 seafaring than a level 3 smuggler with 100.
Ship upgrades are also particularly important for the success of a voyage, especially because any upgrade unlocked can be used on any ship you own on all future voyages. Five upgrades can be applied to the ship, but one (the rudder) doesn't directly affect the success rate. It is recommended to change what you have on your ship first to meet the mission requirements, then change your crewmembers.
Certain effects can also bolster ship stats on a voyage temporarily. These can be earned through random events in the port, which can occur after checking the status of a returning voyage.
Voyages to further portions of the east may take more time, but in time you'll be able to manage 3 or 4 ships to speed up the rate you complete your daily voyages. Rudder upgrades, captains that specialize in speed (at the cost of specializing in a main attribute) and some varieties of crewmen can also improve voyage speed.
One should decide about the voyages that are given. Arc voyages take 21 minutes (without any speed boosts). Skull voyages take 1 hour extra, and Hook voyages take 2 hours extra. If one is needing resources quickly, and have just hired new crew members (like replacing your whole crew with Pincer region crewmembers), they should level up quickly by doing Skull or Hook missions to level up before taking on any special, Bowl, Scythe or Pincer missions. This means you should have a few ships concentrating on the high level missions (as a Pincer region voyage can take up to 6 hours 21 mins to complete), and a few ships concentrating on the low/moderate level missions for some extra resources when the need arrives.
Resources are also an important pick for your port. You will want a large amount of chimes, bamboo and slate to make your port up-to-date. Chimes are used for upgrading the warehouse, which will result in extra resources from a successful voyage. You will need a good amount of bamboo and slate to upgrade the office (which results in more voyages, thus meaning higher resource rate), bar (for a better captain), or workshop (to create the Player-owned-port armors). After that, you should aim on increasing your supply of resources (bamboo is needed if the ship's crew mutinies, as this results in a loss of some bamboo for repairs)
It's a good idea to remember to change the region your focusing on to the highest available region before a reset if it is not already there. This is because the black marketeer will sell resources from the region you're focusing on or lower regions. I.E. If your highest region is the Scythe region, but you set your focus on the Skull region and didn't change it back before the reset, then the black marketeer will only have either gun powder, bamboo or chimes. If you set it to the Scythe region before the reset he will have either cherry wood, black slate, gun powder, bamboo or chimes.
Rewards
Among the range of rewards available from player-owned ports are degradable level 85 armours: Tetsu armour, which is melee class; Death Lotus armour, which is ranged class; and Sea singer's robes, which are magic class. These items can be created by players with 90 Smithing, Crafting, and Runecrafting respectively (non-assistable, unboostable, and the materials are untradeable). Players can create two versions of this armour: tradeable versions with slightly lower stats that crumble to dust when fully degraded, and untradeable versions with slightly higher stats that can be repaired either with coins or port resources. Other available rewards include the high level food rocktail soup, and scrimshaws, which are items for the new pocket slot. These rewards require the player's ships to retrieve 4 pieces of a scroll relating to each item for the player to be able to produce them. Once a scroll is completed, the parts for that scroll are removed from the possible finds for that player.
Titles
Titles are unlocked by increasing your Port Score, found in your captain's log. The titles are found under Descriptions in the Titles section of the Customization screen. In the Captain's Log, the First Mate title is referenced as First Officer. This is likely an error in the Captain's Log.
- [Name] the Cabin Boy/Girl (1-399)
- Bo'sun [Name] (400-799)
- First Mate [Name] (800-1199)
- Cap'n [Name] (1200-1599)
- Commodore [Name] (1600-1999)
- Admiral [Name] (2000-2400)
Increasing Port Score
- Every 5k Distance traveled +1 score
- Scroll pieces found +3 score
- Upgrading Ship Part +5 score
- Upgrading Port +10 score
- Story missions done +20 score
- Adventurers met +50 score
Armour
Tetsu armour
| 0 Pieces | 1 Piece | 2 Pieces | 3 Pieces | 4 Pieces |
|---|---|---|---|---|
![]() Tetsu helm (Superior)
Tetsu helm (Superior)
![]() Tetsu laminar (Superior)
Tetsu laminar (Superior)
File:Tetsu legs.png Tetsu legplates (Superior)
Sea singer's robes
| 0 Pieces | 1 Piece | 2 Pieces | 3 Pieces | 4 Pieces |
|---|---|---|---|---|
File:Sea singer's headband.png Sea singer's headband (Superior)
File:Sea singer's robe top.png Sea singer's robe top (Superior)
File:Sea singer's robe bottom.png Sea singer's robe bottom (Superior)
Death lotus armour
| 0 Pieces | 1 Piece | 2 Pieces | 3 Pieces | 4 Pieces |
|---|---|---|---|---|
![]() Death lotus hood (Superior)
Death lotus hood (Superior)
![]() Death lotus chestplate (Superior)
Death lotus chestplate (Superior)
![]() Death lotus chaps (Superior)
Death lotus chaps (Superior)
Scrimshaws
| 0 Pieces | 1 Piece | 2 Pieces | 3 Pieces | 4 Pieces |
|---|---|---|---|---|
| Item | Version | |
|---|---|---|
| File:Log-splitting Scrimshaw.png Log-splitting scrimshaw | Inferior | Superior |
| File:Rock-crushing Scrimshaw.png Rock-crushing Scrimshaw | Inferior | Superior |
| File:Tree-shaking Scrimshaw.png Tree-shaking Scrimshaw | Inferior | Superior |
| File:Gem-finding Scrimshaw.png Gem-finding Scrimshaw | Inferior | Superior |
| File:Scrimshaw of Vampyrism.png Scrimshaw of Vampyrism | Inferior | Superior |
| File:Scrimshaw of Strength.png Scrimshaw of Strength | Inferior | Superior |
| File:Scrimshaw of the Elements.png Scrimshaw of the Elements | Inferior | Superior |
| File:Scrimshaw of Magic.png Scrimshaw of Magic | Inferior | Superior |
| File:Scrimshaw of Cruelty.png Scrimshaw of Cruelty | Inferior | Superior |
| File:Scrimshaw of Ranging.png Scrimshaw of Ranging | Inferior | Superior |
Recipe Scrolls
| 0 Pieces | 1 Piece | 2 Pieces | 3 Pieces | 4 Pieces |
|---|---|---|---|---|
 Rocktail soup
- Shark soup (unreleased)
While Shark soup is present on the item list of the Grand Exchange, and despite the fact that it was introduced in the same update, it is currently unable to be cooked at any known location in RuneScape - the stoves in the Workshop constructed within the port only offer the ability to prepare Rocktail soup. There are several hints present that would seem to indicate that Shark soup is merely a remnant of previous development stages and is not intended to be available at this time: unlike all the rest of the new craftable items, it can not be created as of yet; the Shark soup heals less life points than its presumed ingredient, a Shark; and finally, its starting price on the Grand Exchange was only 1 coin as opposed to Rocktail soup, which appeared first with a value of 5000 coins. Therefore, it is assumed that should Shark soup ever be properly released, its properties will be at least somewhat reworked.
Trade Goods
These trade goods are components for completing or assembling the items described in the scrolls, much as Herblore uses components in potions. The player's current supply of these items is shown under the "Resources" drop down menu at the top of the screen while in port.
- Ancient bones - used for creation of Scrimshaws
- Plate - used for creation of Tetsu armour.
- Spices - used for creation of Rocktail soup and Shark soup.
- Lacquer - used for creation of Death lotus armour.
- Chi - used for creation of Sea singer's robes.
Experience
When a player receives a special voyage with the reward of experience listed, the player will receive experience in the skill associated with whichever adventurer is connected to that voyage.
- The Missionary - Prayer
- The Convict - Thieving
- The Biologist - Herblore
- The Assassin - Slayer
- The Whaler - Fishing
- The Occultist - Runecrafting
Ship Updates
Whilst on a voyage, you may occasionally receive random updates about your ship, which do not impact on your ships voyage in any way. These include random observations, notices, etc.
Gallery
")
")
")
")
")
")
")
")
Music Unlocked
- Sea Folk - When you enter the port for the first time.
- Sea Hear - When you enter the port for the first time.
- Sea You Late Oar - When you enter the port for the first time.
- Shanty Instrumental - When you enter the port for the first time.
- Stick Your Oar In - When you enter the port for the first time.
- Stick Your Ale In - Walk north from the portal entrace and go near the bar.
Trivia
- Even if the player does not own the port, if the player examines any port staff then "The lifeblood of your port" message will appear.
- Many places and items are named after an ancient Greek epic poem named The Odyssey, including the added effect "bag of winds", which likely came from the bag given by Aeolus, the god of winds, to help with the voyage.
- The Chinese word in the top left of the Archipelago map is "端口" (duānkǒu) which is the wrong translation of port. Duānkǒu refers to a computer port or interface. The correct translation should be "港口" (gǎngkǒu), this may be one of Jagex's notorious plays on words.
- The Chinese word in the bottom left of the Archipelago map is "指南針" (zhǐnánzhēn), meaning compass.
- When attempting to drop an item at the port, players receive an in-game message saying "The Port Sarim Private Docks Authority thanks you for not littering." However, dismissing a familiar carrying items will still result in the items being dropped on the ground.
- When attempting to burn logs at the port, players receive an in-game message saying: "Port Sarim safety regulations forbid the dumping, abandoning or burning of flammable materials on the dockside."
- The islands: "Isle of Juniper", "The Islands That Reflect the Moon", "Haranu" and "Tokoko" resemble the country of New Zealand, twice, one sideways and the other upside down.
- Many of the islands also resemble the Hawaiian islands.
- Sailor's flavor text may read "Seventh child of a seventh child." This may be a reference to the folk belief, around since the Middle Ages, that the seventh son of a seventh son is born with tremendous magical and/or healing powers.
- Several of the island names and descriptions are references to characters from the show My Little Pony: Friendship is Magic
- Shuma the whale, the subject of The Whaler's pursuits, is a reference to the famous orca Shamu, whose name is used as the title of the SeaWorld orca shows.
- "The" does not appear if used in your ship name during an update.
- The ship's update message 'Your ship (ship name) has sighted strange pylons. The crew are attempting to construct an additional one.' is a reference to the video game 'Starcraft'. In Starcraft the race known as 'The Protoss' have to construct buildings known as 'pylons' to be able to support more units. When trying to train a unit without enough of these pylons, the game gives you the message 'You must construct additional pylons'.
- The ship's update message 'Your ship (ship name) was painted in rainbow colours and is now 20% cooler.' is a reference to the character Rainbow Dash from the show My Little Pony: Friendship is Magic.
- The ship's update message "A crew member of (ship's name) shot an albatross. Bad move." is a reference to the poem "The Rime of the Ancient Mariner", in which the an albatross is shot down causing the entire crew to perish but the one that shot it.
- Rocktail Soup (a reward which players can unlock via the minigame) requires 90 cooking, however the ingredient Rocktail requires 93 cooking.
- Some voyages have a requirement of 9001, a reference to a popular Dragon Ball Z meme. This reference has already been used before with the Ferret of Doom.