| ||||||||||||||||||||||||||||||||||||||||||||||||
| Also called | QBD | |||||||||||||||||||||||||||||||||||||||||||||||
|---|---|---|---|---|---|---|---|---|---|---|---|---|---|---|---|---|---|---|---|---|---|---|---|---|---|---|---|---|---|---|---|---|---|---|---|---|---|---|---|---|---|---|---|---|---|---|---|---|
| Release date | 22 May 2012 (Update) | |||||||||||||||||||||||||||||||||||||||||||||||
| Members | Yes | |||||||||||||||||||||||||||||||||||||||||||||||
| Combat level | 2100 | |||||||||||||||||||||||||||||||||||||||||||||||
| XP per kill | Unknown edit | |||||||||||||||||||||||||||||||||||||||||||||||
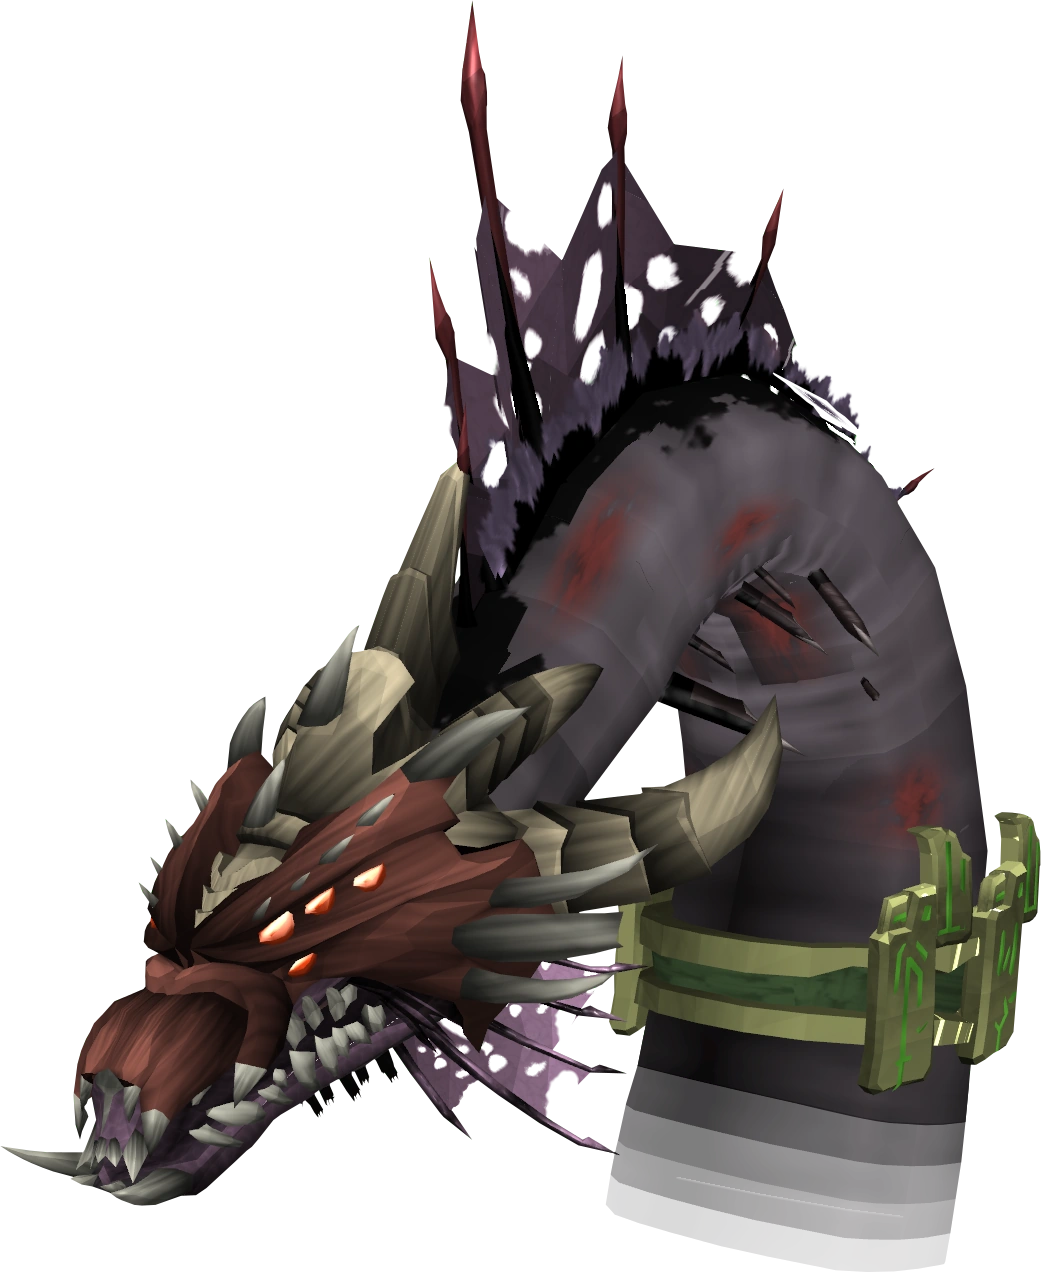
| Examine text | Worms burrow through her rotting flesh. | |||||||||||||||||||||||||||||||||||||||||||||||
| ||||||||||||||||||||||||||||||||||||||||||||||||

The Queen Black Dragon is the largest and most dangerous monster in all of RuneScape. She is the boss of the Grotworm Lair, and the highest-levelled monster in-game, surpassing the previous record holder Nex. She is the first dragon ever created, which was done by Kerapac the Dragonkin, as told by the journals that can be obtained after defeating her. The Queen is fought in an instance, and therefore can only be soloed. Defeating her requires very high combat skills and quick reflexes, and slaying her is one of the hardest challenges in the game. She is so powerful that she cannot actually be killed, only put back to sleep again.
Travel
She can be accessed by an underground cave just north of Rimmington next to the White Knight Camp. You do not need to finish or even start Song from the Depths to enter the Grotworm Lair in which she resides, but the quest will give advantages when encountering the dragon. There are a few means of travel to get to the lair:
- Remora's necklace, which teleports you in the White Knight Camp once a day.
- Port Sarim lodestone, which teleports you just east of the White Knight Camp free and unlimited.
- Rimmington teleport tablet, which teleports you next to the Rimmington house portal.
Lore
The Queen Black Dragon is the egg mentioned in the First dragonkin journal. The egg was created by Kerapac in an experiment which tried to create a new type of dragonkin that would not be cursed to feel pain whenever the Stone of Jas was used by False Users.
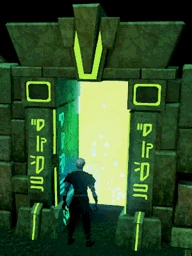
A player entering the Summoning portal at the end of the Grotworm Lair.
The second dragonkin journal describes the time after she hatched. Kerapac noted she was intelligent and possessed many of the powers a dragonkin does like breathing fire, as well as inheriting his magical powers. However, he noted her size limited her ability to use these powers. He considered whether breeding smaller offspring could circumvent this problem.
The third dragonkin journal tells of other dragonkin attempting similar experiments, one resulting in the creation of the King Black Dragon. Despite him being a significantly weaker version, Kerapac attempts to use them for breeding.
These offspring were deemed to be an abject failure. The fourth journal describes them as "broken" and "bestial". Kerapac released the King Black Dragon into the wilds (A.K.A. set free, not the wilderness as it could be taken to mean). This is backed up by how there were Dragon riders in Zaros' army, suggesting dragons existed in the second age, or prior to then. The wilderness was created during the God Wars, by the relentless battles over the fertile heart of the fallen Zarosian empire. The Queen was stored deep underground, restrained by various artifacts designed to protect her and also imprison her.
Habitat
The Queen Black Dragon resides in the lowest level of the Grotworm Lair. To reach her, enter the caves and slide down the worm burrow shortcut on the first level, requiring 50 Agility. This will take you to the bottom level of the lair. Players without 50 Agility can traverse the three levels of the cave, reaching the bottom.
There is a portal to the heart of the caves, leading to the Queen. It requires 60 Summoning to enter. Once inside, there is no exit – the only way to leave is through teleportation, death or triumph. You will end up in a partially submerged arena, with the dragon sleeping. Once she wakes up, the battle begins.
Combat
The Queen Black Dragon has 8 types of attacks that she uses throughout the fight. They are:
Attack Type Breakdown
Melee attack
- The Queen Black Dragon will use this technique if the player stands anywhere closer than one square north of middle artefact.
- It is an accurate bite attack that can damage up to 475 lifepoints.
- Players are advised to wear strong melee gear if they wish to stand anywhere closer than the first artefact.
- This attack can be completely avoided by using melee Deflect/Protection prayers.
Ranged Attack
- The Queen Black Dragon uses this technique on a player anywhere on the field, including melee range.
- It is a sweeping attack that she does with her head that is accurate and can hit in the high 300s.
- Ranged Deflect/Protection prayers completely negate the attack.
Standard Dragon Breath
The Queen Black Dragon has a dragon breath that even super antifires with a Dragonfire shield/anti-dragon shield cannot block. It will hit through both of them and deal damage in the low 200s every time she uses it. Warning: The dragonfire can easily hit 700 to 900 or more if no dragonfire protection is used.
Super Dragon Breath
The Queen Black Dragon will use this technique as a last ditch attempt to kill the player in phase 4. Like the standard dragon breath she uses, it is so hot that even super antifires with a dragonfire shield/anti-dragon shield cannot block it. The Queen Black Dragon will aim the attack at the center of the field and the closer the player is to the epicentre of the attack, the more damage it will deal per tick. The only way to avoid this is to run to the corners of the field.
Fire Wave


The fire wall attack.
The Queen Black Dragon has an attack reminiscent of the one used by Char during The Firemaker's Curse quest. When she is about to use this attack, the chat box will display "The Queen Black Dragon takes a huge breath" in orange. It is a slow moving attack that will move towards the player in a linear fashion. If caught within the licking walls of flames, players will be damaged for rapid low 200s per game tick. There is a pattern to this attack and when she uses it, holes will always appear in one of the 3 types of fire waves she uses. Players are advised to stand close to the centre when the dialogue appears, specifically to the left of the central dragonkin artefact as that is where one fire wave may fail to pass through.
The field has a platform of 19 squares and:
- Type 1 will pass through on the 15th or the 5th square from the right
- Type 2 will pass through on the 9th or 1st square to the left of the centre artefact and
- Type 3 will pass through on the 5th square.
She will cycle between these waves so a player may predict where the next gap will be.
Summoning
The Queen Black Dragon will summon level 147 tortured souls. She begins using this technique during phase 2. When she is about to use this attack, the chat box will display "The Queen Black Dragon releases one of its captured souls" in purple. On first summon, the souls will appear one square west of the player. After which, the soul will cast a spell one square east of the player which will move every game tick until it hits the player. If hit by the spell, it will hit the player for a random damage between 200-500 damage. This attack can be avoided by waiting a second after the soul appears on screen and running through the soul. The attack will continue following the player and hit the soul instead of the player, dealing its max hit on the soul at 500 damage. Other than the spell, the summoned souls will attack with a melee attack when in range that is inaccurate. The souls have a very slow moving speed and are weak to slashing attacks, so the special attack of dragon claws will prove to be effective in dispatching them.
Time Stop
The Queen Black Dragon does not use this technique herself but rather through the tortured souls she summons. This attack happens if players do not kill the souls quick enough. One of the souls will then teleport to a corner of the field and start chanting the incantations. If the soul is not killed by the time the spell completes in 10 seconds, the screen will turn green and players will be unable to move, heal or attack. The summoned souls will also freeze during this duration while the Queen Black Dragon will attack as usual. The effect lasts for approximately 7 seconds and when it's over, the player will take whatever damage was done during the freeze in one tick. There is no way to cancel out of this effect, but killing the soul does prevent the spell from happening.
Grotworms
The Queen Black Dragon will cough up level 123 giant grotworms at the end of each phase. She will not stop coughing up the worms until the player has activated the correct artefact on the field. The worms become larger as the more phases the player takes down. These worms can hit accurate 200s if not protected against as with the ones present in the slayer caves. Their magic attacks can be completely avoided with deflection/protection prayers. Some of the worms may not become aggressive towards you. It is unknown whether or not this is a glitch. It is advised to ignore all worms that are not attacking you.
Crystal Armour
Occasionally the Queen Black Dragon will turn to a crystal form, at which time she will become more resilient against magic attacks, but significantly weaker to melee and ranged attacks.
Hardened Carapace
Sometimes the Queen Black Dragon will harden her carapace, making her more resistent to melee and ranged attacks but weaker against magic attacks.
Phase One
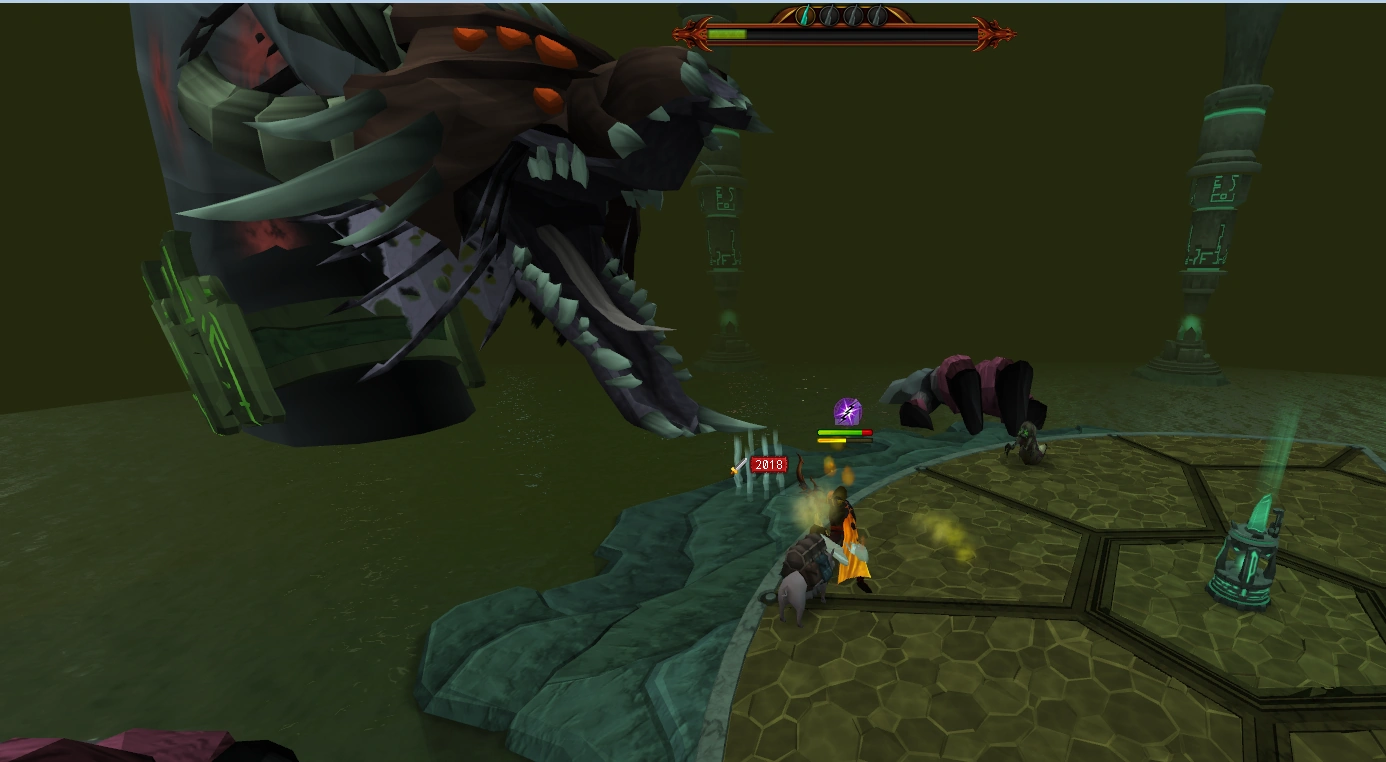
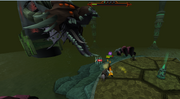
Fighting the deadly Queen Black Dragon
The Queen Black Dragon is fought in four phases. During the first phase, she will attack with melee (if you are within her attack range), Ranged, and Dragonfire. Be aware that this dragonfire attack can hit 700 or higher, so the use of antifire or super antifire potions are a necessity. She will also use a special fire wall attack (shown in the chat box with an orange message). You must pass through the gap in the flames to avoid damage. If this attack does hit, it will hit in the low 200s, dealing damage twice if it passes over you. Running through it may deal damage once, or, timed luckily, may not deal damage at all. In future phases, with multiple waves of flame, reaching a faraway gap may be difficult and running directly through the flames may be a better alternative to taking many hits upon failing to reach the gap. When the health bar for the first stage reaches zero, the Queen will start coughing up level 123 giant grotworms. Touch the dragonkin artefact in the centre of the platform to stop these from appearing. These can hit fairly hard with magic, so it is advised to dispatch them quickly. Avoid letting too many Grotworms spawn by activating the artefact as quickly as possible after depleting the Queen's health bar.
Phase Two
During the second phase, the Queen will summon a level 147 tortured soul to attack. They will use an avoidable attack that hits about 200 every time, and then attack with melee. Kill the tortured souls, and then attack the Queen. During this phase, the fire wall special attack will cause two consecutive walls of fire to appear, instead of just one. When the Queen's lifebar runs out, she will cough up more worms. A quick player can touch the second artefact, which is on the left side of the chamber, while only allowing about two giant worms to spawn.
It is possible, when tortured souls have been spawned, to run through them and make them hurt themselves. To do this, remember that they will always teleport right before doing their special attack, at this time you should run through them, and the special attack will hit the tortured soul and not you. This takes some practice, but does save you a lot of time, because in the fourth wave it is possible to use the souls' special attacks to kill one of the four spawned souls in one hit.
Phase Three
The third phase is similar to the second. However, the Queen will summon two tortured souls instead of one, and there will be three fire waves, instead of two. Once her lifebar reaches zero for the third time, touch the artefact on the right side as quickly as possible.
Phase Four
The fourth phase is by far the most dangerous. She will summon four tortured souls at once to begin the wave. One of these souls will teleport to a corner of the room, and a short phrase will appear over its head. Kill this soul as quickly as possible or it will freeze time. During the time stop, you will be unable to eat, attack or move. However, all other monsters will be able to function normally. The time stop attack lasts for 7 seconds and nearly guarantees death unless you start with very high life points. If you are unable to kill this tortured soul in time, drink Saradomin brews up to your maximum health and hope for low hits. The Queen has one final attack - an extra strong fire attack. When the Queen uses this attack, move out of its way as quickly as possible. As with other waves, she has a fire wave attack, but it will still only have three waves. Once the Queen's lifebar has been depleted for the last time, touch the final artefact. Stairs will descend from the artefact, taking you to the rewards room.
Strategy
Rewards
After restoring the enchantment and returning the Queen to her slumber, you may enter a rewards room with a Dragonkin coffer containing your spoils. Four or more different rewards are received at once.
100% drop
|}- ^ The First dragonkin journal is always received only on the first kill of the queen black dragon.
Books
| Item | Quantity | Rarity | GE price | |
|---|---|---|---|---|
| Dragon bones | 5 | Always | 10,680 | |
| Royal dragonhide | 2–4 | Always | 8,664–17,328 | |
| Royal bolts | 50–100 | Always | 5,300–10,600 | |
| First dragonkin journal | 1 | Always[1] | Not sold |
|}
Weapons and armour
| Item | Quantity | Rarity | GE price | |
|---|---|---|---|---|
| Second dragonkin journal | 1 | Common[1] | Not sold | |
| Third dragonkin journal | 1 | Uncommon[1] | Not sold | |
| Fourth dragonkin journal | 1 | Rare[1] | Not sold |
|}
Runes and arrows
| Item | Quantity | Rarity | GE price | |
|---|---|---|---|---|
| Dragon helm | 1 | Uncommon | 58,601 | |
| Dragon longsword | 1 | Uncommon | 56,212 | |
| Dragon dagger | 1 | Uncommon | 16,952 | |
| Dragon spear | 1 | Rare | 35,861 | |
| Dragon kiteshield | 1 | Rare | 351,414 |
|}
Ores and seeds
| Item | Quantity | Rarity | GE price | |
|---|---|---|---|---|
| Death rune | 500 | Uncommon | 116,000 | |
| Blood rune | 500 | Uncommon | 339,000 | |
| Soul rune | 20–100 | Rare | 26,900–134,500 | |
| Pure essence | 1,480; 3,500 | Rare | 44,400–105,000 |
|}
Other drops
| Item | Quantity | Rarity | GE price | |
|---|---|---|---|---|
| Coal | 300–580 | Uncommon | 33,600–64,960 | |
| Adamantite ore | 50; 172 | Uncommon | 11,350–39,044 | |
| Runite ore | 30; 100 | Rare | 42,570–141,900 | |
| Magic seed | 1 | Rare | 52,464 | |
| Snapdragon seed | 5 | Rare | 1,465 | |
| Watermelon seed | 3 | Rare | 10,770 | |
| Torstol seed | 1 | Rare | 540 |
|}
Gallery
")
")
")
")
")
")
")
")
")
See Also
- King Black Dragon
- Kalphite King
- Grotworm
- Grotworm Lair
- Dragon (race)
- Dragon kiteshield
- Song from the Depths
- Royal Crossbow
Trivia
- According to the May Behind the Scenes article, the Queen Black Dragon was to be so big that 5 King Black Dragons can fit in her mouth alone; however, she isn't quite that big in the concept art, or in the encounters.
- The Queen Black Dragon is the sixth non-quest boss monster that requires a skill level to fight. The first five were the God Wars Dungeon bosses.
- The platform upon which the Queen Black Dragon is fought is the Stone of Jas half of the Dragonkin emblem, who are responsible for the creation of the Queen Black Dragon, as well as all of the other species of dragons across Runescape.
- There was a glitch upon release that users were unable to loot their graves; this was patched straight away.
- Upon dying at the fight with her, your grave would randomly appear outside the Grotworm Lair, in the White Knight camp.
- The highest possible hit on the Queen Black Dragon is 1000, similar to Nex and the Corporal Beast's damage reduction.
- If a player ranges her, the ammo will be near the dragon, right outside the arena boundaries. It can still be picked up, however.
- She is the only boss that does not drop anything upon death; instead, loot is received from the chest.
- The Queen Black Dragon's mother may have been a Wyrm. In the Dragonkin Journals, it states that her egg came from a giant water reptile. However Kerapac's magic and lifeblood turned her into a dragon.
- Apparently, when a familiar lands a hit right after you put her back to sleep, her head dissappears and becomes regular bones. This is similar to when a familiar hits any enemy that creates a separate NPC upon being defeated, such as the swamp snakes in Temple Trekking, or Nomad during his last piece of dialogue in Nomad's Requiem.
- This boss was revealed at the Runefest 2011 Future Updates session by Mod Mark. The Kalphite King was the other boss planned alongside the Queen Black Dragon.
- Dragonfire from the Dragonfire shield can damage her, making her the only dragon that is affected by dragonfire other than metal dragons. It is currently unknown if this is intentional or a glitch.
- The Queen Black Dragon is missing scales from her paws. The way they are present in the front but not in the back suggests that they were removed by water friction.
| Item | Quantity | Rarity | GE price | |
|---|---|---|---|---|
| Rocktail | 1–10 | Common | 4,690–46,900 | |
| Saradomin brew (2) | 1–10 | Common | 9,136–91,360 | |
| Super restore (2) | 1–10 | Uncommon | 1,122–11,220 | |
| Coins | 200–3,000; 0 | Uncommon | 0–3,000 | |
| Magic logs | 90–120 | Uncommon | 34,200–45,600 | |
| Yew logs | 150–500 | Uncommon | 25,050–83,500 | |
| Onyx bolt tips | 30 | Uncommon | 213,210 | |
| Uncut dragonstone | 1–9 | Uncommon | 12,077–108,693 | |
| Shield left half | 1 | Rare | 64,399 | |
| Raw swordfish | 200 | Rare | 68,200 | |
| Grimy lantadyme | 50 | Rare | 377,550 | |
| Grimy torstol | 10 | Rare | 53,890 | |
| Royal torsion spring | 1 | Rare | 90,606 | |
| Royal sight | 1 | Rare | 88,741 | |
| Royal frame | 1 | Rare | 89,215 | |
| Royal bolt stabiliser | 1 | Rare | 89,022 | |
| Dragonbone upgrade kit | 1 | Very rare | 18,629 | |
| Draconic visage | 1 | Very rare | 1,187,911 |
| Preceded by | Title | Succeeded by |
| Nex | Strongest attackable monster in RuneScape | Incumbent |
Draconic races | |
|---|---|
| Dragons | |
| Wyverns |
|
| Other |
|
| Player-owned house |
|
| Player-owned farm |
|
| Individuals |
|
| Pets |
|