m (→Reward: details) Tag: sourceedit |
m (cleanup) |
||
| (42 intermediate revisions by 34 users not shown) | |||
| Line 1: | Line 1: | ||
| + | {{External|os=Rag and Bone Man II}} |
||
| − | {{2007 page}} |
||
{{Redirect|Wish list|the wish list from Fur 'n' Seek|Fur 'n' Seek/Wish list}} |
{{Redirect|Wish list|the wish list from Fur 'n' Seek|Fur 'n' Seek/Wish list}} |
||
'''Rag and Bone Man wish list''' is a miniquest during which the player has to find additional bones for the [[Odd Old Man]]. |
'''Rag and Bone Man wish list''' is a miniquest during which the player has to find additional bones for the [[Odd Old Man]]. |
||
| Line 6: | Line 6: | ||
{{Quest details |
{{Quest details |
||
|start = Talk to the Odd Old Man again. |
|start = Talk to the Odd Old Man again. |
||
| − | |length = Very |
+ | |length = Very Long |
|members = Yes |
|members = Yes |
||
| + | |difficulty = None |
||
| − | |requirements = |
+ | |requirements = |
{{Questreq|Rag and Bone Man/Wish list}} |
{{Questreq|Rag and Bone Man/Wish list}} |
||
* Completed [[The Fremennik Trials]], [[Horror from the Deep]] and [[Waterfall Quest]] (optional) |
* Completed [[The Fremennik Trials]], [[Horror from the Deep]] and [[Waterfall Quest]] (optional) |
||
{{Skillreq|Slayer|40}} |
{{Skillreq|Slayer|40}} |
||
* The ability to kill several high-level monsters |
* The ability to kill several high-level monsters |
||
| − | |items = |
+ | |items = |
* A few more [[Coins]] |
* A few more [[Coins]] |
||
| − | * Few [[empty pot |
+ | * Few [[empty pot]]s |
| − | * 27 sets of [[logs]] (Can be obtained on the path just below the [[Odd old man]]'s hut if you have a hatchet in your |
+ | * 27 sets of [[logs]] (Can be obtained on the path just below the [[Odd old man]]'s hut if you have a hatchet in your tool belt) |
* [[Dusty key]] |
* [[Dusty key]] |
||
| − | * [[Dramen staff |
+ | * [[Dramen staff]] or [[Lunar staff]] would be an advantage for using fairy rings. (Not needed if Fairy Tale III has been completed) |
* Combat gear to kill [[Zogre]]s (an ogre composite bow with brutal arrows is advised) |
* Combat gear to kill [[Zogre]]s (an ogre composite bow with brutal arrows is advised) |
||
| − | * [[Light sources| |
+ | * [[Light sources|Light source]] |
'''Slayer equipment:''' |
'''Slayer equipment:''' |
||
| Line 27: | Line 28: | ||
* [[Spiny helmet]] |
* [[Spiny helmet]] |
||
* [[Ice cooler]] |
* [[Ice cooler]] |
||
| + | |recommended = |
||
| − | '''Recommended items:''' |
||
* [[Ectophial]] |
* [[Ectophial]] |
||
* [[Relicym's balm]] for killing Zogres |
* [[Relicym's balm]] for killing Zogres |
||
| Line 39: | Line 40: | ||
==Overview== |
==Overview== |
||
| − | * None of the bone drops are 100% |
+ | * None of the bone drops are 100%, but they are common. |
* The monsters you need to kill are mentioned on the Wish List that is attached on the house north of the [[Odd Old Man]]. |
* The monsters you need to kill are mentioned on the Wish List that is attached on the house north of the [[Odd Old Man]]. |
||
* It is possible to hand in the collected bones in smaller batches. The Odd Old Man will kindly update the wish list, taking off the bones already submitted. |
* It is possible to hand in the collected bones in smaller batches. The Odd Old Man will kindly update the wish list, taking off the bones already submitted. |
||
| − | * It is possible to complete Basilisk without 20 |
+ | * It is possible to complete Basilisk without level 20 Defence, but you must freeze the basilisk or safe spot it. |
===List=== |
===List=== |
||
| − | Below is the list of |
+ | Below is the list of monsters that need to be killed to obtain all the bones (there are 27 total): |
:{| class="wikitable lighttable" |
:{| class="wikitable lighttable" |
||
| Line 54: | Line 55: | ||
|[[Wolf]] |
|[[Wolf]] |
||
|[[Wolf bone]] |
|[[Wolf bone]] |
||
| − | |[[Feldip Hills]], [[White Wolf Mountain]], Rellekka |
+ | |[[Feldip Hills]], [[White Wolf Mountain]], [[Rellekka]] |
|- |
|- |
||
| − | |[[Bat]] ([[Giant bat]]s do not drop |
+ | |[[Bat]] ([[Giant bat]]s do not drop bat wings) |
|[[Bat wing]] |
|[[Bat wing]] |
||
| − | |Near the [[Odd Old Man]] (make sure you get a Bat wing, not [[Batwing]]; the purple one is not the |
+ | |Near the [[Odd Old Man]] (make sure you get a Bat wing, not [[Batwing]]; the purple one is the hide, not the bone) |
|- |
|- |
||
|[[Rat]] |
|[[Rat]] |
||
|[[Rat bone]] |
|[[Rat bone]] |
||
| − | |Mainly found in Sewers e.g. [[Misthalin underground]] which is accessed via the trapdoor in Draynor village. Also [[ |
+ | |Mainly found in Sewers e.g. [[Misthalin underground]] which is accessed via the trapdoor in [[Draynor village]]. Also [[rat]]s can be found skittering around and outside [[Lumbridge Castle]] |
|- |
|- |
||
|[[Baby blue dragon]] |
|[[Baby blue dragon]] |
||
|[[Baby blue dragon bone]] |
|[[Baby blue dragon bone]] |
||
| − | |[[Taverley Dungeon |
+ | |[[Taverley Dungeon]] (need dusty key or 70 Agility for shortcut) |
|- |
|- |
||
|[[Ogre]] |
|[[Ogre]] |
||
|[[Ogre ribs]] |
|[[Ogre ribs]] |
||
| − | |[[Feldip Hills]], South of Yanille |
+ | |[[Feldip Hills]], South of [[Yanille]] |
|- |
|- |
||
|[[Jogre]] |
|[[Jogre]] |
||
|[[Jogre bone]] |
|[[Jogre bone]] |
||
| − | |Within the dungeon in northern [[Karamja]], |
+ | |Within the dungeon in northern [[Karamja]], just west of the Glider. [[Ardougne Zoo]] with [[Telekinetic Grab]] and ranging weapons or magic attacks (Make sure you pick up the [[Jogre bone]] not the [[Jogre bones]]) |
|- |
|- |
||
|[[Zogre]] |
|[[Zogre]] |
||
| Line 80: | Line 81: | ||
|[[Jiggig]] (requires start of [[Zogre Flesh Eater]], make sure you have the Zogre bone not Zogre Bones.) |
|[[Jiggig]] (requires start of [[Zogre Flesh Eater]], make sure you have the Zogre bone not Zogre Bones.) |
||
|- |
|- |
||
| − | |[[Mogre]] (requires |
+ | |[[Mogre]] (requires [[Fishing explosive]]) |
|[[Mogre bone]] |
|[[Mogre bone]] |
||
|[[Mudskipper Point]] |
|[[Mudskipper Point]] |
||
| Line 90: | Line 91: | ||
|[[Snake]] |
|[[Snake]] |
||
|[[Snake spine]] |
|[[Snake spine]] |
||
| − | |All over [[Karamja]], also dropped by [[Desert snake]]s close to the [[Jackal]]s in the Kharidian desert. Also located in Ardougne zoo next to the Jogres, |
+ | |All over [[Karamja]], also dropped by [[Desert snake]]s close to the [[Jackal]]s in the Kharidian desert. Also located in [[Ardougne zoo]] next to the Jogres, [[Telekinetic Grab]] and range/mage weapons needed |
|- |
|- |
||
|[[Zombie]] |
|[[Zombie]] |
||
|[[Zombie bone]] |
|[[Zombie bone]] |
||
| − | |[[Edgeville Dungeon]], [[Varrock Sewers]], [[Stronghold of |
+ | |[[Edgeville Dungeon]], [[Draynor Sewers]], [[Varrock Sewers]], [[Stronghold of Security]]. |
|- |
|- |
||
|[[Werewolf]] |
|[[Werewolf]] |
||
|[[Werewolf bone]] |
|[[Werewolf bone]] |
||
| − | |[[Canifis]] (You |
+ | |[[Canifis]] (You cannot get the bones if you use wolfbane), or in the [[God Wars Dungeon]] |
|- |
|- |
||
|[[Moss giant]] |
|[[Moss giant]] |
||
|[[Moss giant bone]] |
|[[Moss giant bone]] |
||
| − | |[[Varrock Sewers]], |
+ | |[[Varrock Sewers]], west of the [[Fishing Guild]], [[Crandor]], [[Brimhaven Dungeon]] |
|- |
|- |
||
| − | |[[Fire giant |
+ | |[[Fire giant]] |
|[[Fire giant bone]] |
|[[Fire giant bone]] |
||
| − | |[[Waterfall Dungeon |
+ | |[[Waterfall Dungeon]] (remember to bring a rope and [[Glarial's amulet]]), [[Baxtorian Falls resource dungeon]], [[Brimhaven Dungeon]] |
|- |
|- |
||
|[[Ice giant]] |
|[[Ice giant]] |
||
| Line 114: | Line 115: | ||
|[[Terrorbird]] |
|[[Terrorbird]] |
||
|[[Terrorbird wing]] |
|[[Terrorbird wing]] |
||
| − | |[[Tree Gnome Stronghold]] ( |
+ | |[[Tree Gnome Stronghold]] ([[mounted terrorbird gnomes]] and [[warped terrorbird]]s also drop a terrorbird wing.) |
|- |
|- |
||
|[[Ghoul]] |
|[[Ghoul]] |
||
|[[Ghoul bone]] |
|[[Ghoul bone]] |
||
| + | |[[In Memory of the Myreque|Myreque memorial site]], north of [[Canifis]] |
||
| − | |[[Paterdomus]] temple exit, next to Fairy ring. |
||
|- |
|- |
||
|[[Troll]] |
|[[Troll]] |
||
|[[Troll bone]] |
|[[Troll bone]] |
||
| − | |[[Keldagrim]] Entrance, [[Troll Country]] |
+ | |[[Keldagrim]] Entrance, [[Troll Country]] ([[Mountain Trolls]] also work) |
|- |
|- |
||
|[[Seagull]] |
|[[Seagull]] |
||
|[[Seagull wing]] |
|[[Seagull wing]] |
||
|[[Port Sarim]] docks |
|[[Port Sarim]] docks |
||
| ⚫ | |||
| ⚫ | |||
| ⚫ | |||
| − | |The Farm North-West of [[Port Phasmatys]] |
||
|- |
|- |
||
|[[Experiment]] |
|[[Experiment]] |
||
| Line 138: | Line 135: | ||
|[[Rabbit]] |
|[[Rabbit]] |
||
|[[Rabbit bone]] |
|[[Rabbit bone]] |
||
| − | |[[Miscellania]], [[Tirannwn]], [[Nature altar]] (bring telegrab + range) |
+ | |[[Miscellania]], [[Tirannwn]], [[Nature altar]] (bring telegrab + range), bunnies south-east of Rellekka drop rabbit bones, [[Lumbridge Crater]] |
|- |
|- |
||
| − | |[[Basilisk]] (requires mirror shield and |
+ | |[[Basilisk]] (requires mirror shield and level 40 Slayer) |
|[[Basilisk bone]] |
|[[Basilisk bone]] |
||
|[[Fremennik Slayer Dungeon]] (Fairy ring {{Fairycode|AJR}}) |
|[[Fremennik Slayer Dungeon]] (Fairy ring {{Fairycode|AJR}}) |
||
| + | |||
| − | + | Basilisk bone can be obtained whilst wearing the [[Mask of Reflection]]. |
|
|- |
|- |
||
| − | |[[ |
+ | |[[Lizard]] (requires ice coolers) (only level 77 drops special bone) |
|[[Desert lizard bone]] |
|[[Desert lizard bone]] |
||
| − | |Just east of Sophanem |
+ | |Just east of [[Sophanem]] |
|- |
|- |
||
|[[Cave goblin]] |
|[[Cave goblin]] |
||
|[[Cave goblin skull]] |
|[[Cave goblin skull]] |
||
| − | |[[Lumbridge Swamp Caves]] (Cave goblin miners also work.) |
+ | |[[Lumbridge Swamp Caves]] ([[Cave goblin miners]] also work.) |
|- |
|- |
||
|[[Vulture]] |
|[[Vulture]] |
||
|[[Vulture wing]] |
|[[Vulture wing]] |
||
| − | | |
+ | |North-west of [[Agility Pyramid]] in the [[Kharidian Desert]], labelled on the world map |
|- |
|- |
||
|[[Jackal]] |
|[[Jackal]] |
||
|[[Jackal bone]] |
|[[Jackal bone]] |
||
| − | |South-west of [[Nardah]], next to the fairy ring North of [[Nardah]] ({{Fairycode|DLQ}}), the [[Kharidian Desert]] |
+ | |South-west of [[Nardah]], next to the fairy ring North of [[Nardah]] ({{Fairycode|DLQ}}), the [[Kharidian Desert]], East of the Bandit Camp lodestone |
| ⚫ | |||
| ⚫ | |||
| ⚫ | |||
| + | |West of [[Ectofuntus]] |
||
|} |
|} |
||
| − | + | These monsters can be found in other places; listed are the most convenient spots. |
|
==Walkthrough== |
==Walkthrough== |
||
| − | === |
+ | ===Karamja=== |
| − | :'''Travel method:''' Use the [[ |
+ | :'''Travel method:''' Use the [[gnome glider]] (or [[Fairy ring]] code: {{Fairycode|DKP}}) to get to [[Karamja]]. Both [[jogre]]s and [[snake]]s are found directly west of the gnome glider. Optionally, [[jogres]] are also found in the dungeon by the [[Harpie Bug Swarm]]s, and snakes are also found by the [[Calquat fruit|calquat]] farming patch. |
* [[Jogre]] - drops [[Jogre bone]] (different from the regular [[Jogre bones]]) |
* [[Jogre]] - drops [[Jogre bone]] (different from the regular [[Jogre bones]]) |
||
| Line 172: | Line 174: | ||
===Misthalin=== |
===Misthalin=== |
||
| − | :'''Travel method:''' [[Edgeville]] can be reached by using an [[Amulet of glory]] Teleport, fairy ring, using Home teleport and the [[ |
+ | :'''Travel method:''' [[Edgeville]] can be reached by using an [[Amulet of glory]] Teleport, fairy ring, using Home teleport and the [[canoe]] system, by using [[Varrock Teleport]] and walking a short distance, or by using the [[spirit tree]] in the Grand Exchange. The monsters are all found in the [[Varrock Sewers]]. It is also a good idea to buy a [[mirror shield]], and – if you haven't already got an [[ice shaker]] and ([[Super explosive shaker|super]]) [[explosive shaker]] on your [[tool belt]] – some [[ice cooler]]s and several [[fishing explosive]]s from the [[Slayer Master]] while you are there. |
* [[Zombie]] |
* [[Zombie]] |
||
* [[Moss Giant]] |
* [[Moss Giant]] |
||
| Line 178: | Line 180: | ||
===Port Sarim=== |
===Port Sarim=== |
||
| − | :'''Required items:''' ([[Super fishing explosive|Super]]) [[ |
+ | :'''Required items:''' ([[Super fishing explosive|Super]]) [[fishing explosive]] / ([[Super explosive shaker|super]]) [[explosive shaker]] on [[tool belt]] |
| − | :'''Travel method:''' |
+ | :'''Travel method:''' Use the Port Sarim lodestone and you will find Seagulls on the nearby docks. From there, travel south and look for the Asgarnian Ice Dungeon, where you will find ice giants. Travel south to reach the [[Mudskipper Point]], home to the mogres. Alternatively, you can use fairy ring code {{Fairycode|AIQ}} for the latter two bones. |
* [[Seagull]] - drops [[Seagull wing]] |
* [[Seagull]] - drops [[Seagull wing]] |
||
* [[Ice giant]] (in the [[Asgarnian Ice Dungeon]]) - drops [[Ice giant ribs]] |
* [[Ice giant]] (in the [[Asgarnian Ice Dungeon]]) - drops [[Ice giant ribs]] |
||
| Line 185: | Line 187: | ||
===Nardah=== |
===Nardah=== |
||
| − | :'''Required items:''' [[Ice cooler]] / [[ |
+ | :'''Required items:''' [[Ice cooler]] / [[ice shaker]] on [[tool belt]] |
| − | :'''Recommended items:''' [[Waterskin |
+ | :'''Recommended items:''' [[Waterskin]]s / [[enchanted water tiara]] (not needed if the [[Crocodile Tears]] quest is completed) |
| − | :'''Travel method:''' From [[Mudskipper Point]], use the [[ |
+ | :'''Travel method:''' From [[Mudskipper Point]], use the [[fairy ring]] (code {{fairycode|DLQ}}) to get to the [[Nardah|Nardah hunting area]], and travel west. There are jackals right by the fairy ring. After these, walk south and go west from the Nardah bank to find vultures. From there, run south to the eastern wall of Sophanem, where you will find the level 77 lizards (the lizards north of the fairy ring do not drop the bone). You need to use [[ice cooler]]s on the lizards when their health is low. |
* [[Jackal]] |
* [[Jackal]] |
||
* [[Desert Lizard]] - Level 77 Lizards drop the special bone (not the ones with the name Desert Lizard) |
* [[Desert Lizard]] - Level 77 Lizards drop the special bone (not the ones with the name Desert Lizard) |
||
| − | * [[Vulture]] (north-west of [[Agility Pyramid |
+ | * [[Vulture]] (north-west of [[Agility Pyramid]]) |
| − | === |
+ | ===Canifis=== |
:'''Recommended items:''' [[Ectophial]] |
:'''Recommended items:''' [[Ectophial]] |
||
| − | :'''Travel method:''' Travel to [[ |
+ | :'''Travel method:''' Travel to [[Canifis]] via [[Lodestone Network|lodestone]]. Head to the graveyard to the north-west to find ghouls then travel south to find werewolves. If you don't want to attack a level 88 werewolf you can attack one of the level 24 citizens of Canifis with [[wolfbane]] and when they are almost dead switch to another weapon. Next, travel to [[Fenkenstrain's Castle]] and head under it by pushing memorials to the east to find experiments (see the [[Creature of Fenkenstrain]] quest guide). Finally, continue travelling east or use the ectophial to teleport to the [[ectofuntus]] and head west to the Port Phasmatys farm to find undead cows. |
:Another way to reach Morytania is using Kharyrll teleport from Ancient Magicks or POH portal. |
:Another way to reach Morytania is using Kharyrll teleport from Ancient Magicks or POH portal. |
||
| − | * [[ |
+ | * [[Experiment]] / [[Experiment No. 2]] (Taverley) - drops [[experiment bone]] |
| − | * [[Experiment]] / [[Experiment No. 2]] (Taverley) - drops [[Experiment bone]] |
||
* [[Werewolf]] |
* [[Werewolf]] |
||
* [[Ghoul]] |
* [[Ghoul]] |
||
| + | * [[Undead cow]] |
||
===Feldip Hills=== |
===Feldip Hills=== |
||
| − | :'''Recommended items:''' [[Inoculation brace]] / [[ |
+ | :'''Recommended items:''' [[Inoculation brace]] / [[relicym's balm]] |
| − | :'''Travel method:''' Travel to [[Feldip Hills]] using fairy ring (code: {{Fairycode|AKS}}) or [[ |
+ | :'''Travel method:''' Travel to [[Feldip Hills]] using fairy ring (code: {{Fairycode|AKS}}) or [[gnome glider]] from the [[Tree Gnome Stronghold]]. There you will find ogres and wolves. From there travel using fairy ring (code: {{Fairycode|BKP}}) and then travel east to [[Jiggig]] (south of [[Castle Wars]]) to find zogres. Zogres are located within the Jiggig tomb. |
* [[Wolf]] - not be confused with [[wolf bones]] |
* [[Wolf]] - not be confused with [[wolf bones]] |
||
* [[Ogre]] |
* [[Ogre]] |
||
| Line 209: | Line 211: | ||
===Miscellania, Lighthouse and Waterfall=== |
===Miscellania, Lighthouse and Waterfall=== |
||
| − | :'''Required items:''' [[Glarial's amulet]], [[ |
+ | :'''Required items:''' [[Glarial's amulet]], [[rope]] (from the [[Rope rack#Baxtorian Falls Rack|rope rack]] next to the raft, if the player has built one) |
| − | :'''Recommended items:''' [[Mirror shield]], [[ |
+ | :'''Recommended items:''' [[Mirror shield]], [[games necklace]], [[enchanted lyre]], good armour, good food |
| − | :'''Travel method:''' Use your |
+ | :'''Travel method:''' Use your enchanted lyre to teleport to Rellekka, take a boat to Miscellania and kill some of the rabbits there. Then head into the [[Fremennik Slayer Dungeon]] (killing basilisks will require a mirror shield, as basilisks will dangerously reduce player stats). Then, make a visit to the [[Lighthouse]]. Dagannoths are found within the basement of the lighthouse. Good food and armour is suggested, as these Dagannoths are aggressive. Grab a rope and Glarial's amulet, then use your games necklace to teleport to Barbarian Outpost. Travel south towards the Baxtorian Falls, and get into the [[Waterfall Dungeon]] to find fire giants in the passage to the north-west. |
* [[Dagannoth]] |
* [[Dagannoth]] |
||
* [[Rabbit]] |
* [[Rabbit]] |
||
* [[Basilisk]] - drops [[Basilisk bone]] |
* [[Basilisk]] - drops [[Basilisk bone]] |
||
* [[Fire giant|Fire Giant]] - drops Fire Giant bone |
* [[Fire giant|Fire Giant]] - drops Fire Giant bone |
||
| + | |||
| − | + | Fire Giants also drop shoulder bones, this is not to be mistaken with the [[fire giant bone]]. Though you can polish the shoulder bone, it is required for the [[Fur 'n' Seek/Wish List|Fur 'n' Seek wish list]], not this wish list. |
|
===Tree Gnome Stronghold to Taverley=== |
===Tree Gnome Stronghold to Taverley=== |
||
| − | :'''Required items:''' [[Dusty key]] / 70 [[Agility]] for pipe squeeze [[shortcuts|shortcut]] |
+ | :'''Required items:''' [[Dusty key]] / level 70 [[Agility]] for pipe squeeze [[shortcuts|shortcut]] |
| − | :'''Recommended items:''' [[Ring of duelling |
+ | :'''Recommended items:''' [[Ring of duelling]] |
| − | :'''Travel method:''' Teleport to Al Kharid (using |
+ | :'''Travel method:''' Teleport to Al Kharid (using ring of duelling), and take the [[gnome glider]] to the [[Tree Gnome Stronghold]]. Terrorbirds can be found within the stronghold in large numbers. You can also kill the [[mounted terrorbird gnome]]s as well. Use the [[gnome glider]] to travel to the White Wolf Mountain, and walk east towards [[Taverley]]. You may also use the Taverley home teleport spell, as it is faster. Baby blue dragons are found in the [[Taverley Dungeon]]. Bringing an [[anti-dragon shield]] or [[Antifire|anti-fire potions]] is advisable as the mothers may attack the player while in the dungeons. |
* [[Terrorbird]] - drops [[Terrorbird wing]] |
* [[Terrorbird]] - drops [[Terrorbird wing]] |
||
* [[Baby blue dragon]] - drops [[Baby blue dragon bone]] |
* [[Baby blue dragon]] - drops [[Baby blue dragon bone]] |
||
| Line 230: | Line 233: | ||
'''Without [[Trollheim Teleport]]'''<br /> |
'''Without [[Trollheim Teleport]]'''<br /> |
||
| − | Without the Trollheim Teleport Spell, the easiest way to reach trolls is [[Keldagrim]] |
+ | Without the Trollheim Teleport Spell, the easiest way to reach trolls is the [[Keldagrim]] entrance. It is located close to fairy ring code {{fairycode|DKS}}. Simply walk there from [[Rellekka]] if fairy rings are not an option. The trolls are located just south of the entrance. |
* [[Troll]] |
* [[Troll]] |
||
===Lumbridge=== |
===Lumbridge=== |
||
| − | :'''Recommended items:''' [[Spiny helmet]], [[Light sources| |
+ | :'''Recommended items:''' [[Spiny helmet]], [[Light sources|light source]] (preferably [[light sources|lanterns]]) |
| − | :'''Travel method:''' Home teleport to [[Lumbridge]]. With a lantern, climb through the hole in the kitchen's cellar, and walk south and through the other hole. Go south towards the area full of [[ |
+ | :'''Travel method:''' Home teleport to [[Lumbridge]]. With a lantern, climb through the hole in the kitchen's cellar, and walk south and through the other hole. Go south towards the area full of [[rockslug]]s, then head east towards the goblins. Cave goblins are found at the far east of the [[Lumbridge Swamp Caves]]. You may also take the entrance in the main spot and find them, although you'll need a [[spiny helmet]]. You can also go there by following Kazgar in the hole in Lumbridge Cellar. He takes you to them. |
| − | * [[Cave goblin |
+ | * [[Cave goblin]] (any type of [[Cave goblin]] will work, even guards) |
| − | Note: Any type of [[Cave goblin]] will work, even guards. |
||
===Varrock=== |
===Varrock=== |
||
| − | :'''Recommended items:''' [[Varrock Teleport |
+ | :'''Recommended items:''' [[Varrock Teleport]] (or [[Digsite pendant]]) |
| − | :'''Travel method:''' Teleport to [[Varrock]], and walk |
+ | :'''Travel method:''' Teleport to [[Varrock]], and walk north-east. Bats are flapping about right by the Odd Old Man. |
* [[Bat]] |
* [[Bat]] |
||
| Line 247: | Line 249: | ||
* After you have obtained all the bones, clean the bones using the same method used in the initial part of the quest. |
* After you have obtained all the bones, clean the bones using the same method used in the initial part of the quest. |
||
* Give the cleaned bones to the Odd Old Man for your reward. |
* Give the cleaned bones to the Odd Old Man for your reward. |
||
| − | * |
+ | * The cleaning and submission of the bones to the Odd Old Man can be done in stages. |
| − | *After completing the wish list following the Rag and Bone Man quest, the list will have "Non-chafing Manacles" written on it. After completing the |
+ | * After completing the wish list following the Rag and Bone Man quest, the list will have "Non-chafing Manacles" written on it. After completing the [[Fur 'n' Seek/Wish list|wish list]] following the [[Fur 'n' Seek]] quest, you may speak to the Odd Old Man to get an explanation about this. |
==Rewards== |
==Rewards== |
||
| Line 254: | Line 256: | ||
[[File:Rag and Bone Man wish list reward (ram skull helm).png|center]] |
[[File:Rag and Bone Man wish list reward (ram skull helm).png|center]] |
||
* {{Skill XP|Prayer|5000}} |
* {{Skill XP|Prayer|5000}} |
||
| − | * Choice of either [[ |
+ | * Choice of either [[bonesack]] or [[ram skull helm]] (with the option to switch at any time) |
| + | |||
| + | ==Achievement== |
||
| + | * {{Achievement|Skeletal Wishes|15|Complete Rag and Bone Man and Fur 'n Seek wishlists, and have the Odd Old Man rebuild the Skeletal Horror.}} |
||
==Dialogue== |
==Dialogue== |
||
| Line 260: | Line 265: | ||
==Trivia== |
==Trivia== |
||
| − | * The Rag and Bone Man |
+ | * The Rag and Bone Man wish list used to reward one quest point, and completion was thus required to wear the [[quest point cape]]. This was changed on [[11 August]] [[2009]]. |
* There used to be a glitch where if you checked your quest manual after completing the quest, it said "I gained a bonesack (or ram skull helmet) and 7,000 prayer experience!" This was not true. You only gained the {{Skill XP|Prayer|5000}} as listed above. This has been fixed by Jagex. |
* There used to be a glitch where if you checked your quest manual after completing the quest, it said "I gained a bonesack (or ram skull helmet) and 7,000 prayer experience!" This was not true. You only gained the {{Skill XP|Prayer|5000}} as listed above. This has been fixed by Jagex. |
||
| − | * There used to be glitch where the Quest Complete screen included 2 [[Squeal of Fortune]] spins as a reward. However, no spins were received, this has been fixed. |
||
{{Rag and Bone Man wish list}} |
{{Rag and Bone Man wish list}} |
||
{{Miniquests}} |
{{Miniquests}} |
||
| − | [[Category:Wikia Game Guides quests]] |
||
Latest revision as of 13:01, 8 June 2019
Rag and Bone Man wish list is a miniquest during which the player has to find additional bones for the Odd Old Man.
Details
| Start point | |||
|---|---|---|---|
| Member requirement | |||
| Official difficulty | None | ||
| Official length | Very Long | ||
| Requirements | Skill requirements are not boostable unless marked with a [B] for boostable.
| ||
| Items required | Items from the tool belt are not listed unless they do not work or are not automatically added.
Slayer equipment: | ||
| Recommended |
| ||
| Enemies to defeat | Listed below |
Overview
- None of the bone drops are 100%, but they are common.
- The monsters you need to kill are mentioned on the Wish List that is attached on the house north of the Odd Old Man.
- It is possible to hand in the collected bones in smaller batches. The Odd Old Man will kindly update the wish list, taking off the bones already submitted.
- It is possible to complete Basilisk without level 20 Defence, but you must freeze the basilisk or safe spot it.
List
Below is the list of monsters that need to be killed to obtain all the bones (there are 27 total):
These monsters can be found in other places; listed are the most convenient spots.
Walkthrough
Karamja
- Travel method: Use the gnome glider (or Fairy ring code: DKP) to get to Karamja. Both jogres and snakes are found directly west of the gnome glider. Optionally, jogres are also found in the dungeon by the Harpie Bug Swarms, and snakes are also found by the calquat farming patch.
- Jogre - drops Jogre bone (different from the regular Jogre bones)
- Snake - drops Snake spine
Misthalin
- Travel method: Edgeville can be reached by using an Amulet of glory Teleport, fairy ring, using Home teleport and the canoe system, by using Varrock Teleport and walking a short distance, or by using the spirit tree in the Grand Exchange. The monsters are all found in the Varrock Sewers. It is also a good idea to buy a mirror shield, and – if you haven't already got an ice shaker and (super) explosive shaker on your tool belt – some ice coolers and several fishing explosives from the Slayer Master while you are there.
Port Sarim
- Required items: (Super) fishing explosive / (super) explosive shaker on tool belt
- Travel method: Use the Port Sarim lodestone and you will find Seagulls on the nearby docks. From there, travel south and look for the Asgarnian Ice Dungeon, where you will find ice giants. Travel south to reach the Mudskipper Point, home to the mogres. Alternatively, you can use fairy ring code AIQ for the latter two bones.
- Seagull - drops Seagull wing
- Ice giant (in the Asgarnian Ice Dungeon) - drops Ice giant ribs
- Mogre
Nardah
- Required items: Ice cooler / ice shaker on tool belt
- Recommended items: Waterskins / enchanted water tiara (not needed if the Crocodile Tears quest is completed)
- Travel method: From Mudskipper Point, use the fairy ring (code DLQ) to get to the Nardah hunting area, and travel west. There are jackals right by the fairy ring. After these, walk south and go west from the Nardah bank to find vultures. From there, run south to the eastern wall of Sophanem, where you will find the level 77 lizards (the lizards north of the fairy ring do not drop the bone). You need to use ice coolers on the lizards when their health is low.
- Jackal
- Desert Lizard - Level 77 Lizards drop the special bone (not the ones with the name Desert Lizard)
- Vulture (north-west of Agility Pyramid)
Canifis
- Recommended items: Ectophial
- Travel method: Travel to Canifis via lodestone. Head to the graveyard to the north-west to find ghouls then travel south to find werewolves. If you don't want to attack a level 88 werewolf you can attack one of the level 24 citizens of Canifis with wolfbane and when they are almost dead switch to another weapon. Next, travel to Fenkenstrain's Castle and head under it by pushing memorials to the east to find experiments (see the Creature of Fenkenstrain quest guide). Finally, continue travelling east or use the ectophial to teleport to the ectofuntus and head west to the Port Phasmatys farm to find undead cows.
- Another way to reach Morytania is using Kharyrll teleport from Ancient Magicks or POH portal.
- Experiment / Experiment No. 2 (Taverley) - drops experiment bone
- Werewolf
- Ghoul
- Undead cow
Feldip Hills
- Recommended items: Inoculation brace / relicym's balm
- Travel method: Travel to Feldip Hills using fairy ring (code: AKS) or gnome glider from the Tree Gnome Stronghold. There you will find ogres and wolves. From there travel using fairy ring (code: BKP) and then travel east to Jiggig (south of Castle Wars) to find zogres. Zogres are located within the Jiggig tomb.
- Wolf - not be confused with wolf bones
- Ogre
- Zogre - at Jiggig
Miscellania, Lighthouse and Waterfall
- Required items: Glarial's amulet, rope (from the rope rack next to the raft, if the player has built one)
- Recommended items: Mirror shield, games necklace, enchanted lyre, good armour, good food
- Travel method: Use your enchanted lyre to teleport to Rellekka, take a boat to Miscellania and kill some of the rabbits there. Then head into the Fremennik Slayer Dungeon (killing basilisks will require a mirror shield, as basilisks will dangerously reduce player stats). Then, make a visit to the Lighthouse. Dagannoths are found within the basement of the lighthouse. Good food and armour is suggested, as these Dagannoths are aggressive. Grab a rope and Glarial's amulet, then use your games necklace to teleport to Barbarian Outpost. Travel south towards the Baxtorian Falls, and get into the Waterfall Dungeon to find fire giants in the passage to the north-west.
- Dagannoth
- Rabbit
- Basilisk - drops Basilisk bone
- Fire Giant - drops Fire Giant bone
Fire Giants also drop shoulder bones, this is not to be mistaken with the fire giant bone. Though you can polish the shoulder bone, it is required for the Fur 'n' Seek wish list, not this wish list.
Tree Gnome Stronghold to Taverley
- Required items: Dusty key / level 70 Agility for pipe squeeze shortcut
- Recommended items: Ring of duelling
- Travel method: Teleport to Al Kharid (using ring of duelling), and take the gnome glider to the Tree Gnome Stronghold. Terrorbirds can be found within the stronghold in large numbers. You can also kill the mounted terrorbird gnomes as well. Use the gnome glider to travel to the White Wolf Mountain, and walk east towards Taverley. You may also use the Taverley home teleport spell, as it is faster. Baby blue dragons are found in the Taverley Dungeon. Bringing an anti-dragon shield or anti-fire potions is advisable as the mothers may attack the player while in the dungeons.
- Terrorbird - drops Terrorbird wing
- Baby blue dragon - drops Baby blue dragon bone
Troll Stronghold
With Trollheim Teleport
Use the Trollheim Teleport to get to Trollheim. From there, climb down to the western side. The trolls are a bit to the west.
Without Trollheim Teleport
Without the Trollheim Teleport Spell, the easiest way to reach trolls is the Keldagrim entrance. It is located close to fairy ring code DKS. Simply walk there from Rellekka if fairy rings are not an option. The trolls are located just south of the entrance.
Lumbridge
- Recommended items: Spiny helmet, light source (preferably lanterns)
- Travel method: Home teleport to Lumbridge. With a lantern, climb through the hole in the kitchen's cellar, and walk south and through the other hole. Go south towards the area full of rockslugs, then head east towards the goblins. Cave goblins are found at the far east of the Lumbridge Swamp Caves. You may also take the entrance in the main spot and find them, although you'll need a spiny helmet. You can also go there by following Kazgar in the hole in Lumbridge Cellar. He takes you to them.
- Cave goblin (any type of Cave goblin will work, even guards)
Varrock
- Recommended items: Varrock Teleport (or Digsite pendant)
- Travel method: Teleport to Varrock, and walk north-east. Bats are flapping about right by the Odd Old Man.
Finishing up
- After you have obtained all the bones, clean the bones using the same method used in the initial part of the quest.
- Give the cleaned bones to the Odd Old Man for your reward.
- The cleaning and submission of the bones to the Odd Old Man can be done in stages.
- After completing the wish list following the Rag and Bone Man quest, the list will have "Non-chafing Manacles" written on it. After completing the wish list following the Fur 'n' Seek quest, you may speak to the Odd Old Man to get an explanation about this.
Rewards
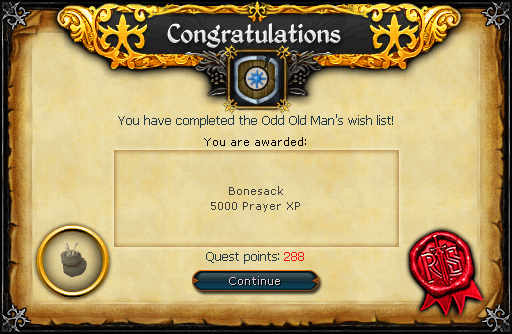

- 5,000
 experience
 - Choice of either bonesack or ram skull helm (with the option to switch at any time)
Achievement
- Skeletal Wishes ( 15) - Complete Rag and Bone Man and Fur 'n Seek wishlists, and have the Odd Old Man rebuild the Skeletal Horror.
Dialogue
Trivia
- The Rag and Bone Man wish list used to reward one quest point, and completion was thus required to wear the quest point cape. This was changed on 11 August 2009.
- There used to be a glitch where if you checked your quest manual after completing the quest, it said "I gained a bonesack (or ram skull helmet) and 7,000 prayer experience!" This was not true. You only gained the 5,000 experience as listed above. This has been fixed by Jagex.
| Free-to-play | |||||||||||
| Members |
| ||||||||||