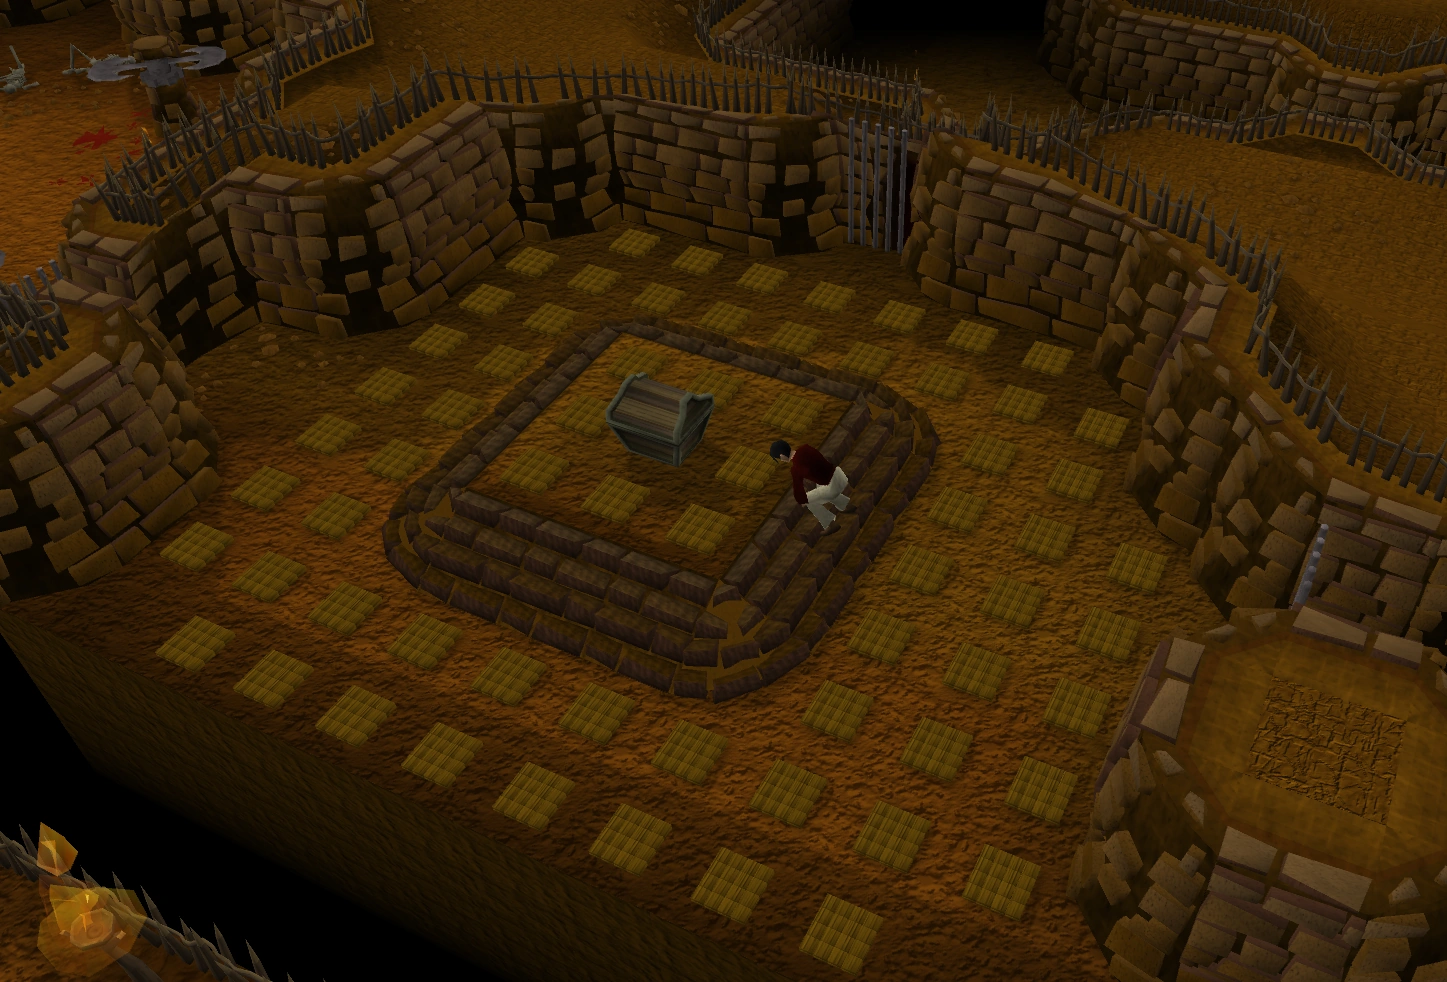
[[File:Rogues Den.png|thumb|The dangerous Rogues Den, where thieves and athletes test their skills.]]
+
The '''Rogues' Den''' was a [[minigame]] where players had to go through a maze containing various traps and obstacles to reach a safe at the end. Players would then used their thieving skills to try to open the safe to receive their loot.
−
The '''Rogues'Den'''isan [[Activity]], whereplayershavetogothrough a maze containing various traps and obstacles to reach a safe at the end. Playersthen use their thieving skills to try to open the safe to receive their loot. To enter the maze, a player must have atleast level 50 [[Agility]] and level 50 [[Thieving]]. It is also recommended that [[Auto retaliate]] is turned off when playing Rogues' Den.
+
The maze was removed on [[13 December]] [[2011]], replaced by the [[Flash Powder Factory]]. The requirements to enter the maze were level 50 [[Agility]] and level 50 [[Thieving]]. It was also recommended that [[Auto retaliate]] was turned off when playing Rogues' Den.
−
==Starting Off==
+
==Starting off==
−
Rogues' Den is located under the [[Toad and Chicken Inn]] in Burthorpe. The fastest way to get there is by using a [[Games necklace]] to the [[Troll invasion|Burthope Troll Invasion]] area, going south and east around the castle, and then going south-east to the inn and down the trapdoor behind the bar. See [[Rogues' Den (location)]] for other means of getting there.
+
Rogues' Den was located under the [[Toad and Chicken Inn]] in Burthorpe. The fastest way to get there was by using a [[Games necklace]] to the [[Troll invasion|Burthorpe Troll Invasion]] area, going south and east around the castle, and then going south-east to the inn and down the trapdoor behind the bar. See [[Rogues' Den]] for other means of getting there.
−
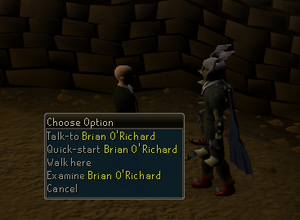
To get inside the maze, the player mustfirstspeak to [[Brian O'Richard]] and get a [[Mystic Jewel]]. Other than the jewel, players cannot take any item into the maze (nothing equipped and nothing but the jewel in inventory). To use a bank to store their items, players may speak to [[Emerald Benedict]], who can be found near the fire.
+
To get inside the maze, the player would have spoken to [[Brian O'Richard]] and get a [[Mystic Jewel]]. Other than the jewel, players could not take any item into the maze (nothing equipped and nothing but the jewel in inventory). To use a bank to store their items, players may speak to [[Emerald Benedict]], who can be found near the fire.
−
Players can activate the [[Mystic Jewel]] while in the maze and can then choose to leave, being teleported back to the main room in the Rogues' Den.
+
Players could activate the [[Mystic Jewel]] while in the maze and can then choose to leave, being teleported back to the main room in the Rogues' Den.
==Obstacles==
==Obstacles==
:{| class="wikitable"
:{| class="wikitable"
−
! Trap !! Agility/Thieving !! Level Reduction
+
! Trap !! Agility/Thieving !! Level reduction
|-
|-
| Bridge || Agility || 2/sec
| Bridge || Agility || 2/sec
Line 39:
Line 61:
==Map of the Rogues' Den maze==
==Map of the Rogues' Den maze==
[[File:RoguesDen minigame map.png|centre|frame|The Rogues' Den maze]]
[[File:RoguesDen minigame map.png|centre|frame|The Rogues' Den maze]]
+
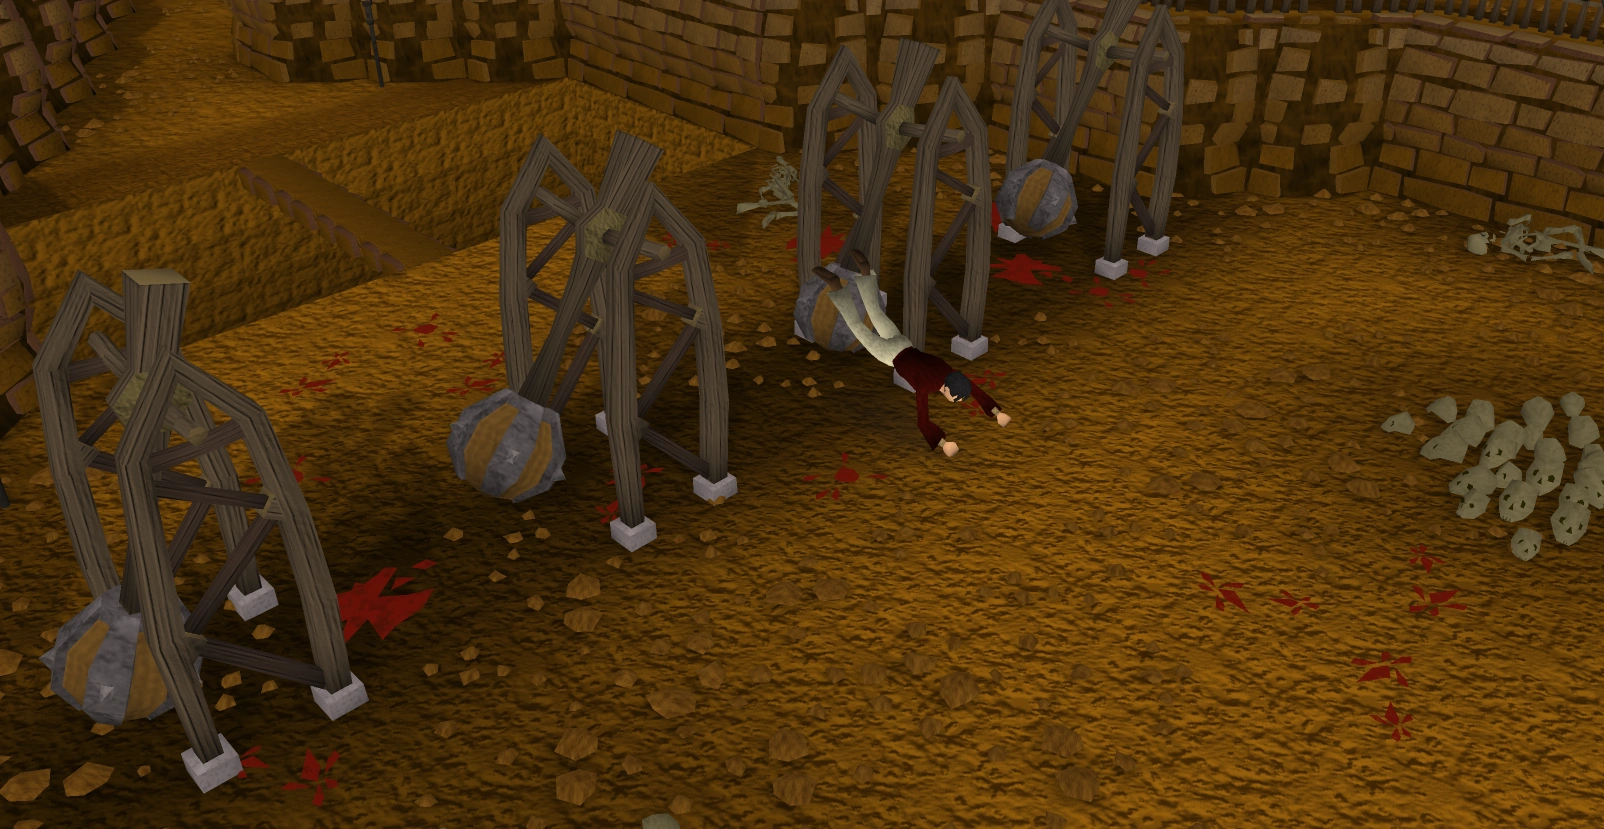
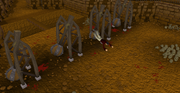
[[File:Evading pendulum.png|thumb|A test for your agility skills!]]
−
+
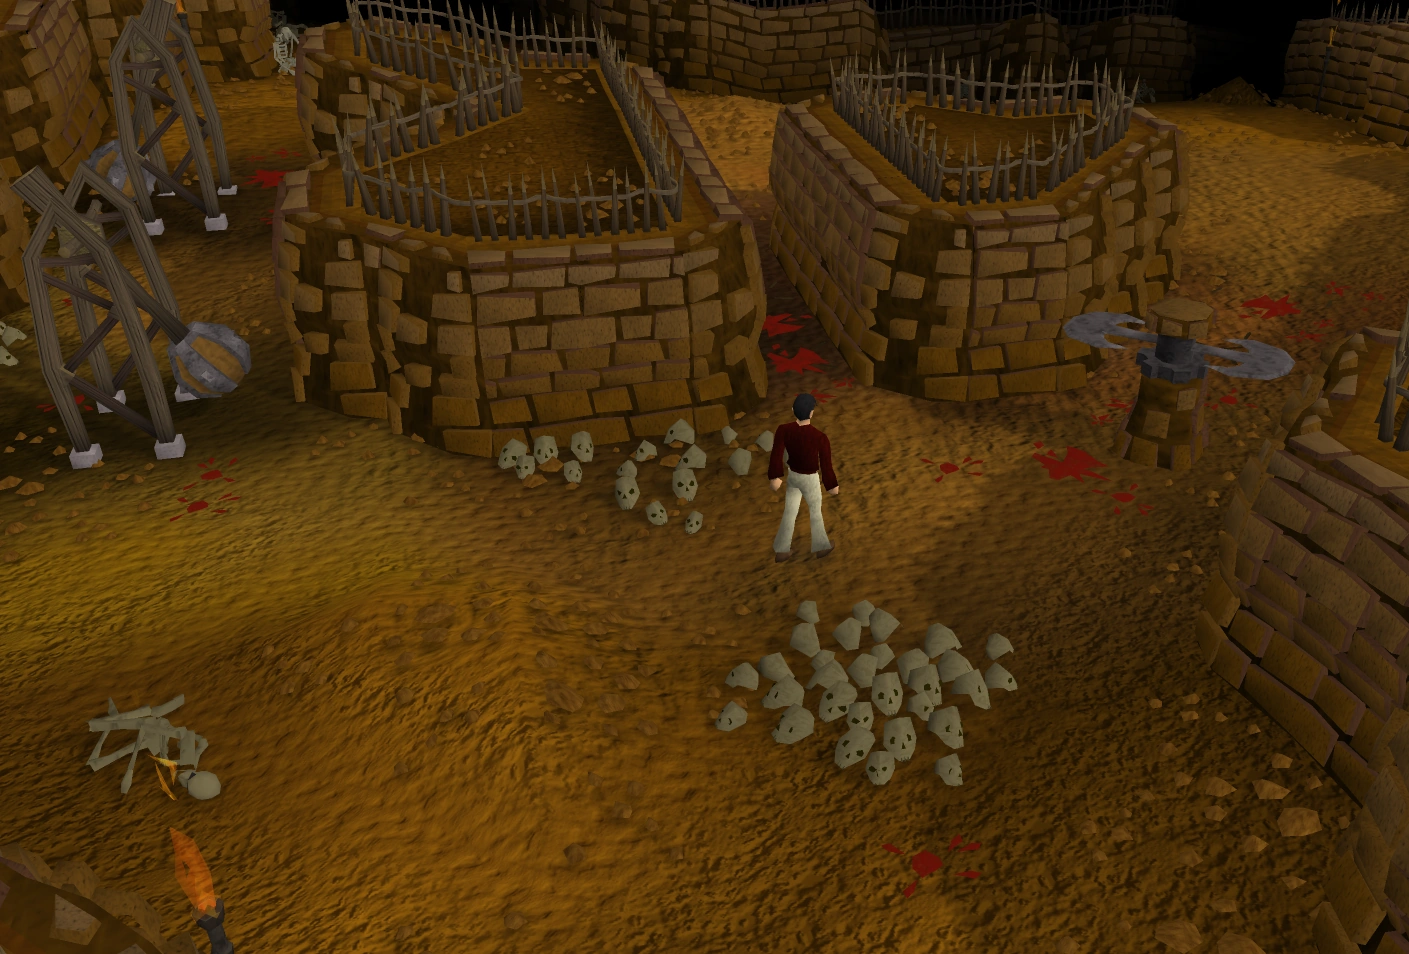
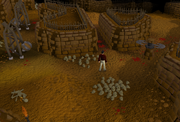
[[File:Pick a route.png|thumb|Would you like to be crushed, pierced or sliced?]]
+
[[File:Deactivating trap.png|thumb|That's just the floor... Or is it?]]
Traps and dangerous obstacles are shown in yellow on the map. You immediately leave the maze if you trigger a trap or touch a dangerous obstacle. Traps can be disarmed by searching them; this uses up thieving points. Some traps can be run past or over without triggering them, without using up thieving points. However, only run a short distance (about 3-4 squares) at a time. Longer runs can trigger a trap.
Traps and dangerous obstacles are shown in yellow on the map. You immediately leave the maze if you trigger a trap or touch a dangerous obstacle. Traps can be disarmed by searching them; this uses up thieving points. Some traps can be run past or over without triggering them, without using up thieving points. However, only run a short distance (about 3-4 squares) at a time. Longer runs can trigger a trap.
Line 85:
Line 109:
: H) Grill room. There is only one correct path through the grills (shown on the map). The room is not dangerous, however, as choosing the wrong grills only results in you having to find you way back to the starting grill and trying again.
: H) Grill room. There is only one correct path through the grills (shown on the map). The room is not dangerous, however, as choosing the wrong grills only results in you having to find you way back to the starting grill and trying again.
−
: I) The "room of death". If you are OK for agility points, go along either of the side walls (you will automatically jump out of the way of the moving blades hidden in the walls). If you are running low on agility, make your away across the floor traps (either searching them or running for short distances). Always avoid going anywhere near the spinning blades on the pedestals!
+
: I) The "room of death". If you are OK for agility points, go along either of the side walls (you will automatically jump out of the way of the moving blades hidden in the walls). If you are running low on agility, make your way across the floor traps (either searching them or running for short distances). Always avoid going anywhere near the spinning blades on the pedestals!
: J) Eight wall safes, the objective of the maze. Open any one of them.
: J) Eight wall safes, the objective of the maze. Open any one of them.
Line 94:
Line 118:
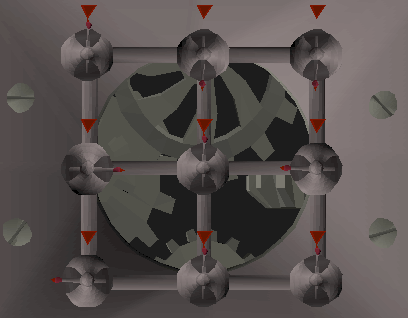
: M) The gear door (not dangerous). You must solve a puzzle consisting of moving four gears to their correct positions for the door to open. You can keep trying as long as you like, and you can also just abandon the puzzle and go somewhere else without penalty. The gear door does not lead to any place interesting or rewarding.
: M) The gear door (not dangerous). You must solve a puzzle consisting of moving four gears to their correct positions for the door to open. You can keep trying as long as you like, and you can also just abandon the puzzle and go somewhere else without penalty. The gear door does not lead to any place interesting or rewarding.
''Much of this walkthrough may be obsolete due to an invisible update, such as the ability to run over multiple traps without harm.''
''Much of this walkthrough may be obsolete due to an invisible update, such as the ability to run over multiple traps without harm.''
+
===Objective===
===Objective===
[[File:Rogueden1na2.png|thumb|right|300px]]
[[File:Rogueden1na2.png|thumb|right|300px]]
Line 105:
Line 130:
[[Experience]] is gained depending on how far the player gets through the maze. Players may also get some loot at the end of the maze, when they are given a chance to crack open a safe. [[Agility]], [[Thieving]] and [[Prayer]] stats are restored to their normal levels when the player leaves the game either via the gem, by being caught by a trap, or by successful completion.
[[Experience]] is gained depending on how far the player gets through the maze. Players may also get some loot at the end of the maze, when they are given a chance to crack open a safe. [[Agility]], [[Thieving]] and [[Prayer]] stats are restored to their normal levels when the player leaves the game either via the gem, by being caught by a trap, or by successful completion.
−
===Tips and Tricks===
+
===Tips and tricks===
It is recommended to set detail to "'''safe mode'''" or to turn off '''textures'''. This is so that the spike traps will be very visible and be less annoying.
It is recommended to set detail to "'''safe mode'''" or to turn off '''textures'''. This is so that the spike traps will be very visible and be less annoying.
If players have '''run''' on, they can move over one floor/wall trap (one square) in one go without needing to disarm them. This is done by standing on the square before the trap and then running over it. Using this trick, players can actually complete the whole maze without having a single [[Thieving]] level drained.
If players have '''run''' on, they can move over one floor/wall trap (one square) in one go without needing to disarm them. This is done by standing on the square before the trap and then running over it. Using this trick, players can actually complete the whole maze without having a single [[Thieving]] level drained.
−
===Starting Off===
+
===Starting off===
* Players start at the doorway, where they will be able to enter the maze. There are some '''Floor traps''' nearby. They can just pass these traps while running, without activating one. You need to be next to it or else you get caught.
* Players start at the doorway, where they will be able to enter the maze. There are some '''Floor traps''' nearby. They can just pass these traps while running, without activating one. You need to be next to it or else you get caught.
* To the west, there are some '''Contortion Bars'''. Players have to climb through these bars.
* To the west, there are some '''Contortion Bars'''. Players have to climb through these bars.
Line 128:
Line 153:
{{Clear}}
{{Clear}}
−
===In the Midst of Things===
+
===In the midst of things===
* If players have a [[Thieving]] level of 80+, they can now use a ''significant'' shortcut (which brings the player almost at the end of the maze) by picklocking the door on the east wall. These would reduce the [[Thieving]] level by 10.
* If players have a [[Thieving]] level of 80+, they can now use a ''significant'' shortcut (which brings the player almost at the end of the maze) by picklocking the door on the east wall. These would reduce the [[Thieving]] level by 10.
[[File:Rogueden14xa7.png|thumb|right|300px]]
[[File:Rogueden14xa7.png|thumb|right|300px]]
Line 138:
Line 163:
{{Clear}}
{{Clear}}
−
===The End is Nigh===
+
===The end is nigh===
* The following room is filled with Floor Blades. Players only have to jump over one Floor Blade, thus saving an [[Agility]] level.
* The following room is filled with Floor Blades. Players only have to jump over one Floor Blade, thus saving an [[Agility]] level.
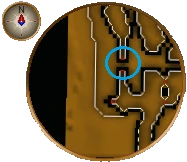
* Players should go forth, reaching a room with 4 tiles on the floor. There is only 1 correct tile (and the correct one is circled in the image.) The other tiles are either the wrong ones, or have a trap on them. Players proceed to the door, then click to open up a "puzzle". They can then click on the correct tile (in the image/Southeastern), and the door will open.
* Players should go forth, reaching a room with 4 tiles on the floor. There is only 1 correct tile (and the correct one is circled in the image.) The other tiles are either the wrong ones, or have a trap on them. Players proceed to the door, then click to open up a "puzzle". They can then click on the correct tile (in the image/Southeastern), and the door will open.
* In the next room, players will notice a mini maze full of Grill doors. Players have to go to the end of this maze in a certain way, or else some doors would not open for them.
* In the next room, players will notice a mini maze full of Grill doors. Players have to go to the end of this maze in a certain way, or else some doors would not open for them.
Line 148:
Line 172:
* After passing the pendulum, players should continue on until they reach a '''narrow path'''. Here, there is a '''hard-to-see''' Floor Trap. Players could run past this trap.
* After passing the pendulum, players should continue on until they reach a '''narrow path'''. Here, there is a '''hard-to-see''' Floor Trap. Players could run past this trap.
−
===The FinishingLine===
+
===The finishing line===
* Players should take the eastern path, and run past the first 2, then the last Floor Trap.
* Players should take the eastern path, and run past the first 2, then the last Floor Trap.
* Further ahead is a room with 4 Spinning Blades, and lots of Floor Traps. To proceed, players must run to the middle of the room, past the first 2 floor traps, then run over the last 2 floor traps.
* Further ahead is a room with 4 Spinning Blades, and lots of Floor Traps. To proceed, players must run to the middle of the room, past the first 2 floor traps, then run over the last 2 floor traps.
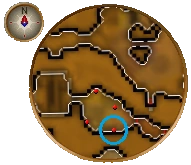
* After players have passed the room with the Spinning Blades, they should keep following the path until players are able to see 2 "red dots" on their minimap. These are [[Flash Powder]], used to distract the [[Rogue guard]]s in the area ahead. There are 2 guards patrolling 2 different paths, and players are required to go through one of these paths to proceed.
* After players have passed the room with the Spinning Blades, they should keep following the path until players are able to see 2 "red dots" on their minimap. These are [[Flash Powder]], used to distract the [[Rogue guard]]s in the area ahead. There are 2 guards patrolling 2 different paths, and players are required to go through one of these paths to proceed.
−
* Players should take either one of these powders, and use it on one of the guards. Players are advised '''NOT''' to get too close to the guards, as these guards might notice and bring them back to the waiting room. As soon as players have thrown the powder, they should immediately run along the path past the blinded guard. Players should not hesitate as the effects of the powder only last a few seconds.
+
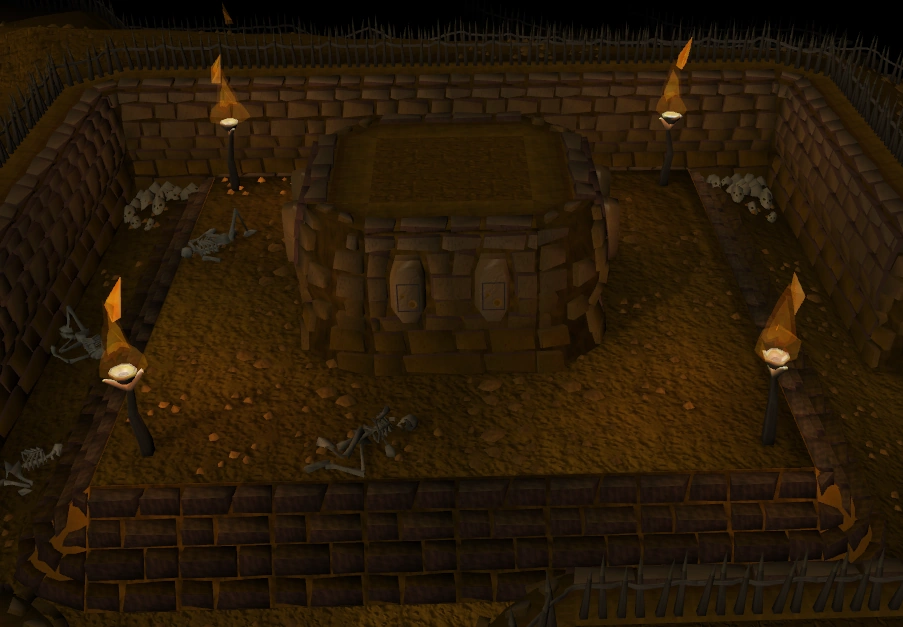
* Players should take either one of these powders, and use it on one of the guards. Players are advised '''NOT''' to get too close to the guards, as these guards might notice and bring them back to the waiting room. As soon as players have thrown the powder, they should [[File:Rogue's Den safes.png|thumb|292px|The end of the maze.]]immediately run along the path past the blinded guard. Players should not hesitate as the effects of the powder only last a few seconds.
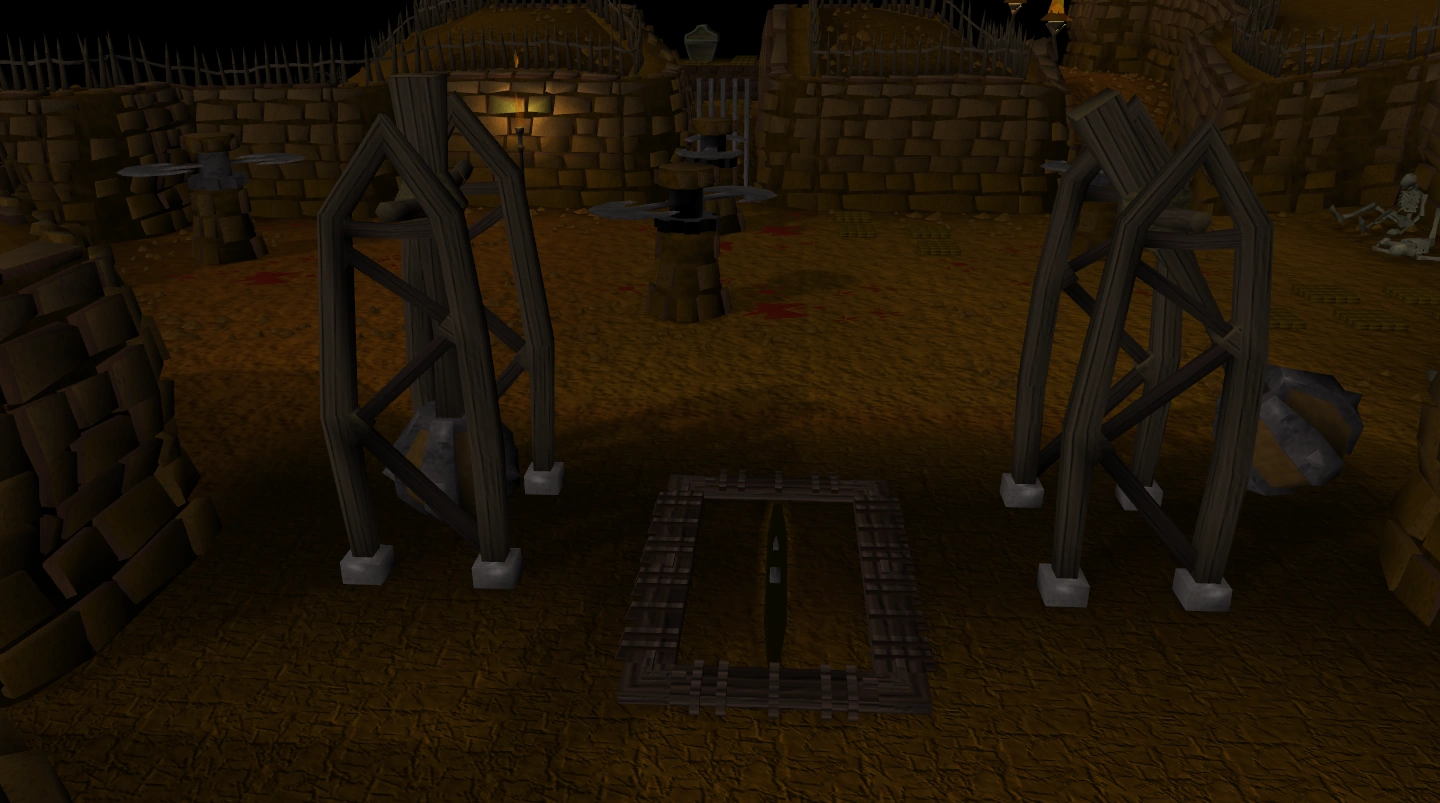
* Players should get past the 2 Pendulums by clicking ahead of these. Once past these pendulums, players will arrive in an area with four wall safes embedded in a central column.
* Players should get past the 2 Pendulums by clicking ahead of these. Once past these pendulums, players will arrive in an area with four wall safes embedded in a central column.
* As player can see, they lost only 1 thieving level in the complete maze.
* As player can see, they lost only 1 thieving level in the complete maze.
{{Clear}}
{{Clear}}
−
===Cracking the Safe===
+
===Cracking the safe===
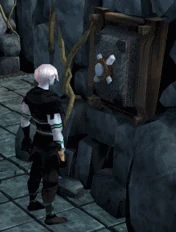
[[File:Safecracking.gif|right|frame|A player cracking a wall safe.]]
[[File:Safecracking.gif|right|frame|A player cracking a wall safe.]]
* Players should proceed to crack any one of the safes. Those with higher [[Thieving]] level (after the reductions in the maze) have better chances of getting loot from the safe.
* Players should proceed to crack any one of the safes. Those with higher [[Thieving]] level (after the reductions in the maze) have better chances of getting loot from the safe.
Line 170:
Line 194:
==Rewards==
==Rewards==
−
* Experience for [[Agility]] and [[Thieving]] based on the progress through the maze.<br />Progress experience is also awarded when you quit (via the gem option) or are otherwise sent back to the waiting room although only a success and quiting will show the amount of experience awarded
+
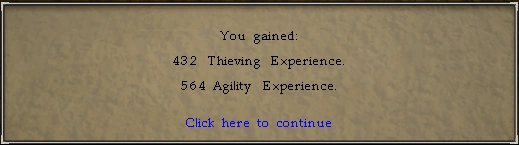
* [[File:Rogues den reward.png|thumb|288px|A players reward.]]Experience for [[Agility]] and [[Thieving]] based on the progress through the maze.<br />Progress experience is also awarded when you quit (via the gem option) or are otherwise sent back to the waiting room although only a success and quiting will show the amount of experience awarded
*One of the following items, if the safe is reached:
*One of the following items, if the safe is reached:
** A [[Rogue Kit]] - transforms into a [[spade]], [[chisel]], [[rope]], or [[tinderbox]]. The kit is stackable, and can be useful for [[quest]]s and [[Treasure trails]].
** A [[Rogue Kit]] - transforms into a [[spade]], [[chisel]], [[rope]], or [[tinderbox]]. The kit is stackable, and can be useful for [[quest]]s and [[Treasure trails]].
** A piece of [[Rogue armour]] - the full set can be stored in a [[POH|Player-owned House]]. None of the pieces can be traded.
** A piece of [[Rogue armour]] - the full set can be stored in a [[POH|Player-owned House]]. None of the pieces can be traded.
−
**There is also a chance to trigger a trap and get nothing.
+
** There is also a chance to trigger a trap and get nothing.
−
====Rogue Armour====
+
====Rogue equipment====
+
[[Rogue equipment]] consists of:
* [[Rogue mask]] (+5 Defence)
* [[Rogue mask]] (+5 Defence)
* [[Rogue body]] (+10 Defence)
* [[Rogue body]] (+10 Defence)
Line 185:
Line 210:
==Music==
==Music==
−
*[[The Far Side]] is unlocked inside the maze.
+
* [[The Far Side]] is unlocked inside the maze.
−
−
==Trivia==
−
* [[Brian O'Richard]] is based on the British television actor, [[Wikipedia:Richard O'Brien|Richard O'Brien]] who in the past hosted a popular UK game show [[Wikipedia:The Crystal Maze|The Crystal Maze]]. He often played a harmonica while contestants were doing the puzzles. Brian O'Richard alludes to this by asking you to search for his harmonica when you first speak to him. The idea that Brian's 'Mummsie' owns the Rogues Den is also taken from the same TV show.
−
* Players can store a [[Rogue armour]] set in their [[POH|Player-owned houses]].
−
* The [[Rogue kit]]s could come in handy when players are doing a new quest. Without knowing what to bring, these kits can be transformed into useful items for the quest.
−
* Players who wish to bank their items before entering the maze can do so by talking to [[Emerald Benedict]].
−
* If a player exits during the knob puzzle and reuses it, they will see the order of the knobs being turned, usually only 3 moves. By doing these in reverse order you solve the puzzle.
−
* At one point there was a glitch in which, if a player followed the route outlined near the top of the page, when they came to the third area containing saw blades, the player would jump back and forth over the blade until their agility level drained completely, at which point they would be kicked out of the maze as if they had failed an obstacle. This was fixed by Jagex.
−
* If a player stands on the fire near [[Emerald Benedict]], the top of the their body appears to light up, which is unrealistic, since the light from the fire is coming from underneath them.
−
* Many players use the bank for cooking, because of the small distance between a permanent fire and the bank.
The dangerous Rogues Den, where thieves and athletes test their skills.
The Rogues' Den was a minigame where players had to go through a maze containing various traps and obstacles to reach a safe at the end. Players would then used their thieving skills to try to open the safe to receive their loot.
Rogues' Den was located under the Toad and Chicken Inn in Burthorpe. The fastest way to get there was by using a Games necklace to the Burthorpe Troll Invasion area, going south and east around the castle, and then going south-east to the inn and down the trapdoor behind the bar. See Rogues' Den for other means of getting there.
To get inside the maze, the player would have spoken to Brian O'Richard and get a Mystic Jewel. Other than the jewel, players could not take any item into the maze (nothing equipped and nothing but the jewel in inventory). To use a bank to store their items, players may speak to Emerald Benedict, who can be found near the fire.
Players could activate the Mystic Jewel while in the maze and can then choose to leave, being teleported back to the main room in the Rogues' Den.
Obstacles
Trap
Agility/Thieving
Level reduction
Bridge
Agility
2/sec
Contortion Bars
Agility
5
Door (Level 80+ Shortcut)
Thieving
10
Floor Blades
Agility
3
Floor Traps
Thieving
1
Grill
-
-
Ledge
Agility
5
Moving Blades
-
-
Pendulum
Agility
3
Spinning Blades
-
-
Wall Traps
Thieving
1
Map of the Rogues' Den maze
The Rogues' Den maze
A test for your agility skills!
Would you like to be crushed, pierced or sliced?
That's just the floor... Or is it?
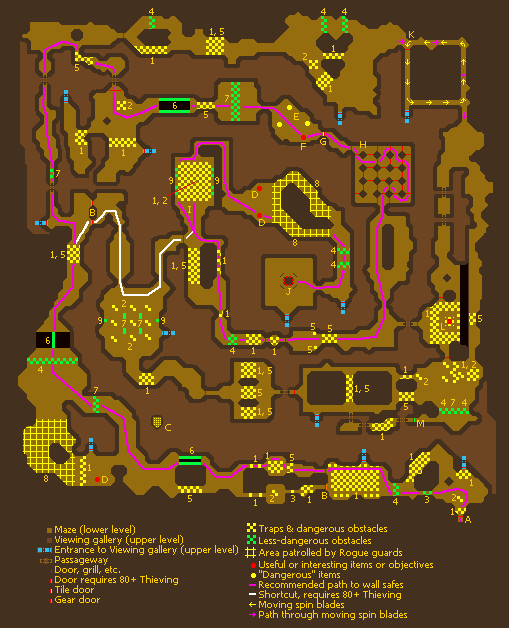
Traps and dangerous obstacles are shown in yellow on the map. You immediately leave the maze if you trigger a trap or touch a dangerous obstacle. Traps can be disarmed by searching them; this uses up thieving points. Some traps can be run past or over without triggering them, without using up thieving points. However, only run a short distance (about 3-4 squares) at a time. Longer runs can trigger a trap.
Less-dangerous obstacles are shown in green. You use up agility points when you pass these obstacles. They are not dangerous unless you run out of agility points, in which case you fail them and immediately leave the maze. When there's a choice between passing traps or obstacles, many players prefer to pass the obstacles. However, this strategy is risky for players with agility levels lower than about 54 or 55, as they can run out of agility points before they reach the final two pendulums that block access to the wall safes. Each pendulum requires 3 agility points, so watch your agility level and take some traps instead of obstacles when necessary to ensure having 6 agility points left.
All doors in the maze are one-way: you can only pass them in one direction. This includes the doors to go to the viewing gallery and even includes the first door you use to enter the maze. Passageways, however, are two-way.
Warnings:
All traps and obstacles on the main routes to the wall safes are marked on the map. The map, however, is not pixel-by-pixel accurate to the exact placement of the traps, so only use it as a guide. See the walkthrough below for a detailed guide of getting through the maze.
Some of the less-visible traps may have been missed in some of the more remote areas of the map, such as barely-visible floor or wall traps. Most, if not all, have been found.
Map Notes:
1) Floor traps of all sorts, including floor spikes and pressure pads.
2) Spinning blades on pedestals (dangerous obstacles).
3) Contortion bars (less-dangerous obstacles).
4) Pendulums (less-dangerous obstacles).
5) Wall traps.
6) Ledges, either hand-hold ledges or "bridges" (both less-dangerous obstacles).
7) Floor blades (less-dangerous obstacles).
8) Areas patrolled by Rogue guards (dangerous obstacles).
9) Moving blades hidden in walls (less-dangerous obstacles).
A) Entrance to the maze.
B) Locked doors. Players with level 80+ thieving can pick the locks of these doors. The two locked doors in the west part of the maze open up a shortcut that is considerably quicker than the standard route.
C) This room with spikes protruding from the floor can be seen from the viewing gallery but apparently is not connected to any other part of the maze.
D) Blinding powder, which can be used to temporarily blind rogue guards.
E) The three tiles marked in yellow on the map are incorrect tiles and will not open the mosaic door.
F) The tile marked in red on the map is the correct tile for the door.
G) The mosaic door, which opens when the correct tile is inserted.
H) Grill room. There is only one correct path through the grills (shown on the map). The room is not dangerous, however, as choosing the wrong grills only results in you having to find you way back to the starting grill and trying again.
I) The "room of death". If you are OK for agility points, go along either of the side walls (you will automatically jump out of the way of the moving blades hidden in the walls). If you are running low on agility, make your way across the floor traps (either searching them or running for short distances). Always avoid going anywhere near the spinning blades on the pedestals!
J) Eight wall safes, the objective of the maze. Open any one of them.
K) Two moving, spin-blade obstacles follow the path marked with yellow arrows on the map. The door in the western corridor blocks you from moving in the same direction as the spin blades. Instead, you must move in the directions indicated by the yellow arrows. You should run down these corridors and time your run to get into the side niches before a spin blade comes through. Note: These obstacles are not on the main path to get to the wall safes. You can take this route, but it is much longer to reach the safes this way. You do have to pass these obstacles if you want to get to the chest room.
L) Chest room. This room has many floor traps, so be careful. There are traps all next to the chest, but you can search a trap, disarm it, and have time to search the chest. However, be sure to search the trap to the front of the chest (the trap immediately west of the chest). Otherwise, when you go to search the chest, you will automatically move to this spot anyway. Almost all players regard the chest as a big waste of time, since it only yields 10 coins.
M) The gear door (not dangerous). You must solve a puzzle consisting of moving four gears to their correct positions for the door to open. You can keep trying as long as you like, and you can also just abandon the puzzle and go somewhere else without penalty. The gear door does not lead to any place interesting or rewarding.
The gear door
Walkthrough
Much of this walkthrough may be obsolete due to an invisible update, such as the ability to run over multiple traps without harm.
Objective
The objective of this activity is to get to the centre of the maze, without getting caught in any of the traps. With every trap disarmed, the player's thieving level is reduced by one, and similarly for every obstacle passed, the agility level is reduced by one. If either of these levels reach 0, the mini-game is over. This results in players being teleported back to the waiting room. Additionally, whilst in the maze, prayer is reduced to zero so that the Rapid Restoreprayer cannot be used.
Experience is gained depending on how far the player gets through the maze. Players may also get some loot at the end of the maze, when they are given a chance to crack open a safe. Agility, Thieving and Prayer stats are restored to their normal levels when the player leaves the game either via the gem, by being caught by a trap, or by successful completion.
Tips and tricks
It is recommended to set detail to "safe mode" or to turn off textures. This is so that the spike traps will be very visible and be less annoying.
If players have run on, they can move over one floor/wall trap (one square) in one go without needing to disarm them. This is done by standing on the square before the trap and then running over it. Using this trick, players can actually complete the whole maze without having a single Thieving level drained.
Starting off
Players start at the doorway, where they will be able to enter the maze. There are some Floor traps nearby. They can just pass these traps while running, without activating one. You need to be next to it or else you get caught.
To the west, there are some Contortion Bars. Players have to climb through these bars.
Players will reach a giant swinging Pendulum. They should jump through the pendulum by clicking across it.
Players will arrive at a room with dozens of floor traps. These traps do not need to be disarmed. They should just walk around the floor traps, and open the Grill to go into the next room.
Moving a little bit forward, they will notice that there are Wall Traps on the walls straight ahead. Run past the wall trap and stop before the floor traps.
For players with Thieving level of 80+, there is a shortcut here. Players should picklock the southern door, and arrive at a room that is filled with Spinning Blades, and two obvious Floor Traps. Players will notice that their Thieving level will be reduced by 10.
Further On
Players will arrive at a room with lots of Floor Traps again. The best route is through the south path. They should run to the west, and move on towards the next area.
There are Floor Traps here, run past them.
Players continue on from here, and should head west. Once there, they will notice a void with Ledges on both sides. These Ledges should be traversed across.
To the north are several Floor Blades. These blades are similar to the Pendulums encountered earlier. Players should jump across by clicking ahead of the blades.
Going forward, players will come across 4 Pendulums. They may pass through any one of the Pendulums. Upon getting through, they will reach another void with a Bridge to cross.
Players continue on until they reach an area with traps: Floor Traps and Wall Traps. They are advised to run past the wall traps, as there are only 2 of them, compared to the 4 floor traps.
In the midst of things
If players have a Thieving level of 80+, they can now use a significant shortcut (which brings the player almost at the end of the maze) by picklocking the door on the east wall. These would reduce the Thieving level by 10.
However, those with lower thieving level will have take a longer route. Players need to keep going north until they reach an intersection. They should go east, then up north. Then, they should pass through a passage, and cross the Floor Blades. After crossing the blades, they should proceed north and pass through a second passage.
Once through, players need to walk north, east, and head south. Up ahead, there are some "nails" sticking out of walls. These are a different kind of Wall Traps. These six traps can all be disarmed, similar to the Wall Traps encountered earlier. However, there is a way where players only have run past it without disarming anything. Players can run past the first 2 and walk diagonally across the other traps.
A square indicates where the player should move to avoid the Wall Traps.
Players then will need to go through a passage, and open the Grill. They should go east from here, but beware of the Spinning Blade. If a player gets hit by this, they will be sent back (to the waiting room). They should go around the Spinning Blade, and traverse the Ledge across the void.
After traversing the Ledge, players will reach an area with 4 Wall Traps. They should disarm them, and proceed through the traps.
The end is nigh
The following room is filled with Floor Blades. Players only have to jump over one Floor Blade, thus saving an Agility level.
The Correct Puzzle Piece
Players should go forth, reaching a room with 4 tiles on the floor. There is only 1 correct tile (and the correct one is circled in the image.) The other tiles are either the wrong ones, or have a trap on them. Players proceed to the door, then click to open up a "puzzle". They can then click on the correct tile (in the image/Southeastern), and the door will open.
In the next room, players will notice a mini maze full of Grill doors. Players have to go to the end of this maze in a certain way, or else some doors would not open for them.
Players should trek on, and they will encounter more traps: 3 Wall Traps. They should disarm the traps, and proceed.
Players will be arrive at a Grill door. They should open the door, and continue on. Next, they will encounter some Floor Traps. Players disarm, and proceed to open another Grill door further down. Again, players will encounter more Floor Traps to be disarmed. Finally, players will reach the swinging Pendulum. They can just jump through it by clicking ahead.
After passing the pendulum, players should continue on until they reach a narrow path. Here, there is a hard-to-see Floor Trap. Players could run past this trap.
The finishing line
Players should take the eastern path, and run past the first 2, then the last Floor Trap.
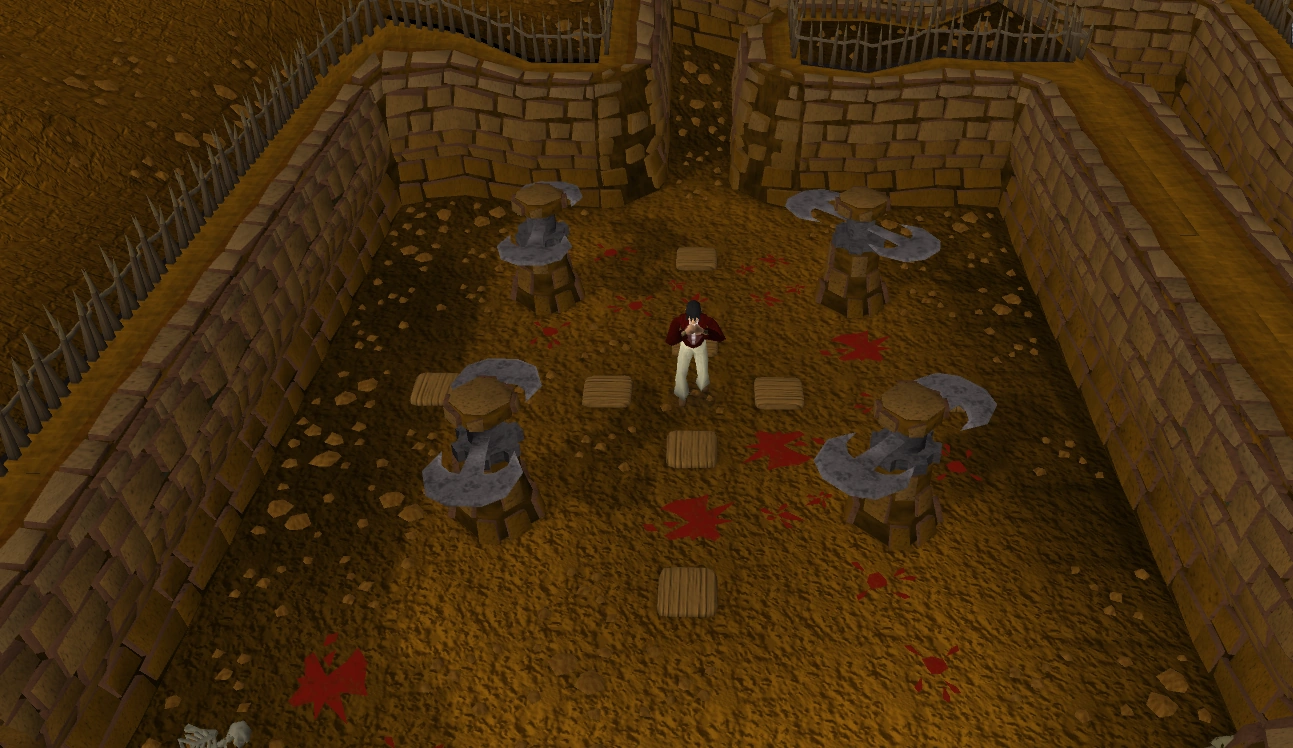
Further ahead is a room with 4 Spinning Blades, and lots of Floor Traps. To proceed, players must run to the middle of the room, past the first 2 floor traps, then run over the last 2 floor traps.
After players have passed the room with the Spinning Blades, they should keep following the path until players are able to see 2 "red dots" on their minimap. These are Flash Powder, used to distract the Rogue guards in the area ahead. There are 2 guards patrolling 2 different paths, and players are required to go through one of these paths to proceed.
Players should take either one of these powders, and use it on one of the guards. Players are advised NOT to get too close to the guards, as these guards might notice and bring them back to the waiting room. As soon as players have thrown the powder, they should
The end of the maze.
immediately run along the path past the blinded guard. Players should not hesitate as the effects of the powder only last a few seconds.
Players should get past the 2 Pendulums by clicking ahead of these. Once past these pendulums, players will arrive in an area with four wall safes embedded in a central column.
As player can see, they lost only 1 thieving level in the complete maze.
Cracking the safe
A player cracking a wall safe.
Players should proceed to crack any one of the safes. Those with higher Thieving level (after the reductions in the maze) have better chances of getting loot from the safe.
When players try to crack the safe, one of these 4 scenarios might happen:
Players crack the safe, and receive a piece of Rogue armour.
Players crack the safe, and receive an uncut gem.
Once players have tried cracking the safe (either successfully or unsuccessfully), they are sent back to the waiting room. Brian will reward the player with some experience in Thieving and Agility.
Note: Players must repeat the maze to obtain the full Rogue armour, and additional Rogue Kits. It may take many attempts to obtain the full Rogue armour.
Rewards
A players reward.
Experience for Agility and Thieving based on the progress through the maze. Progress experience is also awarded when you quit (via the gem option) or are otherwise sent back to the waiting room although only a success and quiting will show the amount of experience awarded
One of the following items, if the safe is reached:


