This is part 3 of the series of editing guides of the RuneScape Wiki. This guide is a step-by-step process on VisualEditor advanced things - or, how to use tables, references, and templates in the VisualEditor offers.
This guide is made from the perspective of a logged-out user (or a logged-in user with default preferences). It also assumes you have read the first and second guide; if you haven't, please do so first!
This guide covers three more complex things:
- Headings
- Tables
- References
- Templates
Walkthrough[]
Headings[]
Headings are actually fairly simple. They're added from the dropdown at the top:
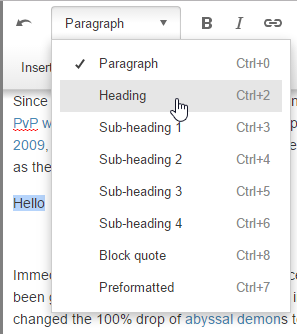
In general:
- Heading level 1 is not used (it is also not present in the dropdown - notice there is no ctrl-1)
- Each subheading is smaller than the previous - below 3 and it starts getting comical, so stay away from those too
Tables[]
Tables are a common way to display information compactly. We're just going to cover basic tables here - more advanced ones are better done with source mode, or may already have a template.
Inserting and edting[]
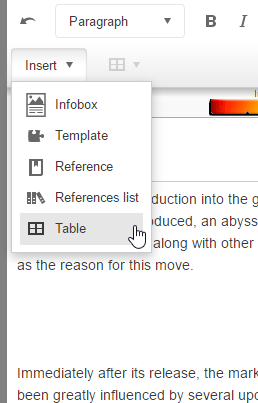
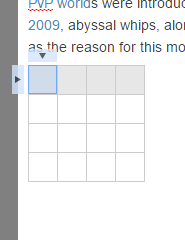
To insert a table, select "Table" from the "Insert" menu at the tip of the page.
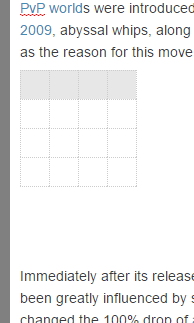
This inserts a blank, 4 by 4 template, with the top row as header cells.
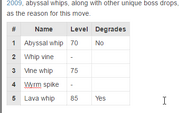
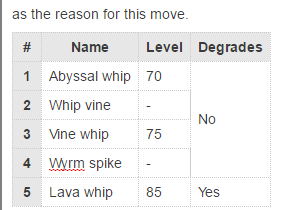
You can type into a cell by simply clicking it and typing; you can add other things like links, images, bold, etc. as normal. Here's a filled-in version that we can work on.
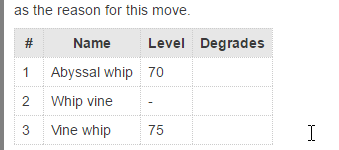

There's a few things to do to this table for demonstration:
- Add some extra rows for the lava whip
- Make the leftmost column header cells
- Merge the cells in the degradable column
New rows and columns[]
Clicking any cell adds an arrow to the top and left, outside the table.

Clicking these gives the option to add (and remove) rows and columns.
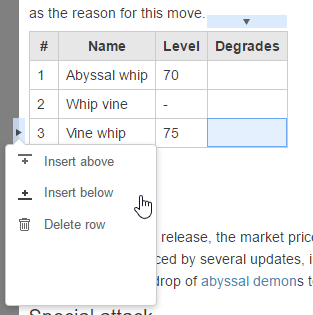

Two rows added and filled.


Header cells[]
Header cells can be added and removed using the dropdown in the toolbar. Much like a spreadsheet, we can select multiple cells by clicking and dragging, so we can do the entire column at once.

Headers can be removed in the same way.
Merging[]
Merging is done in a similar way to the header cells; click and drag to select the cells to merge, then click the table icon in the toolbar and select merge cells. (This is where you can delete the table or add a table caption, too.)
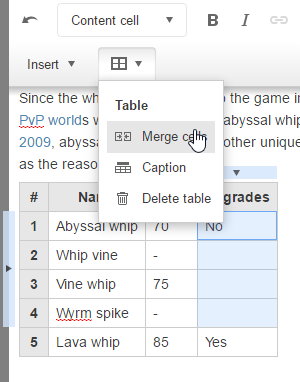

And we're done with this table.

References[]
References cover two types of things: citations and footnotes. Citations are used to back-up statements with a source; footnotes add an addendum to a statement.
We have a variety of citation templates which properly format citations, so those won't be covered here. We do prefer those to be used for citations, but if you aren't sure how to use them, you can just use a normal footnote and someone else can fix it later.
Inserting[]
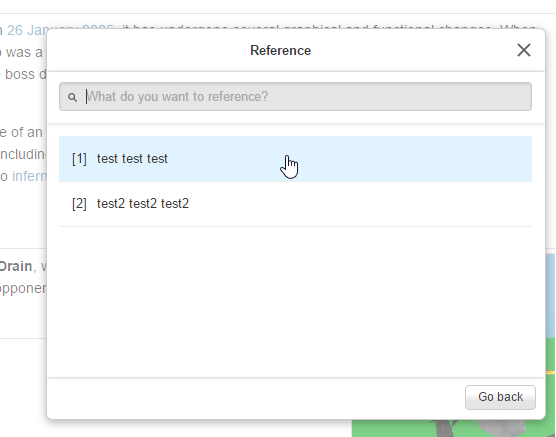
References are inserted like tables, using the "Insert" menu of the toolbar.
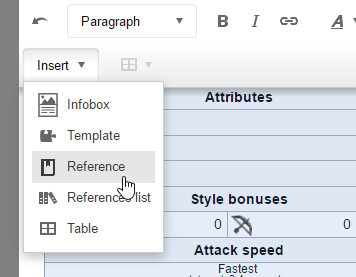

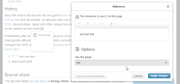
This opens the insert reference dialogue.
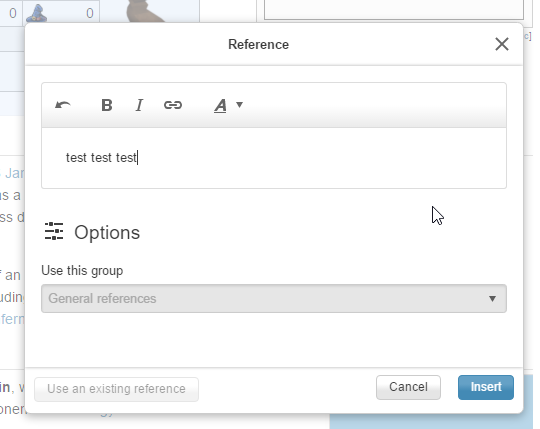

In the dialogue we can set the text of the reference, use an existing reference, or assign it a group. For now we're just going to set some text and click the "Insert" button.
References list[]
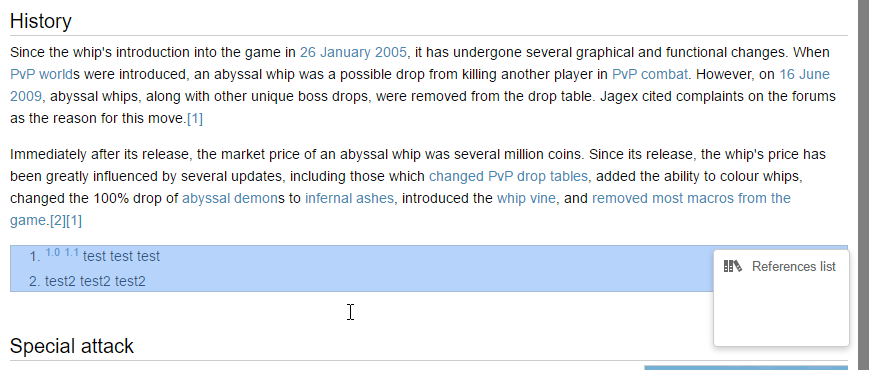
Inserting the reference is half of the process, we now need to add the references list - the place where we want all the references to be listed out.
The list for citations should go at the end of the page, under any trivia sections and above navboxes. Footnotes should go at the end of the relevant section - use common sense on where to place it.
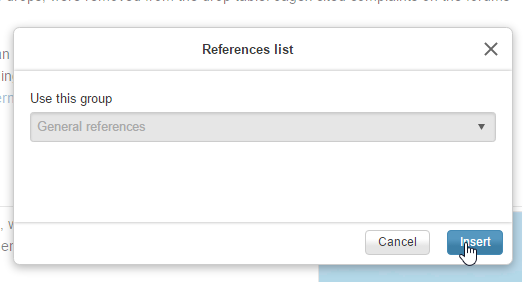
References lists are added from the "Insert" menu in the toolbar.

- Tips
- References lists will list all references (for the selected group) above it on the page up to the previous references list (for the same group) or the top of the page
- If there are no references, the references list will be an error and should be removed
- If there are references, but no references list (for each group), there will be an error at the bottom of the page, so a list should be added
- Templated references (citation templates) won't show up as references in the VisualEditor until the page is saved
Reusing references[]
Sometimes a reference can apply to several parts of the same article/table/section. Rather than duplicating it, we can have the reference be reused.
Here, an additional reference has been created, and a third has been started. Click the "use existing reference" button on the bottom of the dialogue to open this menu:

Now we can select the reference, which then shows up in the references list with additional links to click next to the reused reference.

Reference groups[]
By default, the "general references" group is used by the editor. If we want to separate out reference types - e.g. citations from footnotes - we use groups.
In the reference creation dialogue, simply type the name of the group into the box. If the group already exists, you can also select it from the dropdown. Fow now, we're going to move reference 1 to group "test":

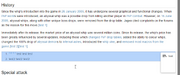
Be aware that this name is visible, so make it short and descriptive. For notes related to drops, "drops" is a good choice; general notes can use "notes".
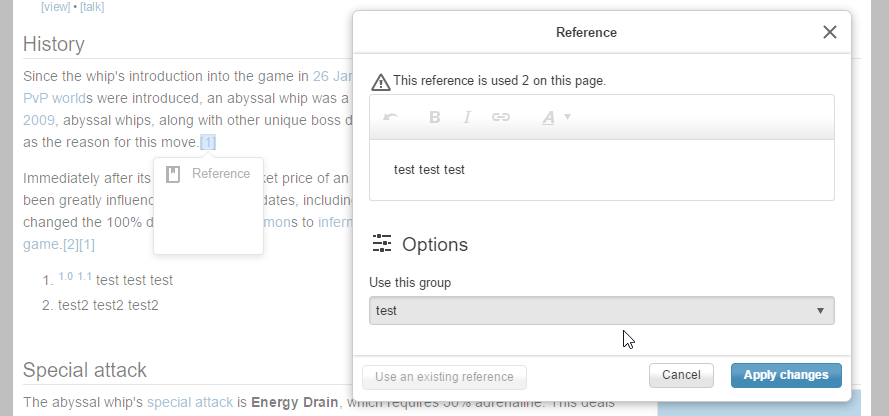
Notice the reference says "[test 1]" instead of "[1]", and "[2]" is now "[1]" - this is because reference numbers are group specific. Also notice that the reference is no longer in the list - reference lists are group specific. Also notice that the tooltip now says the name of the group:

Add another references list as before, but select the group to be for "test" instead of general. Add some bolded headers to clarify which list is which.


And that's all we're going to cover on references. For more information, see the source mode guide or the references style guide. Both of these also cover citation templates.
Templates[]
Templates are the last thing we're going to cover in the VisualEditor, as they really show the problems with it. But first, a quick introduction.
Templates implement a process called transclusion. Transclusion is the inclusion of part or all of one page inside of another page. This allows a number of benefits:
- The same information can be on every relevant page without having to type it each time
- Any time the information needs updating, it can be done so to all pages at once
- It can lend a consistency of style over all pages making them easier to extract key information
In MediaWiki, transclusion is actually more advanced, as you can pass data into the page being included, and it can change itself as a result. This can be as simple as passing a value and that value being displayed, or the entire visual design changing to something completely different.
Templates are made up of two parts:
- One name, which determines which template we are using
- Parameter-value pairs, which define the data passed in to the template. There may be none, one, or many pairs, depending on what is needed by the template
Using existing templates[]
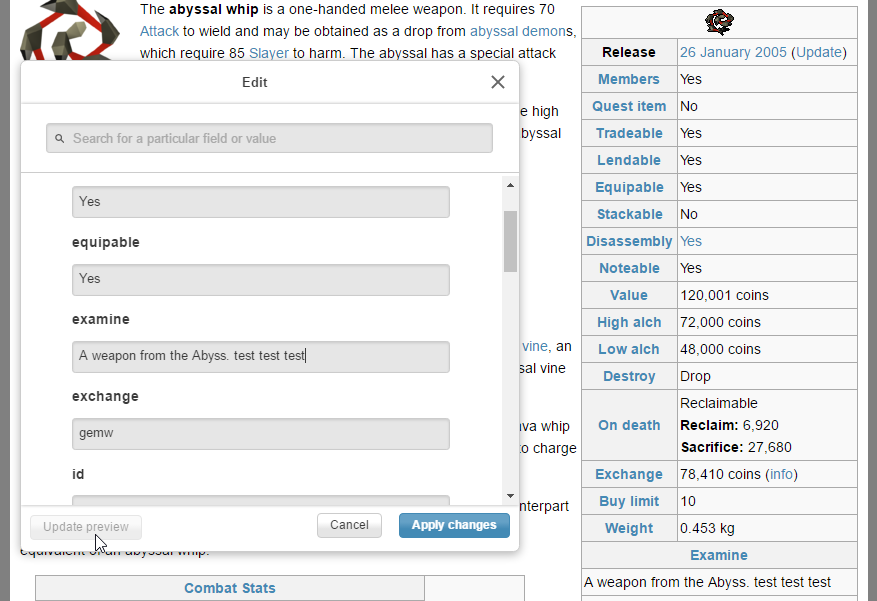
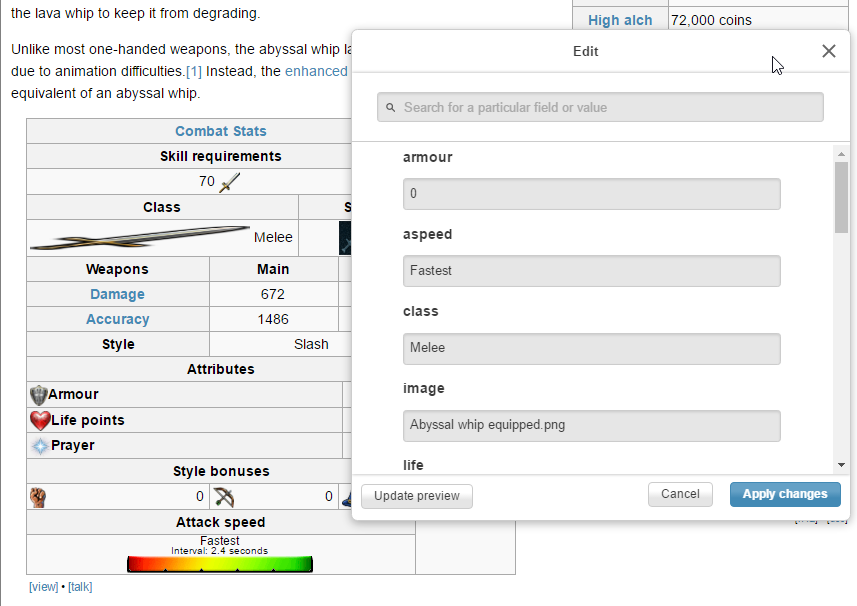
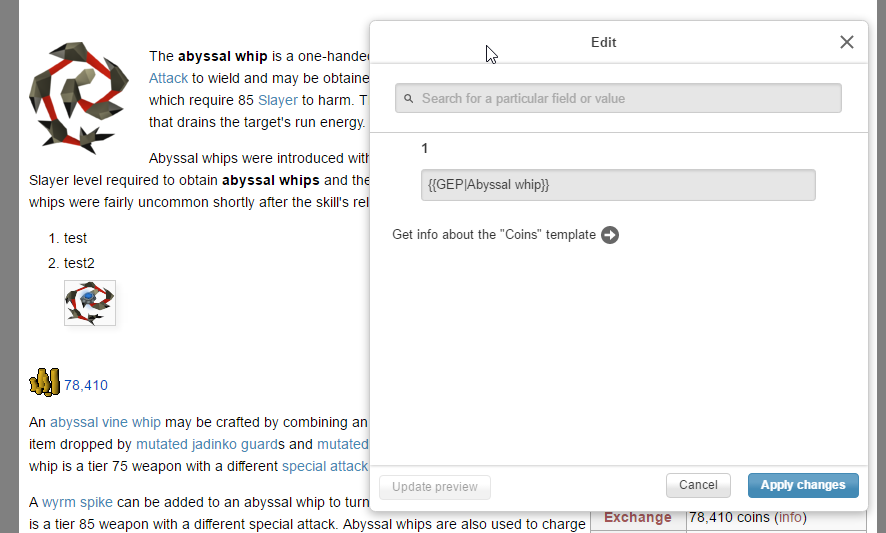
Click on a template - for example, the large table on the right of a page (Infobox Item) - and click the popup to open the template editor.
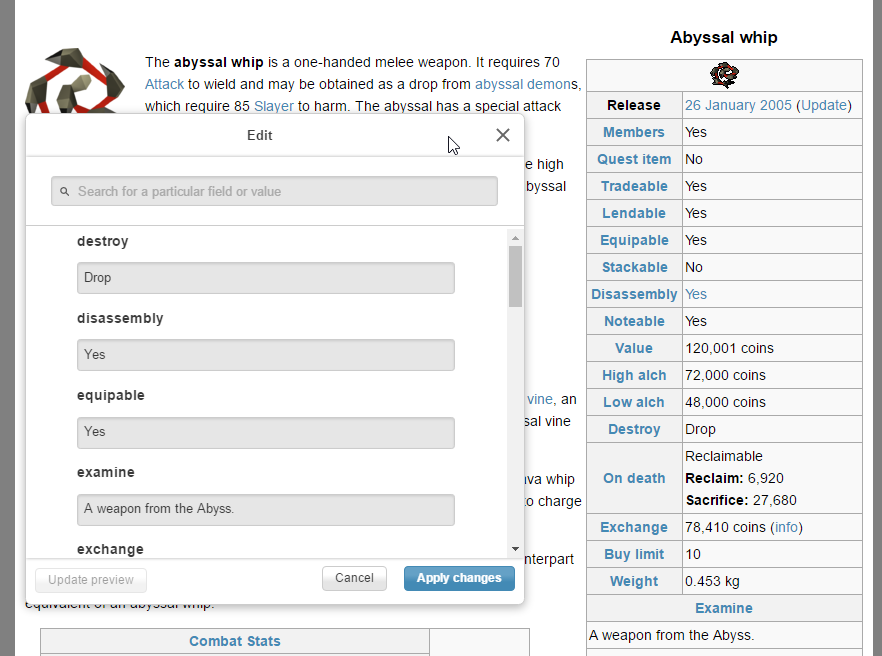

Here we have a list of parameters and the corresponding values. Here you can edit them as you like, then click "Update preview" to see how it looks - as I have with the examine parameter. Click "Apply changes" to finish editing the template, or "Cancel" to revert the edits to the template. At the bottom of the parameters, you can click the "Get info about this template" link to open the template documentation in a new tab.

Other examples include the 'variant' template at the top of the page:
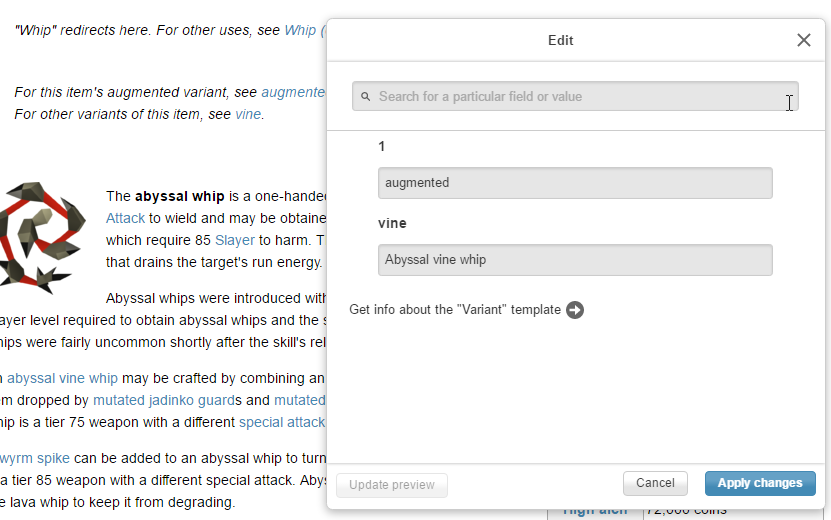

And infobox bonuses:
Inserting[]
To insert a template, click the "Insert" dropdown in the toolbar and select "Template". From there, use the search to find a template - for now look for the template named "incomplete".
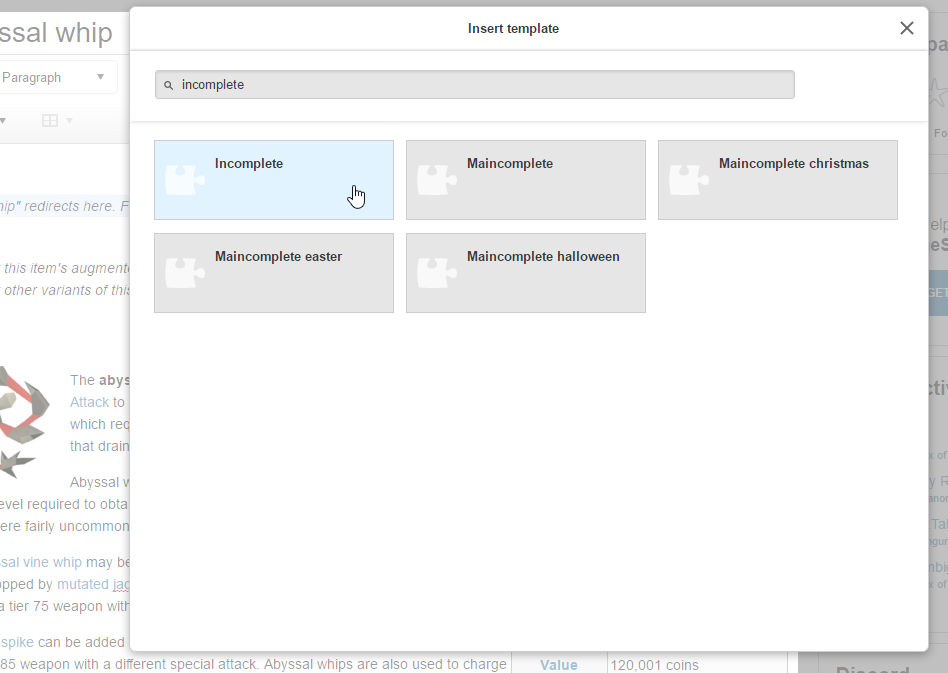

Click on the box to insert it.
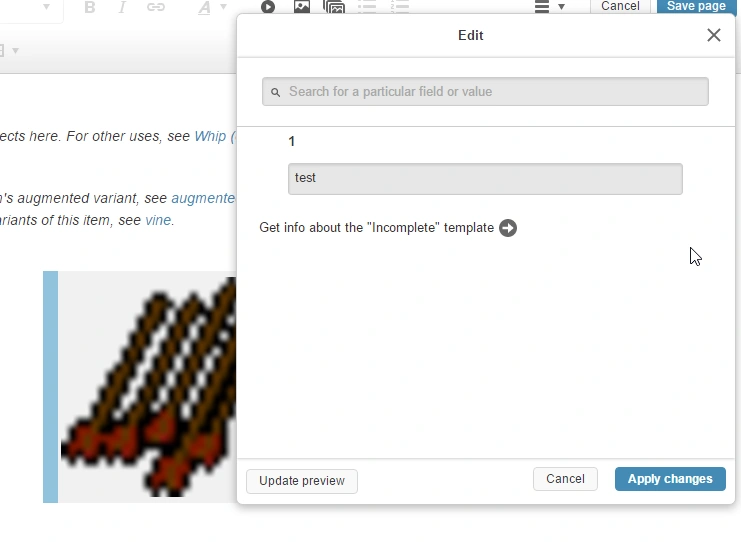

Now we can fill in the parameter, which is 'named' "1" (it is really the first unnamed parameter, but this interface doesn't distinguish between them). The same buttons are here as above. (Clicking "Cancel" only cancels the edit to the template, not the insertion of it; you can delete it by selecting it and pressing the backspace or delete key on your keyboard.)
Problems[]
The VisualEditor isn't very graceful with templates. For example, try inserting the "coins" template.
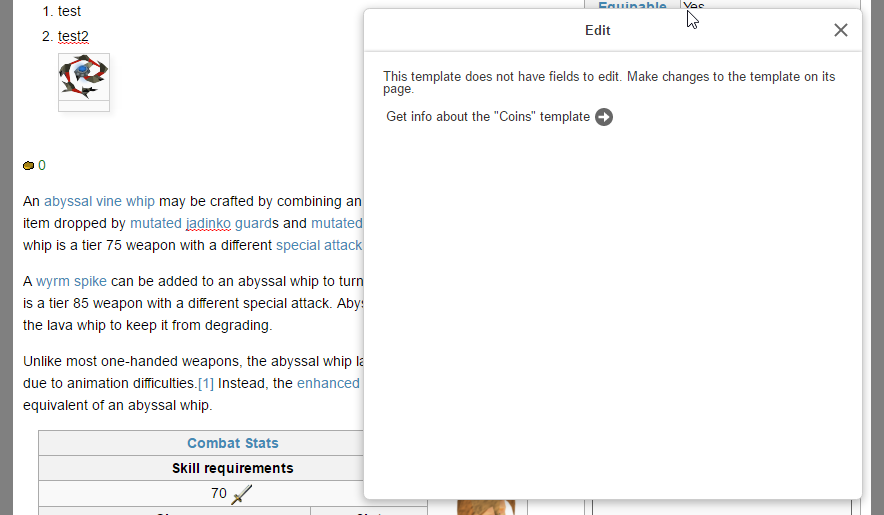

The VisualEditor claims that there are no parameters associated with the template.
This is because the coins template - and many others - is based on a lua backend. This means that the editor can't automatically detect what the parameters are, and it doesn't have a way to manually add new ones. So, in order to use many templates you need to use source mode anyway. Here, I've added relevant code to the template in source mode.

Notice that the parameter contains plain wikicode - so even if you can edit the parameters of a template, if you need to use more than plain text you have to know wikicode anyway!
See also[]
- This guide concludes the VisualEditor guide. There's really nothing more to learn about it, and to do more you need source mode. Luckily, the next guide is RuneScape:Editing/Source mode basics.
- RuneScape:Style guide
- RuneScape:Style guide/References and citations
- RuneScape:Template policy
- Want some more help?
- Ask for help with this topic on the article's talk page.
- Ask for general editing help at RuneScape:User help.
- Request help from an administrator at RuneScape:Administrative requests if you need help which requires an administrator's tools.
- Chat to other editors in our Discord channel.