(fixed link) Tag: sourceedit |
mNo edit summary Tag: Visual edit |
||
| (34 intermediate revisions by 22 users not shown) | |||
| Line 1: | Line 1: | ||
{{Has quick guide}} |
{{Has quick guide}} |
||
{{Infobox Quest |
{{Infobox Quest |
||
| ⚫ | |||
|image = [[File:Rune Memories.png|200px]] |
|image = [[File:Rune Memories.png|200px]] |
||
|release = [[28 November]] [[2012]] |
|release = [[28 November]] [[2012]] |
||
| Line 6: | Line 7: | ||
|members = Yes |
|members = Yes |
||
|voice = Yes |
|voice = Yes |
||
| − | |series = [[ |
+ | |series = [[Signature Heroes quest series|Signature Heroes]] |
|difficulty = Novice |
|difficulty = Novice |
||
|number = 186 |
|number = 186 |
||
| Line 14: | Line 15: | ||
==Official description== |
==Official description== |
||
| − | {{ |
+ | {{Quote|At the end of Rune Mysteries, Ariane found herself in a bit of a bind, and now she needs your help once more. You'll fully explore the arcane ruins beneath the Wizards' Tower and experience - through the memories of its former inhabitants - the clashes of magical ideals that led to the old tower's downfall. Dig deep enough and put together the pieces of this ancient puzzle, and you'll have all you need to free Ariane and avert the disaster once and for all.}} |
==Walkthrough== |
==Walkthrough== |
||
| Line 21: | Line 22: | ||
|start = Talk to Ariane in the ruins beneath the [[Wizards' Tower]]. |
|start = Talk to Ariane in the ruins beneath the [[Wizards' Tower]]. |
||
|difficulty = Novice |
|difficulty = Novice |
||
| − | |length = |
+ | |length = Long (~25 minutes) |
|members = Yes |
|members = Yes |
||
| − | |requirements = |
+ | |requirements = |
| + | {{Questreq|Rune Memories}} |
||
| ⚫ | |||
| + | |items = |
||
| ⚫ | |||
}} |
}} |
||
===Return to the Tower=== |
===Return to the Tower=== |
||
| − | + | Speak with Ariane who is in the ruins beneath the Wizards' Tower. There is a dungeon link on the north east side of the tower. You must pass through two doors in the ruins before you reach Ariane. She will tell you she wishes to investigate the vortices further and requires your help. Accept and start the quest. |
|
Once you accept the quest, Ariane will attempt to cast a spell, but it will lead her to be trapped within the power beam. In order to aid her, [[Ariane]] will give you a [[prepared fire rune]] and a [[prepared air rune]]. Use the fire rune on any red vortex, and the air rune on any grey vortex. Doing so will absorb the soul fragment contained in the vortex into the rune, making the [[Glowing rune|rune glow]]. |
Once you accept the quest, Ariane will attempt to cast a spell, but it will lead her to be trapped within the power beam. In order to aid her, [[Ariane]] will give you a [[prepared fire rune]] and a [[prepared air rune]]. Use the fire rune on any red vortex, and the air rune on any grey vortex. Doing so will absorb the soul fragment contained in the vortex into the rune, making the [[Glowing rune|rune glow]]. |
||
| Line 44: | Line 47: | ||
When you speak with Ariane again, she will give you the remaining runes you need to hold the soul fragments. Use the prepared chaos rune on the remaining red vortex, and the cosmic rune on the remaining Grey vortex. Use the nature and earth runes on the green vortices and the law and water runes on the blue vortices. |
When you speak with Ariane again, she will give you the remaining runes you need to hold the soul fragments. Use the prepared chaos rune on the remaining red vortex, and the cosmic rune on the remaining Grey vortex. Use the nature and earth runes on the green vortices and the law and water runes on the blue vortices. |
||
| − | At this point, remember what soul each of the following [[Glowing |
+ | At this point, remember what soul each of the following [[Glowing rune]]s represents: |
{| class="wikitable" |
{| class="wikitable" |
||
! colspan="2" rowspan="1" | Character |
! colspan="2" rowspan="1" | Character |
||
| Line 92: | Line 95: | ||
! colspan="2" |Alignment !!Rune type !!Location |
! colspan="2" |Alignment !!Rune type !!Location |
||
|- |
|- |
||
| − | | align="center" |[[File:Armadyl symbol.png|25px]] || width="90" |'''Armadyl''',<br />other gods and unaligned|| width="100" |Cosmic rune|| |
+ | | align="center" |[[File:Armadyl symbol.png|25px]] || width="90" |'''Armadyl''',<br />other gods and unaligned|| width="100" |Cosmic rune||North-west |
|- |
|- |
||
| − | | align="center" |[[File:Guthix symbol.png|20px]]||'''Guthix'''||Nature rune|| |
+ | | align="center" |[[File:Guthix symbol.png|20px]]||'''Guthix'''||Nature rune||North-east |
|- |
|- |
||
| − | | align="center" |[[File:Saradomin symbol.png|25px]]||'''Saradomin'''||Law rune|| |
+ | | align="center" |[[File:Saradomin symbol.png|25px]]||'''Saradomin'''||Law rune||South-east |
|- |
|- |
||
| − | | align="center" |[[File:Zamorak symbol.png|25px]]||'''Zamorak'''||Chaos rune|| |
+ | | align="center" |[[File:Zamorak symbol.png|25px]]||'''Zamorak'''||Chaos rune||South-west |
|} |
|} |
||
| Line 108: | Line 111: | ||
When you speak with Ariane, she will be horrified to learn that the Wizards of the Old tower were not above such pettiness as to steal each others ideas, and will ask you to go and trigger another memory in one of the studies of the four masters. |
When you speak with Ariane, she will be horrified to learn that the Wizards of the Old tower were not above such pettiness as to steal each others ideas, and will ask you to go and trigger another memory in one of the studies of the four masters. |
||
[[File:Azacorax arrives.png|thumb|250px|Azacorax, Keeper of the Key to the Abyss is summoned.]] |
[[File:Azacorax arrives.png|thumb|250px|Azacorax, Keeper of the Key to the Abyss is summoned.]] |
||
| − | Head north through the studies door and then to the Red Master's study, which is to the north |
+ | Head north through the studies door and then to the Red Master's study, which is to the north-east. Use the chaos rune on the Master chair, and the fire rune on the chair across the table. This will trigger a cutscene of a memory where the Red Master and Apprentice talk about how [[Azris the Green]] stole his idea. And that instead of trying to convince them it was his idea, they would just complete the research and be the first to come up with a ritual to use another plane to support teleportation. At the end of the cutscene you will see the Red Master summon a demon named [[Lesser demon (Wizards' Tower)|Azacorax]]. |
After the cutscene the runes will be returned to your inventory. Return and speak with Ariane. |
After the cutscene the runes will be returned to your inventory. Return and speak with Ariane. |
||
| Line 114: | Line 117: | ||
===The Teleportation Debate=== |
===The Teleportation Debate=== |
||
[[File:Meeting of the Apprentices.png|thumb|250px|Zanmaron tells the apprentices to prepare themselves for the creation of the beam.]] |
[[File:Meeting of the Apprentices.png|thumb|250px|Zanmaron tells the apprentices to prepare themselves for the creation of the beam.]] |
||
| − | Once again speak with Ariane and she will tell you to trigger |
+ | Once again speak with Ariane and she will tell you to trigger a memory in the library. |
Head to the library (east of Ariane) and use the air rune on the grey chair, the water rune on the blue chair, the fire rune on the red chair, the earth rune on the green chair, and the chaos rune on the table. This will trigger a cutscene of the Red Master and all the tower apprentices. He will announce he has finished a ritual to open a passage to the abyss, and presents each apprentice with a copy of the ritual to deliver to their Masters. He stresses that the ritual must be done exactly as stated or disastrous consequences could ensue. |
Head to the library (east of Ariane) and use the air rune on the grey chair, the water rune on the blue chair, the fire rune on the red chair, the earth rune on the green chair, and the chaos rune on the table. This will trigger a cutscene of the Red Master and all the tower apprentices. He will announce he has finished a ritual to open a passage to the abyss, and presents each apprentice with a copy of the ritual to deliver to their Masters. He stresses that the ritual must be done exactly as stated or disastrous consequences could ensue. |
||
| Line 121: | Line 124: | ||
Ariane will tell you she thinks if you can trigger the memory of the ritual, she may be set free. But as the ritual had to be so specific, and you don't know how it was done, you must search for old documents containing information on the ritual. |
Ariane will tell you she thinks if you can trigger the memory of the ritual, she may be set free. But as the ritual had to be so specific, and you don't know how it was done, you must search for old documents containing information on the ritual. |
||
| − | Head back to the library and search the shelves along the north-west walls and to the east straight past the table. There are 2 [[document fragment]]s to find here. Then head to the studies. The crates/chests in the destroyed studies are now searchable. Each room is labelled by the corresponding flag outside of the room. Search the Grey room, then the Blue room, and finally the Red room. There is one document fragment in each of the 3 remaining studies, plus a [[Diary (Rune Memories)|Diary]] in the Zamorak room within the same crate. Return and speak with Ariane once you have all 5 document fragments and the diary. |
+ | Head back to the library and search the shelves along the north-west walls and to the east straight past the table. There are 2 [[document fragment]]s to find here. Then head to the studies to the north of Ariane. The crates/chests in the destroyed studies are now searchable. Each room is labelled by the corresponding flag outside of the room. Search the Grey room, then the Blue room, and finally the Red room. There is one document fragment in each of the 3 remaining studies, plus a [[Diary (Rune Memories)|Diary]] in the Zamorak room within the same crate. Return and speak with Ariane once you have all 5 document fragments and the diary. |
===Beaming=== |
===Beaming=== |
||
| Line 127: | Line 130: | ||
[[File:Glowing rune placement.png|thumb|right|Image of how the Masters and Apprentices should be placed.]] |
[[File:Glowing rune placement.png|thumb|right|Image of how the Masters and Apprentices should be placed.]] |
||
| − | The runes should be placed as follows; |
+ | The runes should be placed as follows; you must have all of the document fragments for this to work. |
* North: Law |
* North: Law |
||
* North-east: Fire |
* North-east: Fire |
||
| Line 136: | Line 139: | ||
* West: Cosmic |
* West: Cosmic |
||
* North-west: Earth |
* North-west: Earth |
||
| − | |||
| − | (If it doesn't instantly change to a cut scene pick and replace the chaos rune). |
||
A cutscene of the wizards performing the ritual will begin. They will get partly through the ritual before the Blue wizards leave in anger as they realise the ritual consists of pure Red magic and involves demons. They break the ritual, and a lightning beam strikes down the Red Master. The cutscene ends, and Ariane is freed from the beam. However, she notices that the ritual is happening again, and Ariane pushes you out of the way while a similar bolt of lightning strikes her down and induces a magical coma. |
A cutscene of the wizards performing the ritual will begin. They will get partly through the ritual before the Blue wizards leave in anger as they realise the ritual consists of pure Red magic and involves demons. They break the ritual, and a lightning beam strikes down the Red Master. The cutscene ends, and Ariane is freed from the beam. However, she notices that the ritual is happening again, and Ariane pushes you out of the way while a similar bolt of lightning strikes her down and induces a magical coma. |
||
| Line 145: | Line 146: | ||
<gallery> |
<gallery> |
||
It doesn't matter who made it.png|Zanmaron tries to calm the wizards down, so that they don't disrupt the spell. |
It doesn't matter who made it.png|Zanmaron tries to calm the wizards down, so that they don't disrupt the spell. |
||
| − | + | The Ritual's Collapse.png|The ritual collapses when the blue wizards leave, from not wanting to associate with a demon. |
|
The Red Master dies.png|Zanmaron is killed by a blast of magic. |
The Red Master dies.png|Zanmaron is killed by a blast of magic. |
||
</gallery> |
</gallery> |
||
| Line 153: | Line 154: | ||
Speak with Ellaron who is located at the entrance desk next to Valina, and you will learn that Ariane is being possessed by each of the souls from the old tower. You will need to draw them all out of her using the prepared runes you have in order to save her and stop her from exploding causing the destruction of the tower. |
Speak with Ellaron who is located at the entrance desk next to Valina, and you will learn that Ariane is being possessed by each of the souls from the old tower. You will need to draw them all out of her using the prepared runes you have in order to save her and stop her from exploding causing the destruction of the tower. |
||
| − | The beam around her will |
+ | The beam around her will flash between red, grey, blue, and green. There are two types of beam styles: a simple coloured beam that contains an apprentice's soul, and the spinning, more elaborate beam that contains a master's soul. You will need to take note of the wizard or apprentice that speaks to you through Ariane, then use their appropriate rune on Ariane the next time the matching beam appears. |
| − | First, wait for the |
+ | First, wait for the elaborate grey beam, and use the cosmic rune on Ariane. Next is the simple blue beam, which requires a water rune. She will then ascend to the next floor; follow her up. |
| − | + | Now wait for the simple green beam, which requires an earth rune. Then use the fire rune on Ariane when you see the simple red beam. She will again ascend to the next floor; follow her up. |
|
| − | Then, wait for the |
+ | Then, wait for the elaborate blue beam, which requires a law rune, followed by an elaborate green beam, requiring a nature rune. She will then ascend to the next floor; follow her up again. |
| − | + | Finally, use the chaos rune on Ariane when you see the elaborate red beam, and the remaining air rune when you see the simple grey beam. |
|
Once you have drawn out all the souls, Ariane will be free. The souls will then possess Wizard Ellaron, and teleport him to the Abyss where he will supposedly explode, saving the Wizards' Tower! |
Once you have drawn out all the souls, Ariane will be free. The souls will then possess Wizard Ellaron, and teleport him to the Abyss where he will supposedly explode, saving the Wizards' Tower! |
||
| Line 170: | Line 171: | ||
==Rewards== |
==Rewards== |
||
| + | {{Quest rewards |
||
| − | [[File:Rune Memories reward.png|center]] |
||
| + | |name = Rune Memories |
||
| − | * 1 [[quest point]] |
||
| + | |qp = 1 |
||
| + | |rewards = |
||
* {{Skill XP|Magic|300}} |
* {{Skill XP|Magic|300}} |
||
* {{Skill XP|Runecrafting|300}} |
* {{Skill XP|Runecrafting|300}} |
||
* [[First tower robes|First tower robes (top and bottom)]] |
* [[First tower robes|First tower robes (top and bottom)]] |
||
| − | * Access to [[Archmage Sedridor]]'s personal rune |
+ | * Access to [[Archmage Sedridor]]'s personal [[rune chest]] |
| − | ** Contains <math>2.5 |
+ | ** Contains <math>2.5 \times level \times (level+1)</math> rune essence, where <math>level</math> is your Runecrafting level |
** For each additional level gained in Runecrafting, more essence is placed into the chest for you equal to five times your new Runecrafting level. |
** For each additional level gained in Runecrafting, more essence is placed into the chest for you equal to five times your new Runecrafting level. |
||
** There is no benefit or detriment whatsoever in waiting to increase your runecrafting level to use the chest. |
** There is no benefit or detriment whatsoever in waiting to increase your runecrafting level to use the chest. |
||
| + | |post quest= |
||
| ⚫ | |||
* Speak to the lesser demon on the 1st floor of the Wizards' Tower if you have at least {{Skill clickpic|Magic|50}} and {{Skill clickpic|Prayer|50}} to receive 10,000 {{Skill clickpic|Magic}} or {{Skill clickpic|Prayer}} Experience depending on if you choose to give him a drop of your blood or not, respectively. |
* Speak to the lesser demon on the 1st floor of the Wizards' Tower if you have at least {{Skill clickpic|Magic|50}} and {{Skill clickpic|Prayer|50}} to receive 10,000 {{Skill clickpic|Magic}} or {{Skill clickpic|Prayer}} Experience depending on if you choose to give him a drop of your blood or not, respectively. |
||
| ⚫ | |||
| − | * {{Universal quest reward}} |
||
| + | |music = |
||
| − | |||
| ⚫ | |||
| ⚫ | |||
| − | |||
| − | ==Music unlocked== |
||
* [[Bloody Foundation]] |
* [[Bloody Foundation]] |
||
| + | }} |
||
| + | |||
| + | ==Achievements== |
||
| + | * {{Achievement|Stealing Sedridor's Stones|20|Fully loot Archmage Sedirdor's chest.}} |
||
| + | * {{Achievement|Azacorax's Rewards|10|Speak to Azacorax after the 'Rune Memories' quest and gain Magic or Prayer XP.}} |
||
==Required for completing== |
==Required for completing== |
||
* [[Heart of Stone]] |
* [[Heart of Stone]] |
||
| + | |||
| ⚫ | |||
| ⚫ | |||
==Trivia== |
==Trivia== |
||
| Line 201: | Line 208: | ||
}} |
}} |
||
* Upon completing this quest, the Adventurer's Log will read: "I helped Ariane discover what happened to the old Wizards' Tower, and stop a secret Zamorakian from destroying the new one." |
* Upon completing this quest, the Adventurer's Log will read: "I helped Ariane discover what happened to the old Wizards' Tower, and stop a secret Zamorakian from destroying the new one." |
||
| − | * Sedridor's essence chest can contain a maximum of 24,750 pure essence (at level 99 Runecrafting), worth {{ |
+ | * Sedridor's essence chest can contain a maximum of 24,750 pure essence (at level 99 Runecrafting), worth {{NoCoins|{{GEP|Pure essence|24750}}|c}}. |
| + | {{Rune Memories}} |
||
{{Rune Mysteries (historical)}} |
{{Rune Mysteries (historical)}} |
||
{{Signature Hero quests}} |
{{Signature Hero quests}} |
||
| ⚫ | |||
| − | [[Category:Wikia Game Guides quests]] |
||
[[Category:Wizards' Tower]] |
[[Category:Wizards' Tower]] |
||
Latest revision as of 18:24, 11 October 2018

| |||||||||||||||||||||||||
| Release date | 28 November 2012 (Update) | ||||||||||||||||||||||||
|---|---|---|---|---|---|---|---|---|---|---|---|---|---|---|---|---|---|---|---|---|---|---|---|---|---|
| Members | Yes | ||||||||||||||||||||||||
| Voice Over | Yes | ||||||||||||||||||||||||
| Official difficulty | Novice | ||||||||||||||||||||||||
| Quest series | Signature Heroes | ||||||||||||||||||||||||
| Age | Fifth Age | ||||||||||||||||||||||||
| |||||||||||||||||||||||||
Rune Memories is the sequel to Rune Mysteries. In the quest, the player helps Ariane save the Wizards' Tower and learns much about the Wizards' Tower's history.
Official description
At the end of Rune Mysteries, Ariane found herself in a bit of a bind, and now she needs your help once more. You'll fully explore the arcane ruins beneath the Wizards' Tower and experience - through the memories of its former inhabitants - the clashes of magical ideals that led to the old tower's downfall. Dig deep enough and put together the pieces of this ancient puzzle, and you'll have all you need to free Ariane and avert the disaster once and for all.
Walkthrough
| Start point | |||
|---|---|---|---|
| Member requirement | |||
| Official difficulty | |||
| Official length | Long (~25 minutes) | ||
| Requirements | Skill requirements are not boostable unless marked with a [B] for boostable.
| ||
| Items required | Items from the tool belt are not listed unless they do not work or are not automatically added.
| ||
| Enemies to defeat |
|
Return to the Tower
Speak with Ariane who is in the ruins beneath the Wizards' Tower. There is a dungeon link on the north east side of the tower. You must pass through two doors in the ruins before you reach Ariane. She will tell you she wishes to investigate the vortices further and requires your help. Accept and start the quest.
Once you accept the quest, Ariane will attempt to cast a spell, but it will lead her to be trapped within the power beam. In order to aid her, Ariane will give you a prepared fire rune and a prepared air rune. Use the fire rune on any red vortex, and the air rune on any grey vortex. Doing so will absorb the soul fragment contained in the vortex into the rune, making the rune glow.
Speak with Ariane again. She will tell you to use the runes to try and trigger a memory in the Library.
The Teleportation Problem

Viewing the memories of Kelavan the Red and Mei the Grey
Head through the entrance to the library (east of Ariane), and you will see four chairs. If you examine these you can see that they are red, blue, grey and green. Use the glowing fire rune on the red chair and the glowing air rune on the grey chair. This will trigger a cutscene of a memory between Kelavan the Red and Mei the Grey You will see Kelavan presenting his studies of a combat spell problem to Mei. Mei sees this as a possible solution to the 'Teleportation Problem'.
After the cutscene, the runes will be returned to your inventory. If not, the runes are in the chairs where Mei and Kelavan were sitting. (Don't pick up the runes from the chairs or the cutscene will not play.) Return and speak with Ariane.
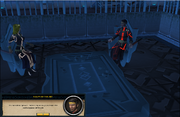
The Meeting of the Head Wizards

The Head Wizards gather to discuss the discovery of Teleportation.
When you speak with Ariane again, she will give you the remaining runes you need to hold the soul fragments. Use the prepared chaos rune on the remaining red vortex, and the cosmic rune on the remaining Grey vortex. Use the nature and earth runes on the green vortices and the law and water runes on the blue vortices.
At this point, remember what soul each of the following Glowing runes represents:
| Character | Rune type | Role | |
|---|---|---|---|
| Unaia the Blue | Law rune | Blue Master | |
| Perien the Blue | Water rune | Blue Apprentice | |
| Zanmaron the Red | Chaos rune | Red Master | |
| Kelavan the Red | Fire rune | Red Apprentice | |
| Azris the Green | Nature rune | Green Master | |
| Sland the Green | Earth rune | Green Apprentice | |
| Temrin the Grey | Cosmic rune | Grey Master | |
| Mei the Grey | Air rune | Grey Apprentice | |
Talk to Ariane again and she will tell you to try and trigger a memory upstairs in the Statue room in the Old Tower. Go back up the staircase, and past the statue you knocked over in the first quest, and to the statue room, in which you first met the Rune Guardian guarding the entrance to the old tower. Use the runes with the corresponding statue as presented below. A cutscene will begin.
| Alignment | Rune type | Location | |
|---|---|---|---|
| Armadyl, other gods and unaligned |
Cosmic rune | North-west | |
| Guthix | Nature rune | North-east | |
| Saradomin | Law rune | South-east | |
| Zamorak | Chaos rune | South-west | |
The Green Master will present the same idea that the Red Apprentice had in the first memory, having stolen it and claimed it as her own work. She will give each master a copy of the idea, and they will return to their studies to discuss the plan with their apprentices.
After the cutscene, the runes will be returned to your inventory. Return and speak with Ariane once again.
Memories of the Abyss
When you speak with Ariane, she will be horrified to learn that the Wizards of the Old tower were not above such pettiness as to steal each others ideas, and will ask you to go and trigger another memory in one of the studies of the four masters.
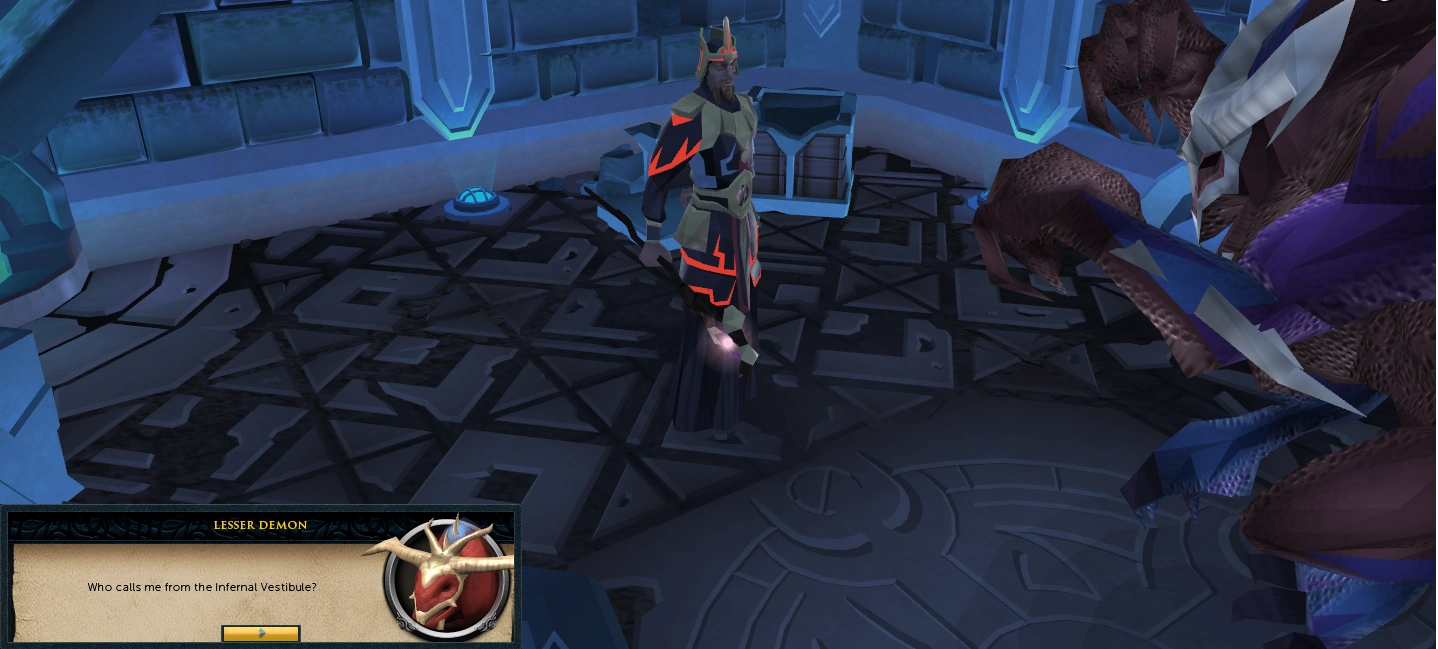

Azacorax, Keeper of the Key to the Abyss is summoned.
Head north through the studies door and then to the Red Master's study, which is to the north-east. Use the chaos rune on the Master chair, and the fire rune on the chair across the table. This will trigger a cutscene of a memory where the Red Master and Apprentice talk about how Azris the Green stole his idea. And that instead of trying to convince them it was his idea, they would just complete the research and be the first to come up with a ritual to use another plane to support teleportation. At the end of the cutscene you will see the Red Master summon a demon named Azacorax.
After the cutscene the runes will be returned to your inventory. Return and speak with Ariane.
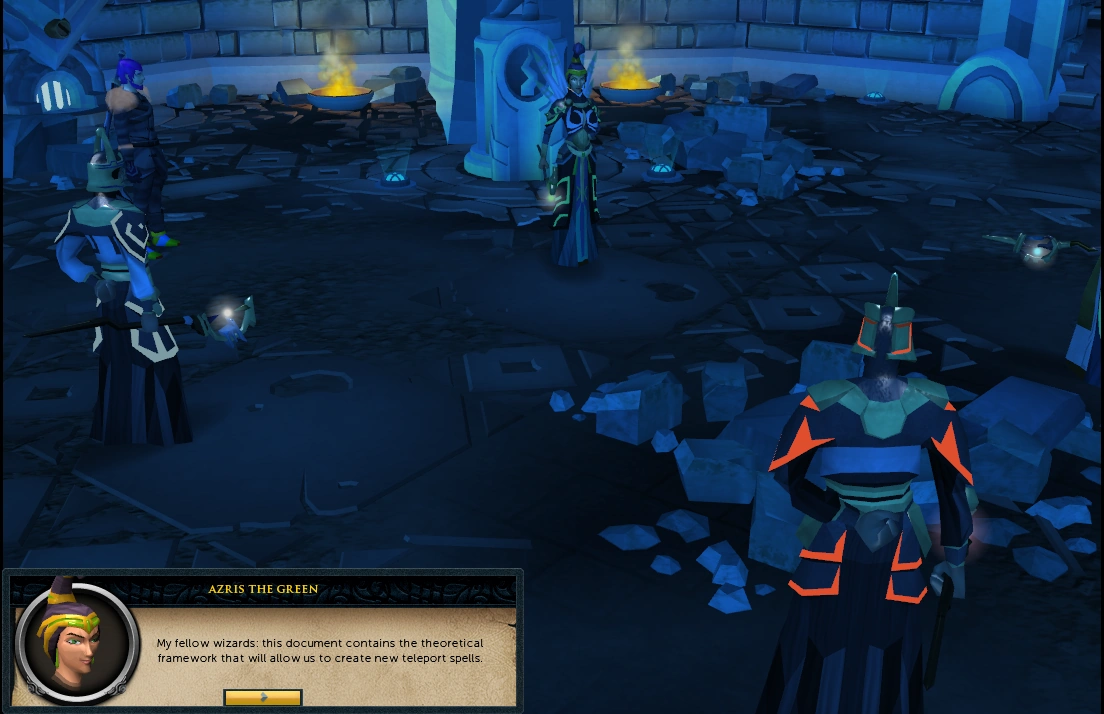
The Teleportation Debate

Zanmaron tells the apprentices to prepare themselves for the creation of the beam.
Once again speak with Ariane and she will tell you to trigger a memory in the library. Head to the library (east of Ariane) and use the air rune on the grey chair, the water rune on the blue chair, the fire rune on the red chair, the earth rune on the green chair, and the chaos rune on the table. This will trigger a cutscene of the Red Master and all the tower apprentices. He will announce he has finished a ritual to open a passage to the abyss, and presents each apprentice with a copy of the ritual to deliver to their Masters. He stresses that the ritual must be done exactly as stated or disastrous consequences could ensue.
After the cutscene the runes will be returned to your inventory. Return and speak with Ariane.
Ariane will tell you she thinks if you can trigger the memory of the ritual, she may be set free. But as the ritual had to be so specific, and you don't know how it was done, you must search for old documents containing information on the ritual.
Head back to the library and search the shelves along the north-west walls and to the east straight past the table. There are 2 document fragments to find here. Then head to the studies to the north of Ariane. The crates/chests in the destroyed studies are now searchable. Each room is labelled by the corresponding flag outside of the room. Search the Grey room, then the Blue room, and finally the Red room. There is one document fragment in each of the 3 remaining studies, plus a Diary in the Zamorak room within the same crate. Return and speak with Ariane once you have all 5 document fragments and the diary.
Beaming
Ariane will tell you to read the documents to decipher where each rune must be placed to trigger the memory.

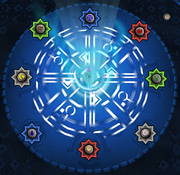
Image of how the Masters and Apprentices should be placed.
The runes should be placed as follows; you must have all of the document fragments for this to work.
- North: Law
- North-east: Fire
- East: Nature
- South-east: Air
- South: Chaos
- South-west: Water
- West: Cosmic
- North-west: Earth
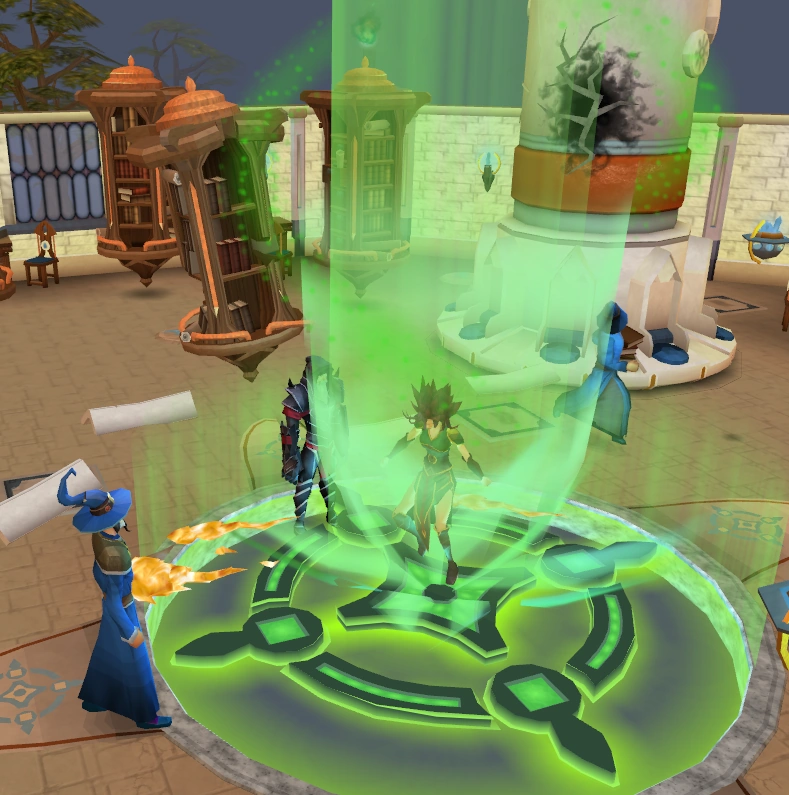
A cutscene of the wizards performing the ritual will begin. They will get partly through the ritual before the Blue wizards leave in anger as they realise the ritual consists of pure Red magic and involves demons. They break the ritual, and a lightning beam strikes down the Red Master. The cutscene ends, and Ariane is freed from the beam. However, she notices that the ritual is happening again, and Ariane pushes you out of the way while a similar bolt of lightning strikes her down and induces a magical coma.
Investigate Ariane and you will see that you should go and speak with Wizard Ellaron; Wizard Ellaron has now moved to the entrance of the tower. You will discover that he is part of a Secret Order of Red Wizards who mean to destroy the Wizards' Tower, and that he planned the whole thing. Go through all the options until Ariane rises up from the middle of the beam in the tower.
")
")
")
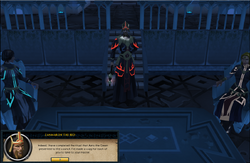
The Burning Tower

Ariane attacks wizard Ellaron.
Speak with Ellaron who is located at the entrance desk next to Valina, and you will learn that Ariane is being possessed by each of the souls from the old tower. You will need to draw them all out of her using the prepared runes you have in order to save her and stop her from exploding causing the destruction of the tower.
The beam around her will flash between red, grey, blue, and green. There are two types of beam styles: a simple coloured beam that contains an apprentice's soul, and the spinning, more elaborate beam that contains a master's soul. You will need to take note of the wizard or apprentice that speaks to you through Ariane, then use their appropriate rune on Ariane the next time the matching beam appears.
First, wait for the elaborate grey beam, and use the cosmic rune on Ariane. Next is the simple blue beam, which requires a water rune. She will then ascend to the next floor; follow her up.
Now wait for the simple green beam, which requires an earth rune. Then use the fire rune on Ariane when you see the simple red beam. She will again ascend to the next floor; follow her up.
Then, wait for the elaborate blue beam, which requires a law rune, followed by an elaborate green beam, requiring a nature rune. She will then ascend to the next floor; follow her up again.
Finally, use the chaos rune on Ariane when you see the elaborate red beam, and the remaining air rune when you see the simple grey beam.
Once you have drawn out all the souls, Ariane will be free. The souls will then possess Wizard Ellaron, and teleport him to the Abyss where he will supposedly explode, saving the Wizards' Tower!
Speak with Ariane.
Congratulations, quest complete!
Rewards
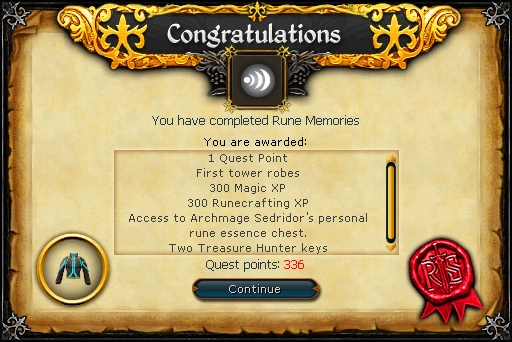
- 1 quest point
- 300
 experience
 - 300 experience
- First tower robes (top and bottom)
- Access to Archmage Sedridor's personal rune chest
- Contains rune essence, where is your Runecrafting level
- For each additional level gained in Runecrafting, more essence is placed into the chest for you equal to five times your new Runecrafting level.
- There is no benefit or detriment whatsoever in waiting to increase your runecrafting level to use the chest.
- 2 Treasure Hunter keys and 2 Hearts of Ice


- Additional rewards/activities
- Speak to the lesser demon on the 1st floor of the Wizards' Tower if you have at least 50 and 50 to receive 10,000 or Experience depending on if you choose to give him a drop of your blood or not, respectively.
- The Archmage [Name] (requires 99 Magic and 99 Runecrafting; speak to Archmage Sedridor to retrieve the title)
- Music unlocked
Achievements
- Stealing Sedridor's Stones ( 20) - Fully loot Archmage Sedirdor's chest.
- Azacorax's Rewards ( 10) - Speak to Azacorax after the 'Rune Memories' quest and gain Magic or Prayer XP.
Required for completing
Transcript
Trivia
- Upon completing this quest, the Adventurer's Log will read: "I helped Ariane discover what happened to the old Wizards' Tower, and stop a secret Zamorakian from destroying the new one."
- Sedridor's essence chest can contain a maximum of 24,750 pure essence (at level 99 Runecrafting), worth 742,500 coins.
Rune Memories | |||||||||
|---|---|---|---|---|---|---|---|---|---|
| NPCs |
| ||||||||
| Items |
| ||||||||
| Rewards |
| ||||||||
| Locations |
| ||||||||
| Music |
| ||||||||
| Miscellaneous |
| ||||||||
| Former version |
| ||||||||
| NPCs | |
| Items |
|
| Miscellaneous |
|
| Replaced by |
|