Tags: Visual edit apiedit |
m (Death is only there if he killed Gielinor) Tags: Visual edit apiedit |
||
| Line 173: | Line 173: | ||
===Epilogue=== |
===Epilogue=== |
||
| − | You will find yourself back in the encampment. Linza will approach you and apologise for her actions, and decides to stay with the Barrow brothers due to being undead. Armadyl or Seren will then approach and ask what it was like in the presence of the Elder Gods. Death and Icthlarin are the last to speak with you, who will commend you for stopping Sliske. |
+ | You will find yourself back in the encampment. Linza will approach you and apologise for her actions, and decides to stay with the Barrow brothers due to being undead. Armadyl or Seren will then approach and ask what it was like in the presence of the Elder Gods. Death and/or Icthlarin are the last to speak with you, who will commend you for stopping Sliske. |
Return to Relomia and either tell her the truth about Sliske. She will become angry, but suddenly changes to be cheerful, and give you your rewards. |
Return to Relomia and either tell her the truth about Sliske. She will become angry, but suddenly changes to be cheerful, and give you your rewards. |
||
Revision as of 23:06, 20 December 2016
| |||||||||||||||||||||||||
| Release date | 19 December 2016 (Update) | ||||||||||||||||||||||||
|---|---|---|---|---|---|---|---|---|---|---|---|---|---|---|---|---|---|---|---|---|---|---|---|---|---|
| Members | Yes | ||||||||||||||||||||||||
| Voice Over | No | ||||||||||||||||||||||||
| Official difficulty | Grandmaster | ||||||||||||||||||||||||
| Quest series | Sliske quest series | ||||||||||||||||||||||||
| Age | Sixth Age | ||||||||||||||||||||||||
| |||||||||||||||||||||||||
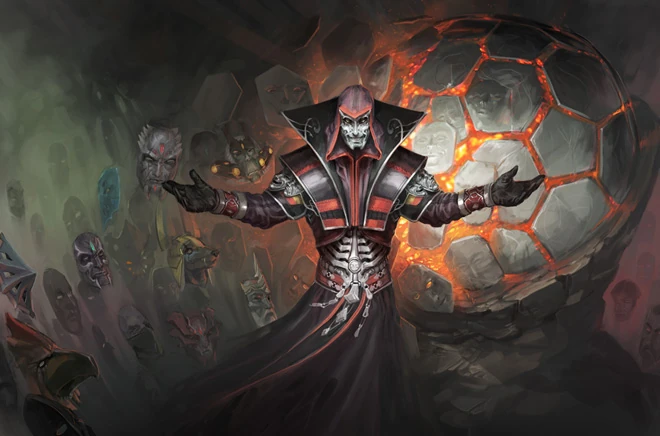
Sliske's Endgame is the finale to the Sliske quest series, released on 19 December 2016. It involves the culmination of Sliske's plan, reaching as far back as the Battle of Lumbridge. Sliske calls an end to his game and tallies up the scores, inviting those who killed a god - Vorago by slaying Tuska, Armadyl by slaying Bandos, Seren by slaying Mah, Death or Icthlarin depending who kills Gielinor during Nomad's Elegy, or have proven themselves worthy through victory in battles - to an event that is big and noticeable. Sakirth is not listed on the God Scoreboard, however the death of V is well noted as seen as a mask with his symbol lays on the floor near the scoreboard with the other slain gods.
Sliske's Endgame will be replayable, but only the first playthrough's outcome will be canon. The events in the quest will reflect the player's choices, in replays the player will be able to make different choices to see how they would have affected the quest's conclusion. However with its release, replays do not seem possible.[1]


The eclipse
On 17 December 2016, an eclipse appeared followed by messages from the gods Armadyl, Saradomin and Zamorak. Armadyl appeared atop his tower south of Falador, Saradomin appeared in the White Knights' Castle and Zamorak appeared in the Black Knights' Fortress. Zilyana also appeared atop the White Knights' Castle, watching Armadyl, while Padomenes appeared in the courtyard training some crusaders.
Walkthrough
| Start point | |||
|---|---|---|---|
| Member requirement | |||
| Official difficulty | |||
| Official length | Very long (4+ hours if unprepared) | ||
| Requirements | Skill requirements are not boostable unless marked with a [B] for boostable.
| ||
| Items required | Items from the tool belt are not listed unless they do not work or are not automatically added.
| ||
| Enemies to defeat |
|
Gathering the Party
To start the quest, speak to Relomia in Draynor Village. She will tell you that Sliske's endgame is near, and ask you to invite all the gods to the grand finale. They can be found in the following locations:
- Zamorak: Black Knight's Fortress 1st floor[UK] (near the altar). You will need a set of black armour, a fortress guard's armour or the Dagon'hai robes. The Skull of Remembrance and Dulcin armour cosmetic override can be used instead. Alternatively, you can find him in his hideout by using the Communication device.
- Saradomin: White Knight castle (next to the altar)
- Armadyl: On the top of his tower during World Event 2, near the clan camp south of Falador.
- Death and Icthlarin: Inside Death's office north of Dranynor
- Seren and Zaros: Within the Tower of Voices in Prifddinas
*You may find Sliske inside Vorago's cave during the search for the gods.
Choices that could affect outcome of the game:
- You can declare support for one of the factions (Zamorak, Saradomin, Seren, Armadyl or yourself)
- You can declare your opposition to one of the factions (Zamorak, Saradomin or Armadyl)
- You can choose to tell Armadyl about Zaros' wrongdoings
- You can tell Seren to trust or distrust Zaros
Once everyone has been invited, return to Relomia. She will tell you to prepare for a possible fight and will tell you to meet her outside at the Heart's encampment. This is the outer encampment, not the ones inside.
The Assembled Party
Once you are geared up, speak to Relomia at the Heart encampment. All of the other participants will appear, before Sliske arrives. He reveals that he has invited the dragonkin since they killed the god V. He will also reveal that he created a "World Guardian" from Nomad, and that it will count as a kill for your god if you defeat him. Nomad does not use any special attacks and is very straight forward to defeat. Once he is defeated, Sliske will send the party members into his big labyrinth.
You are presented with more choices here:
- You can choose to trust Kerapac or not
- You must pick the faction you support, this time for real: yourself, Armadyl, Saradomin, Seren, Zamorak, Zaros, The Godless, Icthlarin, Death, Sliske, the Dragonkin or no one.
- If you attempt to side with no one, Sliske will dismiss your decision for being boring, and thus ask you again to pick a faction to support.
Into the Labyrinth
The labyrinth can take very long to complete, so make sure you have enough time to complete it. If you leave the labyrinth through the exit portal or lobbying, speak to Relomia again, who will drop you off at your previous location inside.

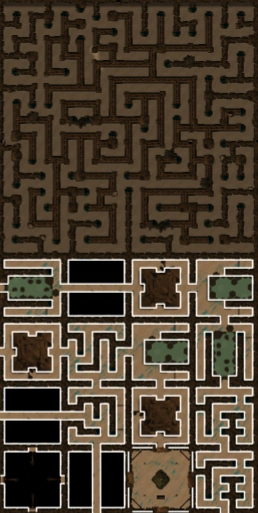
False map section above a real map section
The labyrinth is actually two labyrinths that must be completed in order, the first labyrinth ends with a big swirly portal, whilst the second and final labyrinth ends with a set of stairs. In both labyrinths, you are travelling from the southwestern room to the northeastern room. Each labyrinth have 4 sections (2x2) each consisting of 8x8 rooms. Only the rooms in the section you are currently in is visible on the map, the other sections become visible when you enter the purple door that leads you to another section.
Since your only viable option to finding your way in this maze is by using the map, it is a good idea to increase the size of your minimap to give you a much better overview.
A common tip in the labyrinth is to look for large rooms in your map, aligned with glowing barriers ingame and find your way there, where you will either get a cutscene or have a puzzle to complete. The cutscenes have little impact on the quest, but the puzzles do. When you complete the puzzle, doors or new paths will open further down the path that were previously blocked or empty.
There are several puzzles you can encounter:
- Spotlight - an empty room with a bright spotlight. When you step into the spotlight, the screen will gradually darken into shadow. Stay in the spotlight until the bar is filled.
- Sliske icon - A room with four light makers and a big shadow on the ground. Make the shadow shown in the solution to solve the puzzle.
- Cryptics - A solution panel can be talked to figure out the solution to how the masks can be placed. The puzzles are fairly simple, and you should not have any trouble solving them.
| Cryptic | Solution |
|---|---|
| Misery loves company. | All four casters need sad faces |
| You and I are beautifully broken. The others resent our superiority | Switch broken masks to north (from south) then add gained sad masks to south |
| When the sun rises, we are happy | Happy faces on both of the east casters, sad faces on the west casters. |
| I'm bored of helping you, you can figure this one out on your own | NW: Neutral NE: Happy SE: Sad SW: Broken |
| I'm not a morning person; nor am I a mourning person | Two sad faces on the NE and SE wall, leave the other two without masks. |
| Never let anyone see how you truly feel, they will use it against you | All neutral expressions on all four casters |
In one of the icon rooms a light wisp can be found floating around. Harvest it and use the wisp's energy to empower the light maker. In some of the rooms there will be a wight footsoldier or two which drop a mask when killed which is used to solve the puzzle.
1st maze solution
2nd maze solution
A shortcut on the 1st maze solution: After meeting Zaros, backtrack 3 rooms then go south.
Choices given in the labyrinth:
- You can choose to take Icthlarin with you or not
- You can recommend Zaros negotiate with Sliske or try to kill him
- You can tell Death that Icthlarin is fine or not so fine
- Death can tell you about the fate of one of the gods (Zaros, Seren, Saradomin, Armadyl, Icthlarin or Zamorak)
- You can choose to help Saradomin or Zamorak in a fight between their knights.
- You pick a side in an argument between Zamorak and Seren
- You will be asked by Seren what you think is responsible for taking away the gods powers in the labyrinth (Guthix, the World Guardian, Anima Mundi, the Stone of Jas or the Sword of Edicts)
- You can ask Armadyl or Seren to listen to the other one
- You can encourage Seren and Saradomin to talk in private or not
Make your way through the labyrinth until you find a set of staircases. As you reach the top, you will be met by another god, most commonly Armadyl as he had the highest score on Sliske's scoreboard and thus started with an advantage. The race works the same way regardless of who you're racing.
Sliske will give you a "headstart" of sorts, binding the opponent for a bit. Make your way towards the Stone of Jas; it does not matter who reaches it first. Once the Stone is reached, Zaros and Seren will arrive, arguing who should control the Stone. They reveal that each of them made deals with the other gods, but Zaros' deals prove more powerful and nullify Seren's. Kerapac will suddenly appear and destroy the Stone of Jas.
Be sure to follow the red lines on the first solution, they lead to puzzle rooms off the main map that must be completed to progress along the map later. go back to the green path once the puzzle is done.
The Final Battle
Enraged, Sliske will attempt to kill you again. If you need to restock, change equipment or obtain a familiar, you can leave through the exit portal; simply talk to Relomia again outside the Heart encampment to return. Each wave serves as a checkpoint.
Deaths here are not safe. Upon death, your gravestone appears outside the Heart of Gielinor. Using the Nardah Teleport from the Desert amulet, the gravestone can be easily reached to reclaim items without having to pay Death.
Wave 1
Sliske will send standard wight footsoldiers and archers at you. Kill them to fill the bar. As the bar progresses, he will start sending imbued wight footsoldiers, who are stronger but still weak enough to kill. As you kill more wights, he will start adding unstable wight footsoldiers, who are similar to the imbued ones but explode upon death, dealing damage to anything near it. Keep killing wights until the bar fills.
Wave 2
Angered by your resistance, Sliske will summon the Barrows brothers to attack you. Due to your actions in Kindred Spirits, the brothers defect and support you. Sliske will become enraged and calls upon Nomad, Gregorovic and Linza the Disgraced. You will need to defeat all three to progress.
Nomad uses his standard auto-attacks and will also place mines around you occasionally. If Gregorovic/Linza is defeated, Nomad will occasionally release a powerful attack that deals about half of the player's total life points worth of damage[source needed], which can be completely blocked with Protect from Magic and Devotion. When Nomad is the last one remaining, he will summon several clones of himself, though you only need to defeat one to progress. Nomad has 100,000 Life Points.
Gregorovic will summon a healing spirit, which will heal him for 10,000 lifepoints if it touches him. Simply attacking the spirit is enough to force it away from him; make sure you hit or the spirit will continue towards Gregorovic. If Nomad/Linza is defeated, Gregorovic will also start using his knife throw attack. When Gregorovic is the last one remaining, he will be able to use his shadow clones to assist him. Gregorvic has 200,000 Life Points; his fight is extremely similar to that in the Heart; the only difference is that he does not hit as hard and does not use his knife trick attack.
Linza will be able to bind you for several seconds, in addition to her set's effect of reflecting back damage. If Nomad/Gregorovic is defeated, Linza will be able to perform a defensive stance and heal for 1,500 every few ticks, in a manner similar to Araxxor's web shield. If she is the last one remaining, she will unleash a large-area attack similar to Quake - simply move out of range to avoid this attack. Linza has 150,000 Life Points.
Pick off one of the targets at a time; when you defeat them, the others will recover all their health and gain new abilities. Once all three are defeated, Sliske will personally face you.
Wave 3
Sliske will personally fight you himself. He has 100,000 Life Points, and attacks with magic, using the spell Shadow Blitz.
Sliske also has a unique attack he uses every ~30 seconds where he will yell a random phrase, and a shadow pit full of hands will emerge, dealing 1/4th of your max health as damage every few ticks. This can be avoided by moving out of the way, much like Nex shadow phase. It is recommended to use evasive and sporadic manoeuvres here as Sliske will predict which square your character will move to. Sliske will use this five times before returning to normal attacks.
Wave 3 contains multiple parts. These pieces are listed below in order of suggested completion. Steps 2, 4, and 6 are interchangeable and may be completed in any order. Should you die or leave the arena before the checkpoint (Step 8) is reached, you must begin at Step 1 once again.
- Reduce Sliske to 10,000 Life Points. Sliske will teleport to the cliffside.
- Destroy the Power Source in the centre of the room (1,000 Life Points).
- Sliske heals himself to 100,000 Life Points. Reduce Sliske to 10,000 Life Points. Sliske will teleport to the cliffside.
- Enter one of the rifts. Sliske will bring you back into the arena.
- Sliske heals himself to 100,000 Life Points. Reduce Sliske to 10,000 Life Points. Sliske will teleport to the cliffside.
- Jump on the rock formation in front of Sliske to push him back into the arena.
- Sliske heals himself to 100,000 Life Points. Reduce Sliske to 10,000 Life Points.
- [Checkpoint achieved.]
- Sliske will not damage you at this step. Your character activates its World Guardian powers, and you are given unlimited Life Points, unlimited 100% adrenaline (or 100% special bar in Legacy Mode) and a 50% cooldown reduction on all abilities.
- Damage Sliske until the cutscene ensues.
A cutscene will begin where you fight Sliske with the Staff of Armadyl. You get the upper hand and impale Sliske on the staff, killing him. However, he manages to injure you with the other end of the staff as a last act. He then has the last laugh before petrifying and crumbling away as you collapse.
Meeting Jas
After Sliske's death, you will find yourself on a platform with Seren and Zaros. A voice speaks out, revealing itself to be the Elder god Jas. Zaros requests Jas to make him an elder god, but she refuses, so he leaves in anger; Seren will soon follow. Jas will then focus her attention on you, and ask why you killed her agent. Explain your actions to Jas, who will follow up with more questions. At the end of the conversation, she will consult the other Elder gods about life on Gielinor; if they prove themselves to be worthy, they will spare Gielinor, but if they aren't, they will destroy the planet and all life. Jas will allow you to ask her one question before she sends you back.
Epilogue
You will find yourself back in the encampment. Linza will approach you and apologise for her actions, and decides to stay with the Barrow brothers due to being undead. Armadyl or Seren will then approach and ask what it was like in the presence of the Elder Gods. Death and/or Icthlarin are the last to speak with you, who will commend you for stopping Sliske.
Return to Relomia and either tell her the truth about Sliske. She will become angry, but suddenly changes to be cheerful, and give you your rewards.
Congratulations, quest complete!
Rewards
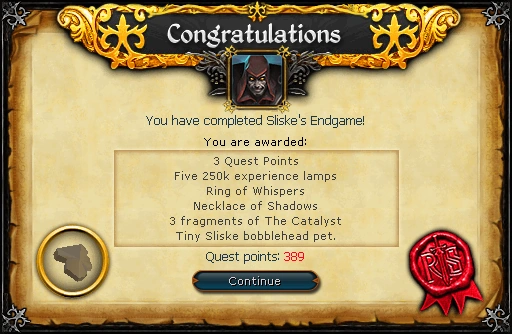
- 3 quest points
- Tiny Sliske bobblehead pet[2]
- Five Stone-touched lamps, giving 250,000 experience each on a skill level 85 or higher.
- A set of skilling items:
- A Combined Catalyst fragment that resets box traps while hunting, halves the degrade rate of runecrafting pouches; and gives a chance to collect experience from dead herbs while farming in the form of shadow-infused herbs.
- The Ring of Whispers that gives an invisible +3 bonus to gathering skills.
- The Necklace of Shadows that stops familiars draining Summoning points after they have initially been summoned.
- A set effect of a Manifested knowledge randomly spawning and providing bonus experience when all 3 items are worn.[3].
- 2 Treasure Hunter keys and 2 Hearts of Ice
Music unlocked
Transcript
Trivia
- After completing the quest, the Adventurer's Log reads "I finally beat Sliske and prevented the elder gods from killing everyone, for now."
- When beginning the sequence of the gods arriving at the start of the maze, Armadyl appears using the same animation as the Aftershock perk.
- Depending on which god the player faces, in the final race to the Stone of Jas, and who wins that race, Zaros and/or Seren may refer to other gods by other names in different languages:
- Seren refers to Armadyl as 'plentyn diniwed', Welsh for 'innocent child'.
- Zaros refers to Armadyl as 'Praetor Plumalis', Latin for 'leader of the feathered'.
- Zaros refers to Saradomin as 'Praetor Barista', Latin for 'leader of the pressured'[source needed].
- Zaros refers to Zamorak as 'Legatus Maximus', Latin for 'greatest general'.
- Outcomes may vary based on player choice during the endgame. Upon replaying the quest, the player may select different options and receive a different outcome. However, only the first run-through is canon for that player.
References
| Main series | |
| Related quests |
|
| Related |
|