(→Titles: Added more information related to the Shadow Drake Ring) Tags: Visual edit apiedit |
m (→Clawdia) Tag: sourceedit |
||
| Line 361: | Line 361: | ||
[[Clawdia]] is an hourly boss who emerges from the water-filled hole in the middle of the crater 45 minutes after every hour. This is indicated by rain falling at the beach. She is level 250 and has 10,000,000 [[life points]], with damage dealt scaling to the player's level and life points. If Clawdia retreats before being killed, participating players will obtain loot, but no killcount for unlocking rewards. |
[[Clawdia]] is an hourly boss who emerges from the water-filled hole in the middle of the crater 45 minutes after every hour. This is indicated by rain falling at the beach. She is level 250 and has 10,000,000 [[life points]], with damage dealt scaling to the player's level and life points. If Clawdia retreats before being killed, participating players will obtain loot, but no killcount for unlocking rewards. |
||
| − | Upon defeat, Clawdia rewards players with the items |
+ | Upon defeat, Clawdia rewards players with the items obtained by skilling on the beach. Fighting Clawdia doesn't increase the temperature gauge and she can thus still be fought for rewards even if the temperature gauge is full. |
During the 2015 event, players could maximise their Clawdia kills by world hopping to defeat her during the five minutes that she appeared each hour. In 2016 it was changed so that Clawdia could only be looted once per hourly spawn. |
During the 2015 event, players could maximise their Clawdia kills by world hopping to defeat her during the five minutes that she appeared each hour. In 2016 it was changed so that Clawdia could only be looted once per hourly spawn. |
||
Revision as of 06:23, 23 August 2017
| |
| Release date | 29 June 2015, 15 August 2016, 31 July 2017 (Update) |
|---|---|
| End date | 31 August 2015, 12 September 2016 (Update) |
| Reward | Cosmetic overrides, titles and more |
| Head developer | Mod Daze |
| Preceded by | N/A |
| Succeeded by | Spring Fayre |
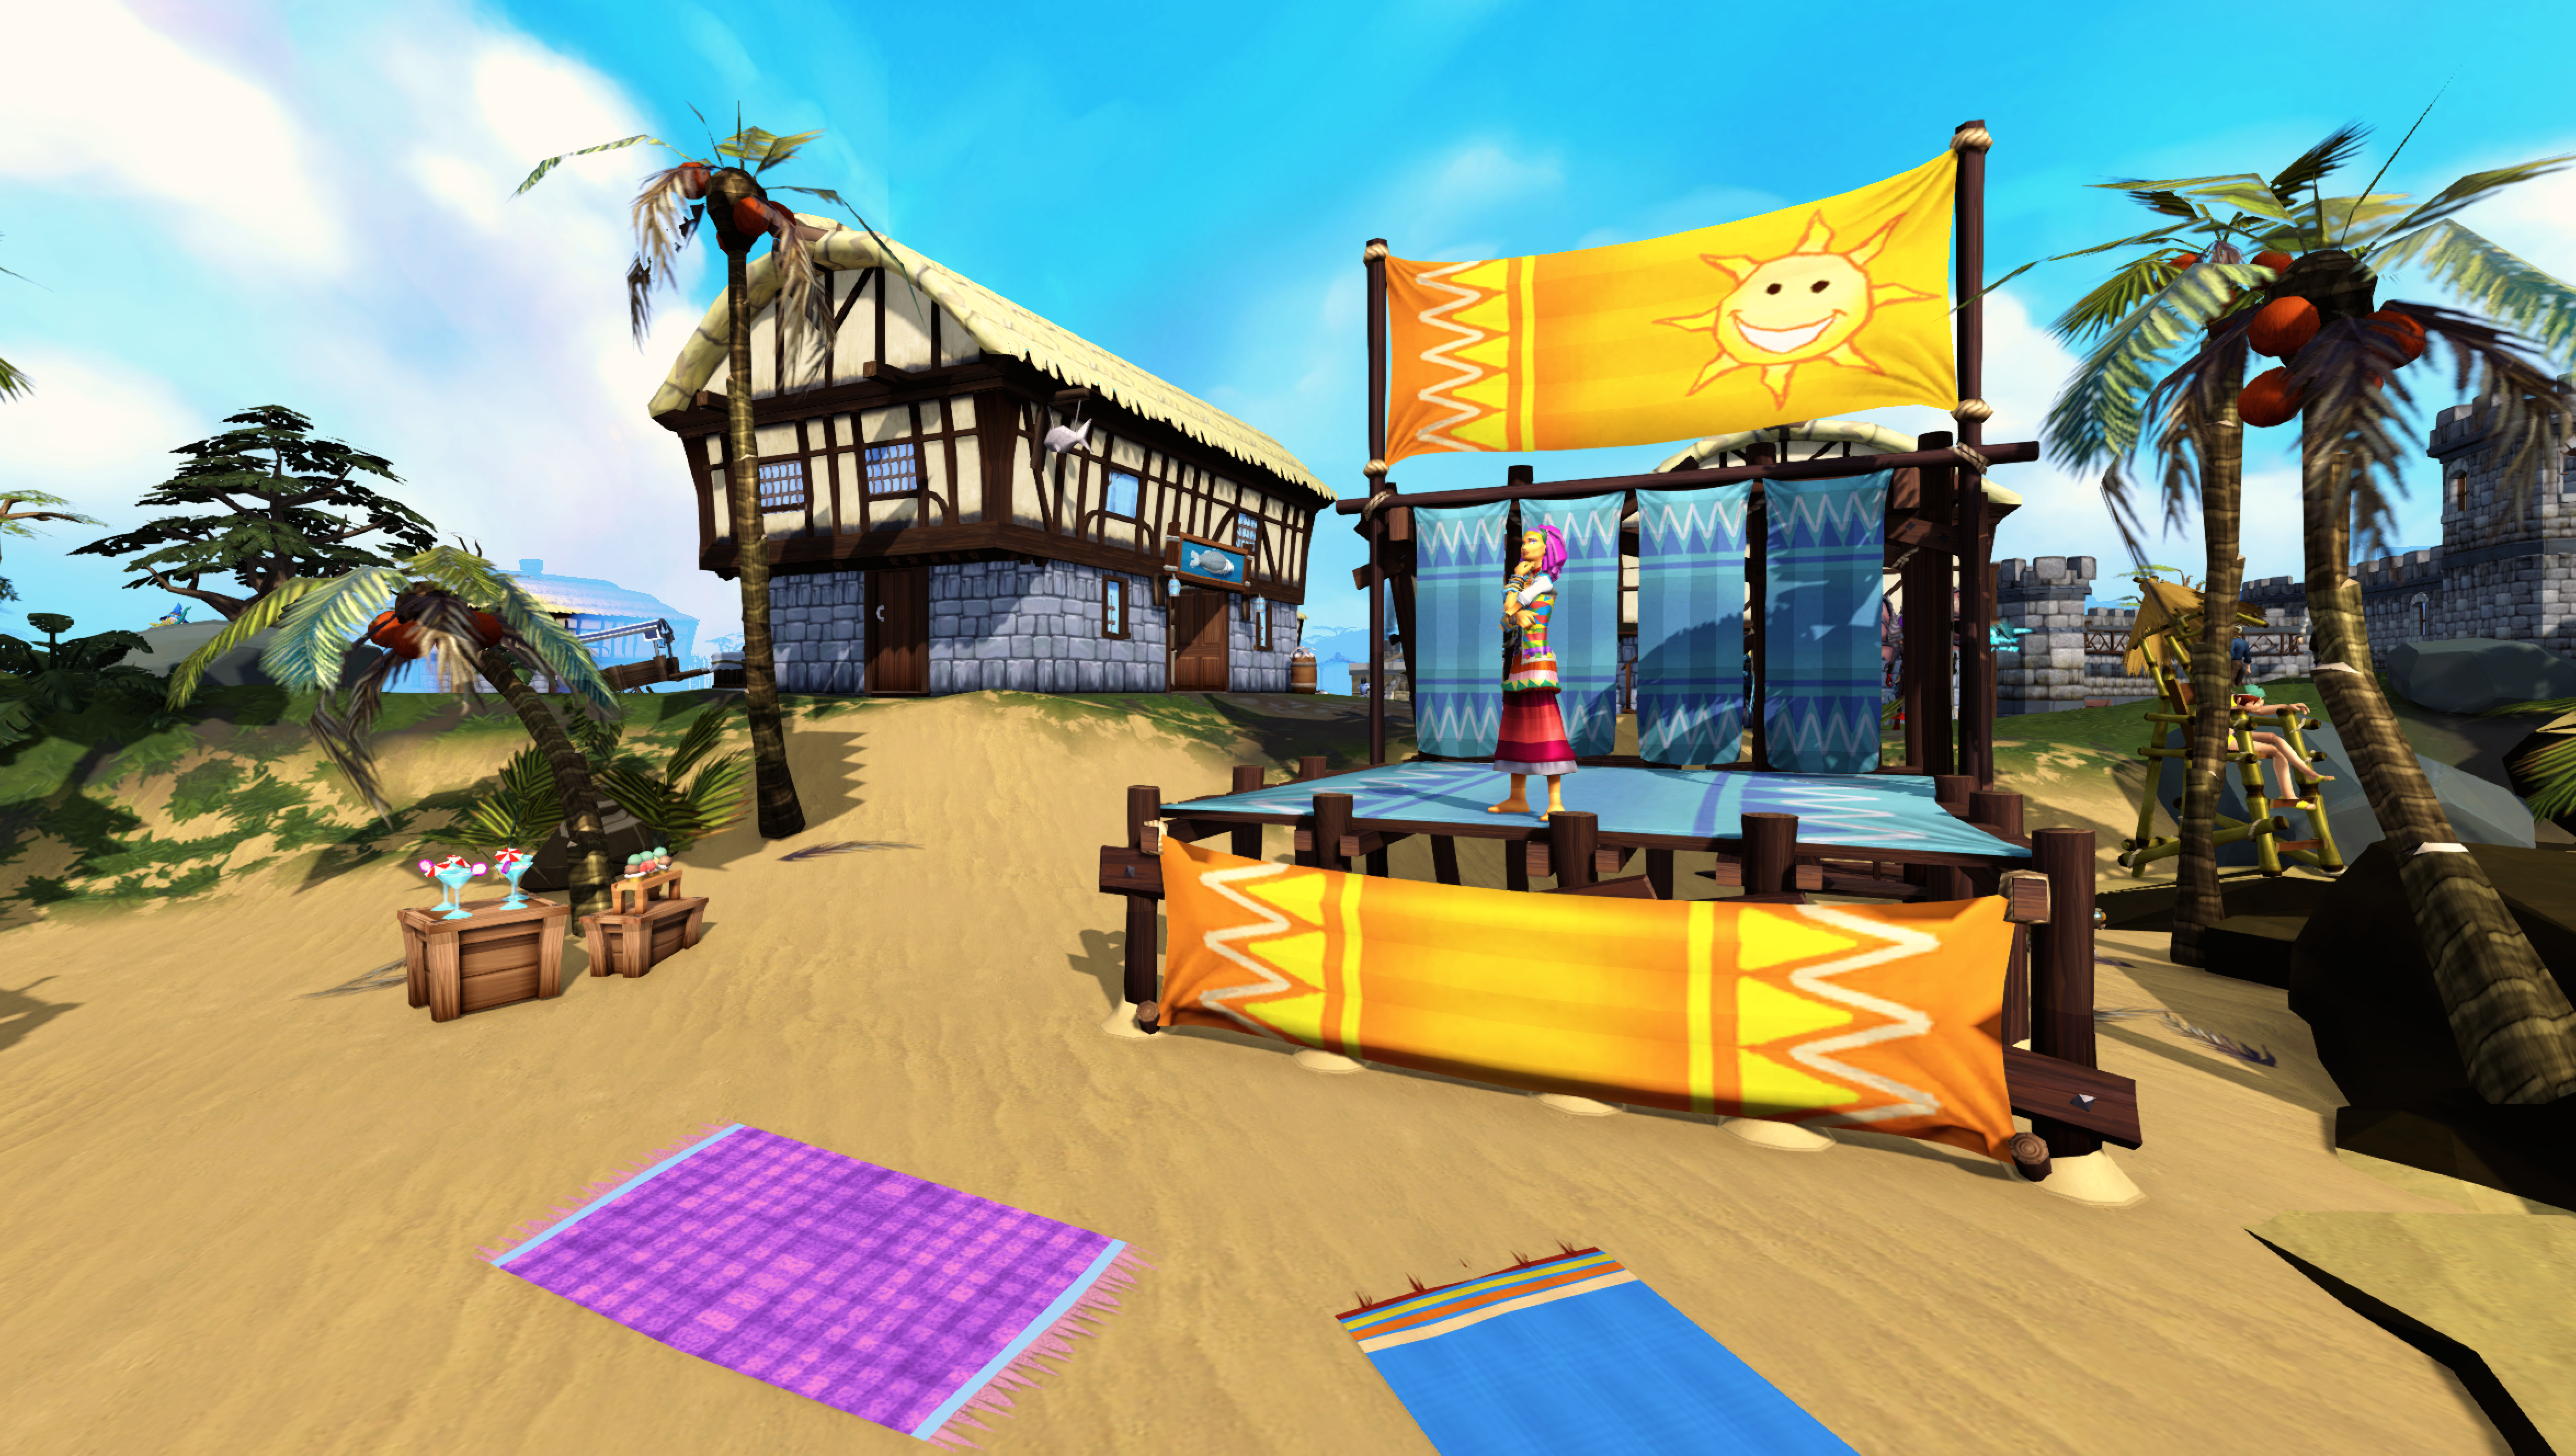
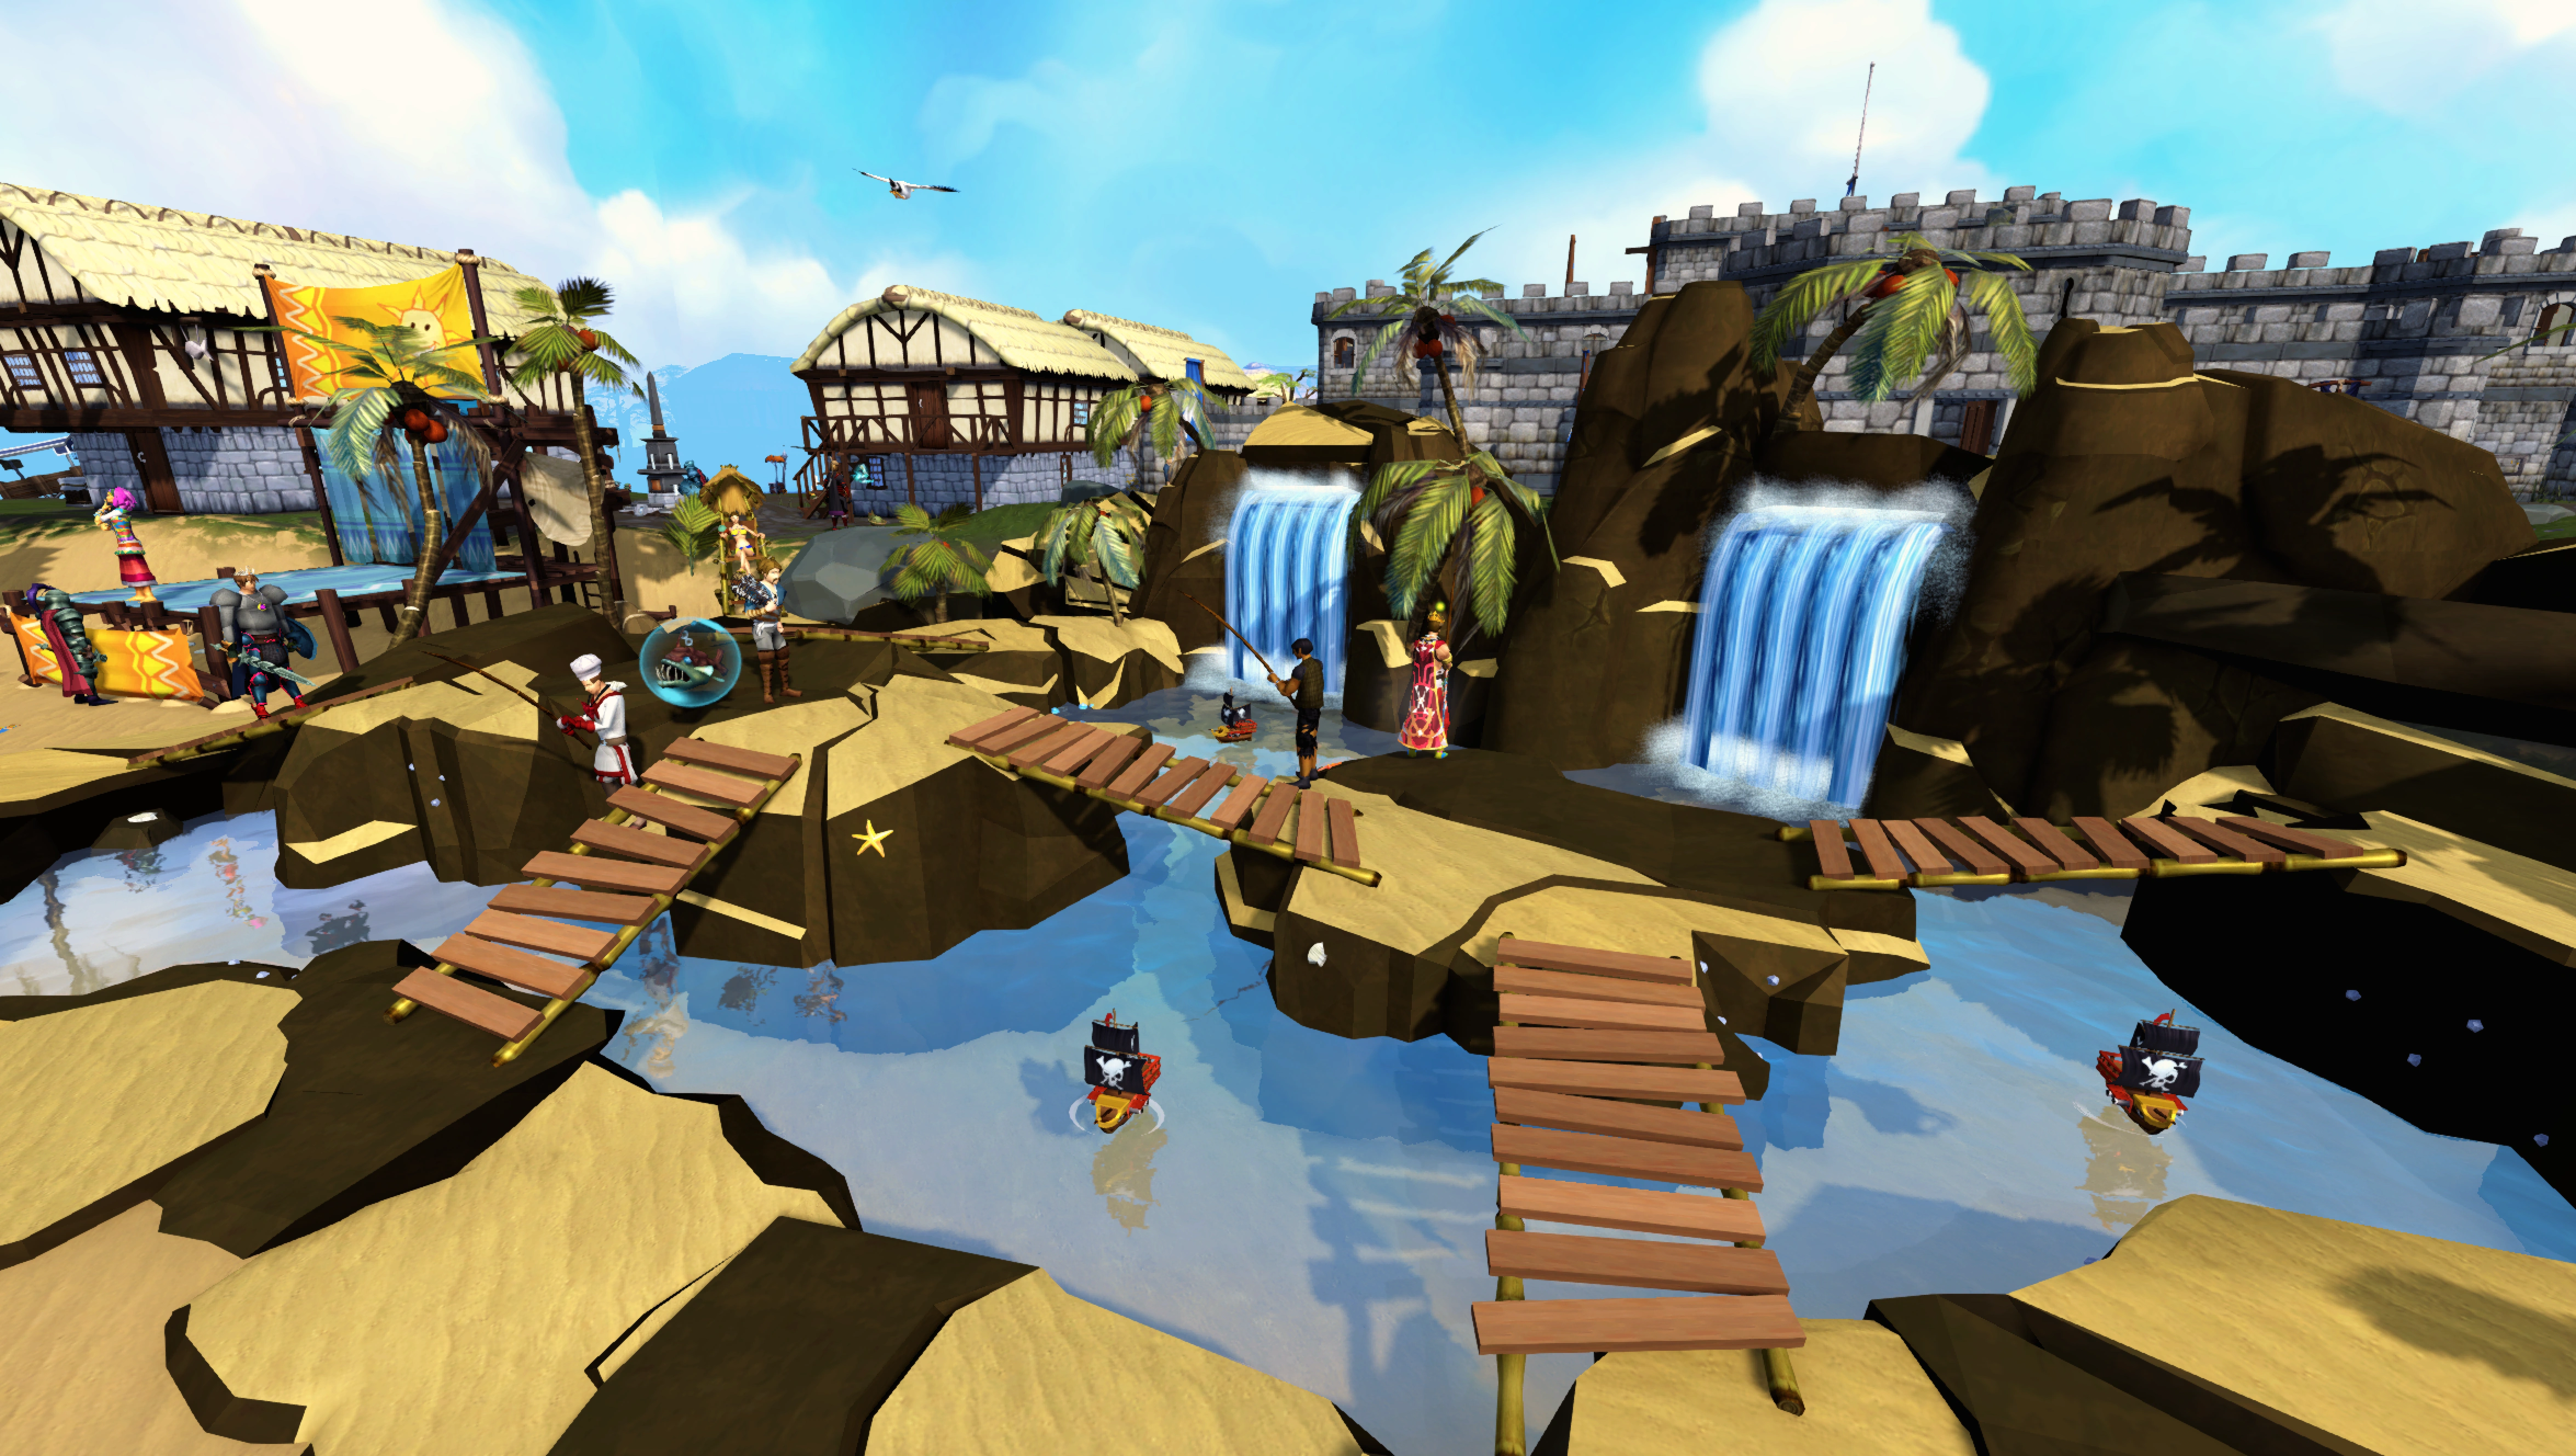
The Summer Beach Party was an event that first ran from 29 June 2015 until the 31 August 2015. The Lumbridge Crater was transformed into a beach and the event was organised by Battle of Lumbridge survivor Reyna.
The Summer Beach Party returned in 2016, from 15 August to 12 September, and 2017, starting on 31 July.

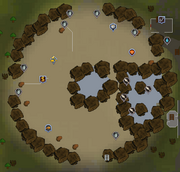
A map of the 2016 and 2017 beach party
Preparations
2015


Reyna among heaps of sand
For about half a week prior to the beach party itself players were able to bring Reyna buckets of sand each day in exchange for mystery boxes.
2016
In 2016, players again were able to bring buckets of sand to the crater, limited to 20 buckets a day. A Treasure Hunter promotion, Build A Beach also ran during the preparation. A big mystery box could be received from Reyna after delivering sand to her on each of the five preparation days. In 2016 players had to claim their big mystery boxes on 15 August before the game update. The rewards from the mystery boxes and big mystery boxes were updated for the 2016 party.
2017
In 2017 a similar event returned to prepare for the 2017 Summer Beach Party. This event was called Build A Beach and made the sand cape obtainable again. This event is not to be confused with the Treasure Hunter promotion of the same name that occurred in the summer of 2016.
After the Summer Beach Party started, players received the following message upon logging in: Lumbridge beach has arrived! Pay a visit today to participate in various activities for XP and unlock unique new rewards!
Activities
There are various activities around the beach, which can be used to gain experience in different skills. Unique item tokens can also be a rare prize from any of the activities.
The filling of a temperature gauge to the left of the screen indicates how close the player is to reaching the daily experience cap, which can be reset 3 times a day by eating an ice cream for a total of 4 full gauges.
| Temperature | |
|---|---|
| Percent | Status |
| 0% - 19% | Cool |
| 20% - 39% | Warm |
| 40% - 59% | Hot |
| 60% - 79% | Boiling |
| 80% - 99% | Scorching |
| 100% | Inferno |
You can only eat an ice cream at "Inferno" status.
Every 15 minutes a different activity is spotlighted, which provides an extra 10% experience buff to the relevant skilling activity. The spotlighted activity differs from world to world.
The only activity compatible with urns is the Fishing activity (Rock pools).
Barbeques

The summer barbecue plot
Barbeques [sic] is an activity located in the north-eastern corner of the beach. It is run by Nigel. In it 3 grills and 3 large chopping boards can be used to gain Cooking experience.
Each skilling spot can be used to gain experience twice per interaction which takes a total of 18 seconds. At level 99 Cooking, 584 Cooking experience is obtained. Each time that experience is gained raises the temperature by 14/15 %, so Barbeques may be used to gain experience 108 times before reaching 100% temperature. The following table shows some typical values for Barbeques at level 99 Cooking, assuming maximum efficiency with re-clicking the objects.
| Experience per gauge | Time to fill the gauge | Item drops per gauge |
|---|---|---|
| 63,072 | 15 minutes | 2.3 |
Barbeques experience table
This table should be used as a rough guide for the experience gained at your level. Values may be off, but always within 1 experience correct. Experience is given by the following formula, where is the level and is the experience given:


_map.png)
This is rounded to the nearest 0.1 value. The values are displayed below:
| Experience per harvest | |||||||||||||
|---|---|---|---|---|---|---|---|---|---|---|---|---|---|
| XP | XP | XP | |||||||||||
| 1 | 44.2 | 34 | 184.5 | 67 | 339.4 | ||||||||
| 2 | 48.5 | 35 | 189 | 68 | 347 | ||||||||
| 3 | 52.7 | 36 | 193.4 | 69 | 355.7 | ||||||||
| 4 | 57 | 37 | 197 | 70 | 361.9 | ||||||||
| 5 | 61.2 | 38 | 201.5 | 71 | 369.6 | ||||||||
| 6 | 65.5 | 39 | 206 | 72 | 377.2 | ||||||||
| 7 | 69.7 | 40 | 210 | 73 | 385.8 | ||||||||
| 8 | 74 | 41 | 214.5 | 74 | 393.4 | ||||||||
| 9 | 78.2 | 42 | 218.5 | 75 | 400 | ||||||||
| 10 | 82.5 | 43 | 222.9 | 76 | 408.1 | ||||||||
| 11 | 86.7 | 44 | 226.7 | 77 | 415.7 | ||||||||
| 12 | 91 | 45 | 231.5 | 78 | 423.3 | ||||||||
| 13 | 95.2 | 46 | 235.3 | 79 | 431 | ||||||||
| 14 | 99.5 | 47 | 240 | 80 | 438.6 | ||||||||
| 15 | 103.7 | 48 | 243.8 | 81 | 446.2 | ||||||||
| 16 | 108 | 49 | 248.6 | 82 | 453.8 | ||||||||
| 17 | 112.2 | 50 | 252.4 | 83 | 461.5 | ||||||||
| 18 | 116.5 | 51 | 256.2 | 84 | 469.1 | ||||||||
| 19 | 120.7 | 52 | 261 | 85 | 476.7 | ||||||||
| 20 | 125 | 53 | 264.8 | 86 | 484.4 | ||||||||
| 21 | 129.2 | 54 | 270.2 | 87 | 492 | ||||||||
| 22 | 133.5 | 55 | 274.4 | 88 | 499.6 | ||||||||
| 23 | 137.7 | 56 | 278.1 | 89 | 507.3 | ||||||||
| 24 | 142 | 57 | 281.9 | 90 | 514.9 | ||||||||
| 25 | 146.2 | 58 | 286.7 | 91 | 522.5 | ||||||||
| 26 | 150.5 | 59 | 291.5 | 92 | 529.9 | ||||||||
| 27 | 154.7 | 60 | 295.3 | 93 | 537.8 | ||||||||
| 28 | 159 | 61 | 299.1 | 94 | 545.8 | ||||||||
| 29 | 163.5 | 62 | 302.9 | 95 | 553 | ||||||||
| 30 | 167.5 | 63 | 307.7 | 96 | 560.7 | ||||||||
| 31 | 172.5 | 64 | 317.2 | 97 | 568.3 | ||||||||
| 32 | 176.5 | 65 | 323.8 | 98 | 575.9 | ||||||||
| 33 | 180.5 | 66 | 331.5 | 99 | 584 | ||||||||
Raw tropical trout may also be deposited here for Fishing experience.
Beach ball rolling (m)

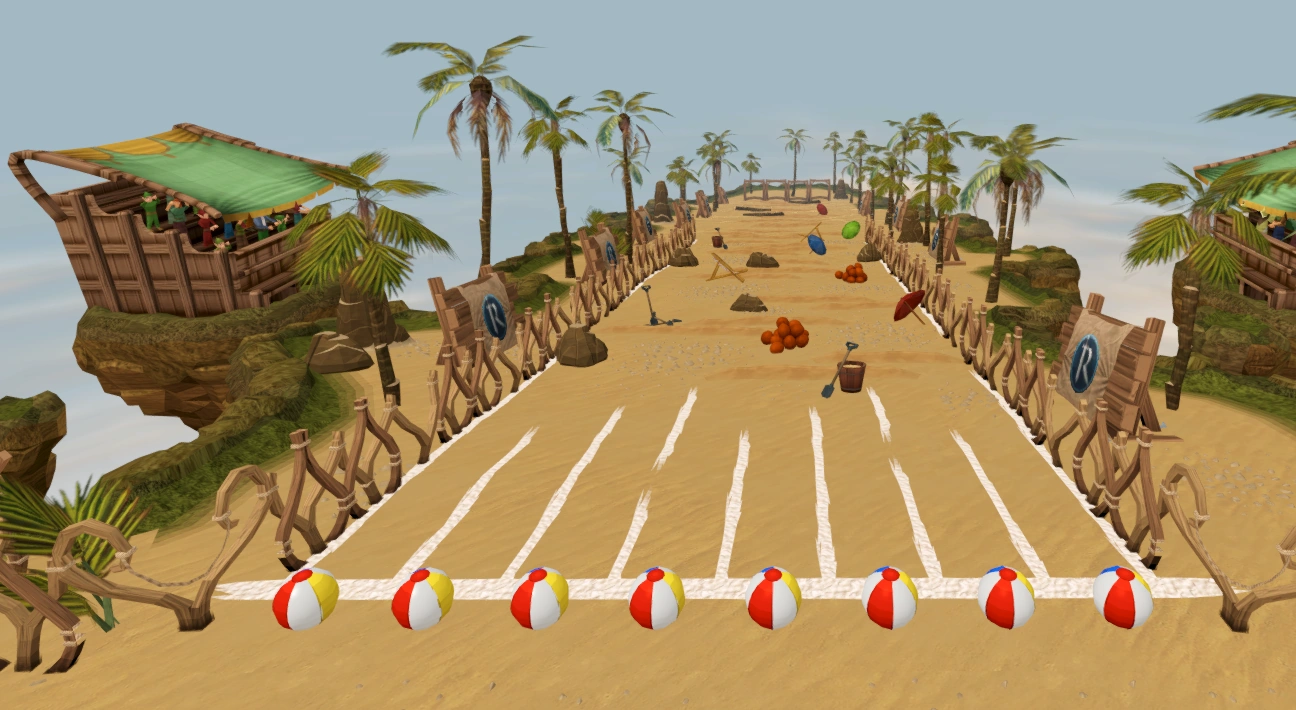
The beach ball rolling event
The Beach ball rolling portal can be found in the northern area of the beach. Entering it teleports the player to the beach ball rolling event island where players roll beach balls down a slope and run after them, trying to keep upright for as long as possible. Participating in the Beach Ball Rolling grants Agility experience. Players fall over if they collide with an object on the route. They can also fall over randomly without colliding and inevitably fall over at the 45 metres, making it impossible to reach the bottom.
At level 99 Agility, 12.3 Agility experience is awarded for every metre stood upright. For stumbling right at the beginning 1 Agility experience is rewarded. Each metre takes 0.6 seconds to run and increases the temperature gauge by 1/15 %, so a full temperature gauge takes 15 minutes of active running down the hill. In practice, falling over and restarting the running makes it take slightly longer. The following table shows some typical values for Beach Ball Rolling at level 99 Agility.
| Experience per gauge | Time to fill the gauge | Item drops per gauge |
|---|---|---|
| 18,450 | 25.2 minutes | 2.7 |
This activity was initially released on 13 July 2015, as part of batch 2 of the beach.
")
")
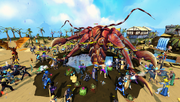
Clawdia

Clawdia fighting the players
Clawdia is an hourly boss who emerges from the water-filled hole in the middle of the crater 45 minutes after every hour. This is indicated by rain falling at the beach. She is level 250 and has 10,000,000 life points, with damage dealt scaling to the player's level and life points. If Clawdia retreats before being killed, participating players will obtain loot, but no killcount for unlocking rewards.
Upon defeat, Clawdia rewards players with the items obtained by skilling on the beach. Fighting Clawdia doesn't increase the temperature gauge and she can thus still be fought for rewards even if the temperature gauge is full.
During the 2015 event, players could maximise their Clawdia kills by world hopping to defeat her during the five minutes that she appeared each hour. In 2016 it was changed so that Clawdia could only be looted once per hourly spawn.
Coconut shy

The coconut shy stand
There is one coconut shy on the beach (two in 2015), located in the south-eastern corner and run by Sarah. It provides Ranged experience relative to the type of projectile thrown and the player's Ranged level. Tropical coconuts from Palm Tree Farming can also be deposited here for Farming experience.
| Item | Experience | Hit chance |
|---|---|---|
| Ball | Average | Average |
| Cabbage | High | Low |
| Chinchompa | Low | High |
If the "play" option is selected on the stall, an interface opens where the item selection can be made. The stall can also be right-clicked to quickly start throwing any of the items. After the item is selected, the player attempts to knock off the coconuts for a maximum of 10 times per interaction. Each attempt can cause either experience being gained, the item bouncing off the coconut ("It bounced off the coconut. So close.") or the coconut being missed ("You missed the coconut, maybe next time.").
At level 99 Ranged, throwing a ball successfully yields 198 Ranged experience. Cabbage yields 5/3 times that (330 Ranged experience), and chinchompa 5/7 times that (141.4 Ranged experience). A throw takes 3 seconds. Each successful throw causes the temperature to rise by 1/3 %, so 300 successful throws can be made before reaching 100% temperature, regardless of the items thrown. Failed throws do not cause the temperature to rise. The following table shows some typical values for Coconut Shy at level 99 Ranged, assuming maximum efficiency with restarting the throwing.
| Item | Experience per gauge | Time to fill the gauge | Item drops per gauge |
|---|---|---|---|
| Balls | 59,400 | 27.8 minutes | 9 |
| Cabbages | 99,000 | 47.2 minutes | 6 |
| Chinchompas | 42,420 | 22.7 minutes | 12 |
Coconut shy experience
| Experience per throw | ||||||||||||||||||
|---|---|---|---|---|---|---|---|---|---|---|---|---|---|---|---|---|---|---|
| Level | Ball | Cabbage | Chin | Level | Ball | Cabbage | Chin | Level | Ball | Cabbage | Chin | Level | Ball | Cabbage | Chin | |||
| 1 | 26 | 51 | 76 | |||||||||||||||
| 2 | 27 | 52 | 77 | 131 | 218 | 94 | ||||||||||||
| 3 | 28 | 53 | 78 | |||||||||||||||
| 4 | 29 | 54 | 49.4 | 82.3 | 35.2 | 79 | ||||||||||||
| 5 | 30 | 55 | 80 | |||||||||||||||
| 6 | 31 | 56 | 81 | |||||||||||||||
| 7 | 32 | 57 | 82 | 150.4 | 250.6 | 107.4 | ||||||||||||
| 8 | 33 | 58 | 83 | |||||||||||||||
| 9 | 34 | 59 | 84 | |||||||||||||||
| 10 | 35 | 60 | 85 | |||||||||||||||
| 11 | 36 | 61 | 86 | |||||||||||||||
| 12 | 37 | 62 | 87 | |||||||||||||||
| 13 | 38 | 63 | 88 | |||||||||||||||
| 14 | 39 | 64 | 89 | |||||||||||||||
| 15 | 40 | 29.2 | 48.6 | 20.8 | 65 | 90 | ||||||||||||
| 16 | 41 | 30.2 | 50.3 | 21.5 | 66 | 91 | ||||||||||||
| 17 | 42 | 67 | 92 | 180.6 | 301 | 129 | ||||||||||||
| 18 | 43 | 68 | 93 | |||||||||||||||
| 19 | 44 | 69 | 94 | |||||||||||||||
| 20 | 45 | 70 | 95 | |||||||||||||||
| 21 | 46 | 71 | 96 | |||||||||||||||
| 22 | 47 | 72 | 97 | |||||||||||||||
| 23 | 48 | 37.6 | 62.6 | 26.8 | 73 | 98 | ||||||||||||
| 24 | 16.2 | 27 | 49 | 74 | 99 | 198 | 330 | 141.4 | ||||||||||
| 25 | 16.8 | 28 | 12 | 50 | 75 | |||||||||||||
Hook a Duck (m)

.png)
The Hook-a-Duck stand.
Hook a Duck is an event that first appeared in 2016. It is run by Sarah. In it the player must choose from three types of rod to use at the booth and gain Hunter experience. The experience gained scales by the player's level in Hunter. The choice of rod has the following effects.
| Rod | Experience | Success rate |
|---|---|---|
| Light weight | Average | Average |
| Fast action | High | Low |
| Magnetic | Low | High |
If the "play" option is selected on the stall, an interface opens where the rod selection can be made. The stall can also be right-clicked to quickly start catching with any of the rods. After the rod is selected, the player attempts to catch a duck for a maximum of 10 times per interaction. Each attempt can cause either experience being gained, the duck slipping away ("The duck just slips away. So close.") or the duck being missed ("The duck was no where near your rod, maybe next time.").
At level 99 Hunter, catching a duck successfully with the light weight rod yields 234 Hunter experience. Fast action rod yields 5/3 times that (390 Hunter experience), and magnetic rod 5/7 times that (167.1 Hunter experience). An attempt takes 3 seconds. Each successful attempt causes the temperature to rise by 1/3 %, so 300 successful attempts can be made before reaching 100% temperature, regardless of the rod used. Failed attempts do not cause the temperature to rise. The following table shows some typical values for Hook a Duck at level 99 Hunter, assuming maximum efficiency with restarting the activity.
| Rod | Experience per gauge | Time to fill the gauge | Item drops per gauge |
|---|---|---|---|
| Light weight | 70,200 | 30 minutes | 9 |
| Fast action | 117,000 | 48 minutes | 12 |
| Magnetic | 50,130 | 21.7 minutes | 14 |
Hook a Duck experience
| Experience per success | ||||||||||||||||||
|---|---|---|---|---|---|---|---|---|---|---|---|---|---|---|---|---|---|---|
| Level | Light | Fast | Magnetic | Level | Light | Fast | Magnetic | Level | Light | Fast | Magnetic | Level | Light | Fast | Magnetic | |||
| 1 | 26 | 35.8 | 59.6 | 25.5 | 51 | 74.8 | 124.6 | 53.4 | 76 | |||||||||
| 2 | 27 | 37.0 | 61.6 | 26.4 | 52 | 77.6 | 129.3 | 55.4 | 77 | |||||||||
| 3 | 28 | 38.0 | 63.3 | 27.1 | 53 | 81.0 | 135.0 | 57.8 | 78 | |||||||||
| 4 | 29 | 39.4 | 65.6 | 28.1 | 54 | 83.8 | 139.6 | 59.8 | 79 | |||||||||
| 5 | 30 | 40.4 | 67.3 | 28.8 | 55 | 86.6 | 144.3 | 61.8 | 80 | |||||||||
| 6 | 31 | 40.8 | 68.0 | 29.1 | 56 | 89.8 | 149.6 | 64.1 | 81 | |||||||||
| 7 | 32 | 41.6 | 69.3 | 29.7 | 57 | 92.6 | 154.3 | 66.1 | 82 | |||||||||
| 8 | 33 | 41.8 | 69.6 | 29.8 | 58 | 95.6 | 159.3 | 68.2 | 83 | |||||||||
| 9 | 34 | 42.2 | 70.3 | 30.1 | 59 | 98.6 | 164.3 | 70.4 | 84 | |||||||||
| 10 | 35 | 42.4 | 70.6 | 30.2 | 60 | 102.0 | 170.0 | 72.8 | 85 | |||||||||
| 11 | 36 | 42.8 | 71.3 | 30.5 | 61 | 106.2 | 177.0 | 75.8 | 86 | |||||||||
| 12 | 37 | 43.0 | 71.6 | 30.7 | 62 | 87 | ||||||||||||
| 13 | 38 | 43.6 | 72.6 | 31.1 | 63 | 88 | ||||||||||||
| 14 | 39 | 43.6 | 72.6 | 31.1 | 64 | 89 | ||||||||||||
| 15 | 40 | 44.2 | 73.6 | 31.5 | 65 | 90 | ||||||||||||
| 16 | 41 | 46.2 | 77.0 | 33.0 | 66 | 91 | ||||||||||||
| 17 | 42 | 48.8 | 81.3 | 34.8 | 67 | 146.8 | 244.8 | 104.9 | 92 | |||||||||
| 18 | 27.5? | 43 | 51.6 | 86.0 | 36.8 | 68 | 93 | |||||||||||
| 19 | 28.6 | 47.6 | 20.4 | 44 | 54.2 | 90.3 | 38.7 | 69 | 94 | |||||||||
| 20 | 29.6 | 49.3 | 21.1 | 45 | 59.0 | 98.3 | 42.1 | 70 | 95 | |||||||||
| 21 | 30.8 | 51.3 | 22.0 | 46 | 61.4 | 102.3 | 43.8 | 71 | 96 | |||||||||
| 22 | 31.8 | 53.0 | 22.7 | 47 | 64.6 | 107.6 | 46.1 | 72 | 97 | |||||||||
| 23 | 32.6 | 54.3 | 23.2 | 48 | 67.0 | 111.6 | 47.8 | 73 | 98 | |||||||||
| 24 | 33.8 | 56.3 | 24.1 | 49 | 69.6 | 116.0 | 49.7 | 74 | 99 | |||||||||
| 25 | 35.0 | 58.3 | 25.0 | 50 | 72.0 | 120.0 | 51.4 | 75 | ||||||||||
Palm tree farming (m)
There are 16 palm trees with coconuts found around the beach, grown by Palmer. They can be harvested for Farming experience and tropical coconuts.
Each picked coconut yields 34 Farming experience at level 99 Farming, taking 1.8 seconds for each coconut. After a random amount of coconuts picked the tree becomes depleted for a while. Each coconut picked causes the temperature to rise by 0.2%, so 500 coconuts can be gathered before reaching 100% temperature.
Additional Farming experience can be gained by depositing the tropical coconuts in the pile of coconuts east of Sarah, by the coconut shies. At 99 Farming each deposited coconut gives 8.5 Farming experience, a quarter of the experience given for picking them. This doesn't increase the temperature and you can thus get the experience for depositing coconuts after having filled the temperature gauge.
The following table shows some typical values for Palm Tree Farming at 99 Farming with moderate efficiency in switching the trees when needed.
| Method | Experience per gauge | Time to fill the gauge | Item drops per gauge |
|---|---|---|---|
| Depositing the coconuts | 21,250 | 21.7 minutes | 12 |
| Dropping the coconuts | 17,000 | 17.1 minutes |
Rock pools
Rock pool fishing spot with toy warships in
The rock pools can be found on the east side of the beach, overseen by Wellington. Raw tropical trout can be caught here from the 4 fishing spots for Fishing experience. At level 99 Fishing, 239.3 Fishing experience is gained for each trout caught. Further Fishing experience can be gained by depositing the raw trout at the table north of Nigel, by the grills. This gives quarter of the experience received when catching the trouts (59.8 Fishing experience at level 99 Fishing).
Toy pirate battleships can also be found here, to fight toy royal battleships, earning the player Construction experience.
Players can gain 100,000 experience an hour at the Rock Pool activity with level 50 Fishing and usage of decorated fishing urns, scaling up to over 150,000 experience an hour at level 98 Fishing. 94 trouts can be fished before reaching 100% temperature, with each trout contributing 16/15 %. Unlike with many other activities, the time it takes to fill the temperature bar fully varies slightly due to nature of Fishing; sometimes the bar can be filled in 14 minutes of active fishing or less. Depositing the fish at the table does not increase the temperature and can thus be done even after reaching the maximum temperature.
The following table shows some typical values for Rock Pool Fishing at 99 Fishing, assuming moderate efficiency in switching the spots and depositing fish.
| Method | Experience per gauge | Time to fill the gauge | Item drops per gauge |
|---|---|---|---|
| Depositing the fish | 28,115.4 | 13.8 minutes | 4.5 |
| Dropping the fish | 22,494.2 | 12.8 minutes |
Rock pool experience table
This table should be used as a rough guide for the experience gained at your level.
| Experience per harvest | ||||||||||||||
|---|---|---|---|---|---|---|---|---|---|---|---|---|---|---|
| Level | XP | Deposit XP | Level | XP | Deposit XP | Level | XP | Deposit XP | Level | XP | Deposit XP | |||
| 1 | 8.0 | 2.0 | 26 | 76.0 | 19.0 | 51 | 76 | 176.0 | 44.0 | |||||
| 2 | 9.6 | 2.4 | 27 | 80.0 | 20.0 | 52 | 77 | 177.8 | 44.0 | |||||
| 3 | 11.2 | 2.7 | 28 | 92.0 | 23.0 | 53 | 78 | |||||||
| 4 | 12.8 | 3.2 | 29 | 96.0 | 24.0 | 54 | 79 | |||||||
| 5 | 14.4 | 3.6 | 30 | 100.0 | 25.0 | 55 | 80 | |||||||
| 6 | 16.0 | 4.0 | 31 | 104.0 | 26.0 | 56 | 81 | |||||||
| 7 | 17.6 | 4.4 | 32 | 112.0 | 28.0 | 57 | 164.2 | 40.9 | 82 | |||||
| 8 | 19.2 | 4.8 | 33 | 116.0 | 29.0 | 58 | 164.9 | 41.2 | 83 | |||||
| 9 | 20.8 | 5.2 | 34 | 121.6 | 30.4 | 59 | 84 | |||||||
| 10 | 22.4 | 5.6 | 35 | 128.0 | 32.0 | 60 | 85 | |||||||
| 11 | 24.0 | 6.0 | 36 | 131.2 | 32.8 | 61 | 86 | |||||||
| 12 | 25.6 | 6.4 | 37 | 134.4 | 33.6 | 62 | 87 | |||||||
| 13 | 27.2 | 6.8 | 38 | 137.6 | 34.4 | 63 | 88 | 204.4 | 51.1 | |||||
| 14 | 29.6 | 7.4 | 39 | 140.8 | 35.2 | 64 | 89 | |||||||
| 15 | 32.0 | 8.0 | 40 | 144.0 | 36.0 | 65 | 90 | 212.8 | 53.2 | |||||
| 16 | 36.0 | 9.0 | 41 | 66 | 91 | 213.5 | 53.3 | |||||||
| 17 | 40.0 | 10.0 | 42 | 67 | 92 | |||||||||
| 18 | 44.0 | 11.0 | 43 | 68 | 93 | |||||||||
| 19 | 48.0 | 12.0 | 44 | 69 | 94 | |||||||||
| 20 | 52.0 | 13.0 | 45 | 70 | 95 | 227.6 | 56.9 | |||||||
| 21 | 56.0 | 14.0 | 46 | 71 | 96 | 230 | 57 | |||||||
| 22 | 60.0 | 15.0 | 47 | 72 | 97 | |||||||||
| 23 | 64.0 | 16.0 | 48 | 73 | 98 | |||||||||
| 24 | 68.0 | 17.0 | 49 | 74 | 99 | 239.3 | 59.8 | |||||||
| 25 | 72.0 | 18.0 | 50 | 75 | ||||||||||
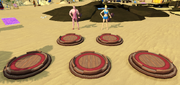
Sandcastle building (m)
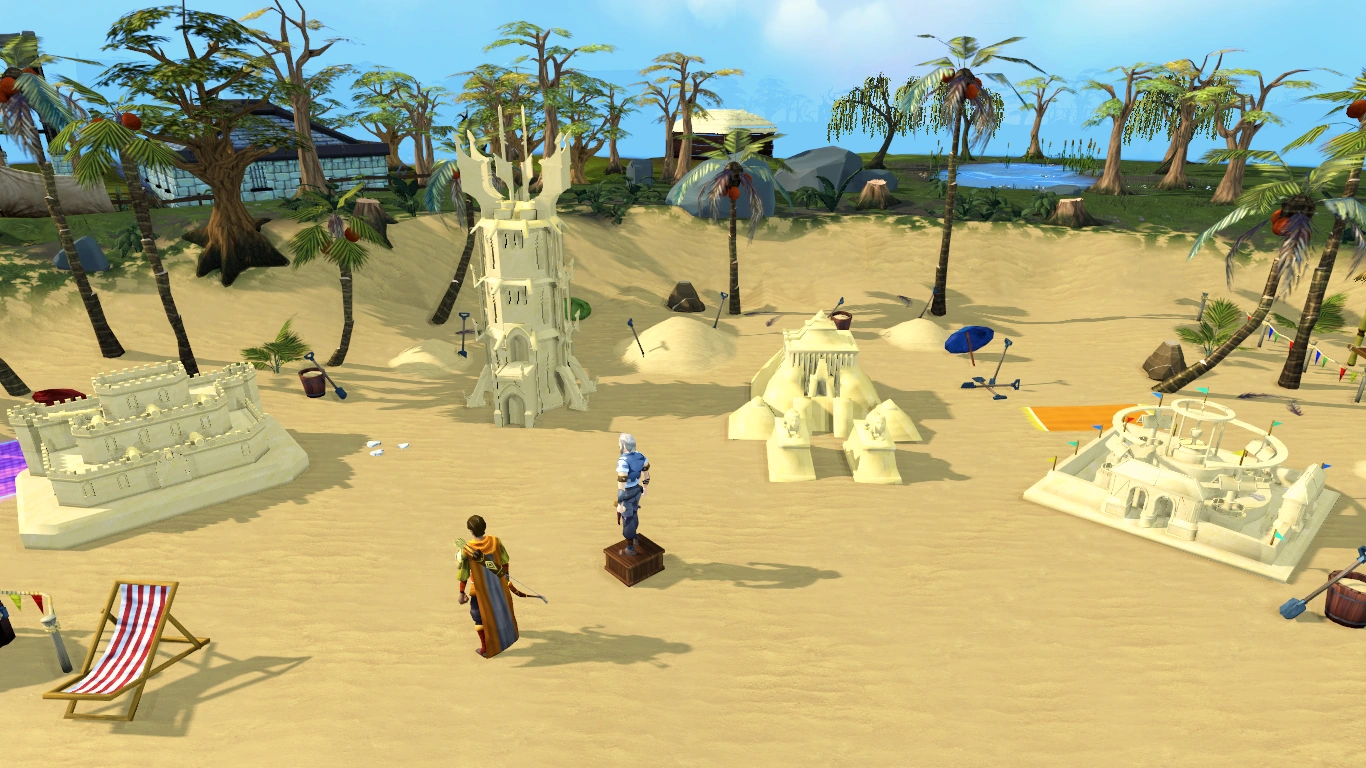

Sandcastle building area, with four buildings in progress
Foreman George runs the sandcastle building, located in the north-western corner of the beach. Building the sandcastles rewards Construction experience. Players can build the corresponding tower to the current NPC guest to earn double experience. The NPC guest will spawn next to Foreman George and will change every 2.5 minutes.
Players will automatically stop shoveling when they tire out after 20 scoops of sand. For each scoop at the incorrect location with level 99 Construction, 36.7 Construction experience is awarded, and building the correct sandcastle doubles this to 73.4 Construction experience. One scoop takes 3 seconds. Scoops at the correct sandcastle cause the temperature to rise by 1/3 % and incorrect sandcastles by 0.2%, so 300 correct scoops or 500 incorrect ones can be made before reaching 100% temperature.
Each sandcastle model has four different states and players can work together to advance the states. One state requires a total of 250 scoops of sand.
The following table shows which sandcastle is the correct one to build for a guest.
| Sandcastle | NPC |
|---|---|
| Dominion Sandtower (2015 and 2016) | Ozan |
| Sand Pyramid (2017) | Ozan |
| Lumbridge Sandcastle | Duke Horacio |
| Sand Exchange | Sally the Grand Exchange clerk |
| Wizards' Sandtower | Archmage Sedridor |
The following table shows some typical values for Sandcastle Building at 99 Construction, assuming moderate efficiency in switching the spots and restarting the building.
| Method | Experience per gauge | Time to fill the gauge | Item drops per gauge |
|---|---|---|---|
| Building correct sandcastles | 22,020 | 16.1 minutes | 7 |
| Staying at one sandcastle | 19,660.7 | 21.4 minutes | 11.5 |
| Building incorrect sandcastles | 18,350 | 26 minutes | 20 |
Sandcastle experience
| Experience per move | ||||||||||||||
|---|---|---|---|---|---|---|---|---|---|---|---|---|---|---|
| Level | Right pile | Wrong pile | Level | Right pile | Wrong pile | Level | Right pile | Wrong pile | Level | Right pile | Wrong pile | |||
| 1 | 26 | 51 | 76 | |||||||||||
| 2 | 27 | 52 | 77 | |||||||||||
| 3 | 28 | 53 | 78 | |||||||||||
| 4 | 29 | 54 | 79 | |||||||||||
| 5 | 30 | 55 | 80 | |||||||||||
| 6 | 31 | 56 | 81 | |||||||||||
| 7 | 32 | 57 | 82 | 60.2 | 30.1 | |||||||||
| 8 | 33 | 58 | 83 | 61 | 30.5 | |||||||||
| 9 | 34 | 59 | 84 | 61.8 | 30.9 | |||||||||
| 10 | 35 | 60 | 85 | |||||||||||
| 11 | 36 | 61 | 86 | |||||||||||
| 12 | 37 | 62 | 87 | |||||||||||
| 13 | 38 | 63 | 88 | |||||||||||
| 14 | 39 | 64 | 89 | |||||||||||
| 15 | 40 | 65 | 90 | |||||||||||
| 16 | 41 | 66 | 91 | |||||||||||
| 17 | 42 | 67 | 92 | |||||||||||
| 18 | 28.5 | 43 | 68 | 93 | ||||||||||
| 19 | 29.5 | 44 | 69 | 94 | ||||||||||
| 20 | 45 | 70 | 95 | |||||||||||
| 21 | 46 | 71 | 96 | |||||||||||
| 22 | 47 | 72 | 97 | |||||||||||
| 23 | 48 | 73 | 98 | |||||||||||
| 24 | 49 | 74 | 99 | 73.4 | 36.7 | |||||||||
| 25 | 50 | 75 | 55 | 27 | ||||||||||
Terrorbird racing


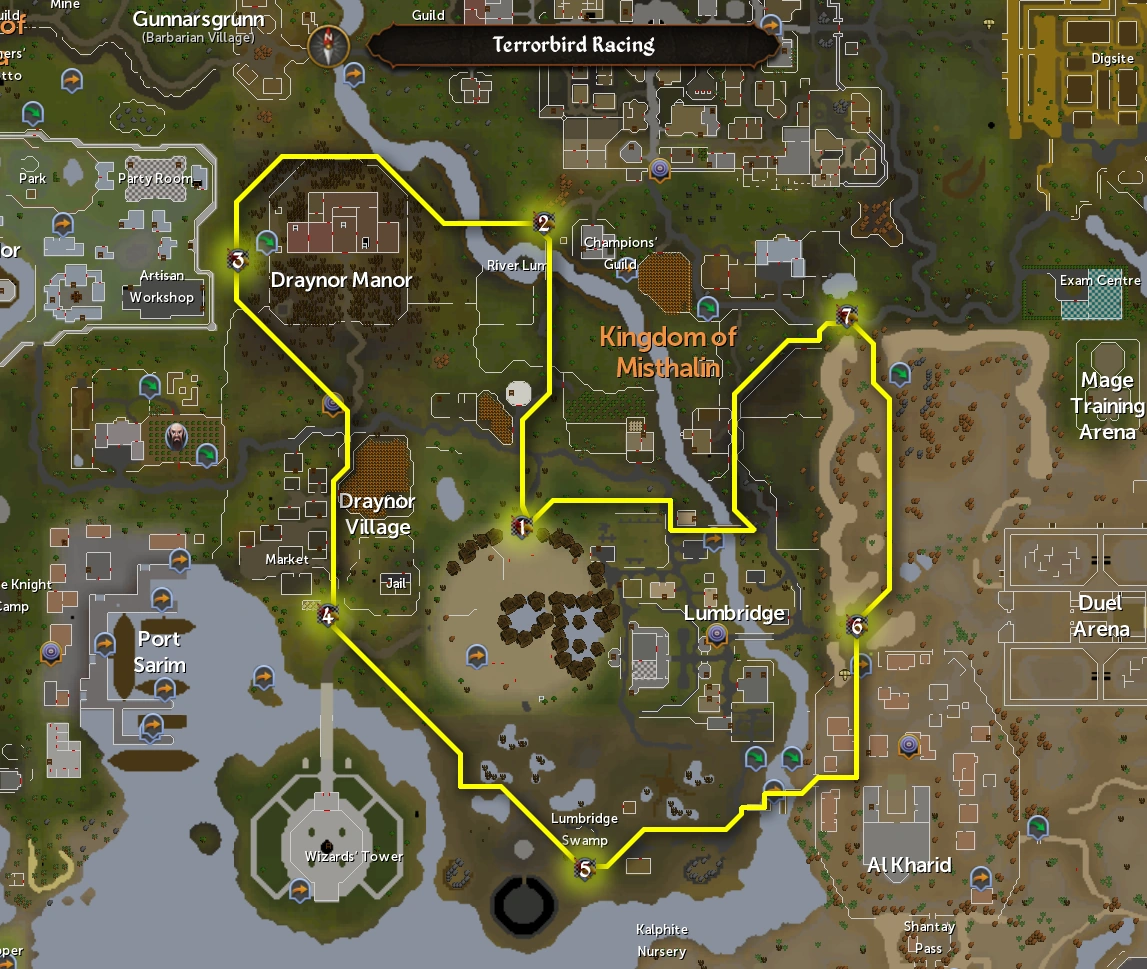
_map.png)
The route for Terrorbird Racing (2016)


One of the Terrorbird racing checkpoints that players must pass through
Terrorbird Racing is an event that featured for the first time in the 2016 Summer Beach Party. In it, the players participate in a race across Misthalin which awards an amount of Agility experience dependent on how quickly the course is completed. There are global and world hiscores for race completion times that can be checked on the starting portal. The global hiscores may take some time to update. Completing 10 races unlocks the Feathered title, and an additional 10 unlocks the Slomo Walk animation override - having the title already unlocked from 2016 makes the walk only require 10 races.
Players may participate in Terrorbird Racing once an hour, during the first 30 minutes past the hour. Terrorbird Racing does not increase the temperature gauge and can thus be played even if the gauge is filled. To participate in the race players must have a terrorbird mount. Previously unlocked terrorbird mounts can be used, or a mount of random colour can be obtained from the crate of Terrorbird costumes near Xuan at the race's start point. However, the mount from the crate will be removed each day upon the daily reset.
The race route is indicated by arrow signs and gates (![]() ) through which the player must pass. Teleporting and other means of getting around the course faster are permitted; all that counts is passing the gates. If the time runs out in the middle of the race, the race has failed and no experience is awarded. The experience that is rewarded is based on time.
) through which the player must pass. Teleporting and other means of getting around the course faster are permitted; all that counts is passing the gates. If the time runs out in the middle of the race, the race has failed and no experience is awarded. The experience that is rewarded is based on time.
Terrorbird Racing is never spotlighted.
2016 experience
| Time | Experience* |
|---|---|
| 80–99 | 7,400 |
| 100–119 | 7,200 |
| 120–139 | 6,800 |
| 140–159 | 6,400 |
| 160–179 | 6,000 |
| 180–199 | 5,400 |
| 200–219 | 5,000 |
| 220+ | 4,000 |
*The experience is halved below level 50 Agility.
2017 experience
| Time | Experience |
|---|---|
| 0–159 | 16,000 |
| 160–199 | 14,800 |
| 200–239 | 14,400 |
| 240–279 | 13,600 |
| 280–319 | 12,800 |
| 320–359 | 12,000 |
| 360–399 | 10,800 |
| 400–439 | 10,000 |
| 440+ | 4,000 |
2017 course
_map.png)
The 2017 course map
The gates along the route can be found:
- At the start/finish line just north of the beach in the Lumbridge Crater.
- Next to the mine, south west of Varrock.
- Between the Falador wall and Draynor Manor.
- South of Draynor by the Wizard's tower bridge.
- South Lumbridge swamp.
- Between Lumbridge and the Kharidian Desert.
- South of the Varrock south east mine.
- Back to the start/finish line north of the beach in Lumbridge Crater.
Since experience is solely based on time, it is recommended to use teleports to clear the course as quick as possible. For the high scores, having other people place Prisms of Salvation along the route helps to shave off many seconds. Surging past the gates does not count as going through them since it is technically a teleport. The following technique should be used for the best possible times, with as many Prisms of Salvation as possible scattered along the route. (If you did not side with Saradomin in Battle of Lumbridge, the best times aren't possible.)
If you do not have Prisms of Salvation at hand, one may use teleports to speed things up.
- For the first gate simply run through it.
- Use a combat bracelet to teleport to the Champions' Guild and run west to the 2nd gate.
- Use an explorer's ring 3 or above to cabbageport and run north to the 3rd gate.
- Use a traveller's necklace to teleport to the Wizard's tower and run north to the 4th gate; alternatively, use an amulet of glory to teleport to Draynor market and run south to the gate. One can also use the colony teleport ability of the Elder divination outfit to teleport to the pale wisps (keybinds 0 then 5), then run west.
- Use an enlightened amulet to teleport to the Nexus and run south-west to the 5th gate.
- Use the Lodestone Network and teleport to Al Kharid and Surge northwards for the 6th gate; alternatively, teleport to Lumbridge lodestone, or use the Lumbridge Teleport spell and surge over the bridge to the gate.
- Use the Dungeoneering cape or Hoardstalker ring and select the Al Kharid mining site resource dungeon (use keybinds 0 then 5), and climb up the shortcut (requires 38 Agility) and run north for the 7th gate.
- Teleport to the east of the Lumbridge Crater by using your Beach sand and run north west to the start for the final gate. Alternatively, use Lumbridge Teleport after the sand gets removed on 3 August; alternatively, if owned, the Saradominist token or the Zamorakian token are the best teleports.
Utilising Surge with the Mobile perk is ideal to reduce the time between the teleports and the gates - this should be on body or legs armour, to save having to switch between the terrorbird mount and a weapon/shield. Remember that the Lodestone Network and the beach sand teleport cannot be used while in combat, so plan ahead and don't surge when these are about to be used, or use the Lumbridge Teleport spell instead of the lodestone. Be warned that the gates must be walked through, and the game will not register you as having walked through the gate if you surge through it.
Jewellery should be worn, as then the 'rub' option is not displayed, instead going to the teleport directly. Make sure to switch from traveller's necklace/amulet of glory to the enlightened amulet while running to the 4th gate.
Weight training

The body building podia.

There are five body building podiums south of where Clawdia spawns; these podiums are run by two bodybuilders, Ivan and Greta. Participating in the activity gives Strength experience when doing one of the following four actions:
- Curl
- Lunge
- Fly
- Raise
There is a warning about gaining Strength experience that can be toggled off permanently. Players earn experience for each of the actions that they perform and quadruple experience can be gained by following the bodybuilders' demonstration. The correct action changes randomly; unlike at Sandcastle Building, the correct action can remain for a very short amount of time. At level 99 Strength, 19.8 Strength experience is gained for every incorrect action and 79.2 Strength experience for correct ones. After starting working out, the player continues to work out until leaving manually. Experience is gained in 2.4-second intervals. Each incorrect action grants 1/15 % temperature and correct ones 4/15 %.
The following table shows some typical values for Weight Training at 99 Strength, assuming moderate efficiency in switching the actions.
| Method | Experience per gauge | Time to fill the gauge | Item drops per gauge |
|---|---|---|---|
| Following the orders | 29,700 | 16.4 minutes | 19 |
| Doing just one action | 34.3 minutes | 25.5 | |
| Disobeying the orders | 51.6 minutes | 39 |
While working out, the player occasionally says one of the following lines:
- Feel the burn!
- Oof!
- Uuuh!
- Weugh!
This activity was initially released on 13 July 2015, as part of batch 2 of the beach.
Weight Training Experience
| Experience per move | ||||||||||||||
|---|---|---|---|---|---|---|---|---|---|---|---|---|---|---|
| Level | Right move | Wrong move | Level | Right move | Wrong move | Level | Right move | Wrong move | Level | Right move | Wrong move | |||
| 1 | 26 | 7.1 | 1.7 | 51 | 16.9 | 4.2 | 76 | |||||||
| 2 | 3.0 | 1.0 | 27 | 7.3 | 1.8 | 52 | 17.8 | 4.4 | 77 | |||||
| 3 | 3.1 | 1.0 | 28 | 7.6 | 1.9 | 53 | 18.8 | 4.7 | 78 | |||||
| 4 | 3.2 | 1.0 | 29 | 7.9 | 1.9 | 54 | 19.8 | 4.9 | 79 | |||||
| 5 | 3.2 | 1.0 | 30 | 8.1 | 2.0 | 55 | 20.7 | 5.1 | 80 | 57.5 | 14 | |||
| 6 | 3.3 | 1.0 | 31 | 8.5 | 2.1 | 56 | 21.7 | 5.4 | 81 | |||||
| 7 | 3.4 | 1.0 | 32 | 8.9 | 2.2 | 57 | 22.7 | 5.6 | 82 | |||||
| 8 | 3.5 | 1.0 | 33 | 9.2 | 2.3 | 58 | 23.7 | 5.9 | 83 | |||||
| 9 | 3.6 | 1.0 | 34 | 9.6 | 2.4 | 59 | 24.6 | 6.1 | 84 | |||||
| 10 | 3.6 | 1.0 | 35 | 9.9 | 2.4 | 60 | 25.6 | 6.4 | 85 | |||||
| 11 | 3.8 | 1.0 | 36 | 10.3 | 2.5 | 61 | 27.1 | 6.7 | 86 | |||||
| 12 | 4.0 | 1.0 | 37 | 10.7 | 2.6 | 62 | 28.6 | 7.1 | 87 | |||||
| 13 | 4.2 | 1.0 | 38 | 11.0 | 2.7 | 63 | 30.1 | 7.5 | 88 | |||||
| 14 | 4.4 | 1.1 | 39 | 11.4 | 2.8 | 64 | 89 | |||||||
| 15 | 4.5 | 1.1 | 40 | 11.7 | 2.9 | 65 | 90 | |||||||
| 16 | 4.7 | 1.1 | 41 | 12.2 | 3.0 | 66 | 91 | |||||||
| 17 | 4.9 | 1.2 | 42 | 12.6 | 3.1 | 67 | 92 | 72 | 18 | |||||
| 18 | 5.1 | 1.2 | 43 | 13.0 | 3.2 | 68 | 93 | |||||||
| 19 | 5.3 | 1.3 | 44 | 13.4 | 3.3 | 69 | 94 | 74.2 | 18.5 | |||||
| 20 | 5.4 | 1.3 | 45 | 13.8 | 3.4 | 70 | 40.5 | 10.1 | 95 | |||||
| 21 | 5.7 | 1.4 | 46 | 14.2 | 3.5 | 71 | 96 | |||||||
| 22 | 6.0 | 1.5 | 47 | 14.6 | 3.6 | 72 | 97 | |||||||
| 23 | 6.3 | 1.5 | 48 | 15.1 | 3.7 | 73 | 98 | |||||||
| 24 | 6.5 | 1.6 | 49 | 15.5 | 3.8 | 74 | 99 | 79.2 | 19.8 | |||||
| 25 | 6.8 | 1.7 | 50 | 15.9 | 3.9 | 75 | ||||||||
Events
Happy Hour
A "Happy Hour" is a scheduled set time which makes every activity a spotlight plot, allows players to do the activities without the temperature gauge increasing and an increased chance to receive items.[1]
Because the temperature gauge is frozen, players can continue skilling even if they had previously capped both ice cream and temperature for the day.
During Happy Hour the best activity to get items from is doing Weight Training and following the orders, compared to non-Happy Hour which is doing Weight Training and not following the orders.
| Day | Worlds 2017 | |||
|---|---|---|---|---|
| 81 (F2P) and 82, 83, 84, 85 & 88 (P2P) (English) | 118 and 55 (F2P) (French) | 102 and 122 (F2P) (German) | 47 (P2P) and 94 (F2P) (Portuguese) | |
| Mon–Sun |
|
|
|
|
Happy Hours' starts are notified with the following message: Happy Hour has started on Lumbridge beach! Gain more XP, no temperature increases, and a better chance of drops for the next hour!
Heatwave
For the 2017 Summer Beach Party a heatwave event was introduced. Between the noons of 11 and 14 August, and 25 and 28 August players were allowed to participate in the activities that normally raise the temperature after reaching the maximum temperature.
While eating the ice cream was not required to continue with the activities, the daily limit of eating it thrice was still in place.
Logging in after the start of a heatwave event prompted the message It's a scorcher! If your temperature bar hits the maximum on the beach, you can carry on during the heatwave! followed by During a heatwave you can reset the temperature gauge if you wish with ice creams[sic] or you can carry on regardless!
Attempting to participate in a relevant activity with maximum temperature also prompted the above messages, with the first reading It's a scorcher! Your temperature bar is off the scale. You can carry on though during the heatwave!
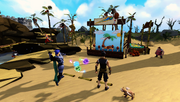
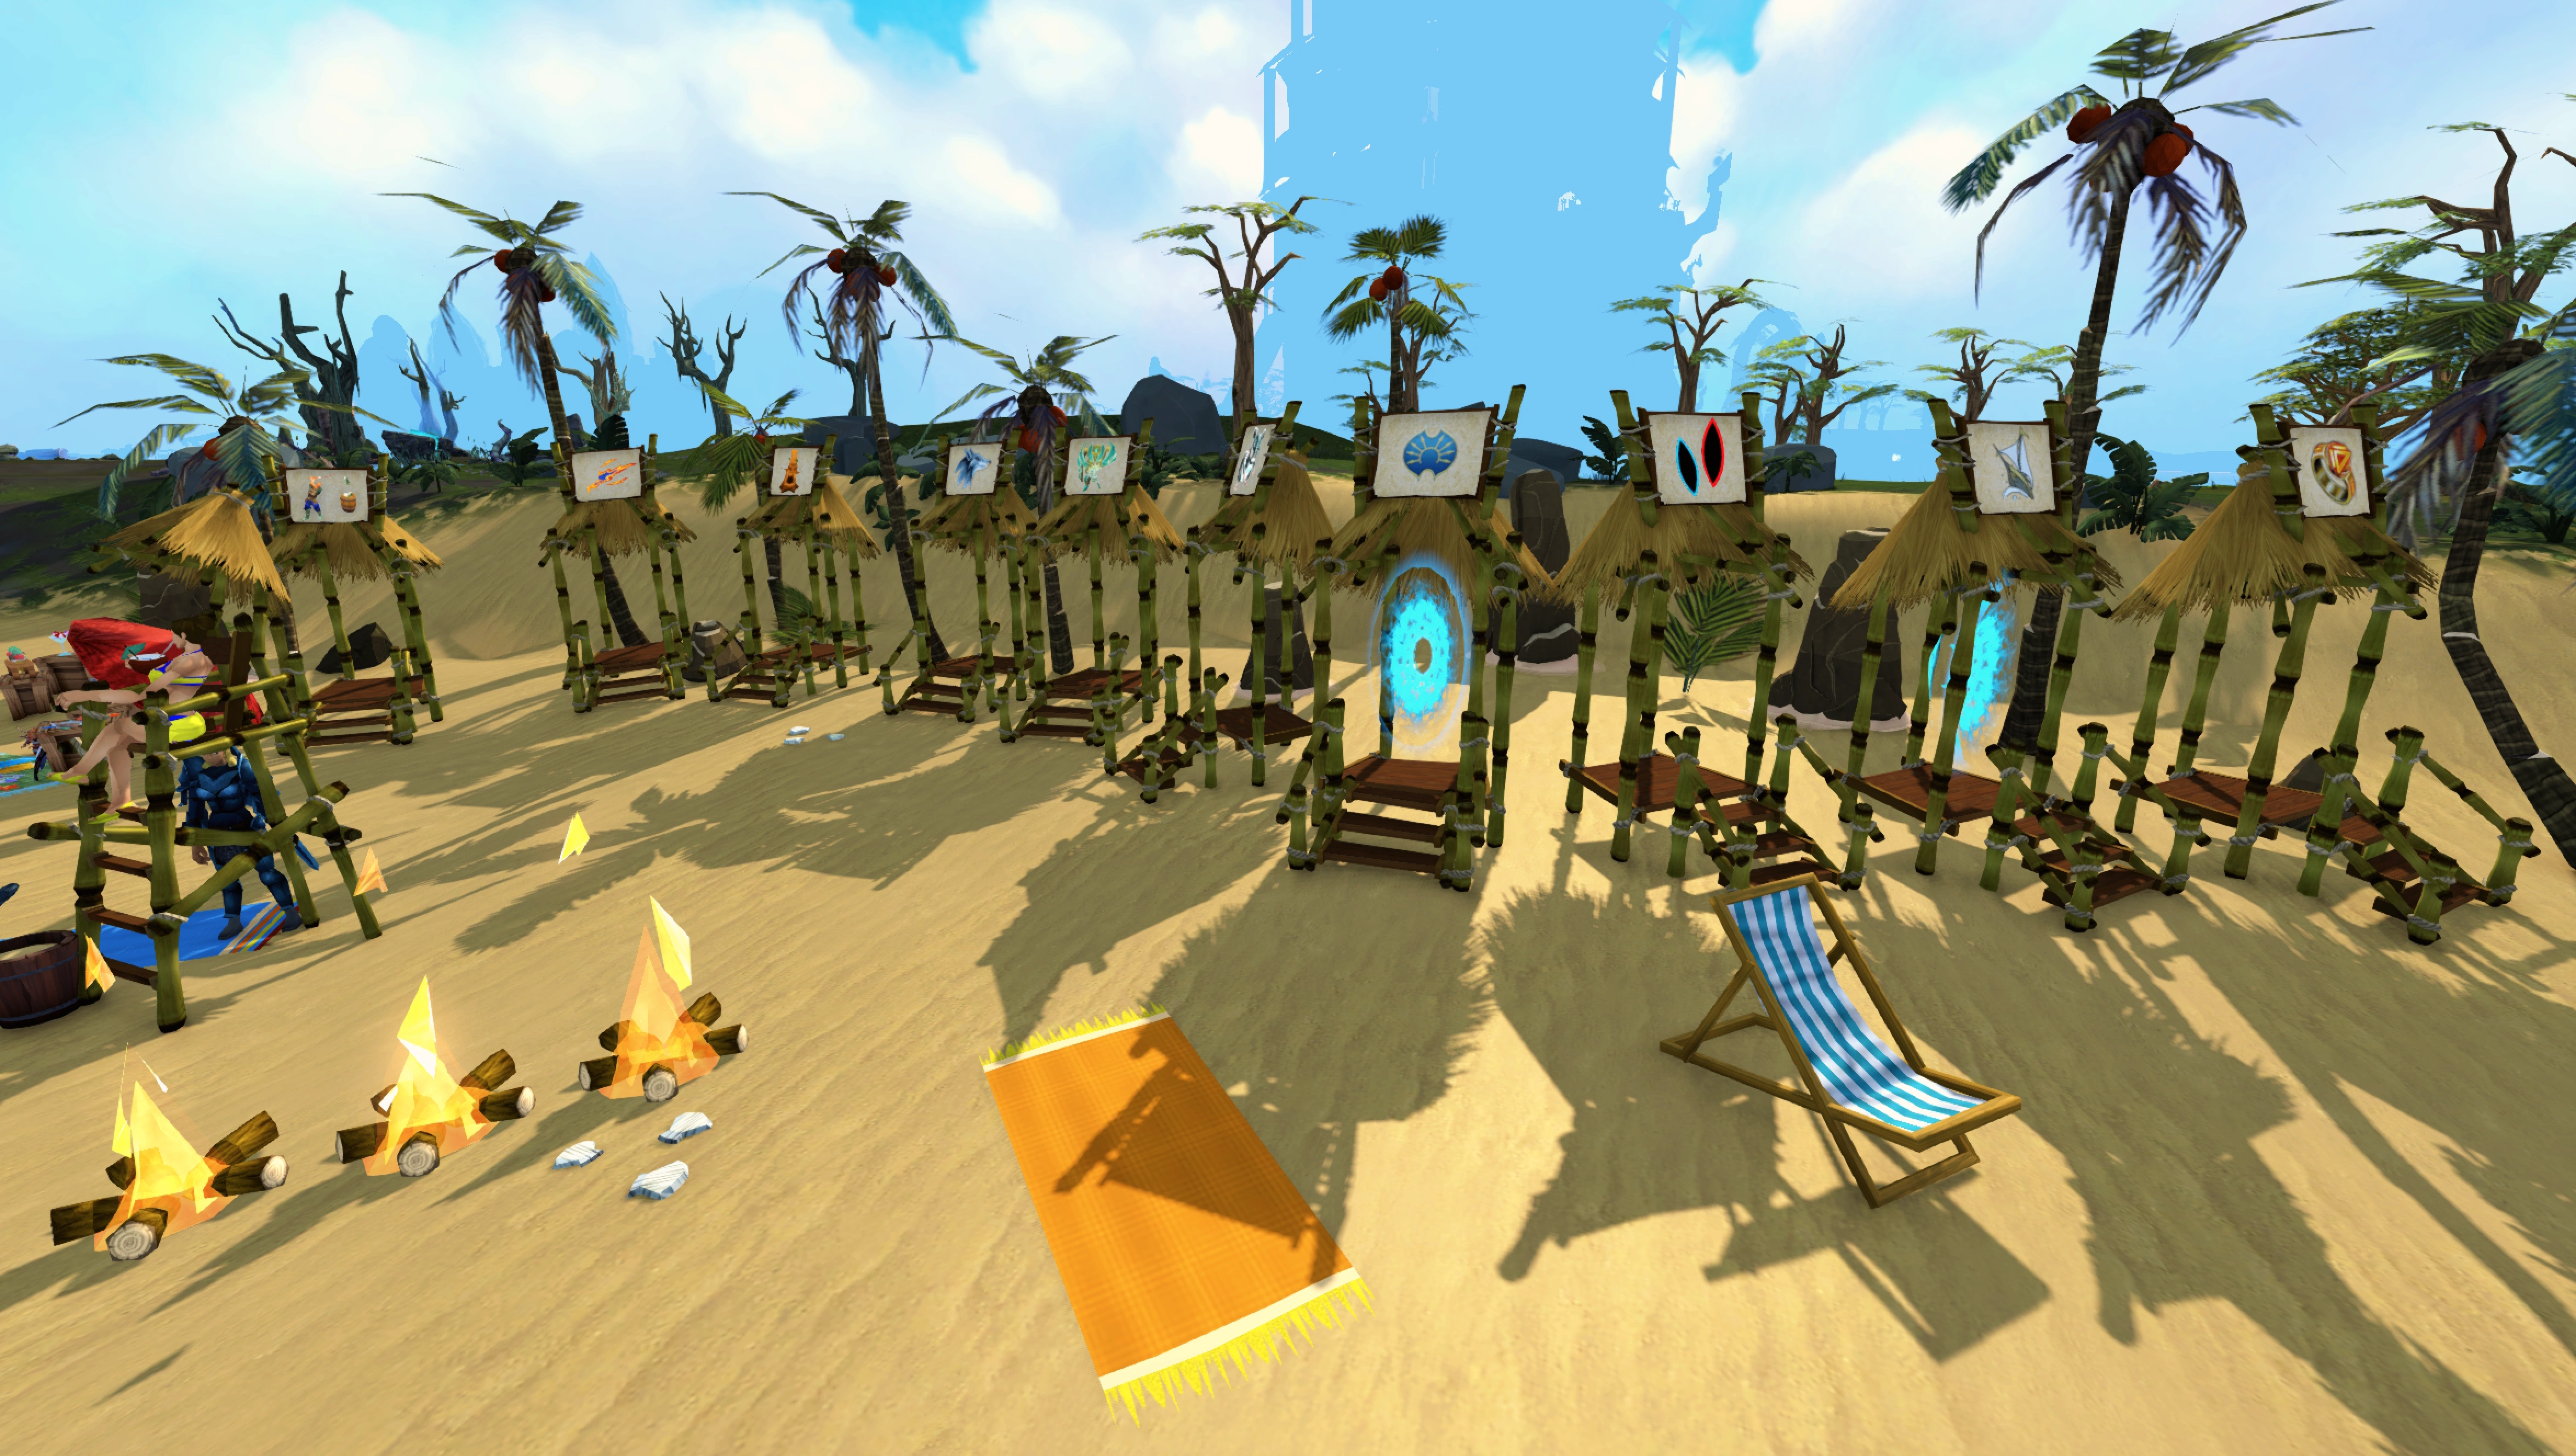
Distraction and Diversion portals

The Distraction and Diversion portals, with several portals active
The south-western corner features 7 Distraction and Diversion portals and 3 location portals, which can be entered to teleport the player to the corresponding D&D or location. A lifeguard announces which D&D activities are active on the players world. A portal to Waiko was added during the 2016 beach party. A portal to Menaphos and Shattered Worlds were added during the 2017 beach party.
The portals featured include:
- Big Chinchompa portal
- Evil tree portal
- Familiarisation portal
- Fish Flingers portal
- Guthixian Cache portal
- Shooting Star portal
- Sinkhole portal
- Waiko portal
- Menaphos portal
- Shattered Worlds portal
If the world's current shooting star is in the wilderness, players will be given a warning beforehand.
Rewards
When the summer beach event is active, all rewards from the past years remain available: This includes previously released titles, cosmetic items (including some from Solomon's General Store), and cocktails. The 2015 reward tokens themselves are not re-obtainable from the vendors; instead players buy the past overrides directly with RuneCoins. Once all of the new items have been unlocked, the older item tokens may be randomly obtained while skilling on the beach.[2] While newer tokens are freely tradeable, the 2015 tokens obtained this way or kept from previous events are tradeable, but not via the Grand Exchange.
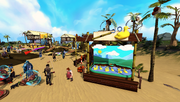
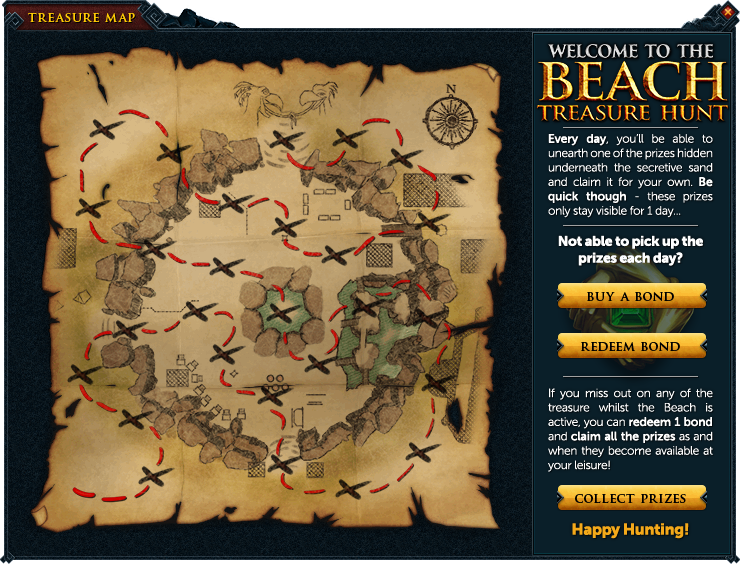
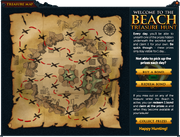
Treasure map
_(Incomplete)_interface.png)
The treasure map as shown in game.
Treasure map is a daily event, similar to the Christmas Advent Calendar event, where the player can claim a free item each day, running from 16 August 2016 to 11 September 2016 and 31 July 2017 to 26 August 2017. Claiming 20 or more items will unlock the Shell Shield cosmetic override and Water Spout loot beam.
The map can be reclaimed from Diango, not Reyna, if lost.
A bond cost could be used to claim all of the rewards from the treasure map, costing 18,933,490.
Tokens
Tokens may be earned through skilling, from Clawdia, or purchased with RuneCoins from Flo's Fun Item Shop, Sheldon's Cosmetic Item Shop, or Gill's Pet Shop. Tokens can also be purchased on the Grand Exchange as they are all tradeable. The title [Name], King/Queen of the Sandcastle is unlocked by redeeming all the 2015 tokens. The title [Name], Emperor/Empress of the Sandcastle is unlocked by redeeming all the 2015 and 2016 (non-pinata) beach tokens. Tokens which cannot be purchased from an NPC and non-token items are not required for the titles.
The 2015 tokens are tradeable, but cannot be traded on the Grand Exchange.
2017
| Reward | Unlocks | Bought from | RuneCoins | G.E. price |
|---|---|---|---|---|
| Pyramid Hat | Sheldon | 100 | 11,825 | |
| Bubble blower | Flo | 200 | 375,386 | |
| Palm tree Resting | Flo | 150 | 126,227 | |
| Kauai parasol | Flo | 50 | 15,042 | |
| O'ahu parasol | Flo | 50 | 14,769 | |
| Kahului parasol | Flo | 50 | 15,802 | |
| Maui parasol | Flo | 50 | 19,933 | |
| Hawai'i parasol | Flo | 50 | 20,443 | |
| Sandy | Gill | 200 | 42,932 | |
| Octo | Gill | 200 | 138,843 |
2016
*these tokens are not required for the title [Name], Emperor/Empress of the Sandcastle.
2015
| Reward | Unlocks | Bought from | RuneCoins |
|---|---|---|---|
| Phoebe | Gill | 50 | |
| Gillbert | Gill | 50 | |
| Buried in Sand Resting animation | Flo | 33 | |
| Surfboard emote | Flo | 33 | |
| Beach ball | Flo | 10 | |
| Anti-dragon throwing disc case | Flo | 10 | |
| N/A | Flo | 45 | |
| N/A | Flo | 108 | |
| Bunting whip | Sheldon | 33 | |
| Stick of rock sword | Sheldon | 33 | |
| Throwing starfish | Sheldon | 33 | |
| Snorkel | Sheldon | 20 | |
| Bucket head | Sheldon | 20 | |
| Clawdia hat | Sheldon | 100 | |
| Dragon ring | Sheldon | 33 |
This amounts to 458 RuneCoins to buy back all 2015 unlockables, not counting the Masterwork music box and Challenge gems. This takes 3 bonds costing 56,800,470.
Other
The following items can be earned from beach activities or killing Clawdia:
| Item | Description | |
|---|---|---|
| 5 × Barrel of monkeys | Causes monkeys to come out of the barrel | |
| 50 × Water balloon | Can be thrown at players, similar to snowballs. Gives a "splash" of XP | |
| Anti-sun potion | Gives a 5% experience boost to any activity done on the beach for the next 24 hours | |
| Ice cream | Used to reset the temperature gauge, up to 3 times a day | |
| Lemon sour | Gives a 2% experience bonus (stackable to 10%) to all support skills (Agility, Dungeoneering, Slayer, and Thieving) for 30 minutes | |
| Pink fizz | Gives a 2% experience boost (stackable to 10%) to all combat skills (Attack, Constitution, Defense, Magic, Prayer, Ranged, Strength, and Summoning) for 30 minutes | |
| Pineappletini | Gives a 2% experience bonus (stackable to 10%) to all gatherer skills (Divination, Farming, Fishing, Hunter, Mining, and Woodcutting) for 30 minutes | |
| Purple Lumbridge | Gives a 2% experience bonus (stackable to 10%) to all artisan skills (Cooking, Construction, Crafting, Firemaking, Fletching, Herblore, Runecrafting, and Smithing) for 30 minutes | |
| Challenge gem | Allows players to start their own skilling or combat challenges | |
| Large shell | Chance to lower temperature condition by 0.5–1% for a number of times before a crab scuttles away with the shell | |
Rewards obtained through other means are:
| Reward | Unlock method |
|---|---|
| Swimming outfit | 50 maxed thermometers in 2015 [notes 1] |
| Beach Summer Fun outfit | 50 maxed thermometers in 2016 [notes 1] |
| Shadow Drake Ring | Unlock all beach titles |
| Deckchair Resting animation | Sit in each colour deck chair (red, blue, and green) 10 times |
| Rainbow kite | Speak with certain NPCs on the beach at least once (includes Nigel, Palmer, Reyna, Sarah, Wellington and Xuan) |
| Beach Towel Cape | Rest 10 times on the beach with any beach rest animation enabled |
| Slomo Walk | Complete 10 Terrorbird races after unlocking the Feathered title (10 races if the title is unlocked from 2016, 20 total if you don't have the title beforehand). |
Titles
These titles are not purchasable; they are instead earned from doing certain things.
In order to unlock the 2015 titles, the 2016 titles must first be gained and then the 2015 titles can be gained after doing an additional amount required for the title. For example, a total of 61 thermometers[2] need to be maxed in 2016 to gain the 2015 title 'the Bronzed'.
The Shadow Drake Ring override is obtained once all titles have been unlocked. When new titles are added it gets locked and has to be unlocked again.
2017 Titles
| Title | Requirement |
|---|---|
| [[the Completesunist|[Name] the Completesunist]] | Complete every activity once, unlock all store tokens from 2015/2016/2017, and obtain the Slomo Walk. Speak to Reyna to unlock. |
2016 Titles
| Title | Requirement |
|---|---|
| [[The Feathered|[Name] the Feathered]] | Complete the terrorbird race 10 times |
| [[The Beachy Keen|[Name] the Beachy Keen]] | Successfully catch 5 ducks in a row in the Hook-a-duck game |
| [[the Sunkissed|[Name] the Sunkissed]] | Listen to a large shell 10 times |
| [[The Sun-sational|[Name] the Sun-sational]] | Participate in all of the activities from 2015 and 2016 |
| [[Emperor/Empress of the Sandcastle|[Name], Emperor/Empress of the Sandcastle]] | Unlock all of the beach tokens from 2015 and 2016 |
2015 Titles
| Title | Requirement |
|---|---|
| [[the Quackers|[Name] the Quackers]] | Find 10 hidden little toy ducks |
| [[the Totally Quackers|[Name] the Totally Quackers]] | Own Mod Dolan's rubber duck, or find 10 hidden little toy ducks and own the mega ducklings |
| [[the Beachbum|[Name] the Beachbum]] | Successfully hit 5 coconuts in a row in the coconut shy game |
| [[Lifeguard (title)|[[Lifeguard|Lifeguard [Name]]]]] | Kill Clawdia 50 times in a single year |
| [[the Bronzed|[Name] the Bronzed]] | Reach 10 maximum thermometers in 2015 [notes 1] |
| [[the Sunburned|[Name] the Sunburned]] | Reach 25 maximum thermometers in 2015 [notes 1] |
| [[the Chilled|[Name] the Chilled]] | Eat 10 ice creams in a single year |
| [[Beachcomber|Beachcomber [Name]]] | Participate in all of the activities from 2015 |
| [[King/Queen of the Sandcastle|[Name], King/Queen of the Sandcastle]] | Unlock all of the beach tokens from 2015 |
- ^ a b c d The requirement of fulfilling thermometers is done in descending order: 2017 caps out after 25 thermometers, 2016 and 2015 after 50 each. Partial progress from previous years remains considered though. Cite error: Invalid
<ref>tag; name ":0" defined multiple times with different content Cite error: Invalid<ref>tag; name ":0" defined multiple times with different content Cite error: Invalid<ref>tag; name ":0" defined multiple times with different content
Right-click lifeguards and select Beach Stats to see the amount of thermometers filled, Clawdias killed and ice creams eaten for the current year; past years can be checked by clicking the arrowhead button.
Gallery
")
")
")
")
")
")
")
")
")
")
")
")
")
")
")
")
")
")
Music unlocked
References
| Hallowe'en event | |
| Christmas event |
|
| Easter/Spring event |
|
| Summer Beach Party |
|
| Spring Fayre |
|
| Thanksgiving event |
|
| April Fools' |
|
| Cryptic Clue Fest |
|
| Winter event |
|
| Winter Weekends |
|
| RuneFest |
|
| Membership promotions |
|
| The Drop |
|
| Christmas Advent Calendar |
|
| Game Jam |
|
| Miscellaneous |
|