*Bring the pet rock to Lalli and give it to him as a present.
*Bring the pet rock to Lalli and give it to him as a present.
*However, Lalli doesn't want another rock and is scared that they will have baby rocks, so tell him you can make him a delicious stone soup. Sadly, this means saying goodbye to your beloved rock for a while. ''(You can get a replacement from Askeladden later.)''
*However, Lalli doesn't want another rock and is scared that they will have baby rocks, so tell him you can make him a delicious stone soup. Sadly, this means saying goodbye to your beloved rock for a while. ''(You can get a replacement from Askeladden later.)''
−
*Talk to Lalli again, then '''use''' the rock, potato, onion and cabbage on his cauldron to make some stone soup. He likes it and will "trick" you by giving you [[golden fleece]] instead of a golden apple. ''You can use the drop trick again, to obtain multiple golden fleeces, if you want multiple lyres.''
+
*Talk to Lalli again, then '''use''' the rock, potato, onion and cabbage on his cauldron to make some stone soup. He likes it and will "trick" you by giving you [[golden fleece]] instead of a golden apple. ''You can use the drop trick again, to obtain multiple golden fleeces, if you want multiple lyres. You should also save one extra fleece for the [[Odd Old Man]]'s second wishlist in [[Fur 'n' Seek]] to avoid having to pay {{Coins|1000}} coins for it later.''
[[File:Fossegrimen altar location.png|thumb|Location of the strange altar for the final step.]]
[[File:Fossegrimen altar location.png|thumb|Location of the strange altar for the final step.]]
*You must now spin the fleece into a ball of wool on a spinning wheel. The closest spinning wheel you can use is in the south-western most building of Rellekka. Use the ball of golden wool on the lyre. You cannot use the assist system to string the lyre, you must have level 25 Fletching.
*You must now spin the fleece into a ball of wool on a spinning wheel. The closest spinning wheel you can use is in the south-western most building of Rellekka. Use the ball of golden wool on the lyre. You cannot use the assist system to string the lyre, you must have level 25 Fletching.
(NOTE: The Woodcutting, Fletching, and Crafting requirements are not needed if you decide to kill Borrokar for the Enchanted Lyre. This does, however, take much longer.)
Items required
Items from the tool belt are not listed unless they do not work or are not automatically added.
Koschei the Deathless (three forms - the fourth does not have to be killed, as letting it kill you will result in victory and no loss of items. They do not have a combat level)
Borrokar (level 48) (if you wish to get his Lyre instead)
NOTE: The closest bank for those who have started/finished the The Giant Dwarf Quest is the Keldagrim bank, besides the Seers' Bank and the Zanaris Bank when using the Slayer Cave fairy ring.
The Trials
To start the quest, travel to Rellekka, which is located north of the Seers' Village. Walk into the longhall, in the heart of the city, and talk to Brundt the Chieftain. Brundt tells you that the locals are inherently unfriendly towards foreigners. To have a conversation with them, a person has to be a Freminnik - either be born one or be voted in by the council.
The only way to be voted as a Fremennik by the council, is by impressing seven of the twelve members of the council of elders, enough that they give you their vote. Each of the seven that accept outlanders have a trial for you to complete.
After you have spoken to him, tell him that you are interested in the Fremennik Trials, and he will tell you that you need 7 of 12 votes from the council members.
You can do the trials in any order.
Click on either the green circle or the name of the Fremennik below to follow the guide for that particular part of the quest.
Error: Image is invalid or non-existent.
= Task is Doable = Task is a put off, can't be done, and they won't vote for you!
You can find Manni the Reveller in the longhall, right next to the chieftain. He says that to become a Fremennik, you need to show cunning, stamina, fortitude and an iron constitution and he knows only one to do it - a drinking challenge. If you beat him, he promises to give you his vote.
Pick up a keg of beer from one of the tables and accept his challenge. You will lose no matter what, while he'll hardly get drunk at all.
On your way back to Rellekka, at the bridge just south of it, you will see a Council workman. Offer the beer to him and he'll gladly accept. (Remember, the default action is to drink the beer, so don't left-click it or you'll have to get another one!). He will give you a cherry bomb, something he picked up from his outings, as a gift.
Go back to the longhall and take another keg first. If you try mixing the normal beer keg with the low alcohol one, Manni will get angry and stop you. You will need a distraction. Look to the outside of the longhall, on the eastern wall, for a pipe. Light the cherry bomb and place it inside.
WARNING, if you leave a lit "strange object" in your inventory for long enough, it will eventually explode, dealing 25 damage.
Enter the longhall and mix the low alcohol keg with the longhall keg. The bomb bursts with a loud noise, stunning everyone. Finally, challenge Manni for a rematch and you will win this time, gaining his vote.
Olaf the Bard
Items Needed: Potato, onion, cabbage, (All 3 can be obtained during the quest) knife, hatchet, (toolbelt will work for both) raw shark/raw manta ray/raw sea turtle (sharks are the cheapest).
You may choose to obtain the Enchanted Lyre as a very rare drop from Lanzig, Freidir, or Borrokar, in which case you can skip most of the steps below. However, this method can take a while and is only recommended for players who do not meet the requirements.
You should speak with Olaf the Bard, who is to the east of the longhall. He promises you his vote if you can prove your worth as a bard by performing at the longhall.
The first thing you need is a lyre:
A player having their lyre enchanted.
Leave through the gates and turn east. Move deep into the woods and head straight for the swaying tree indicated by a rare tree symbol on the map. It stands on a hill, and is surrounded by bunnies.
Chop off a branch (40 woodcutting required) and use your knife on it to get an unstrung lyre (40 crafting required). You can obtain multiple branches and lyres.
After that, you need to string your lyre, for which you require a ball of golden wool. Head south-east, and you'll find an enclosure with golden sheep and a Golden Apple Tree in it. Talk to Lalli, a troll who apparently is the self-proclaimed guardian of the golden apples, and ask about golden wool. No matter how much you try to convince him to part with it, you can't change his mind, although he'll mention giving some golden fleece to another human named Askeladden, a young Fremennik also trying to complete his trials.
Go back outside the longhall and talk to Askeladden. He says he traded Lalli a pet rock for some golden fleece, and will give you one to trade, although he thinks Lalli won't fall for the same trick twice. You can use the drop trick to obtain multiple pet rocks from Askeladden.
Now would be a good time to grab a potato, onion, and cabbage from behind the house in the south-eastern corner of Rellekka if you don't already have them.
Bring the pet rock to Lalli and give it to him as a present.
However, Lalli doesn't want another rock and is scared that they will have baby rocks, so tell him you can make him a delicious stone soup. Sadly, this means saying goodbye to your beloved rock for a while. (You can get a replacement from Askeladden later.)
Talk to Lalli again, then use the rock, potato, onion and cabbage on his cauldron to make some stone soup. He likes it and will "trick" you by giving you golden fleece instead of a golden apple. You can use the drop trick again, to obtain multiple golden fleeces, if you want multiple lyres. You should also save one extra fleece for the Odd Old Man's second wishlist in Fur 'n' Seek to avoid having to pay 1,000 coins for it later.
You must now spin the fleece into a ball of wool on a spinning wheel. The closest spinning wheel you can use is in the south-western most building of Rellekka. Use the ball of golden wool on the lyre. You cannot use the assist system to string the lyre, you must have level 25 Fletching.
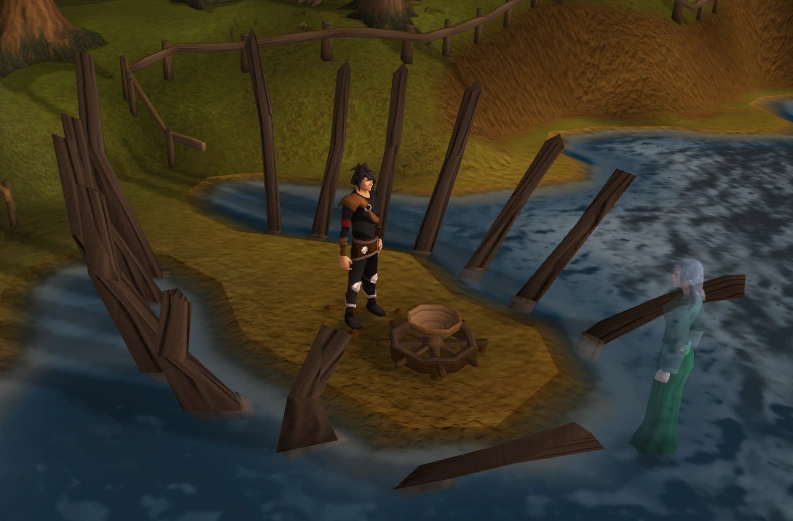
The final step is to get your lyre enchanted. Bring either a raw shark, raw manta ray, or raw sea turtle with you and head south-west of Rellekka to a fork in the main dirt road. There is a strange altar on a tiny peninsula. (If you hit the "Lighthouse" trail, you've gone too far.)
With the lyre on your person, use the shark on the Strange altar. A Fossegrimen spirit will appear and bless your lyre. Go back and talk to Olaf the Bard again.
Once you have the Enchanted lyre, go backstage through the side door guarded by a bouncer. (North east side of the longhall.) Play your lyre in front of the crowd.
Olaf will be impressed and keep his promise of giving you his vote.
Peer the Seer can be found south of the market. He will give you his vote if you can simply enter the front door to his house, and come out the other side. There is a catch though - you cannot take any items inside. Peer the Seer will offer to deposit any items you have on you for the remainder of the quest.
To get in, you need to answer a puzzle. The answer is a four letter word, and Peer will give you a clue for each letter and the word itself. Possible answers include: "tree", "time", "life", "mage", "fire", "wind", "mind" and "disk".
After you've solved the riddle, enter the building and go upstairs. Search all of the objects and examine the statues on the wall to find an old red disk, a wooden disk, an uncooked red herring, a jug, and a bucket. You will also find a blue thread, a pick, a ship toy and a magnet, but these items serve no purpose in the quest.
Cook the red herring to get sticky red goop and use it on the wooden disk to get a second red disk. Then go down the other trapdoor and use the two disks on the abstract mural to get a vase lid.
You now need to get the vase, which can be found in the chest upstairs in his house. To open it, you must set exactly four litres of water on it. You need the jug, which can hold 3 units of water and the bucket, which holds 5 units, to open the chest. Here is what you should do:
Fill up the jug with water, from the tap. Use it with the bucket.
Do this again and you'll have a full bucket and a 1/3 full jug.
Use the bucket on the drain to get an empty bucket.
Fill up the bucket with the 1/3 full jug.
Fill the jug again, and use it with the bucket to get a 4/5ths full bucket.
Use the 4/5ths full bucket with the chest, and it will open, giving you a vase.
Fill up the jug again, and use it on the vase, to make a Vase of water.
Use the sealed vase with the frozen table to freeze the water, which then expands in the vase and shatters it. You will receive a key frozen in a block of ice (If you accidentally freeze the water without sealing it, use it on the range to empty it).
Thaw the frozen key on the range, then go down the eastern ladder again and out the exit to get Peer's vote and a free herring, which you can eat.
Sigli the Huntsman
Items Needed: Food and combat gear
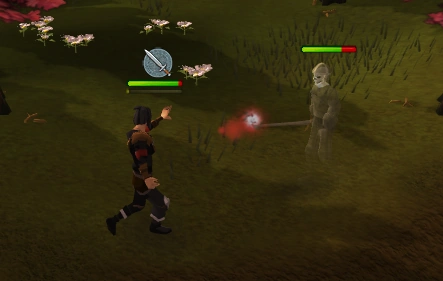
Sigli the Huntsman is near the entrance gate of Rellekka. His task for you is to find and kill the Draugen, an evil ghost that is said to devour the souls of brave warriors who meet their ends at sea. As it cannot be defeated by normal means, Sigli provides you with a hunter's talisman to capture the Draugen's spirit.
The Draugen in action.
Keep using the talisman to locate the Draugen. It may not be able to go to the Seer's village area, and it will travel no farther east or south than the intersection at Sinclair's Mansion. It appears in a different place for each player. Remember, the Draugen is not visible until you get close to his location.
Eventually, you'll find him. His combat level is 96 and he can easily hit 80s or higher, up to a max of 100. It is advised to use rune armour or stronger. He is fairly easy to defeat, although results may vary depending on your combat level. When fighting him, there are some safe spots for mages and rangers, like east of the bridge. Simply activate your run and circle a block of rocks or a set of mushrooms until you're on one side and he's on the other. You may also use a halberd. After you defeat him once, return to Sigli to get his vote. Do not drop or lose the talisman as it contains the Draugen's spirit, so you will have to fight him again!
You can find Sigmund the Merchant in the market. He will want you to get him an Exotic flower. This may sound easy, but you will end up having to complete a trail of requests from many people, similar to the One Small Favour quest.
Make sure you bring 5000 coins to complete this task.
Go to the clothing store to the west of the market and ask Yrsa about them. She will agree to make the boots only if Brundt the Chieftain produces a fiscal statement that lowers the taxes on the stores.
If you talk to Brundt in the longhall, he will tell you that the clan will be able to afford it if Sigli the Huntsman will give him a tracking map showing the best places to hunt monsters.
Go south of the longhall. Sigli agrees, but first he will want a custom bowstring made.
Go to the helmet store just north of the longhall. The shopkeeper Skulgrimen will give you one in exchange for the unusual fish that the Fisherman caught.
On the docks to the north of Rellekka Market, you'll find the Fisherman. He will ask you to get a sea fishing map showing the best spots to catch edible fish.
Find Swensen the Navigator. He is in a house south of the market. He will make the map but he will want a weather forecast first.
Peer the Seer will give you a forecast if you can find him a bodyguard and make him sign a warrior's contract.
Thorvald the Warrior can be found in the helmet store. He wants you to get him a seat in the long hall, which will require a champion's token, in exchange for becoming the Seer's bodyguard.
Manni the Reveller is in the long hall. He will gladly give up his seat if Thora the Barkeep will make him one of her legendary cocktails.
Thora will only agree to make one if you can get a signed promissory note from Askeladden for him to stay out of the bar.
Talk to Askeladden (who is outside the long hall) to get the promissory note for 5000 coins.
Then give the promissory note to Thora, the legendary cocktail to Manni, the champion's token to Thorvald, the warrior's contract to Peer, the weather forecast to Swensen, the sea fishing map to the Fisherman, the unusual fish to Skulgrimen, the custom bowstring to Sigli, the tracking map to Brundt, the fiscal statement to Yrsa, the sturdy boots to Olaf, the Fremennik ballad to the Sailor, and finally the exotic flower to Sigmund. You will get his vote.
Talk to Swensen in his house, which is southwest of the longhall, and south of the marketplace. Your task is to navigate your way through his maze of portals.
A player in the maze of Swensen the Navigator.
Start by going down the ladder in the small room in his house. In each room, there are four portals: One on the north wall, one on the south wall, one on the east wall, and one on the west wall. One of the portals will take you to the next room. The other three will send you back to the start.
The trick is to spell his name. First go in the South portal, then the West, then East, then North, then South, then East, and finally North again (SWENSEN). After you finish, talk to Swensen to get his vote.
Thorvald the Warrior lives in the helmet store north of the longhall. His task is for you to fight a special warrior called Koschei the Deathless. There are three rules:
1. You must defeat him at least three out of four times, If you die anytime during the first three fights, you will die normally and lose your items.
2. You must fight to the death.
3. No weapons or armour - which also means no runes, staves. etc.
You only have to defeat him 3 times, only THEN you may allow him to defeat you. Also, if you leave during any part of the fight, you will have to restart the fight from the beginning.
You can use food and prayer (Combat level 80 or higher only need prayer and 10 lobsters), an amulet of defence (or amulet of your choice), a gnome amulet if you have completed Tree Gnome Village, and rings of recoil. A combat bracelet is allowed; the explorer's ring is allowed but not terribly useful. Do not wear a ring of life when fighting, you will have to restart all over again. The Vampyrism aura is allowed, so is a set of potions such as a Super set.
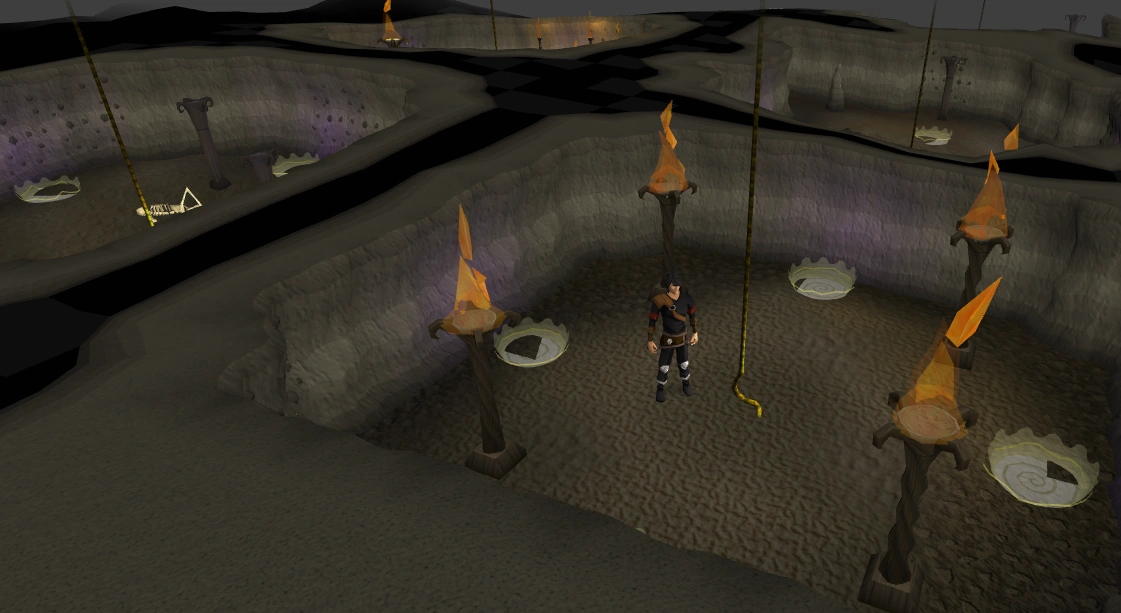
Go into the basement to begin fighting, after you bank all unnecessary items. Peer the Seer will bank all your items, regardless of task completion for this trial. Beware that using his banking will deposit all your items, food and all.
Koschei's first form is easy and should give you no problems. After you defeat him, he will regain all of his health and get stronger. There is no safe place to hide and attack, although you can trap him over the poles with fire burning on top of them and heal yourself. Just don't stay there too long or he'll disappear and reappear after you run around, and you'll start over at his first form.
His second form might give you a bit of trouble and you might need to use food or prayer. The food you should use is lobsters or better. Pures can't really beat him, unless they are pure melee. File:Fremennik Trails - Koschei.png
A player wielding a Dramen staff fighting Koschei.
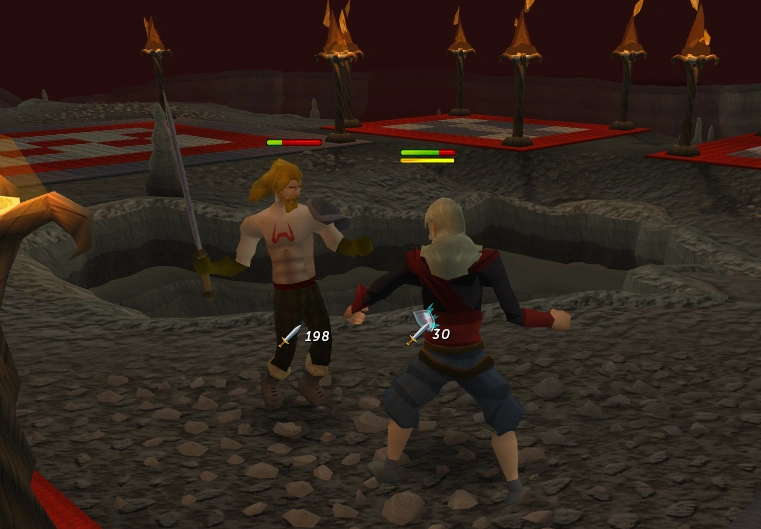
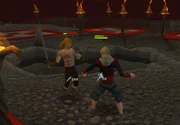
His third form is fairly difficult, so you'll probably want to use food or prayer here. You may need to use a prayer potion or prayer flashing to survive.
A player fighting Koschei.
The fourth form is the hardest, but not necessary, because the first rule states that you must defeat him three times. You can then let yourself die and gain Thorvald's vote. He will hit about once every quarter second.
It is recommended that the player wears rings of recoil while killing him. Your inventory should contain 6 or 7 of the rings with the rest of the slots taken up by food.
A regen bracelet is allowed, and provides good combat bonuses as well as health regeneration, which makes the fight much easier, even if praying.
Also note that your prayer is drained to 0 at the beginning of the fourth form. Prayer potions can be drunk to restore your prayer, but if you use a protect prayer, then every hit from Koschei will take away 1 point, quickly draining it back down to 0. However, you can safely use stat-boosting prayers after restoring, without them being drained.
If the player defeats this form, he/she will get a Fremennik blade. This sword is also dropped by Fremennik guards in Rellekka, Lanzig and Dagannoths on Waterbirth Island. Also, do NOT climb the ladder back up if you have not defeated his forth form or you will have to restart the fight from form one.
It is in fact possible (with the correct quest requirements) to smuggle a crab shell helmet, and a dramen staff into the dungeon. simply bring the raw materials (a fresh crab shell and dramen branch), a chisel and knife and fletch/craft the items respectively. Now, you can also bring in the golden hammer since it provides no bonuses. This is recommended over just hands and feet due to the increase in attack speed.
If you don't feel that you can beat his fourth form, simply let your life points run out. Instead of dying, you'll kneel down and wake up in a bed upstairs with Thorvald's vote because it was a test of bravery, not strength.
Opposition
The following people are the remaining members of the council, but it is not possible to gain their votes and as such do not play any important role in the quest.
While Inga is one of the council members, she simply won't give you her vote. Located just south of Olaf, when you talk to her she gives you a mild insult, and during the conversation you will in turn insult her as well. No matter what you do, she will always vote against you in the trials.
Agnar
When the player asks Agnar for his vote he will say that he will vote for you if you give him 100,000,000,000,000,000,900,470,093 coins. This is impossible as the maximum coins anyone can hold (in a single slot, which he wants) is 2,147,483,647. He can be found wandering the market square.
Sassilik is another council member who will talk with you but won't give you her vote. She is located just south-east from the furnace and forge. She states that she will vote for you on one condition; when your character asks what the condition is, she claims you are too gullible to become a Fremennik.
Pontak is also a council member. He has a small gardening plot behind his house, which is useful for other parts of the trials, and even offers a sub-quest to perform to gain his vote. He asks you to obtain the following items in order to earn his vote:
As these items simply don't exist (The left-handed chisel used to be on the Grand Exchange as a joke), this is a brush-off to let you know that he won't vote for you no matter what you do.
Fisherman
The Fisherman sits on the end of the middle dock fishing for stuff. As a council member, you can also attempt to persuade him to vote for you. The following are the terms he requires to cast his vote for you:
Skies turn red
Water turns pink
Rocks turn yellow
Sun turns black
In other words, he will never vote for you either. Still, he can be helpful when you try to complete the task that Sigmund the Merchant has asked you to do, along with several other council members.
The Honour Is Mine
After you have completed all the council members' tasks, go straight to Brundt the Chieftain. Congratulations, quest complete!
Medium: "Fremennik History 101", "Who's a Good Boy?", "Only Takes a Little Vial", "You Know You Want It!", "Fremmental", "You Really Don't Need Any More Shoes" and "Grand Theft Fish"
Hard: "Defeating Deadly Dagannoths" and "Dress to Impress"
The name of the Fremennik is similar to that of the Fremen people in Frank Herbert's "Dune" series of books. The custom of granting a new name to someone who passes a difficult trial is also practiced by the Fremen.
During the Peer the Seer's Trial the scale puzzle is a reference to a scene from the movie Die Hard with a Vengeance.
A red herring is a well-known logical fallacy, representing an issue which holds no true relevance to the matter at hand. The red herring is actually used in Peer the Seer's puzzle trial; however, one of the ways you might realise that you are supposed to do something to it - in this case, cook it - is by knowing this.
If you have a skill level of 99 when you compose your ballad, your character will sing a song boasting of their aptitude for this particular skill. Or if you have 32 quest points, you will sing about how you are a Champion of the Champions Guild; if you are in the Heroes Guild, you'll sing about it; or if you are a member of the Legends Guild, about that.
A player singing with the lyre about his skillcape.
The "stone soup" that you have to make to receive golden fleece from the troll is from a story called, "Stone Soup," in which, Jack Grand (a Rat-a-tat man and a traveller) reaches a town and doing tricks for individuals, receives small amounts of ingredients and with a large pot and water, and his stone from his pocket, he makes a stone soup and the whole village is happy.
When you die to Koschei the Deathless after beating him 3 times, your life points will not go to 0, but 1, signifying that you are still alive. You will also get the message: Oh dear you are .... still alive somehow?
When you use the toy boat or thread on the range, it burns. If you use the magnet, it says "You use the magnet on the range. It gets slightly warmer".
After losing a drinking contest to Manni, he will tell you to come back for another one, but to wait for him to have some coffee, based on the belief that drinking black coffee makes you sober.
Examining the grey butterfly that the hunter's talisman locates give the message 'Flutter by oh butterfly', a title of a poem written by an anonymous writer.
When talking to Askeladden about Lalli and the golden apples, he claims Lalli is a "maroon". This is possibly a reference to the Looney Tunes character Bugs Bunny, who constantly used the phrase "what a maroon".
If speaking to some of the barbarians in Gunnarsgrunn, your character will tell them that they have passed their Fremennik Trials.
When talking to Juna, your character will say, "...and that was how I became an honourary member of the Fremennik, and I was given my Fremennik name, (whatever your Fremennik name is)."
When playing your lyre after getting it enchanted by the Fossegrimmen (and before performing in the Long Hall), your dialogue box will read "Doh Ray Me So Fah La Ti Doh" instead of "Do Re Mi Fa Sol La Ti Do", as is the way of singing a scale using solfege syllables.
There is a glitch where upon entering the maze with bloom enabled in the graphics settings, the screen goes white. This has not yet been fixed, but turning off bloom is a valid workaround.

 Manni the Reveller


