m (that he is) Tag: sourceedit |
m (Ordering) |
||
| (35 intermediate revisions by 21 users not shown) | |||
| Line 5: | Line 5: | ||
===Starting off=== |
===Starting off=== |
||
| + | {{Needed|[[Enchanted key (Meeting History)|Enchanted key]]}} |
||
| ⚫ | |||
| − | * |
+ | * Talk to [[Eluned]] in the [[Ithell Clan]] district. {{Chat options |
| + | |1 Of course! |
||
| + | |Accept |
||
| + | }} |
||
| + | * Climb the stairs in the [[Tower of Voices]]. {{Chat options |
||
| + | |1 The Light Within. |
||
| + | |2 I've come to offer my help. |
||
| + | |3 How do we decide? |
||
| + | |1 Yes. |
||
| + | |3 What now? |
||
| + | }} |
||
| + | * Give the [[Enchanted key (Meeting History)|enchanted key]] to [[Lady Trahaearn]] to attune it. |
||
| − | ===Time- |
+ | ===Time-travelling=== |
| + | {{Needed|[[Enchanted key (Meeting History)|enchanted key]], 1 free inventory space|recommended=[[Sixth-Age circuit]] to teleport to Guthix's shrine}} |
||
| − | * Teleport to Guthix's shrine after having attuned the enchanted key. (Speak with Lady Trahaearn to reattune if necessary) |
||
| + | * Go to [[Guthix's shrine]] in the caves north-west of the [[Legends' Guild]] entrance. |
||
| − | * Rub the enchanted key in front of Guthix |
||
| + | * Walk up to [[Guthix]] as close as possible and rub the enchanted key. |
||
| − | * Talk to Guthix |
+ | * Talk to Guthix. {{Chat options |
| − | ** Talk option 1: "I am the World Guardian" |
||
| + | |1 I am the world guardian. |
||
| − | + | |4 I need to restore Seren. |
|
| ⚫ | |||
| + | }} |
||
| ⚫ | |||
| ⚫ | |||
| ⚫ | |||
| ⚫ | |||
| ⚫ | |||
| ⚫ | |||
| ⚫ | |||
| ⚫ | |||
| ⚫ | |||
| − | + | |3 [Continue...] |
|
| + | }} |
||
| − | ** Talk option 2: "Thank you for the help" |
||
| ⚫ | |||
| ⚫ | |||
| ⚫ | |||
| − | ** Lady Ithell. |
||
| + | |Any |
||
| − | ** Arianwyn, read the [[Baxtorian's journal]]. |
||
| + | }} |
||
| − | ** Lord Crwys and Lady Meilyr. |
||
| + | * Return to the conclave in the Tower of Voices. {{chat options |
||
| − | ** Lord Amlodd and Lady Hefin. |
||
| + | |1 The Light Within. |
||
| + | }} |
||
| + | * Talk to everyone except Eluned. |
||
| + | * Read [[Baxtorian's journal]], given to you by [[Arianwyn]]. |
||
===Shards=== |
===Shards=== |
||
====Artisan shard==== |
====Artisan shard==== |
||
| + | {{Needed|[[Trahaearn exoskeleton set]], 1 free inventory space|recommended=[[crystal teleport seed]]}} |
||
| − | *Equip the Trahaearn |
+ | * Equip the Trahaearn exoskeleton set. |
| − | *Investigate the well in Lletya. |
+ | * Investigate the well in [[Lletya]]. {{Chat options |
| − | *Answer automaton's questions: |
||
| + | |1 Yes. |
||
| ⚫ | |||
| + | }} |
||
| ⚫ | |||
| + | * Attempt to pass the [[Trahaearn automaton mk V]]. {{Chat options |
||
| ⚫ | |||
| ⚫ | |||
| ⚫ | |||
| ⚫ | |||
| − | *The automaton will move aside, allowing you to take the shard. |
||
| ⚫ | |||
| ⚫ | |||
| + | }} |
||
| + | * Take the [[Seren shard (prudence)|Seren shard]]. |
||
====Naturalist shard==== |
====Naturalist shard==== |
||
| + | {{Needed|[[grand defence potion]], 3 free inventory spaces|recommended=[[crystal teleport seed]]}} |
||
| − | *Speak with Coeden (the living tree) in the Crwys district to obtain a Wintercup mushroom. Click elf clan icons to maintain focus. |
||
| + | * Talk to Coeden, the living tree surrounded by ivy in the [[Crwys Clan]] district. {{Chat options |
||
| ⚫ | |||
| + | |1 The Light Within. |
||
| ⚫ | |||
| + | }} |
||
| ⚫ | |||
| − | * |
+ | ** Click on the elven clan symbols which appear throughout the dialogue. |
| + | ** You will receive a [[wintercup mushroom]]. |
||
| ⚫ | |||
| + | ** It can be reached by teleporting to the Tirannwn lodestone and going west through the dense forest. |
||
| ⚫ | |||
| ⚫ | |||
| + | * Enter the cave entrance that appears and take the [[Seren shard (harmony)|Seren shard]]. |
||
====Military shard==== |
====Military shard==== |
||
| + | {{Needed|[[Glarial's amulet]] and [[rope]] or [[hoardstalker ring]]/[[Dungeoneering cape]], 2 free inventory spaces|recommended=[[Games necklace]]}} |
||
| − | *Go to Baxtorian falls (bring a Rope and [[Glarial's amulet]]). |
||
| + | * Go to the [[Waterfall Dungeon]]. |
||
| − | *Take the raft which is used to progress down the water and enter the cave, which contains the Fire Giants. |
||
| + | ** It can be reached by teleporting to the [[Baxtorian Falls resource dungeon]] or by boarding the log raft at the top of [[Baxtorian Falls]], using a rope on the rock and then the dead tree, and entering the door. |
||
| − | *Enter the |
+ | * Enter the eastern room. |
| − | *Search the crates until you find the key. |
||
| + | * Search the odd coloured crate to find [[A key (Waterfall Dungeon)|a key]]. |
||
| − | *Proceed to west room and move north through the two doors. |
||
| + | * Ensure you have read [[Baxtorian's journal]], then proceed to western room and enter through the two doors to the north. |
||
| − | *Investigate the |
+ | * Investigate the statue of King Baxtorian. {{Chat options |
| − | *Collect the nearby shard. |
||
| + | |2 [Polite]My name is Player. |
||
| + | |4 We need to restore Seren. |
||
| + | }} |
||
| + | * Take the [[Seren shard (integrity)|Seren shard]]. |
||
====Wisdom shard==== |
====Wisdom shard==== |
||
| − | {{Needed| |
+ | {{Needed|three [[light core]]s|recommended=[[crystal teleport seed]]}} |
| − | *Go to the |
+ | * Go to the [[Corrupted Seren Stone]] in the [[Hefin Cathedral]], located in the northern-most part of [[Prifddinas]]. {{Chat options |
| + | |1 Yes. |
||
| ⚫ | |||
| + | |2 I'm ready to start! |
||
| − | **Paper and pencil is helpful during this part to write down the first letter of each word. |
||
| + | }} |
||
| ⚫ | |||
| + | ** Consider writing down the first letter of every word of the incantations. |
||
| − | === |
+ | ===Tarddiad=== |
| + | {{Needed|[[Seren shard (harmony)]], [[Seren shard (prudence)]], [[Seren shard (integrity)]], and [[Seren shard (wisdom)]]|recommended=[[Sixth-Age circuit]], combat equipment, and [[food]], your best tools if you skill for the shards instead of kill}} |
||
| − | * Head to the Tower of Voices with the 4 newly acquired shards and give them to respective elves. |
||
| + | * Return to the conclave in the Tower of Voices. {{Chat options |
||
| ⚫ | |||
| + | |1 |
||
| ⚫ | |||
| + | }} |
||
| ⚫ | |||
| + | * Give the Seren shards to the respective Elders: |
||
| ⚫ | |||
| ⚫ | |||
| ⚫ | |||
| ⚫ | |||
| − | * Go through the door on the west side of the Grand Library. |
||
| ⚫ | |||
| − | * Go to the shard in the south-western corner, either retrieve or destroy it. |
||
| ⚫ | |||
| ⚫ | |||
| ⚫ | |||
| − | * Teleport to the World Gate with the Sixth-Age circuit. |
||
| + | |1 Ask for access to the Grand Library. |
||
| ⚫ | |||
| + | }} |
||
| − | * Change the dial so "1" shows on the World Gate, then enter. (refer to image on right, sharks or higher is recommended for food.) |
||
| ⚫ | |||
| − | * Collect 50 Tarddian Crystals by killing Crystal Shapeshifters or collect 150 Crystal Fragments and exchange them with Angof to the north for Tarddian Crystals. |
||
| + | * Take the [[Seren shard (dark)|Seren shard]] in the south-western corner. {{Chat options |
||
| − | * Speak to Angof for the final song piece. |
||
| + | |Any |
||
| ⚫ | |||
| + | }} |
||
| ⚫ | |||
| + | * Go to the [[World Gate]]. |
||
| ⚫ | |||
| + | * Rotate the dial until "1" (see image to the right) shows on the World Gate. |
||
| + | * Enter the World Gate. |
||
| + | * Obtain 50 [[Tarddian crystal]]s by: |
||
| + | ** Killing [[crystal shapeshifter]]s. |
||
| + | ** Mining [[solid crystal]]s, chopping [[branching crystal]]s, and fishing [[floating crystals]] to collect 150 [[crystal fragment]]s and exchanging them with [[Angof]] to the north. |
||
| + | * Talk to Angof. {{Chat options |
||
| + | |1 Hello, pleased to meet you. |
||
| + | |5 [Leave] |
||
| + | }} |
||
| ⚫ | |||
| − | === |
+ | ===Freneskae=== |
| + | * Watch the cut-scene and go through the dialogue. Skipping won't work. {{Chat options |
||
| − | * During the cutscene choose if you want to sacrifice Eluned or not. |
||
| + | |Any |
||
| − | * Agree to take Seren to Freneskae. |
||
| + | |Any |
||
| ⚫ | |||
| + | |Any |
||
| − | * Talk to Zaros to go to the Elder Halls. |
||
| + | |1 I'll go now. |
||
| + | |1 I'm ready. |
||
| + | }} |
||
| + | * Travel to the [[World Gate]] and travel to [[Freneskae]] using the quick dial option |
||
| ⚫ | |||
| + | * Talk to [[Zaros]]. |
||
| − | === |
+ | ===Light puzzle=== |
| − | There are three rings |
+ | There are three rings in the puzzle: outer, middle and core. To solve the puzzles, rotate any crystal from each ring as many times and in the direction specified below. |
| − | ==== |
+ | ====Puzzle 1==== |
| + | {| class="wikitable lighttable" |
||
| ⚫ | |||
| + | |- |
||
| ⚫ | |||
| + | |- |
||
| ⚫ | |||
| + | |} |
||
| ⚫ | |||
| − | *Outside ring: +2 (2x clockwise) |
||
| + | {| class="wikitable lighttable" |
||
| ⚫ | |||
| − | + | |Outer ring: +2 (2x clockwise) |
|
| + | |- |
||
| ⚫ | |||
| + | |- |
||
| ⚫ | |||
| + | |} |
||
| − | ==== |
+ | ====Puzzle 3==== |
| + | {| class="wikitable lighttable" |
||
| ⚫ | |||
| + | |- |
||
| ⚫ | |||
| + | |- |
||
| ⚫ | |||
| + | |} |
||
| + | ====Puzzle 4==== |
||
| − | *Outside ring: +2 (2x clockwise) |
||
| + | {| class="wikitable lighttable" |
||
| ⚫ | |||
| − | + | |Outer ring: -2 (2x anti-clockwise) |
|
| + | |- |
||
| ⚫ | |||
| + | |- |
||
| ⚫ | |||
| + | |} |
||
| − | === |
+ | ===Seren's return=== |
| + | * Talk to Seren. {{Chat options |
||
| + | |Any |
||
| + | |1 Yes |
||
| + | }} |
||
| ⚫ | |||
| ⚫ | |||
| + | ==Rewards== |
||
| ⚫ | |||
| + | {{Quest rewards page|The Light Within}} |
||
| ⚫ | |||
| ⚫ | |||
| − | |||
| ⚫ | |||
| − | |||
| ⚫ | |||
| ⚫ | |||
| ⚫ | |||
| − | |||
| − | === Seren's return === |
||
| ⚫ | |||
| ⚫ | |||
{{The Light Within}} |
{{The Light Within}} |
||
| − | {{DEFAULTSORT |
+ | {{DEFAULTSORT:Light Within/Quick guide, The}} |
[[Category:The Light Within| ]] |
[[Category:The Light Within| ]] |
||
Latest revision as of 22:48, 17 September 2018
Walkthrough
| Start point | |||||||
|---|---|---|---|---|---|---|---|
| Member requirement | |||||||
| Official difficulty | |||||||
| Official length | Long | ||||||
| Requirements | Skill requirements are not boostable unless marked with a [B] for boostable.
| ||||||
| Items required | Items from the tool belt are not listed unless they do not work or are not automatically added.
| ||||||
| Recommended | |||||||
| Enemies to defeat |
|
Starting off
Items needed: Enchanted key
- Talk to Eluned in the Ithell Clan district. (
 •)
•) - Climb the stairs in the Tower of Voices. ( ••••)
- Give the enchanted key to Lady Trahaearn to attune it.
Time-travelling
Items needed: enchanted key, 1 free inventory space
Items recommended: Sixth-Age circuit to teleport to Guthix's shrine
Items recommended: Sixth-Age circuit to teleport to Guthix's shrine
- Go to Guthix's shrine in the caves north-west of the Legends' Guild entrance.
- Walk up to Guthix as close as possible and rub the enchanted key.
- Talk to Guthix. ( •)
- Go west and talk to Haluned. ( •••)
- Talk to Guthix. ( •)
- Return to the conclave in the Tower of Voices. ( )
- Talk to everyone except Eluned.
- Read Baxtorian's journal, given to you by Arianwyn.
Shards
Artisan shard
Items needed: Trahaearn exoskeleton set, 1 free inventory space
Items recommended: crystal teleport seed
Items recommended: crystal teleport seed
- Equip the Trahaearn exoskeleton set.
- Investigate the well in Lletya. ( )
- Attempt to pass the Trahaearn automaton mk V. ( •••)
- Take the Seren shard.
Naturalist shard
- Talk to Coeden, the living tree surrounded by ivy in the Crwys Clan district. ( )
- Click on the elven clan symbols which appear throughout the dialogue.
- You will receive a wintercup mushroom.
- Pick a bloodcap mushroom just west of the Tirannwn mushroom farming patch.
- It can be reached by teleporting to the Tirannwn lodestone and going west through the dense forest.
- Combine the mushrooms with a grand defence potion to create an Elixir of Revealment.
- Travel to the currently active crystal tree (excluding the one in Prifddinas) and use the elixir on any of the tree's shards.
- Enter the cave entrance that appears and take the Seren shard.
Military shard
Items needed: Glarial's amulet and rope or hoardstalker ring/Dungeoneering cape, 2 free inventory spaces
Items recommended: Games necklace
Items recommended: Games necklace
- Go to the Waterfall Dungeon.
- It can be reached by teleporting to the Baxtorian Falls resource dungeon or by boarding the log raft at the top of Baxtorian Falls, using a rope on the rock and then the dead tree, and entering the door.
- Enter the eastern room.
- Search the odd coloured crate to find a key.
- Ensure you have read Baxtorian's journal, then proceed to western room and enter through the two doors to the north.
- Investigate the statue of King Baxtorian. ( •)
- Take the Seren shard.
Wisdom shard
- Go to the Corrupted Seren Stone in the Hefin Cathedral, located in the northern-most part of Prifddinas. ( •)
- Follow Lady Hefin through the 3 sets of poses and incantations.
- Consider writing down the first letter of every word of the incantations.
Tarddiad
Items needed: Seren shard (harmony), Seren shard (prudence), Seren shard (integrity), and Seren shard (wisdom)
Items recommended: Sixth-Age circuit, combat equipment, and food, your best tools if you skill for the shards instead of kill
Items recommended: Sixth-Age circuit, combat equipment, and food, your best tools if you skill for the shards instead of kill
- Return to the conclave in the Tower of Voices. ( 1)
- Give the Seren shards to the respective Elders:
- Lady Meilyr or Lord Crwys - Harmony
- Lady Hefin or Lord Amlodd - Wisdom
- Lord Iorwerth or Arianwyn - Integrity
- Lady Ithell or Lady Trahaearn - Prudence
- Talk to Morvran in the Iorwerth Clan district. ( )
- Enter the western door in the Grand Library.
- Take the Seren shard in the south-western corner. ( )
- Return to the conclave in the Tower of Voices.
- Go to the World Gate.
The world gate icon for Tarddiad
- Rotate the dial until "1" (see image to the right) shows on the World Gate.
- Enter the World Gate.
- Obtain 50 Tarddian crystals by:
- Killing crystal shapeshifters.
- Mining solid crystals, chopping branching crystals, and fishing floating crystals to collect 150 crystal fragments and exchanging them with Angof to the north.
- Talk to Angof. ( •)
- Return to the conclave in the Tower of Voices.
Freneskae
- Watch the cut-scene and go through the dialogue. Skipping won't work. ( ••••)
- Travel to the World Gate and travel to Freneskae using the quick dial option
- Avoid Muspah attacks by walking around.
- Talk to Zaros.
Light puzzle
There are three rings in the puzzle: outer, middle and core. To solve the puzzles, rotate any crystal from each ring as many times and in the direction specified below.
Puzzle 1
| Outer ring: +2 (2x clockwise) |
| Middle ring: -2 (2x anti-clockwise) |
| Core ring: -1 (1x anti-clockwise) |
Puzzle 2
| Outer ring: +2 (2x clockwise) |
| Middle ring: +1 (1x clockwise) |
| Core ring: -2 (2x anti-clockwise) |
Puzzle 3
| Outer ring: 0 (no movement) |
| Middle ring: -2 (2x anti-clockwise) |
| Core ring: -3 (3x anti-clockwise) |
Puzzle 4
| Outer ring: -2 (2x anti-clockwise) |
| Middle ring: +2 (2x clockwise) |
| Core ring: -2 (2x anti-clockwise) |
Seren's return
- Talk to Seren. ( •)
- Return to the conclave in the Tower of Voices.
- Quest complete!
Rewards
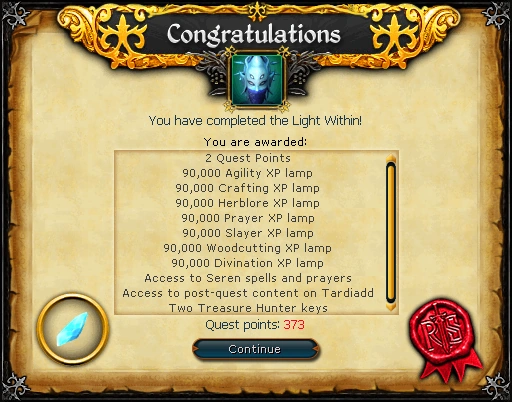
- 2 quest points
- Lamps granting 90,000 experience in Agility, Crafting, Herblore, Prayer, Slayer, Woodcutting, and Divination
- Access to Seren spells in the Ancient Magicks spellbook
- Access to Seren prayers in the Ancient Curses
- Access to Tarddiad, containing:
- Crystal Shapeshifters, Slayer creatures.
- Solid crystals, Mining locations.
- Branching crystals, Woodcutting locations.
- Floating crystals, Fishing locations.
- Crystal armour, bought from Angof.
- 2 Treasure Hunter keys and 2 Hearts of Ice
- Music unlocked
| Part 7 of the God quest series • Part 3 of the Enchanted key quest series • Related to the Elf quest series | |||||||
| NPCs |
| ||||||
| Enemies |
| ||||||
| Items | |||||||
| Rewards |
| ||||||
| Locations |
| ||||||
| Music |
| ||||||
| Miscellaneous |
| ||||||