(A more likely explanation of the alarm) |
|||
| Line 156: | Line 156: | ||
Start heading eastwards through the forest until Golrana stops you and points your attention to an air vent that the anti-illusion device revealed. Open the vent, and Golrana will hand you a rope to attach to it, allowing you to climb down. Head down the vent. After heading down the vent, you will see a cutscene with a gnome that appears to be [[Glouphrie]] training a handful of gnomes who have the ability to create an illusion to conceal themselves. After the cutscene, you will fall through the vent and arrive in a room with a few mining tortoises. |
Start heading eastwards through the forest until Golrana stops you and points your attention to an air vent that the anti-illusion device revealed. Open the vent, and Golrana will hand you a rope to attach to it, allowing you to climb down. Head down the vent. After heading down the vent, you will see a cutscene with a gnome that appears to be [[Glouphrie]] training a handful of gnomes who have the ability to create an illusion to conceal themselves. After the cutscene, you will fall through the vent and arrive in a room with a few mining tortoises. |
||
| − | '''Note:''' If you are logged out while you are in Arposandra, you may return by climbing the rope in Lletya into the forest and heading back through the vent. To get to the rope |
+ | '''Note:''' If you are logged out while you are in Arposandra, you may return by climbing the rope in Lletya into the forest and heading back through the vent. To get to the rope squeeze through the fence right next to the enterance to the bank. You can also go to the building immediately north of the bank and go through the north door and then squeeze through the fence as soon as you exit. |
====Finding Bolrie==== |
====Finding Bolrie==== |
||
Revision as of 06:45, 13 January 2012
| File:Prisoner of Glouphrie.jpg | |||||||||||||||||||||||||
| Release date | 9 February 2011 (Update) | ||||||||||||||||||||||||
|---|---|---|---|---|---|---|---|---|---|---|---|---|---|---|---|---|---|---|---|---|---|---|---|---|---|
| Members | Yes | ||||||||||||||||||||||||
| Voice Over | Unknown edit | ||||||||||||||||||||||||
| Official difficulty | Master | ||||||||||||||||||||||||
| Quest series | Gnome (#6) | ||||||||||||||||||||||||
| Age | Fifth Age | ||||||||||||||||||||||||
| |||||||||||||||||||||||||
The Prisoner of Glouphrie is the sixth quest released in the Gnome quest series which involves the continued hunt for Glouphrie. With the help of Golrie's mother, Golrana, players go off in search of Bolrie, a long lost gnome, and Arposandra, the hidden stone city.
Official description
| “ | An old letter is found in a disorderly storeroom, leading you to Lletya in the company of a gnome mother, using a path that no human - and only one gnome - has ever trodden before.
Be introduced to Yewnock's most ingenious calibration device to date, and gain a unique insight into life within underground Arposandra, as you investigate the fate of the prisoner of Glouphrie! |
” |
Walkthrough
| Start point | |||
|---|---|---|---|
| Member requirement | |||
| Official difficulty | |||
| Official length | Short-medium | ||
| Requirements | Skill requirements are not boostable unless marked with a [B] for boostable.
| ||
| Items required | Items from the tool belt are not listed unless they do not work or are not automatically added.
Rope (In case you experience a glitch where Golrana disappears) Runes for Ourania teleport (optional, if you have 71 Magic and are using Lunar spells) | ||
| Enemies to defeat | None |
Starting out
To start the quest, speak to Golrie, who is located in the jail of the Gnome Village Dungeon. The entrance to the dungeon is located slightly east of Elkoy's location near the center of the maze and is denoted by the dungeon icon (File:Dungeonicon.PNG). If you are using boosts for Agility and/or Runecrafting, use them now or else you cannot start the quest. Golrie will inform you that what he had been using as a bookmark for several years was in fact a note from his long lost grandfather, Bolrie. He asks you for your help and suggests that you take his mother, Golrana, with you. Golrie tells you that she can be found on the surface inside the Tree Gnome Village and teleports you directly to her.
The Way to Lletya

The entrance to the maze.
Once at the surface, Golrie will introduce you to his mother, Golrana. He tells her that you were using the letter as a bookmark for a few years before you realised that it was really a letter from Bolrie. Golrana becomes excited and snatches the letter from Golrie to read it for herself. Eager for the chance to rescue her father, Golrana is resolved to go save him by herself, but after a little bit of prompting, she will allow you to accompany her as her "questing apprentice". Golrana tells you to meet her north of the observatory and south of the lava fields when you're ready.
Golrana will be waiting for you in a clearing with hill giants, just south of the entrance to the Ourania Runecrafting Altar (ZMI Altar). Speak to her and tell her that you are ready to continue, and you will appear on the other side of the plants west of where you were previously standing. Should you stray too far from the correct path, Golrana will disappear. To fix this, either press the "call follower" button, or pass back through the plants to find her standing north of the observatory, where she originally told you to meet her.
The Location of the Dead Tree


The exit to the cave.
After passing through the plants, head north-west through the path of dead trees until you come across an extremely large and decaying dead tree. Search the tree to reveal the entrance to a cavern. Enter through the tree to find yourself in a tunnel. A wide chasm prevents you from continuing forward, and Golrana will suggest that you look around to find a way to cross it. Investigate the southern wall to reveal a crossable ledge. Golrana quickly dismisses the idea of you crossing the ledge, maintaining that your legs are too "freakishly long". Golrana will cross the ledge herself and throw a rope across the rift for you to traverse.
After crossing the rope, head further south (follow the south-easternmost route) until you come to three separated plateaus, each accessible by jumping from the previous plateau. Each jump will have a shortcut icon denoting it on the minimap (File:Shortcuticon.PNG). To jump over, click on the gap itself, not the ledge. Continue along the path until you reach a small stream with stepping stones blocking the way(follow the north-easternmost route). There won't be enough stepping stones for you to navigate it successfully, so Golrana will need to reach the other side and push an extra stone into the stream for you to cross. Investigate a crevice on the south wall, and Golrana will squeeze through, telling you to stay put and wait for her to get back. She will appear on the other side and move the extra stepping stone into the brook, allowing you to cross.
The stepping stones.
Cross the steam by jumping from one stepping stone to the other; it is only possible to jump to a block that is no more than 2 spaces away from your current location. Upon successfully crossing, continue through the tunnel through the northern route (with the U turn) until you reach an opening leading out of the cave.


The sturdy tree with the rope attached.
Note: When you reach the exit crevice, you should wait for Golrana to catch up, or else you may lose her when you go through. Even if she is beside you, if she doesn't have direct access to the exit, she will vanish when appearing on the other side. If she does disappear, continue towards the sturdy tree and use the rope as listed on the recommended items on it. Golrana will reappear and the quest will continue.
The exit leads into the Galarpos Mountains east of Lletya. Head as far west and south as you can and investigate the "sturdy tree"; Golrana will immediately attach a rope to it. After attaching the rope, she will express her concern that she is unsure whether or not it will be able to hold your weight. Nevertheless, you will climb down the rope and arrive in the Lletya bank. Ilfeen will be waiting for you at the bank, stating that this is only the second time a gnome has come into Lletya. She will lead you to Bolrie's lab so that you may look for clues as to his current location.
Bolrie's Lab
Building the device


The singing bowl and the prism in the lab
Enter the trapdoor to Bolrie's lab and find a handwritten book on a crate next to the ladder. The book will contain information as to which materials are required to build the anti-illusion device. In total, you will need 6 short planks, 2 medium planks, 2 long planks, 2 strips of fabric, 1 short crystal, 1 long crystal, 1 light crystal, and rune glue to build the device. The planks, the long crystal and the short crystal may be found inside various crates throughout the room. The strips of fabric may be found in a crate against the wall directly south of the hamock. The rune glue can be found by searching the picture in the north-west corner beside the hammock. The medium crystal is found on the shelf beside that painting- on the west wall. Finally, the light crystal may be found by searching the elven lamp immediately west of the ladder leading into the lab. Once you have found all of the necessary items to build the device, you will receive a message informing you that you now have all of the necessary materials. Head to the table in the east side of the room and click on it to build the anti-illusion device.
Calibrating the device


The anti-illusion device after having being calibrated. In this example, section 1 (cyan) required a green and blue square, two (magenta) required a red triangle and violet hexagon, and three (yellow) required a yellow triangle and a yellow almond.
Once the device has been built, you will need to calibrate it to make it fully functional. To successfully calibrate the device, various coins of different shapes and colours must be placed in the 6 slots of the machine. Coins may be made by shaping minute crystal seeds using the singing bowl. Note: Additional minute crystal seeds can be found in the northern crate to the east of the singing bowl. The colour of the coin is defined by the current colour of the singing bowl. The colour of the singing bowl can be changed by rotating the crystal through which the light is beamed. Each rotation of the crystal will cause the colour of the bowl to cycle through each of the seven colours of the rainbow.
Different shapes of the coins are formed based on the fill-level of the bowl. An empty bowl will form a circle, a slightly more filled bowl will form an almond(20% full), then a triangle(40% full), square(60% full), pentagon(80% full), and a completely full bowl will form a hexagon.
The device will be divided into three sections, each of which has a colour and a number associated with it and 2 slots for coins. The average of the colours of the two coins inserted into the slots and the sum of their values must match with the colour and number provided in the partition. Below is a list of coin values based on the colour and shape.
| Colour | Value | |||||
|---|---|---|---|---|---|---|
| Circle | Almond | Triangle | Square | Pentagon | Hexagon | |
| Red | 1 | 2 | 3 | 4 | 5 | 6 |
| Orange | 2 | 4 | 6 | 8 | 10 | 12 |
| Yellow | 3 | 6 | 9 | 12 | 15 | 18 |
| Green | 4 | 8 | 12 | 16 | 20 | 24 |
| Blue | 5 | 10 | 15 | 20 | 25 | 30 |
| Indigo | 6 | 12 | 18 | 24 | 30 | 36 |
| Violet | 7 | 14 | 21 | 28 | 35 | 42 |
Combining the colours
The three colours that must be made in order to calibrate the device are cyan, magenta, and yellow, or the three primary colours.
Note: Only one of the methods have to be chosen.
Cyan can be made only by combining a blue crystal and a green crystal which both have the same shape.
Magenta can be made by combining:
- a red crystal and a blue crystal which both have the same shape.
- a red triangle and an indigo square.
- a red crystal and a violet crystal, where the violet crystal has twice the number of sides as the red.
Yellow can be made by combining:
- a red crystal and a green crystal which both have the same shape.
- a green crystal and an orange crystal, where the orange crystal has twice the number of sides as the green.
- two yellow crystals.
Note: circle crystals are considered to have 1 side.
Additionally, the numbers corresponding to each of the crystal pieces inserted into the two slots must add up to the specified number. The simplest way to approach the puzzle is to pick one option from above that will combine to find the right colour and determine whether or not different shapes may be selected to also sum up to the specified number. If it is not possible with the colours that you selected, pick a different option from above and repeat.
Note that there may be multiple solutions in some circumstances. For example, yellow at intensity 15 can be a yellow circle and a yellow square, a yellow almond and a yellow triangle, or a red triangle and a green triangle.
- Solution
If you wish to work out the solution yourself, do not unhide the following section.
| Show/hide solution → | ||||
|---|---|---|---|---|
 template  = tpogc
 form      = tpogcF
 result    = tpogcR
 param     = colour|Colour|Cyan|select|Cyan,Magenta,Yellow
 param     = target|Target||int|0-100
The following algorithm is what is used by the above calculator.
Divide the target intensity by 6. This is the number of sides the blue and green crystal must have.
If the target intensity is 27, then the solution is a red triangle and an indigo square. Else, divide the target intensity by 15. If this number is whole (i.e. it has no decimal/fractional part), then you need a red crystal with that many sides, and a violet crystal with twice that many sides. Else, divide the target intensity by 6. This is the number of sides the red and blue crystals must have.
Divide the target intensity by 5. If this number is whole (i.e. it has no decimal/fractional part), then you need a red crystal and a green crystal with that many sides. Else, divide the target intensity by 8. If this number is whole (i.e. it has no decimal/fractional part), then you need a green crystal with that many sides and an orange crystal with twice that many sides. Else, you need two yellow crystals. There is no relation between the number of sides. First, divide the target by 3. You then need two numbers which add up to that number, both of which must be less than or equal to 6. Those two numbers will represent the number of sides each yellow crystal requires. Note that it is likely that there will be multiple solutions, any of which will work. |
Arposandra
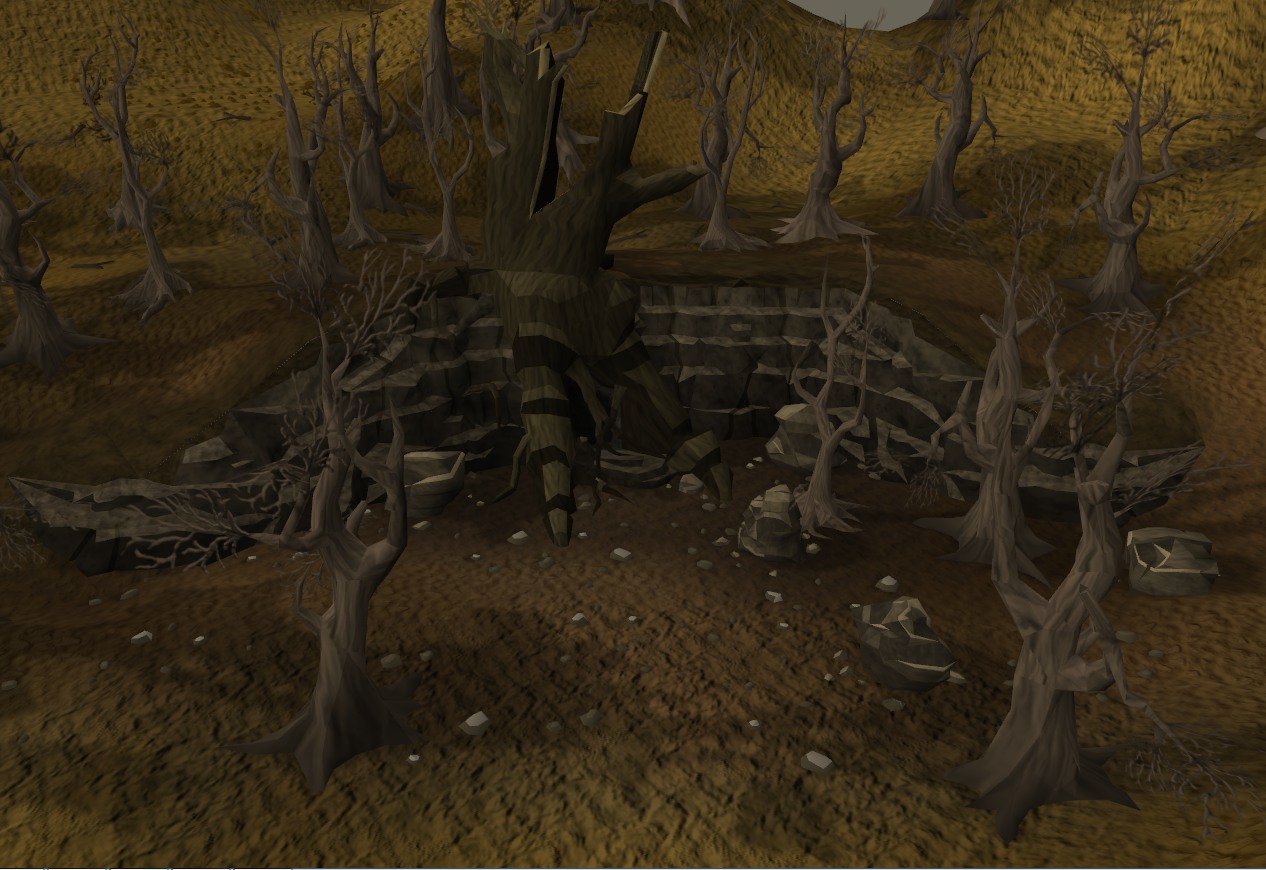
The vent in the rocks
Reaching Arposandra

The gnomes are capable of turning invisble.


A mining tortoise as seen in the first room after entering Arposandra.
After successfully calibrating the anti-illusion device, speak to Golrana and she will offer to take the crystal pieces off your hands and instruct you to meet her back at the Lletya bank. Exit the cave through the hatch and meet her where you originally met with Ilfeen. Speak to her and tell her that you're ready to go on; you will appear next to the sturdy tree east of Lletya.
Start heading eastwards through the forest until Golrana stops you and points your attention to an air vent that the anti-illusion device revealed. Open the vent, and Golrana will hand you a rope to attach to it, allowing you to climb down. Head down the vent. After heading down the vent, you will see a cutscene with a gnome that appears to be Glouphrie training a handful of gnomes who have the ability to create an illusion to conceal themselves. After the cutscene, you will fall through the vent and arrive in a room with a few mining tortoises.
Note: If you are logged out while you are in Arposandra, you may return by climbing the rope in Lletya into the forest and heading back through the vent. To get to the rope squeeze through the fence right next to the enterance to the bank. You can also go to the building immediately north of the bank and go through the north door and then squeeze through the fence as soon as you exit.
Finding Bolrie

Avoid these.
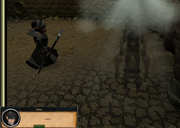
After a short chat with Golrana, head up the stairs on the west side of the room to a level with several watchers dispersed throughout the floor. Make sure you do not walk in front of a watcher as you will be caught. Go east down the pathway until you reach the entrance to a prison with a watcher guarding the entrance. Walk behind the watcher and rotate it so that it is facing the wall. Enter the jail and you will be confronted by Guard no. 103. No matter what option you choose, the guard will become convinced and leave you alone with the prisoner. Pick-lock the prison door to find Bolrie slouched against the wall in the far side of the cell.
When you first speak to Bolrie, he will suspect that you are Glouck disguised as a human. When you mention Glouphrie, he will decide to humour your story and quiz you to determine whether you truly are whom you claim to be.
Quiz answers:
- The elf he mentioned in his letter: Ilfeen
- The gnome the letter was addressed to: Gena
- The number of possible combinations with his machine: 42
- What was on his picture at his wall in his cave: The Grand Tree
You may choose "I don't remember" to at most one of the questions and still gain his trust.
Finishing up


Finally a moment to reunite.

Breeder no. 153 and Operator no. 126 mutating terrorbirds.
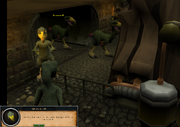
Once you have gained Bolrie's trust, exit the prison and head west, past where you originally emerged from the stairs. About halfway through cave, you will stop and instruct Bolrie to hide in a small alcove in the passageway. Head forward through the tunnel and open the locked door and you will run into Golrana. You witness two terrorbird breeders attempt to transform captured terrorbirds by forcing them through a machine. The first one succeeds and turns into No. 202, however the second one, of which Operator no. 126 thought that she was good ("lovely plumage"), transforms into a warped terrorbird and is dumped in to the sewers. A short while after the process has begun, an alarm will sound, signaling that Bolrie's escape has been discovered. Heading out of the room, you run into Bolrie, and all three of you will head up back to the Galarpos Mountains. Glouck's minions will be in hot pursuit, so you are forced to push a boulder into the vent to prevent them from catching you.
Now that you are safe from being caught, Bolrie and Golrana will begin to catch up on the events that have transpired since Bolrie's disappearance centuries ago. Bolrie inquires about his wife, Gena, and Golrana woefully informs him about her passing. However, she tells him that she is now married to Captain Belmondo and has a son. Golrana will signal for gnome gliders, and Captain Belmondo arrives to take them back to the Tree Gnome Village. Once back at the Tree Gnome Village, Bolrie and his brother, King Bolren, are reunited, and Golrie is finally able to meet his grandfather for the first time.
Congratulations, quest complete!
Rewards
- 1 Quest Point
- 60,000
 Experience
 - 60,000 Experience
- 50,000 Experience
- 45,000 Experience
- A new glider just outside Tree Gnome Village.
- Spirit tree seed storage. (Golrana will store spirit tree seeds.)
- Ability to plant up to two spirit trees at a time with 86 Farming (boosts may be used).
- Access to Lletya via a passageway through mountain range.
- Easier access to crystal seed enchantment (Ilfeen can be found wandering Lletya shortly after starting the quest).
Gallery
")
")
")
")
")
")
")
Music unlocked
References
- RuneScape Game Guide
Trivia
A stretching glitch during the hugging scene.
- On the day of the release the spoilers said: We subjected the spoilers to the anti-illusion device and they disappeared! Come back tomorrow when we manage to wrestle the real rewards from Glouphrie.
- The update page and the official Game Guide article both state the quest name is "Prisoner of Glouphrie" while in game, the quest guide says it's "The Prisoner of Glouphrie".
- After completing the quest, the 'Quest complete' text in the Adventurer's Log reads: With a bit of help I infiltrated the underground area of Arposandra and rescued a high profile prisoner.
- There was a glitch that when operating the bowl with water, your skin could turn pale.
- As of an unknown date, the picture in the bottom left hand corner of the "Quest Overview" has been replaced with what appears to be a Mahjarrat skull. This can be seen by right clicking on the quest in the "Quest" tab, and selecting, "Quest Overview".
Pop culture references
- The song "Cage against the Machine" is a reference to the band Rage Against the Machine.
- If you investigate the crack on the other side of stepping stones after you cross a message will say, "All in all just another crack in the wall", this is a reference to the song "Another Brick in the Wall" by Pink Floyd.
- The answer "42" and the term "Don't Panic" are references to Douglas Adams's "The Hitchhiker's Guide to the Galaxy".
- The phrase "Lovely plumage" is a reference to Monty Python's Dead Parrot sketch.
- After the Quest, the player can talk to Golrie about his grandfather, Bolrie. The player talks to him about how his mum is training to be a tree whisperer and that she's full of surprises. Golrie replies with "Yeah? Well, your mum...". This is a lighthearted reference to "Your mum" jokes.