Confront the mastermind behind the pests on the mainland, and send them back where they came from!
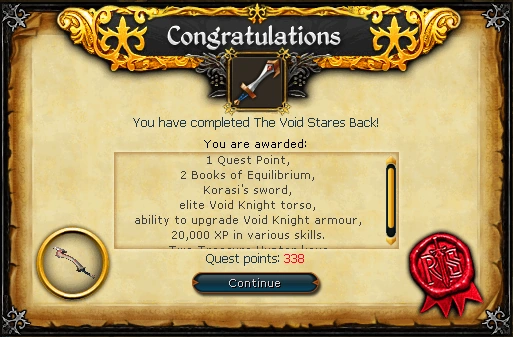
The Void Stares Back is a quest that was released on 6 October2010. It is the third Grandmaster quest released. It is also the third and final quest of the Void Knights quest series.
The plot revolves around the impending threat of a full-on invasion by the void pests. The quest also includes strong enemies and difficult puzzles.
Where are the remaining pest-goo-filled puzzle boxes from the Black Knights' plot to weaken Falador? Who was the mysterious figure responsible for the death of Commodore Matthias? Is the Valluta real or just an old Voids' tale? Infiltrating yet another Black Knight stronghold will set you on the path to answers, but the truth isn't as black and white as you might think. And remember: if you stare into the Void too long, the Void stares back...
To start the quest, speak to Captain Korasi, who is at Falador park. She will be happy to see you, and remark how you have managed to infiltrate the Black Knights' Fortress multiple times by wearing nothing but a guard's outfit - three times. That means that you are THE person to go investigate the fortress for clues on the waxwood boxes of leech goo. She will give you a special set of Black Knight armour: Black full helm (bugged), Black platebody (bugged), and Black platelegs (bugged), which will record movement and speech so that Savant may rescue you, should something go wrong. Accept the mission.
Head north of Falador to the Black Knights' Fortress. Equip your black armour. When you enter, you will be called by an angry Commander Colby, who will criticise you for being an hour late. He will teleport you to the Black Knights' base in Taverley Dungeon. He will only teleport you once, so if you have to go back for any reason you must go through Taverley Dungeon.
Note: If you are killed in the Black Knights' base in Taverley Dungeon before the Pest Queen is summoned, you will have to travel back there by foot. The base is located deep in the dungeon, with most of the quest taking part in an even more remote set of rooms. It can take some time to get back to your gravestone. Therefore, it is essential to purchase the longest-lasting gravestone one can afford, and you should consider bringing run energy-restoring items (e.g. energy potions). If you have an Agility level of 5 or more, you can take the short cut in the Falador's western wall. There is a bank near the short cut, allowing for restocking. Alternatively Taverley lodestone and bank are near the entrance.
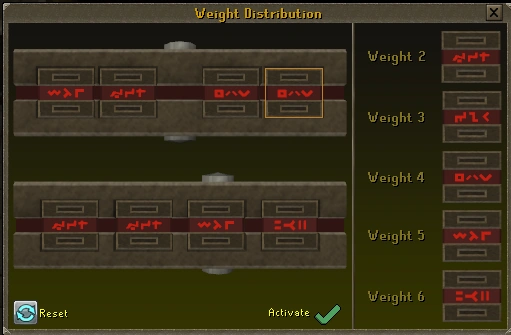
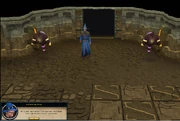
Security Room 1: The Weight Distribution
The crate room.
Talk to Captain Gilroy next to you and he will automatically send you through the big metal door, where a fellow team member has already set up. Behind it is a room with some crates. You will see Gilroy ordering the other Black Knight to open the door, which will electrocute him, killing him. First surprised, Gilroy will command you, the recruit, to fix the door, but not to touch it. Try to take any crate. You will remark that the label is positioned in a funny way and tell the Captain. The crates contain weights and these must be placed in a certain order on the balance scale on the wall for the door to open. Gilroy concludes the crates have been sabotaged by someone, thus making every Knight kill themselves, since they will get the code all wrong. Gilroy will ask you to hand him some weights so that he, with his Misthalanian farmer skills, can decide which one is heavier, in order to help unlock the door.
Search the crates and you will find there are blocks in them. You need to fit them into the door's locking mechanism, but the labels on the blocks displaying their weight are incorrect. Captain Gilroy will tell you that he can determine the blocks' actual weight. Take all the blocks out of the crate. They are numbered from 2 to 6. Now use two on Captain Gilroy at a time. He will tell which one is lighter and which one is heavier. You have to find out the correct order of blocks, from lightest to heaviest. Keep using pairs of blocks on Gilroy until you know the order. Arrange them in your inventory from lightest to heaviest. It is advised to use the notes system or a piece of paper and note which block is which.
When you know the order, talk to Gilroy and choose the option "I think I've got it." Now give the weights for each block, starting with the lightest one and so working your way up to the heaviest one. For example, if you found the order of blocks is 3, 5, 2, 6, 4, start with block 3, then tell the weight of block 5, and so on.
The block labeled 2 weighs 4, label 3 weighs 2, label 4 weighs 6, Label 5 weighs 3, and the block labeled 6 weighs 5.
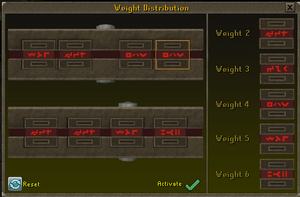
After you've told Gilroy the right order, he will tell you to correct the scales on the door. Today's password is "15". Blocks must be arranged such that the weight on each bar adds up to 15, and such that the leverage of the weights on each side of the swivel point (ie the distance from the swivel point times the size of the weight) is equal. The weight labels are correct at this point.
A possible solution.
Notes:
The easiest tactic is to first find the block that is lighter than all others. Put it apart, and find the lightest block of the remaining ones. Put that one apart too next to the first one, and repeat these steps. You'll end up with the correct order.
Security Room 2: The Ambush
Ambushed by the Pests
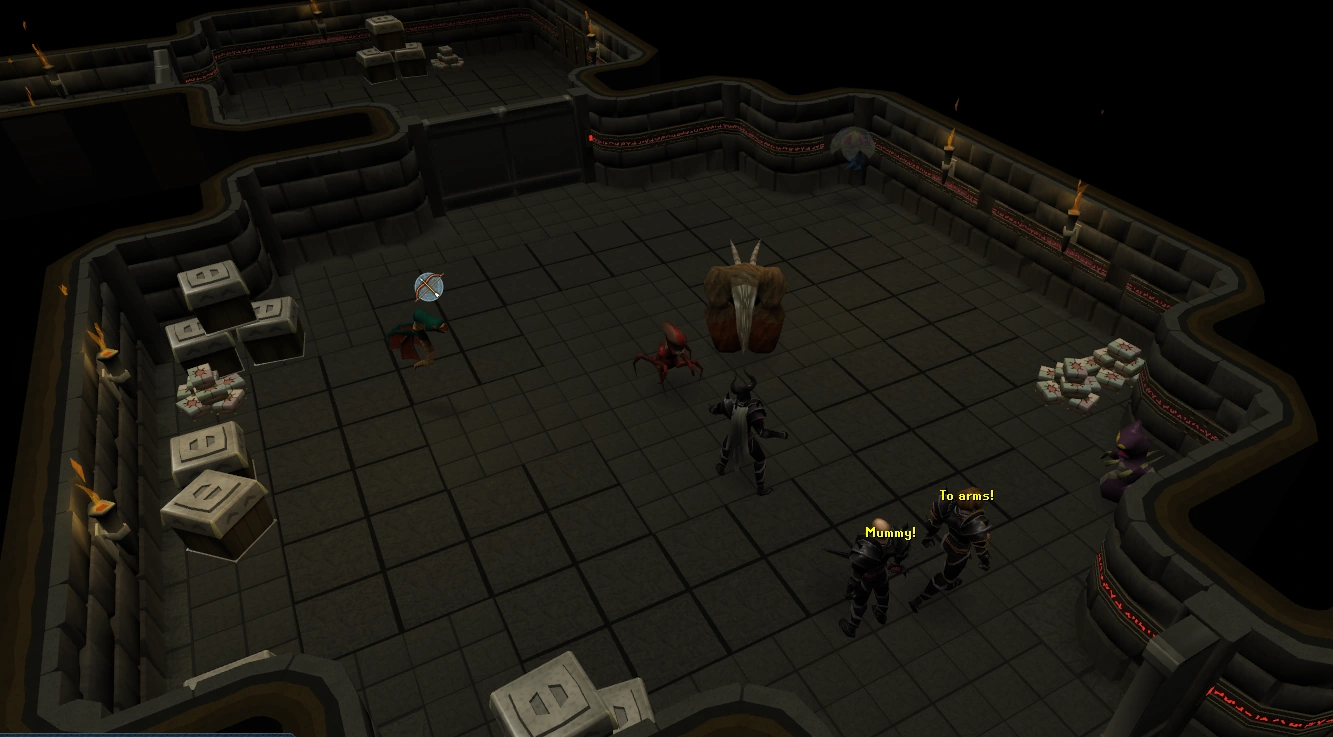
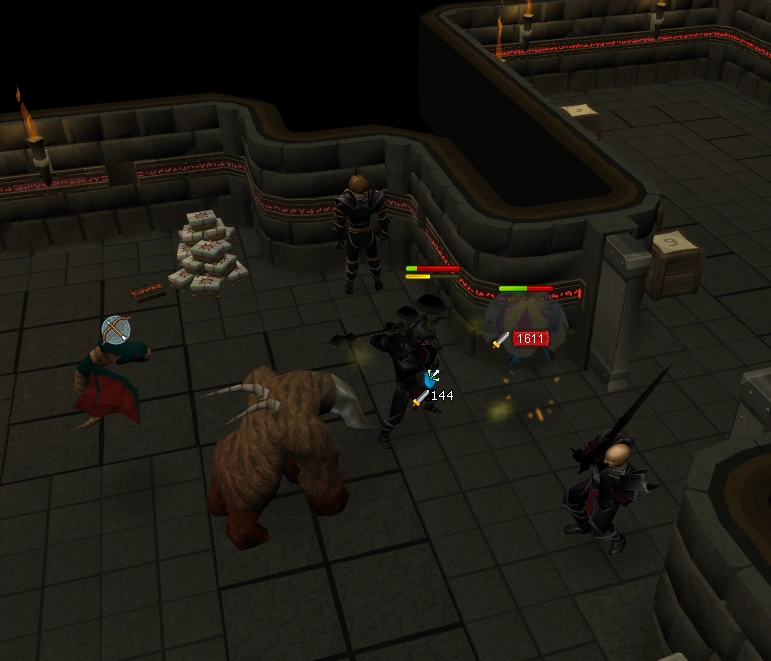
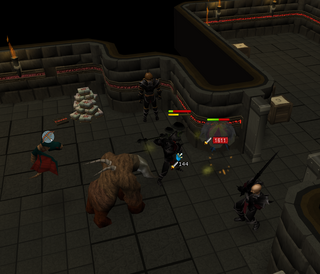
Prepare for a fight. Now open the door and enter the room. You will be ambushed by a group of pests. Captain Gilroy will fight the Defiler, while the Black Knight cowers in a corner. You have to fight four: a Torcher, a Brawler, a Shifter, and a Spinner. These fight as they do in Pest Control, except they are much stronger than their levels suggest. Consider using Protect from Melee or Deflect Melee to block most damage.
The Spinner will continually heal the other three very rapidly.
The Shifter will move a distance away from the player and teleport-swap positions with the pest that the player is currently attacking.
The Brawler obstructs player movement as in the Pest Control activity.
The Torcher shoots magic while having the Protect from Ranged prayer active. It can also activate Protect From Magic.
If you die during the fight, the bugged black armour will not be dropped on the floor. You will have to collect it from Captain Korasi again. Attack the spinner first. It will rapidly heal the other creatures as long as it is alive. Due to the constant teleporting effect of the shifter, players may find it faster or easier to kill it with magic or ranged. After the spinner is killed, finish off the rest as you see fit. Keep in mind the shifter should be next as it teleports the other monsters around which can be annoying. Also note that the brawler hits unusually high and quickly, at the speed of throwing knives.
Pick up the security blocks the pests dropped. There are four blocks (Gilroy gives you one after speaking to him), but one is broken. Speak to Captain Gilroy. He will tell you to fix the block at the forge in a north-west room. Unfortunately, the forge has been destroyed and thus must be repaired.
Hammering away at the tiny forge
Exit the room and head north-west until you find the forge. Investigate it; you will need a limestone brick, a hammer and a piece of hard leather to fix it. Gilroy tells that all items can be found in the base. Search the crate in the same room as the forge, in the south-western corner, to get a limestone brick. The hard leather is located in a crate near the jail, in the far east. Now access the entrance hall and search the crate in the room south of the kitchen for a hammer, or you can use the hammer in your tool belt. Return to the forge and fix it. (If you are told that the forge is "Tiny and...broken" when you try to repair it, then go back and speak to Gilroy). It will now require some fuel and needs to be lit. A set of logs can be found in a crate in the kitchen, which is the most north-north-eastern room, and a tinderbox (you can use a tinderbox in your tool belt, also), which is south of the kitchen. Fuel the forge and light it with your tinderbox. Put the broken block in the forge. You will obtain a fourth security block. Head back to the room with Captain Gilroy and place the four blocks in their holes - the order does not matter - in the western wall. The security door can now be opened. If you log out or teleport before you open the security door, you will have to re-do the fight.
Security Room 3: The Control Panel
Enter the room, click on the control panel on the western wall, and Gilroy will remark that, after the first two rooms, he suspects it has been sabotaged as well. Select to search it for magical traps. After disarming the trap, open the panel. Talk to Gilroy again. You need to solve another puzzle. Drag the tiles into the panels. You need to make a horizontal line spanning all three panels, but also fill all the empty spaces. Once you've completed the puzzle, you can open the door.
When you've made the horizontal line, there will be other bits of line left; you don't have to do anything with them.
The puzzle will only be completed when every tile is placed. This includes tiles that are not needed to make the horizontal line.
There are multiple solutions to this puzzle.
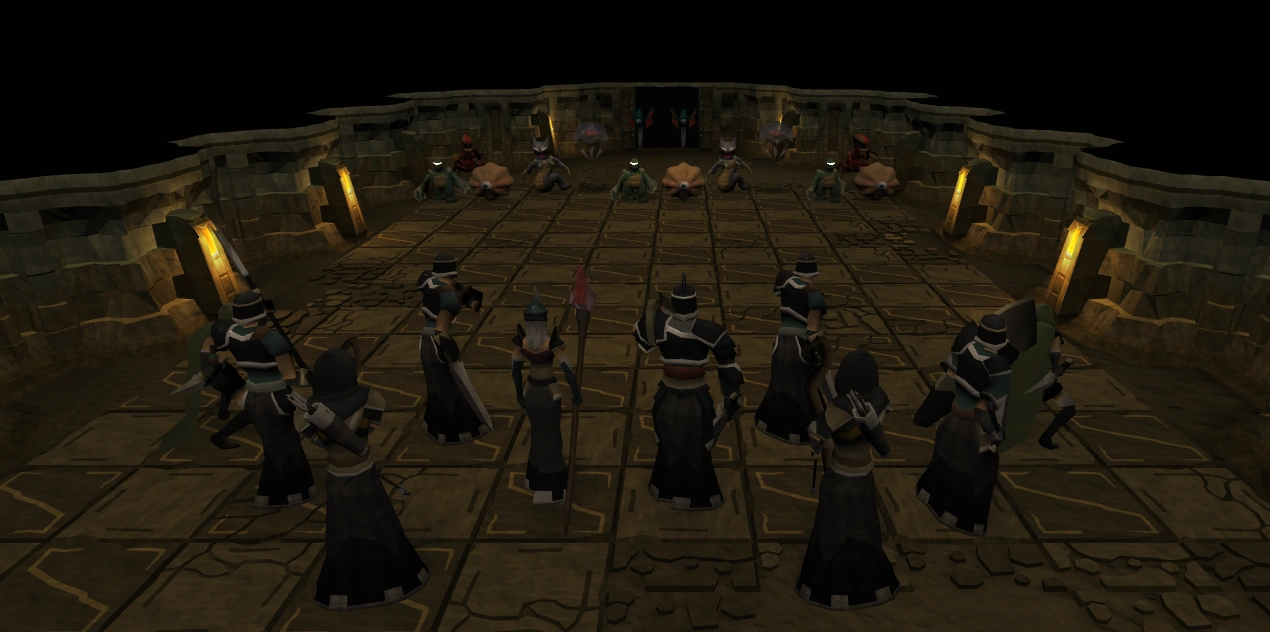
Grayzag's Plan - Pest Conquest
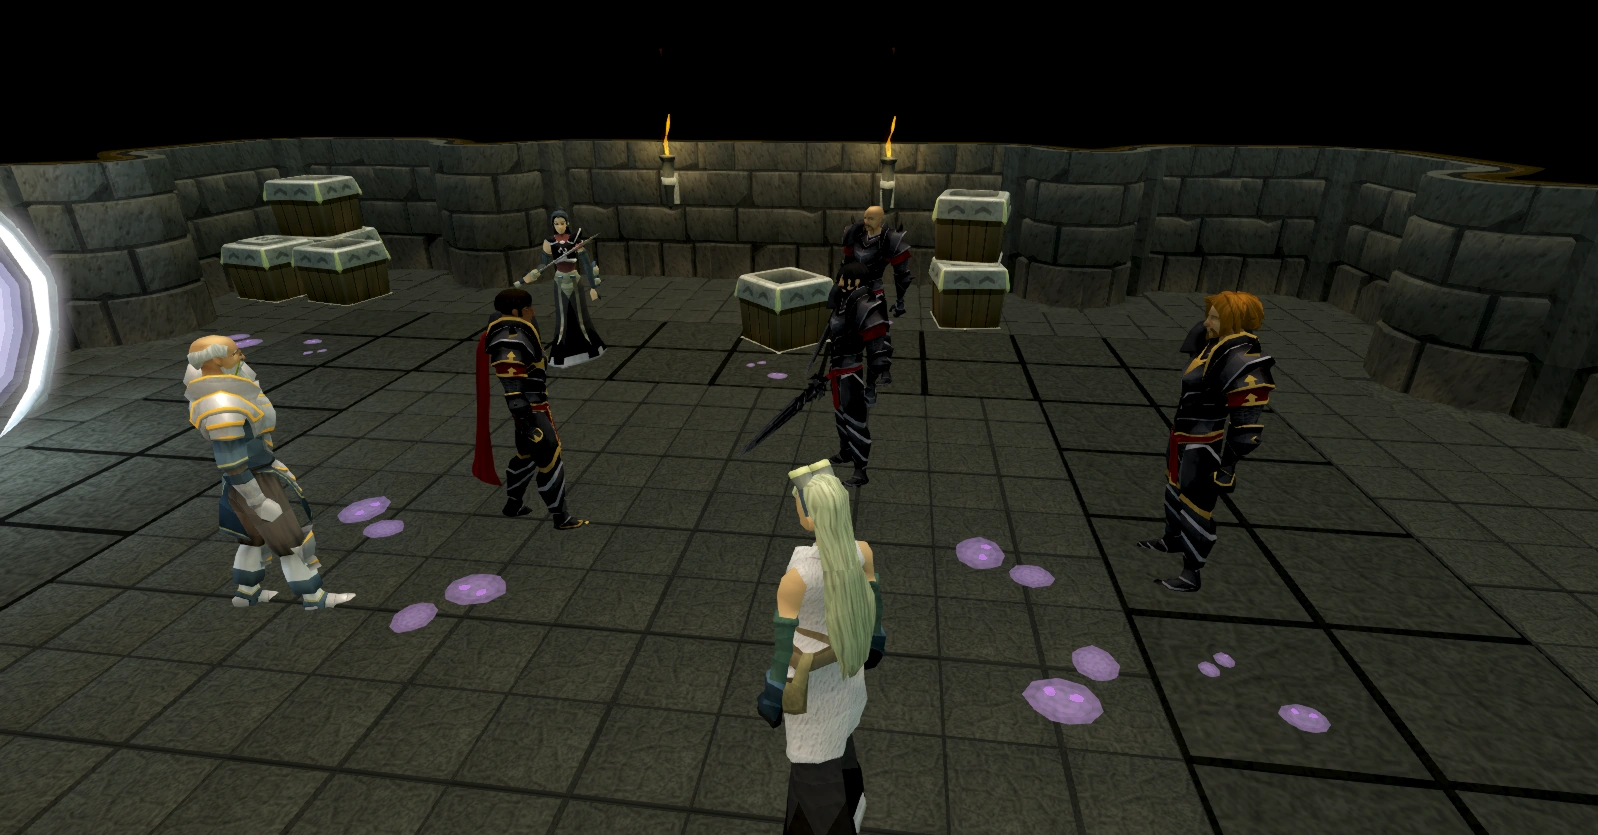
Tiffy, Korasi and Jessika arrive.
Enter the next room. You will view a cutscene. A portal is discovered, and your true identity is revealed to Lord Daquarius. Reinforcements arrive in the form of Sir Tiffy, Korasi and Jessika. You manage to convince Daquarius to join forces. More Temple Knights, Black Knights, White Knights and Void Knights teleport in, and the parties agree to unite under the leadership of the player. Talk to Korasi to receive Korasi's sword.
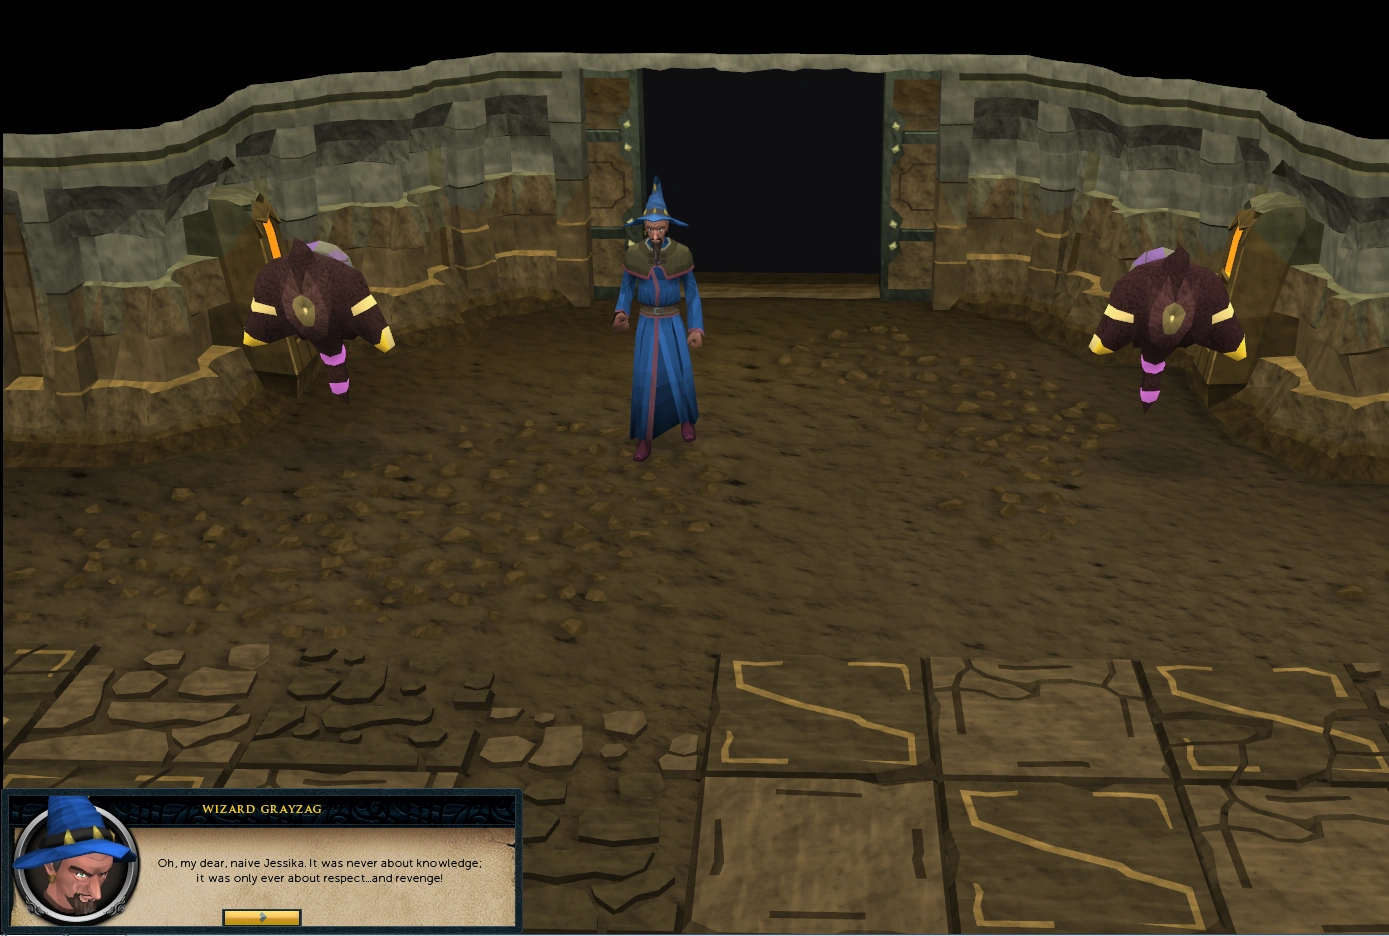
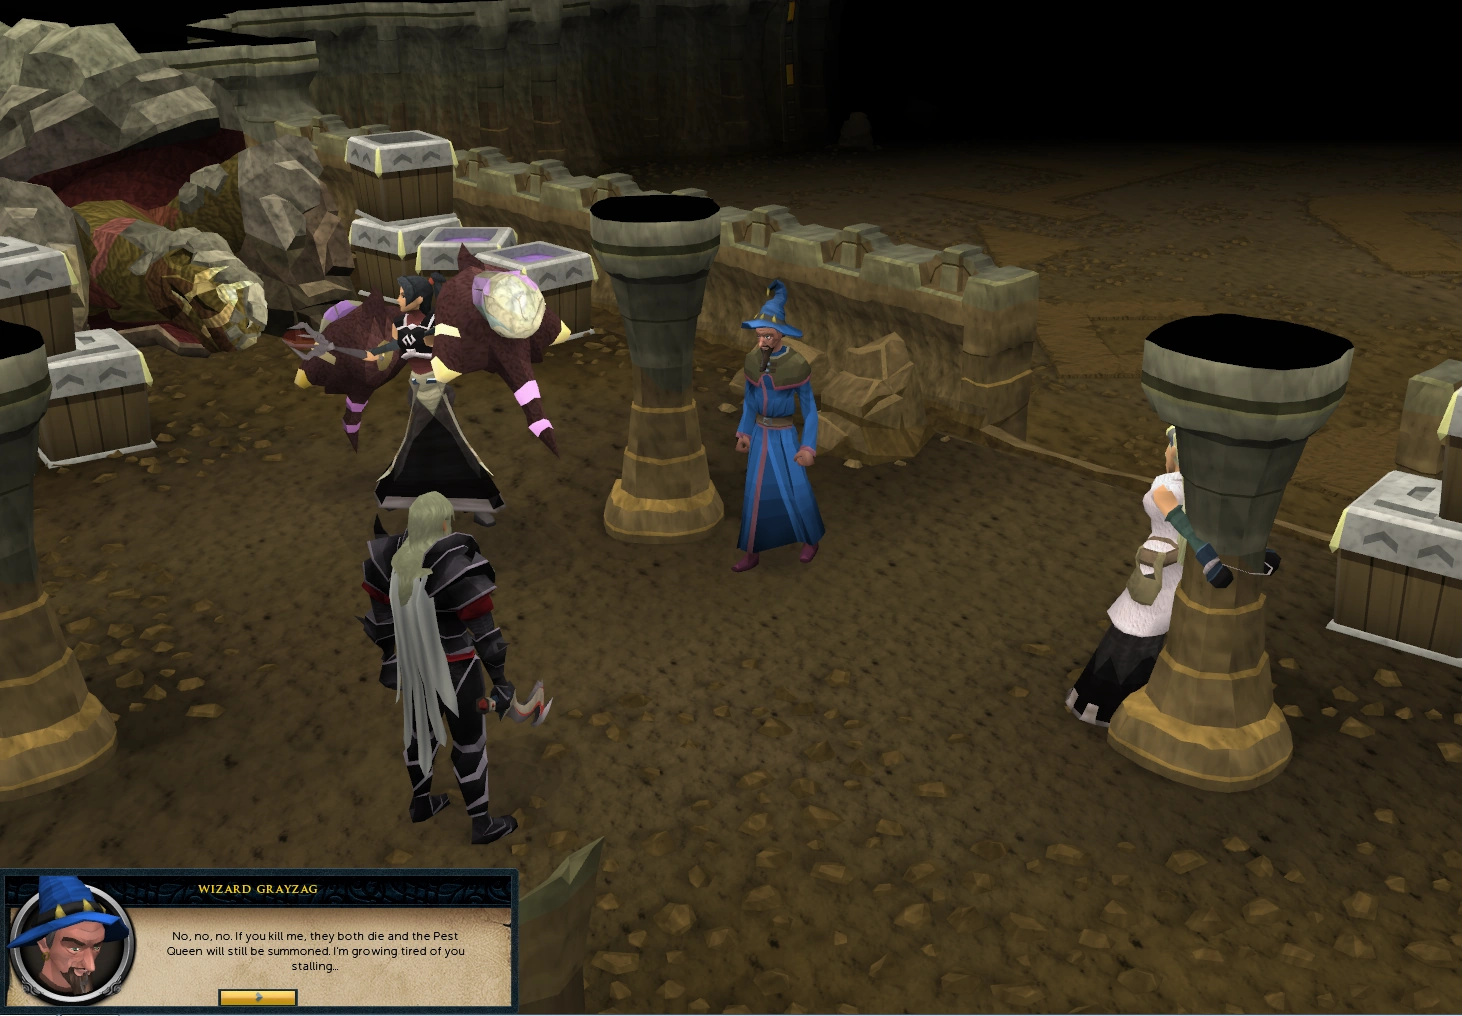
Wizard Grayzag makes his entrance.
Talk to Commodore Tyr, then step into the portal. Another cutscene will start. It reveals that Wizard Grayzag is behind the pest manipulations and plans to gain revenge against his enemies (basically everyone) by summoning the Pest Queen. Grayzag is not quite ready and sends a force of splatters to attack, forcing a cave-in on the area where the player was standing. You take shelter in a nearby cave.
While the others attempt to make a way out, you must play a modified game of Conquest against the AI-controlled pest force. You must command your own troops and defeat all enemy units on the battlefield. This game is safe; for if you lose, you return to the cave with all your items, and can try again. You have a slight advantage, as the pests cannot use commands such as Battle Cry or Regenerate. You will have standard units, but the opponent has special pest troops:
The Ravagers (300 Health/300 Damage) have the movement range of Scouts and the damage rate of a Knight. They can easily destroy your party if they are not dealt with swiftly, so they should be a top priority.
The Shifters (200 Health/200 Damage) are less of a threat than other units and can be tanked if need be; however, watch your 100 LP units.
The Defilers (200 Health/200 Damage) are similar to Mages.
The Spinners (800 Health/100 Damage) are similar to Champions in that they are very powerful. They do not heal their units (which is what spinners do in the Pest Control activity).
The Torchers (100 Health/100 Damage) are similar to Archers.
The Splatters (600 Health/100 Damage) will explode and deal 100 LP of damage to any adjacent unit that is within one square on death. However, they can also move next to a friendly unit and suicide for the sole reason of dealing damage.
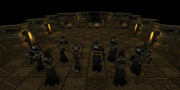
The unique game of Conquest.
The AI has a fair amount of randomness in its play and does not always make what seems to be the best move. One winning strategy against it is to line up your units near the back of the playing field (not advancing toward the enemy) and destroy the enemy units as they close in to fight. Another good tactic is to only use high-hitting units such as your Champion and Knight. You can fight recklessly as they can not be killed in a single hit, unlike in Conquest. If they get low on health you can use Regenerate to fully heal them. Most pests will go down in two hits of the Knight, and nothing can survive two hits from the Champion. Taking out enemy units faster than they can take out your units will usually result in a win. If the AI is playing well, you can always retreat from the game and start a new one, as the AI may not play well the next time.
Only a reduced set of commands are available, but these are key to winning:
Use Chastise to stop the move and attack of powerful enemy units when they come close, and then destroy (or at least heavily damage) them before they can move and attack again.
Use Regenerate to heal powerful units that become damaged. The Champion and Halberdier are worth healing.
Use Battle Cry to buff up the attack of your units so that they can destroy enemy units. As with regenerate, the Champion, Halberdier, and the Mage all can be worth buffing. (with this command, the Champion can often take out a unit in a single hit, the Halberdier can hit hard from two squares away while being out of retaliation range of 1-range units, and the Mage can inflict 400 points of damage at several squares range.)
Charge doubles a unit's movement and is less useful but can be used to pick off a distant unit on occasion, although the charging unit will be vulnerable if other enemies are nearby.
If you happen to log out during the game, or back in the cave, you will end up back outside at the portal room and will have to restart the Conquest game.
The Mother of all Pests
A difficult decision.
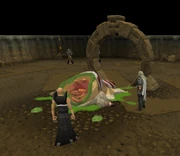
Once you have defeated the opponent, enter the door at the end of the room. A cutscene will start. The first thing you will notice is that Valluta is not a metaphor, but a Guardian of Guthix in the form of a giant tortoise. Wizard Grayzag is very close to summoning the Pest Queen, and he needs a sacrifice to complete the ritual.
Greyzag tries to escape.
He leaves the decision on who to save — Korasi or Jessika — to you, or else he says he will kill both. If you save Jessika, Korasi will be slain by the nearby Pest drones; if you save Korasi, Grayzag will kill Jessika with Saradomin Strike. After killing the one who the player decided to not save, Grayzag summons the Pest Queen from the portal in the middle of the room. Korasi or Jessika (depending on who you saved) manages to close the portal by exploding the food-goo, badly injuring herself in the process. Unfortunately, the Pest Queen has already managed to climb through. You can ask Valluta for assistance but she will respond that she is too weak to do anything. She will, however, answer questions on how to fight the Pest Queen. Make sure this part is completed before you bank/gear up because if you don't, Sir Tiffy will not be able to teleport you back to the chamber.
Before continuing, bank and gear up for the battle with the Pest Queen. Fighting the Pest Queen can go through an entire inventory of Saradomin brews, although if you have high stats (90+) an inventory of rocktails can be more than enough food. If taking brews, also take enough Restore potions to recover your stats from the brews' effect. Korasi's Sword seems to be very effective against the Pest Queen, so you can just bring that (as you need its special) without a second weapon to save an inventory space.
The chamber where the final fight with the Pest Queen occurs. The northern part contains the portal and the queen in the centre. The southern part contains Valluta and either Korasi or Jessika.
If you happen to die during the fight with the Pest Queen, your gravestone will appear in front of the portal in the black knight's headquarters. This means you can regain your items without risk of combat, but be aware that it can take some time to get to from your respawn point. Sir Tiffy Cashien will teleport you back directly to the boss portal. Therefore, the fastest route back to your gravestone is to teleport to Falador and talk to Sir Tiffy. An even faster route is to make Falador your respawn location and then talk to Sir Tiffy to get back, therefore saving time and runes.
If you teleport out of the black knight headquarters, Korasi's sword will disappear; you can get it back by entering the Pest Queen's chamber and talking to the NPC you saved in the cut scene.
While gearing, keep in mind that your primary weapon will be Korasi's sword. In particular, you will need to frequently use stun attacks (such as Backhand or Kick) to prevent the queen's charge attacks, as these cause 500 life points of damage to you and your archers as well as healing the queen. Because of this, you should be sure to save these abilities when she begins to charge up her attack. You will not be able to hit with any stun attacks unless you have Korasi's sword equipped. You can save yourself an inventory space by not bringing another weapon, although a good weapon like a chaotic weapon or an Abyssal whip can be useful when dealing with the queen's elite defilers. However, it is recommended to simply distract the defilers, not kill them.
The Green dots indicate the positions taken by the Void archers, whereas the Red positions indicate the Pest Queen and her 4 pest drones.
Strategy 1
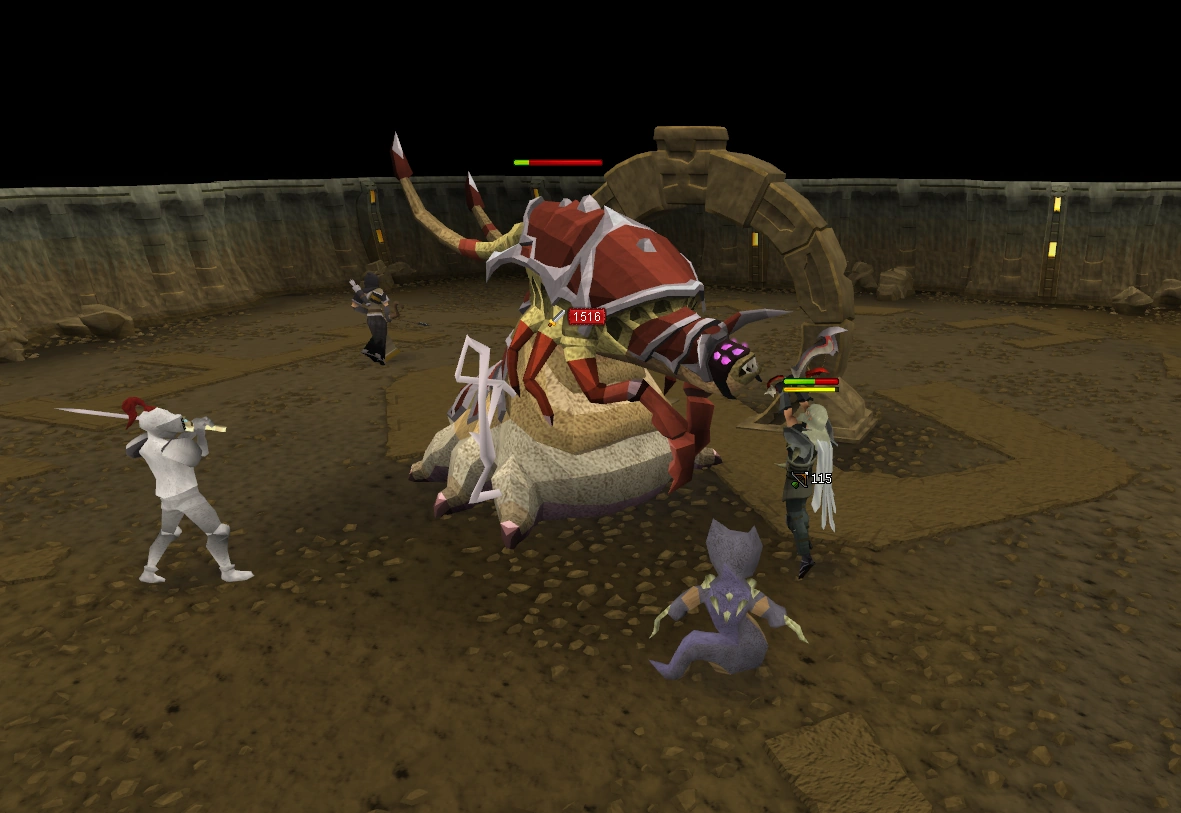
As for fighting the Pest Queen, she has two styles of attack: melee and magic, which both hit up to 214. You will, however, take damage regardless of your prayer, as prayer only lessens the damage to a maximum of 130 LP. While melee attacking the Pest Queen it is advisable to use the Protect from Melee prayer as that is the more common attack she uses at close range.
Most importantly, when the Queen stops attacking and looks upward, equip Korasi's sword and use a stun ability (Backhand or Kick) to prevent her from activating her special attack, because she can deal a maximum of 4000+ (could be less) LP of damage to you and the knights and archers (which will most likely be killed in one hit) attacking the Queen (oddly, the archers usually survive this attack, so don't panic if you are forced to take the special attack of the Queen). Even with Korasi's sword equipped, the stun ability may miss, in which case you will need to quickly click the other one (Backhand/Kick). Keeping your LP above her max hit is also advised in case you fail to stun her twice and are unable to stop her special attack. Note: She will heal herself after she successfully casts the special attack.
Battling the Pest Queen.
Those who have access to ancient curses should seriously consider using them. A good combination of curses for low levels (under 74) is Deflect Melee, Sap Warrior, and Sap Mage. Despite the fact that the queen has a special attack, Sap Adrenaline does not work against her. At higher levels, Leech curses (or Turmoil) are even more effective. For those who do not have curses, Chivalry/Piety will increase your overall melee stats, and more importantly, increase the chances of blocking the queen's attacks, although the style you are not praying against will most likely hit you anyway.
Also using a chaotic weapon/Abyssal whip instead of Korasi's sword will quicken the battle, but remember to switch to Korasi's sword to stun her when needed, and then switch back to the other weapon.
If you spoke to Valluta, you will know that in order to defeat the queen you must defeat her drones. There are a total of ten drones during the fight, which are summoned in 4 waves. Four drones will be summoned in the first wave, three in the second, two in the third, and one in the fourth. Inasmuch as you can't attack them, you must rely on the Void archers that enter the room periodically. In order to prevent them from dying, be sure to either distract or kill the level 83 elite defilers when they spawn, as they will attack the archers otherwise, and can hit them for over 350 damage. It is recommended to distract the defilers by attacking them (which turns their attention permanently to you) and trapping them behind the Queen or behind the boxes at the entrance of the room. This takes a bit of time, but is worth the effort as it will eliminate a major source of damage and distraction, since they can hit almost constantly for around 100-150 damage. A maximum of two defilers will be in the arena at any given time, so they will not be a threat if they are trapped in the first room behind the boxes. A good way to do this is to bring a longbow and bronze arrows. If you stand back and use the long-range attack style, you will be able to force the defilers to move closer to you while dealing minimal damage. You can stand behind the pillars next to the Valluta to lure them closer, as they must approach you to get a clear shot.
Be wary, in between drone waves (and after all 10 of the queen's drones are defeated) she will begin swapping Attack style in accordance with your prayer. This means that she will always be capable of dealing her full damage potential to you. At this point, you may choose to distract the elite defilers (instead of killing them) to give you more time to damage the Queen. After a short period of time, the drones will respawn. Be sure to keep the archers around so they can dispatch the drones again. If you did not keep the elite defilers off the archers, you may find her fully replenishing her health.
When you leave the queen to kill the elite defilers, switch your melee protection to magic protection to avoid taking too much damage.
Bring a titan, unicorn or kyatt and many scrolls for it in your inventory.
When the food in your beast of burden is depleted, dismiss it (you can go to the Follower Details tab, right-click the Dismiss button and choose the "Dismiss now" option to avoid the dialogue). Then summon your second familiar. If you bring a kyatt, the overall strategy is the same; however, now is when you begin spam clicking ambush scrolls. Bring 100-200 ambush scrolls (some players report using only about 80 in the fight while others use on the order of 150 or so).
Strategy 2
This strategy is much simpler, but requires 84 Herblore (which can be boosted).
Go to the queen and wait for the other NPCs to enter and attack the queen. Turn on protect/deflect melee. Leech defence and leech attack may also be helpful.
Attack the elite defilers once when they appear to switch their attention from the rangers to you, then go back to fighting the queen. At the beginning of the fight, just wait for the rangers to kill the drone healers and keep the queen from using her special attack. (The drones heal the queen for any damage the player does until then.) Once the drones are dead, hit the queen with a stun ability when wielding Korasi's sword whenever possible, even when she is not preparing her special attack. Remember that you can drink a dose of Restore adrenaline only once every 30 seconds.
When gearing for the Pest Queen, try to emphasize Magic and Melee defence, as these are her two attack styles (one will always be hitting you, so bring defence against both). Magic gear should be favored, as it gives extremely high Melee defence and high Magic defence.
High value items can be taken, as your gravestone will appear in front of the portal. You can teleport directly there by talking to Sir Tiffy Cashien in Falador Park. (He will only teleport you after the pest queen has been summoned. If you leave or die in the Black Knights' headquarters before the queen is summoned, you must make your way back there by foot.)
Aura: Invigorate (If you don't have 84 herblore or a close enough level to boost it)
Additional info
It is possible to attack and then quickly run away while praying against magic to avoid the swapping of attack styles; however, this is risky as you may do less damage before the drones return.
The queen can only attack with melee when within melee range, this means that you can use range or mage against the queen then run in to stop her special with Korasi's Sword
The Steel Titan familiar is very handy when defeating queen, as its special attacks can hit very high.
Stand to her side close to the portal so her attacks do not splash onto the knights that are helping you.
Using your familiar's attack option on the elite defilers is a safer way to attract their attention.
Consider using hotkeys (F1,F2,F3, etc.) to switch to different interfaces. This minimizes cursor movement and therefore allows for more concentration on the battlefield. Refer to the article on Hotkeys for more information.
It can be useful to attack each Elite Defiler once when they spawn, then run away to Valluta until all 8 archers are in place, you won't take any damage while waiting and the Pest Queen won't use her special, so you need then much shorter time for the archers to kill the drones.
After the fight is over, the elite defilers may be still alive if you lured them out of the battlefield. This can be easily rectified by unleashing Korasi's sword upon them.
The use of a Bonfire's health boost can be useful for this fight.
Death of a Queen
The Pest Queen is dead.
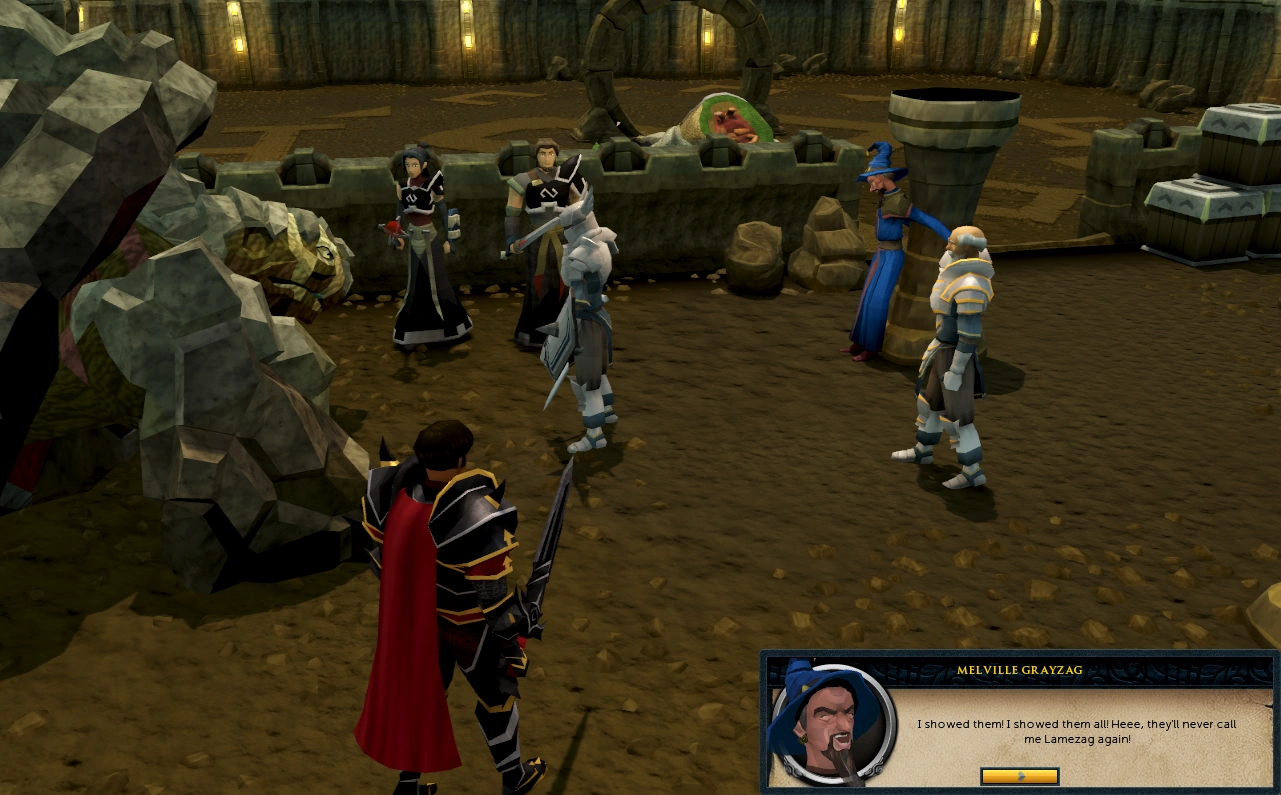
After you have killed the Pest Queen, return through the portal to the southern part of the chamber. Speak to Jessika or Korasi or Valluta and a cut scene will play. Grayzag has been captured and is tied to a pillar. The various orders of knights cannot agree on what to do with Grayzag and leave the decision up to you. You will choose one of four fates:
Grayzag is defeated.
Choosing Commander Tyr's Void Knights option will result in Tyr killing him on the spot, cutting Grayzag's throat with his sword.
Choosing Sir Tiffy's Temple Knights option will result in Sir Tiffy untying Grayzag and teleporting both Grayzag and himself to the Temple Knights, where they will 'dispose' of Grayzag.
Choosing Sir Amik's White Knights option will result in Sir Tiffy untying Grayzag and teleporting Grayzag to the White Knights, where they imprison him. (Sir Amik himself is not present but Sir Tiffy presents Sir Amik's option as well as his own.)
Choosing Lord Daquariaus' Black Knights option will result in Daquariaus torturing and then killing Grayzag.
Void guardian torso, Void justiciar torso, or Void executioner torso, depending on how you answered several psychological questions/decisions in the void quests. (You can change the colours, White for Guardian, Grey for Justiciar, and Black for Executioner, by talking to Commandor Tyr and paying 100k)
The quest's name is a reference to the famous quote by philosopher Friedrich Nietzsche, "Whoever battles monsters should take care not to become a monster too, for if you stare long enough into the Abyss, the Abyss stares back into you." This reference is particularly profound with regards to the quest's content - the first half of the quote can be seen to refer to the multiple moral choices you must make throughout the three quests in the Void series. The reward of Guardian, Justicar or Executioner Elite Void Robes at the end of the quest can therefore be seen as a judgement on whether or not you, having battled monsters, have yourself 'become a monster'. The 'abyss' in the quote is embodied by the Void.
The day the quest was released, the spoilers said, "Sir Tiffy, Commodore Tyr and Lord Daquarius are squabbling over the rewards. This may take a while..."
When Grayzag leaves to summon the Pest Queen, he summons a group of pests and cries, "Say hello to my little friends!", a direct reference to Al Pacino in the 1983 version of the film Scarface.
Upon the completion of this quest, one's Adventurer's Log will read: "I led an alliance of knights against the Pest Queen and defeated her."


.png)
.png)
.png)
.png)