Roles
- Base tank (preferred backup) - Player should be focusing Yakamaru in a direction away from the rest of the team.
- North tanks - During the mirage phase, two players will get the aggression of the mirages to prevent them from flinging projectiles at the team. It is recommended to have them using Ice Barrage or Bolas to bind the summoned jellyfish for 10 seconds. With two or three nt's, stun pool can be cleared and planked before other players reach sand.
- Healers - Anyone who ranges at Yakamaru should also be healing the team when possible by using a piece of equipment that serves as a shield, then using Heal Other or Heal Group while under the effects of Barricade. If possible, they should also be using Vengeance Group.
- Have a rotating order between healers so two healers do not use Barricade at the same time, skipping the next heal and forcing the other healer to heal others next.
- Poison tank - At 100,000 life points, Yakamaru will unleash a dangerous poison. The player serving this role will enter the spot where the poison will land and then go within melee distance of Yakamaru in order to complete the phase.
- Backup poison tank(s) can help in case the main poison tank is killed by being "blued" or is affected by tentacles/quicksand. Tank can take poison if it targets near him, and a backup tank will have to voke Yakamaru until base tank is resuscitated.
- CPR (resuscitator) - After every Yakamaru pool change from poison, run to the beach and save the poisoner from the insta-kill effect. By 20,000 life points, you should start drifting towards the beach.
Gear
All players are usually required to have Dreadnips, as when Yakamaru is attacked by 5 or more at any given time, he becomes stunned (this does not affect northeast pool's stun effect) preventing him from attacking or using abilities. Like most other bosses that have access to abilities, they only use them if they can attack their target.
Like Vorago, melee can be used but is not recommended as anyone within a 2x2 range of Yakamaru will be hit by magic attacks and be affected by his enrage mechanics unless the player is the base tanker.
When maging, it is required to be on either the standard spellbook to cast debuff spells on Yakamaru or the Ancient spellbook to cast Ice Barrage on summoned Jellyfish to bind them for 10 seconds. If north tanking, it is recommended to be on Ancients and be dual wielding due to 2-handed weapon's slow attack rate.
Rangers should be on the Lunar spells spellbook with access to Heal Other/Heal Group and Vengeance spells, as it will be needed to restore the health of players from the many sources of high damage during the fight. As Heal Other and Group heal lifepoints based on the player's current health at the time, equipment that has more health bonuses are usually a priority for more effective heals.
Canals Puzzle

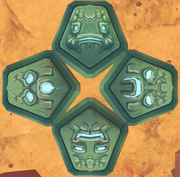
The Faces at the puzzle. North is taciturn face, east is angry face, south is happy face, west is shocked face
After entering a canal puzzle, you will be facing various Jellyfish in each island and there is a blocked water spout. The jellyfish that appear must be killed to unblock the spout, which will take you to the next skirmish. Once all jellyfish are killed, have five people from the group go back to the islands which had pressure pads. One player will hit the block, which will show a face. The players on the other islands must stand on the pad containing that face to unblock the canal, leading to the boss fight.
Rebank if needed by logging out then back in if you can't use the two canal banks, then re-enter the instance.
Note: In order to go straight to the boss fight from instance portal, all players must have dived into the arena; if one player has not dived through the waterfall yet, the whole team must complete the canal, even if the group leader sets the boss to Yakamaru.
Jellyfish
These jellyfish appear throughout the fight with Yakamaru. When they appear, they should be immediately prioritized over Yakamaru as they have a very fast attack speed and deal a decent amount of damage at their target(s), and can easily kill teammates. Stuns temporarily stop them from attacking.
When an orange jellyfish spawns, multiple cracks appear on the ground and geysers erupt a few seconds later. The geysers deal 1500-2000 damage to players hit by them, but also deal 10,000 damage to the jellyfish per player damaged by them. Carefully timed Resonance can be used to both heal yourself and damage the jellyfish.
| Durable Jellyfish | Jellyfish (Priority target) |
Magical Jellyfish | Piercing Jellyfish | Meleefish | Reflecting Jellyfish Do not attack | |
|---|---|---|---|---|---|---|
|
|
|
|
|
| |
| Uses | Magic, heals other jellyfish |
Melee | Magic | Ranged | Distance Melee | Melee |
| Weak to | Slash | Nothing (geysers as game mechanic) | Arrows | Stab | Earth spells | Nothing (despite being weak to Crush) |
Pre-Fight

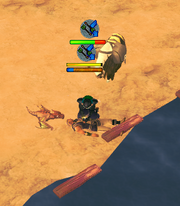
DPS position for start of fight
Before fighting Yakamaru, run NORTH to reset the loading map; this can prevent lag.
Group in close proximity to other players while standing in the gaps between pools as seen to the right, to allow for healers and group veng'ers to reach everyone. This also allows you to easily run back during shark or sand effects.
The Fight
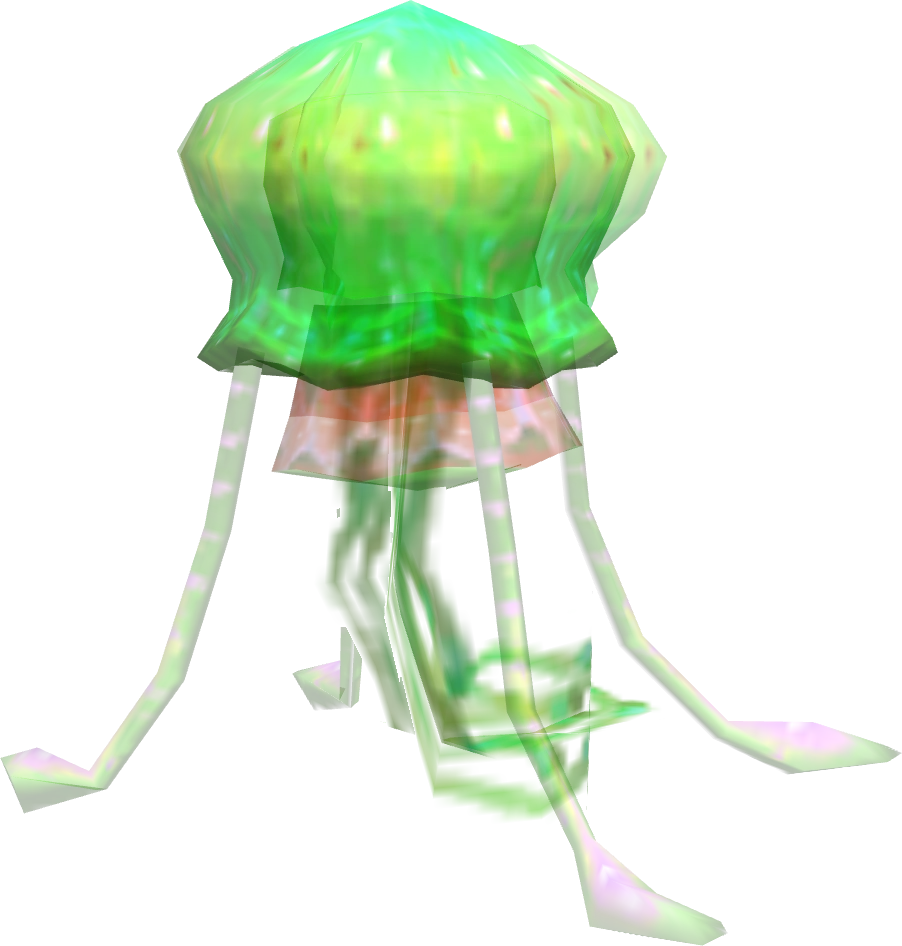
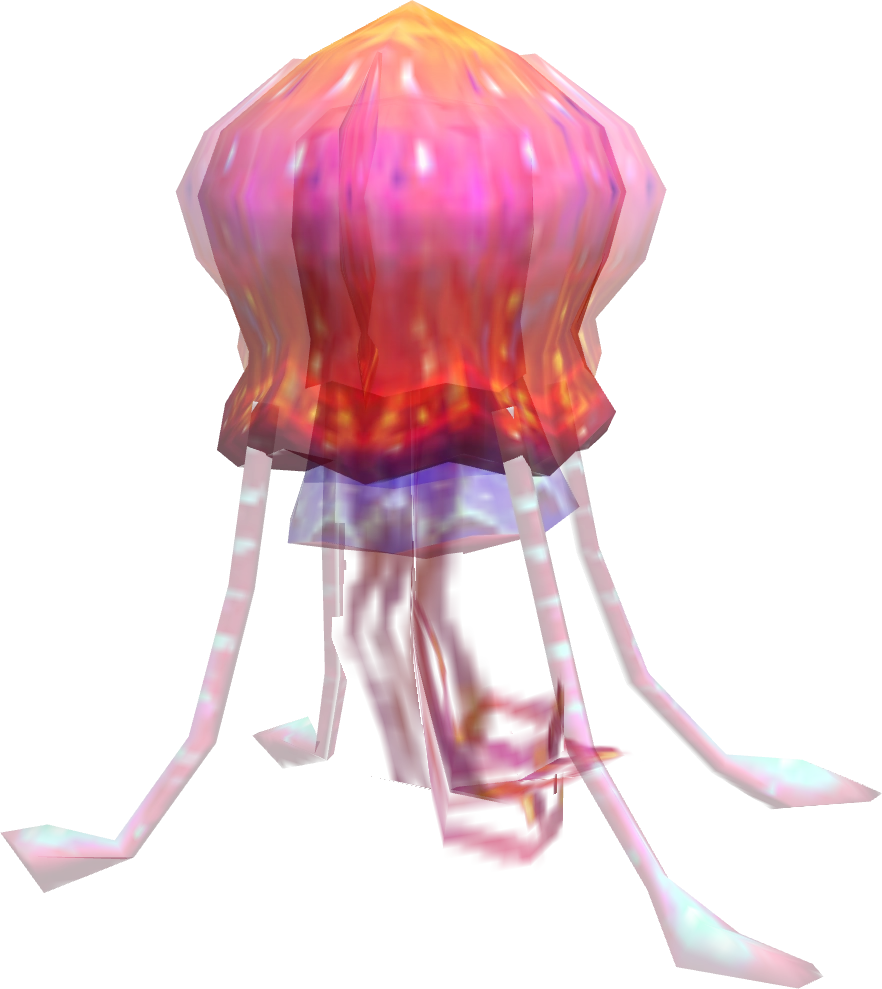
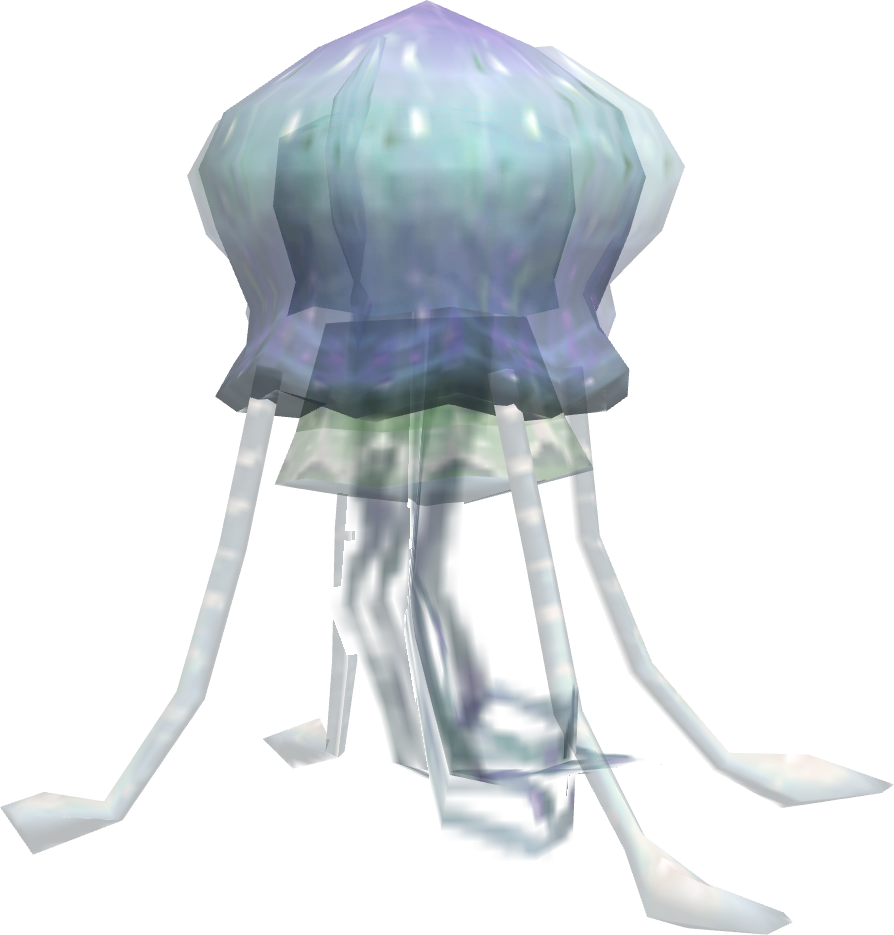
Yakamaru does not move for the majority of the fight; the only time he moves is when he jumps to another pool. Yakamaru will jump to another pool when his health is depleted. Each pool is a phase that gives Yakamaru different abilities, and there are 5 phases in total. Players will need to deal as much damage as possible, as the total damage needed to kill him is 5,600,000 from its phases and mirages.
Yakamaru's attacks will hit everyone in the fight within a 20x20 radius of him. He does not use melee-based attacks, but his melee-distance attack is a magic attack instead. Anyone 3 spaces or further from him will instead be hit with ranged attacks, shown as tentacles bursting from the ground and attacking the player.
During the fight, Yakamaru will not let you attempt you leave the fight through lobbying. If you do so, a message will say "Yakamaru is displeased with your cowardice.", preventing you from doing so. If you are out of combat, a message will appear saying "Yakamaru is displeased with your cowardice, and throws dangerous projectiles at you!", dealing 2,000 damage to all players out of combat with him. This will mean that it is a fight to the death, although players can leave a failed kill by asking the group leader to kick them or removing themselves from the group.
For positioning, the tank should stand in a side away from the DPS group, turning Yakamaru's direction away from them. On the southern pool, be south of Yakamaru and be ready to run back and forth five attacks after the blue spec is released. On the south-eastern pool, stand north with ability to run back if you cannot Barricade or Immortality. DPS'ers, which includes non-tank roles, should be in a group close enough to share Ice Asylum and Vengeance Group but away from the tank.
As soon as Yakamaru appears, attack him. There are abilities that can occur throughout the whole fight:
- An orange jellyfish can spawn along with cracks with 50,000 lifepoints. Players can stand on the cracks, after which a geyser will erupt out. The player will take around 1,700-1,850 typeless damage from the geyser, but will deal 10,000 damage onto the jellyfish. Prioritize these jellyfish over Yakamaru, as they are aggressive and can stack rapid AoE melee damage. Use Resonance timed correctly for a free heal, killing the jellyfish, or stun and ignore during Mirage phase.
- One random player will turn blue (similar to the water Metamorphosis ability), and must pass the effect on to another player. This is done by standing next to someone else who has not obtained it yet (this is why standing close together is helpful). If you do not pass it on to another person, you will be hit for typeless damage, starting at 1500 and incrementing by 1000 for every following hit, until the effect is passed. After passing the effect around to 5 or 6 players, the effect will disappear. The effect does not pass between players standing on the same square.
- Yakamaru as well as Beastmaster Durzag have enraging mechanics, where damage against you increases over time. This effect increases damage taken by 20% per hit and is applied to anyone in an area around the main target. Yakamaru will warn you about increased enrage three times, saying "Yakamaru's water begins to drench you," (As soon the effect is applied, thus x1.2 damage taken.) "Yakamaru's waters begin to soak through you," (Damage multiplier has reached x2, after 5 hits taken.) and "Yakamaru's waters conducts his full power." (Damage multiplier has reached x3, after 10 hits taken.). There is no limit to how high this multiplier can go.
By using Freedom, the enrage is decreased to the state of the previous message received. As such, using it on first state will clear the effect. Using it on second state will reduce the multiplier to x1.2. Using it on third state will reduce the multiplier to x2. It is essential to Freedom the rage as doing so also lowers enrage stacks on the tank. Unlike Durzag, Yakamaru does not reset his enraging mechanic when he is not focusing on that player, so the only way to decrease his stacks are by continually using Freedom whenever those messages appear.
- If Freedom is on cooldown, Devotion and Debilitate can be used to temporarily reduce damage. Also, you can check your drench level when using Devotion, as you will take more than 1 damage while drenched.
Poison
When Yakamaru reaches 100,000 lifepoints at the specialty pools, poison will spawn in a designated spot. The team should have a poison runner, someone who will use the poison to infect Yakamaru at the end of the phase. When Yakamaru shoots the poison, it will hit a 1x1 area (shown with green arrows on that spot). The poison runner will then go melee distance to Yakamaru once they are poisoned (Protect Magic prayer) and the team depletes his health to 0. The poison appears near players that Yakamaru is not focusing on, so the DPS group should stick together to allow the poison to be closer to them.
A successful poison attempt should yield the message "Yakamaru is lured by the scent of your poison..." and drag them into the pool with him. That player will later end up on the shore, and must be resuscitated by a teammate or will instantly die from the poison. While that player is being resuscitated, any damage from Yakamaru will be reduced to 1 regardless of protection prayers or defenses. You can still eat and drink potions while being resuscitated however, and it is advised to do so should the resuscitator become "blued" while saving you.
If the poison tanker misses the poison, Yakamaru cannot be poisoned and the phase must be repeated again. The message "As no one poisoned Yakamaru, it returns to the central pool to recover." will appear, and Yakamaru will be back at the starting pool at health he was at + 50,000. No canal jellyfish will appear when this occurs.
Phases
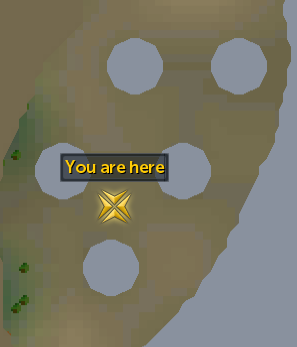
Centre pool (Start)
This is the pool that Yakamaru is waiting for players in. The designated tank should shatter the barrier, starting the fight. The tank should be in melee distance with Yakamaru while praying against magic attacks. Everyone else should be standing away, but close together, while praying against ranged attacks. Everyone should use Dreadnips to stall Yakamaru's attacks as much as possible in every phase of the fight.
After Yakamaru 200,000 life points while in the starting pool, he will go to the next phase by jumping to one of the pools. The first pool is randomly chosen, but the others will be chosen in a clockwise rotation based on the previous pool.
If Yakamaru is killed without being poisoned at the end of phases, Yakamaru will return here, then players must redo the pool that he was just in until he is poisoned.


Southern-most pool (Tentacles)
During this phase, Yakamaru has access to two tentacle abilities.
- The first one, which is a group of bunched up tentacles, is used against his current target and deals rapid hits of 2000 for players near it, which will kill them easily. The base tank should be prepared to run or take heavy damage from them. This attack can be easily seen as Yakamaru will lower his head onto his main target, rather then using regular attacks.
- The other tentacle ability will choke some of the players not targeted by him who are considered "top DPS", dealing small but increasing damage starting at around 200 per 2 game ticks. The tentacle also binds players and clears/resets defensive abilities. Affected players will be freed when enough damage has been done on Yakamaru. If the tentacle effect is somehow left uncleared, it can deal very high damage.
Deal damage to Yakamaru while avoiding his special attacks until the end of the phase, where like all phases, poison will spawn. The person who is contaminated by running into the 1x1 target area must then run melee distance to Yakamaru, infecting it. If you suspect that the tentacles are about to appear, wait for them to be used or have someone backup poison tank, as the smaller tentacles can grab the main poison tank.
Yakamaru will return to the centre pool now.
Centre pool (Poison)

Resuscitating ally at the beach.
Yakamaru leaves this pool after 200,000 lifepoints lost. If you successfully poisoned, it will run to the next phase (Pool clockwise from the last pool). If you defeated Yakamaru before he was poisoned, the pool that he was just in will need to be repeated again. If unpoisoned from the last phase, he will return back to the pool with health when he went to that pool + 50,000 (so on first pool he would have 850,000 lifepoints if he wasn't poisoned).
After every successful phase Yakamaru will return to this pool and summon multiple jellyfish encountered in the canal puzzle. Each group always contains 3 combat canal jellyfish (one of all types) and one support jellyfish (durable/reflect). The support jellyfish rotate after every successful phase, the first spawn being random. Prioritise killing jellyfish first, as they hit very fast and hard on the players. Use stuns such as Ice Barrage or Tight Bindings to stop the jellyfish from attacking.
Resuscitator should save the poison tanker on the beach and be in combat via defensive abilities, as they can go out of combat and be hit with projectiles for 2,000 while saving the poison tanker. Players with spare inventory space should loot planks for Mirage phase.
During the phase, five planks appear on the south-eastern coast (20 planks total when all pools have been defeated). There is no need to have a designated person to collect planks since it takes up many inventory spaces. Whoever has lots of empty inventory spaces should pick them up, as it is needed to defeat Yakamaru.
While poisoned, Yakamaru will take double damage from all attacks. The poison is removed if Yakamaru is damaged enough to be forced into the next pool, a canal jellyfish touches him, or a durable/reflecting jellyfish is killed. One technique used is to tag all jellyfish to take them away from Yakamaru and leave the last jellyfish alive to extend poison effects. When a Reflecting Jellyfish spawns, leave a Piercing Jellyfish alive due to its range attacks matching players' range prayers. When a Durable Jellyfish spawns, tag but do not kill until poison is removed or other jellyfish are dead.
South-western pool (Sharknado)
During this phase, Yakamaru has the ability to create sharknados. This can be easily seen, as the whirlpool around Yakamaru will grow larger and have sharks circling around it. After several attacks, Yakamaru will release the sharks in a circle, which will drop onto the floor and then explode, dealing 2100-2400 typeless damage per shark. If you Surge or Escape before the sharks appear on the ground, they will appear on the tile where the player Surged or Escaped to. The sharks are solid objects, so players should avoid Surging or Escaping too early or teammates will be hurt by their damage.
Alternatively, you can fish the sharknado pool, which will reduce the amount of sharks but is NOT RECOMMENDED as you will be forced to go within melee distance and the risk of sharknado is nonexistent with experience.
Immediately after the sharks explode, an orange jellyfish will spawn.
Deal damage to Yakamaru while avoiding his special attacks until the end of the phase, where like all phases, poison will spawn. The person who is contaminated must then run to Yakamaru, infecting it. Players should be very careful with their DPS on Yakamaru. If he is near 150,000 lifepoints and a sharknado is about to be launched, wait for the sharks to be launched before damaging him to below 100,000. The poison tank should be ready to use Barricade.
Yakamaru will return to the centre pool now.
North-western pool (Sand)
In this phase, Yakamaru dampens the ground around him, causing players near him to be stuck in the sand. A message will appear for two people not affected by the ability saying "Yakamaru drags your team into quicksand! Free them before they drown!". There is no warning message for players affected by the quicksand, so players should be looking for a Detonate-like animation at the beginning of the quicksand and quickly spam a phrase that will let players know that they need to be freed. This effect triggers five attacks after the orange jellyfish. If not saved in time, the player will die instantly, although a Sign of Life or Death will activate and the player can rejoin the battle.
Players are advised to stand in a rectangle formation to easily see who is stuck in the sand and have a partner free them, so more people can focus on DPS. The main tank can and will be dragged also, so a player should use protect/deflect magic until they are out of his melee range.
Deal damage to Yakamaru while avoiding his special attacks until the end of the phase, where like all phases, poison will spawn. The person who is contaminated must then run to Yakamaru, infecting it. Be careful if a quicksand attack is about to occur when Yakamaru is near 100,000 lifepoints, as the main poison tank may be grounded and be unable to reach the poison.
Yakamaru will return to the centre pool now.
North-eastern pool (No-stun)
During this phase, Yakamaru gradually gains a damage reduction effect, until he is completely immune to damage. He will also be weak to a certain combat style, which will partially bypass this effect. A designated stunner (usually the base tank) must be set before starting the fight or this phase will be hard to pass through. Stuns are not to be used outside certain circumstances, as any stuns used against Yakamaru while he is in this pool will reflect damage back at all team members who are near the pool. This is shown with a game message "(Player name) has stunned Yakamaru!" in addition to a red aura pulsing out from him. The damage from the reflect varies based on how high his damage reduction was; the reflect damage deals anywhere from 1,000 (lowest) to 5,000 (highest).
Abilities that count as stuns are: Asphyxiate, Deep Impact, Impact, Tight Bindings, Binding Shot, Destroy, Stomp, Forceful Backhand, Backhand, Kick. Dreadnips can stun/stall Yakamaru but they don't trigger the pool's mechanics. Dominion gloves bind not stun the target and are thus safe to use during this phase.
After each stun, players should use all their threshold abilities (excluding stuns), as after being stunned, all damage towards Yakamaru will increase greatly where thresholds that normally hit 4,000 damage can increase up to 10,000 without using any damage boosters. Rapid Fire is highly effective, and Soul Split can be used to heal a lot of life points right after the pool has been stunned. However, the designated stunner can miss, so a backup stunner is helpful to avoid multiple players from stunning at one time.
After every successful stun while Yakamaru has at least 150,000 or lower health, tone down on thresholds as they can deal too much damage if all players use it and will force them to restart this pool again.
Deal damage to Yakamaru while avoiding using stuns (unless you are the designated or backup stunner) where like all phases, poison will spawn. The person who is contaminated must then run to Yakamaru, infecting it.
Yakamaru will return to the centre pool now.
Mirage phase
After all five phases are done and Yakamaru has been damaged to 50,000 lifepoints at the centre pool, it will create mirages of itself on all but the starting pool. Each mirage only has 150,000 lifepoints.
Use damage boosting abilities such as Sunshine and Death's Swiftness either when Yakamaru is nearing the 50,000 lifepoint mark or on the tendril mirage when it appears.
Jellyfish that spawn during mirage phase should be stunned instead of killed, as it is more important to kill the images of Yakamaru and each mirage can only spawn two jellyfish.
If any number of the mirage images are left out of combat, a message will say "As a mirage was left out of combat, it flings dangerous projectiles at the group!", dealing 2,000 damage to all players in the arena. This can be fatal when combined with damage from standard jellyfish, so the two north tanks come into play to aggro the mirages on them, so they do not fling projectiles at them. Teams go from the tentacle pool to the damage reduction pool (hence the role north tank). While at the tendril pool, have someone aggro the nearby sharknado mirage or it will fling projectiles at all members.
As soon as the mirage's health bar is depleted (not the real Yakamaru, shown in the top bar), go to melee distance and spam click the pool instantly, otherwise the mirage will return with full health and it has to be defeated again. The tentacle and sand pools are blocked with sand, requiring no items. Planks obtained during the fights can be applied in one click to the sharknado and stun pools, making it beneficial for only two players to carry 10 planks each while other players surge and dps. To block, it is recommended to get within melee distance of the mirage at 10,000 lifepoints (all players for sand pools, only those with planks for plank pools).
For north tanks, it is highly recommended to be on Ancient Magicks and be casting Ice Barrage with Dark Form on the summoned jellyfish. Remember to have the mirages aggro on you or they will fling projectiles at everyone, leaving them in a dangerous state if their health is low. Attack the mirages to block stun pool and weaken sand pool while running around continuously in a set pattern to avoid being hit by the jellyfish. Bolas and Entangle are also useful tools for stunning jellyfish.
As all phase effects are active at once, make sure to stay aware of sharks when killing tendril pool, etc. The Base tank will also be needed at stun pool.
Note: During the quicksand phase, make sure that no one is stuck in the ground before depleting Yakamaru's health bar, since they will be unable to move and unable to block the pool, reducing the amount of players that can block the pool.
After the pools have been blocked, Yakamaru will return to the center pool with 50,000 life points left. Once he is killed, the fight is over (Jellyfish will expire) and you may loot if eligible before leaving through the whirlpool.
Feats Challenges
There are 5 special challenges that when completed award progress towards "the Daredevil" title. In order to complete the feat, the challenge described must be met AND players must finish the kill.
| Feat name | Description | Technique |
|---|---|---|
| Better not touch | Defeat Yakamaru with all but one member of the raid still poisoned | On the last phase before mirage, the whole team should take the poison. North or base tank then is consumed by Yakamaru and the rest of the team must constantly stay high hp as they take 500-1000 poison damage every other game tick.
Note that if the non-poisoned member is killed, the feat will be lost. If any dead players remain in the group, the feat will be lost. |
| Day at the aquarium | Defeat Yakamaru with one durable jellyfish and one reflecting jellyfish still alive | Leave the jellyfish alive after they spawn after the 3rd and 4th phases. Upon the reflecting jellyfish appearing, leave Piercing jellyfish alive, otherwise the reflecting jellyfish will be killed as a result. Lure them south so AoE abilities do not accidentally kill the remaining combat canal jellyfish or the Durable jellyfish. |
| How to make friends and influence people | Use Asphyxiate on Yakamaru's north pool and have the whole raid survive |
There should be somebody barricaded and using heal other to keep the asphyxiator alive, and all 8 other team members should either be out of range or using barricade. Alternatively, the asphyxiator can use Natural Instinct, get the adrenaline needed for barricade (everyone else should use it the same time as the asphyxiator), drink a dose of adrenaline then cast the said ability. If done correctly the user should only take 5,000 damage if the last hit connects. If any of the four Asphyxiate hits splashes, the attempt will not count. If any players activated a Sign of life or a Phoenix necklace during the kill, the attempt will not count. If any dead players remain in the group when Yakamaru dies, the feat will be lost. If the player who used Asphyxiate dies at any point, the feat is lost even if they leave the group. |
| All together now | Defeat all four images of Yakamaru within ten seconds of one another | There should be at least one player tanking each image of Yakamaru, with shark and stun pool members carrying the planks. It is recommended to have one or two players with wands using Entangle on jellyfish. Weaken all four mirages to at most 20,000 lifepoints before killing simultaneously. The ten second timer begins after the first pool is sealed with planks or sand.
DPS group should start mirage by damaging sand, then shark and finally the tentacle pool. Stun pool members solo their pool. When everyone is ready, the tentacle pool is killed and closed by DPS while shark and stun groups finish off their pool. Finally, everyone rushes to sand and closes it. |
| Rewind | After defeating all of the images of Yakamaru, allow the consumption of a Durable Jellyfish and then kill it | When the last durable jellyfish spawns, have one player tank it all the way to the end of mirage phase. Lure it to melee distance of Yakamaru in the centre pool when mirages are dead. Doing so will result in the whole fight being reset, so be prepared to face all four pools and mirage phase again. The reset is marked by a message: "In desperation, Yakamaru sees the Durable Jellyfish and consumes it, healing him fully!"
Use Saradomin brews, defensive abilities and Heal Group/Other to sustain lost lifepoints, as supplies are most likely to be depleted. |